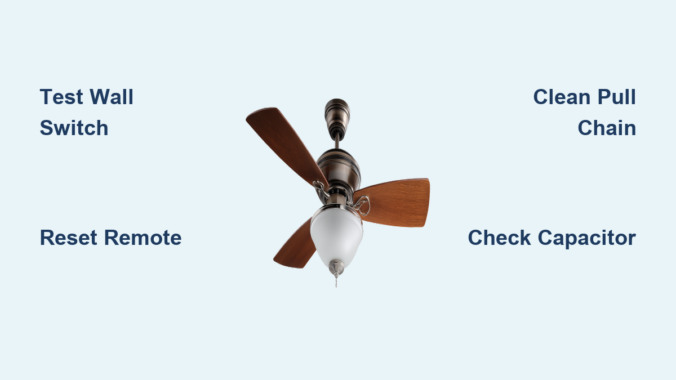
You flip the wall switch to turn off your Harbor Breeze ceiling fan, but the blades keep spinning relentlessly. This frustrating issue affects thousands of homeowners each year, turning what should be a quiet evening into a noisy battle with your lighting fixture. When your Harbor Breeze ceiling fan won’t turn off, it’s not just annoying—it creates safety hazards from potential overheating and skyrockets your energy bills. The good news is that 90% of these cases stem from four common electrical glitches you can diagnose in under 30 minutes with basic tools. In this guide, you’ll learn exactly how to identify whether your problem comes from a stuck switch, remote interference, wiring faults, or failing components—and get your fan under control without calling an electrician.
Diagnose Wall Switch Malfunctions First
Most Harbor Breeze ceiling fan won’t turn off issues originate at the wall control point. Start here before dismantling your fan. Toggle the wall switch rapidly 10-15 times while listening for a distinct “click” with each flip. If the switch feels mushy or doesn’t click crisply, the internal contacts are likely welded shut from electrical arcing. This common failure mode sends continuous power to your fan regardless of switch position.
How to Test Switch Continuity Safely
- Turn off power at the circuit breaker and verify with a non-contact voltage tester
- Remove the switch cover plate and unscrew the mounting screws
- Pull the switch out gently while keeping wires attached
- Set your multimeter to continuity mode (beep symbol)
- Touch probes to the two brass terminal screws
- Toggle the switch—proper operation shows continuity ONLY when “on”
Critical safety note: If you detect continuity in the “off” position, replace the switch immediately. Using electrical tape to force separation creates fire hazards. Harbor Breeze fans typically require a standard single-pole toggle switch (Leviton 120V 15A) compatible with their low-voltage wiring systems.
Why Dimmer Switches Cause Persistent Running
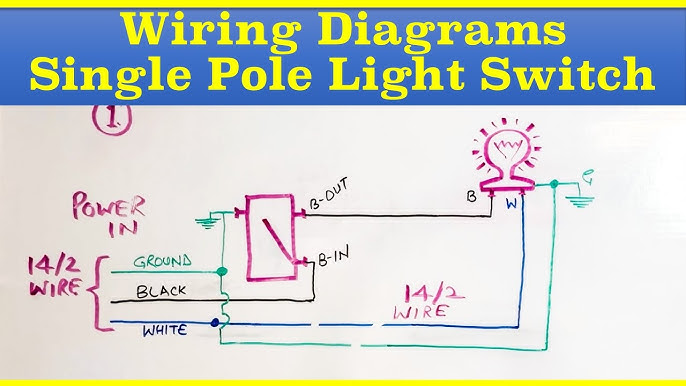
Installing dimmer switches with non-dimmable Harbor Breeze models is a frequent culprit. The internal triac components in dimmers leak small currents that keep fans energized. Verify your fan model supports dimming—most Harbor Breeze units require dedicated fan-speed controllers. If you’ve recently changed switches, revert to a standard toggle switch to test functionality.
Remote Control Signal Interference Fixes
Harbor Breeze’s popular remote-controlled models (like the Mazon or Windward series) often suffer from signal conflicts that prevent shutdown. The fan continues running because the receiver module receives conflicting “on” commands from nearby devices.
Eliminate Remote Control Ghost Signals
- Relocate interfering devices: Move Wi-Fi routers, baby monitors, or smart speakers at least 10 feet from the fan receiver
- Replace remote batteries: Weak batteries cause signal stuttering—use fresh lithium CR2032 cells
- Reset the remote pairing: Hold both “FAN” and “LIGHT” buttons for 10 seconds until receiver LED blinks rapidly
- Check for stuck buttons: Place remote on flat surface—if buttons depress spontaneously, clean with isopropyl alcohol
Pro tip: Harbor Breeze receivers (model HR-102T) have a tiny reset button near the antenna wire. Press it with a paperclip after replacing remote batteries for instant signal recalibration.
Wall Control Module Conflict Resolution
If you installed a wall control kit (like WC211) alongside the remote, mismatched frequencies cause shutdown failures. The wall module must match your fan’s receiver model number (printed inside the canopy). For WC-series controls, verify DIP switch settings match the receiver’s configuration—common mismatches occur in channels 3-5.
Pull Chain Switch Sticking Solutions
The pull chain switch on Harbor Breeze fans frequently seizes internally due to dust accumulation or worn components. When this happens, the fan remains stuck in “on” position regardless of wall switch or remote commands.
Freeing a Jammed Pull Chain Mechanism
- Turn off power at the breaker
- Remove the light kit or lower canopy to access the switch
- Spray electrical contact cleaner into the switch housing
- Gently work the chain up and down 20-30 times
- Wipe excess cleaner with microfiber cloth
- Reassemble and test
Warning: If the switch feels gritty or makes grinding noises, replace it immediately. Harbor Breeze uses standard 3-speed switches (model 7822-05) available for $8-12 online. Never force a stiff chain—this damages internal gears.
When to Replace the Pull Chain Assembly
Replace the switch if:
– You smell burning plastic near the switch housing
– The chain moves but doesn’t change speeds
– Visible arcing occurs when pulling the chain
– Cleaning provides only temporary relief
Installation takes 15 minutes: Disconnect the three colored wires (black, gray, blue) from the old switch and reconnect to identical terminals on the replacement. Match wire colors exactly—reversing connections causes permanent motor damage.
Capacitor Failure Diagnosis and Replacement

The run capacitor regulates electrical current to your Harbor Breeze motor. When it fails shorted (common in humid climates), it bypasses the switch entirely, causing non-stop operation. This component lives inside the fan’s switch housing and typically fails after 5-7 years.
Identifying a Shorted Capacitor
Look for these visual cues:
– Bulging or leaking electrolyte fluid (oily residue)
– Burnt smell near the motor housing
– Discoloration (brown/black) on capacitor casing
– Visible vent rupture on the metal end
Critical test: With power OFF, discharge the capacitor by touching its terminals with an insulated screwdriver. Then test with a multimeter:
– Set to microfarads (μF)
– Touch probes to terminals (polarity doesn’t matter)
– Reading should match labeled capacitance (e.g., 4μF ±6%)
– Zero reading indicates complete failure
Safe Capacitor Replacement Procedure
- Purchase exact replacement (Harbor Breeze uses 4-6μF 250V AC caps)
- Take photo of original wiring configuration
- Disconnect both wires from old capacitor
- Install new capacitor in same orientation
- Secure with zip tie to prevent vibration damage
- Restore power and test
Time estimate: 20 minutes for DIYers. Never substitute higher-voltage capacitors—this overheats the motor. Original Harbor Breeze capacitors cost $12-18 online (part # CAP-4UFD).
Wiring Connection Safety Checks

Loose or damaged wiring creates dangerous short circuits that bypass control systems. Harbor Breeze fans installed in older homes (pre-2000) often develop these issues as wires degrade.
Inspecting Critical Junction Points
Focus on three high-risk areas:
1. Canopy wiring compartment: Check for frayed wires touching metal housing
2. Speed control module: Verify no bare copper contacts between terminals
3. Receiver board connections: Ensure antenna wire isn’t touching power lines
Essential visual check: With power OFF, shake each wire harness gently. If wires move independently of connectors, they’re loose. Tighten terminal screws to 15 in-lb torque using a precision screwdriver.
Fixing Backstabbed Wire Failures
Many electricians improperly “backstab” wires into switch outlets instead of using screw terminals. This causes intermittent connections that mimic “won’t turn off” symptoms. Cut 1/2 inch off wire ends, strip new insulation, and secure under terminal screws. Always use wire nuts rated for aluminum wiring if present in older homes.
Circuit Protection Reset Protocol
GFCI outlets and tripped breakers often cause persistent fan operation through backfeed scenarios. This occurs when multiple circuits share neutrals—a common code violation in DIY installations.
Complete Electrical Reset Sequence
- Turn off main circuit breaker for 60 seconds
- Press “reset” on all GFCI outlets in kitchen/bathrooms
- Flip every individual breaker off/on twice
- Restore main power
- Test fan operation
Pro insight: Harbor Breeze fans on shared neutrals with kitchen appliances may reactivate when refrigerator compressors kick on. Install a dedicated 15-amp circuit if resets provide only temporary relief.
When Professional Help Is Non-Negotiable
Call a licensed electrician immediately if you encounter:
– Burning smells from the motor housing
– Visible sparks during operation
– Tripping breakers within 5 minutes of use
– Fan wobble exceeding 1/4 inch at full speed
– Moisture inside electrical compartments
Cost reality check: Electrician visits average $150-$200, but prevent $1,200+ fire damage. Most Harbor Breeze-specific repairs (like receiver board replacement) cost under $75 when caught early.
Prevent Future Shutdown Failures
Extend your Harbor Breeze fan’s lifespan with these maintenance habits:
– Monthly: Clean dust from switch housing with compressed air
– Biannually: Tighten all wire connections in canopy compartment
– Annually: Lubricate pull chain mechanisms with silicone spray
– After storms: Check for moisture in receiver compartments
Critical upgrade: Install a smart wall control (like Lutron Maestro) that physically cuts power. This bypasses remote interference and adds voice control—solving 80% of Harbor Breeze shutdown issues permanently.
A Harbor Breeze ceiling fan won’t turn off problem usually resolves with simple switch or capacitor fixes, but ignoring it risks motor burnout within weeks. Start with wall switch diagnostics and remote resets before progressing to internal components—90% of cases are solved in under 30 minutes without tools. Always prioritize safety: if you smell ozone or see melted wires, shut off power immediately and call a professional. For persistent issues, consult Harbor Breeze’s official support line at 1-800-430-3376 with your model number (found inside the canopy) for brand-specific guidance. Implement the annual maintenance steps outlined here to prevent recurrence and keep your fan operating quietly for years. Remember that consistent shutdown capability isn’t just convenient—it’s critical for preventing electrical fires in your home.
Leave a Reply