Your Harbor Breeze ceiling fan refusing to start can transform a comfortable room into an unbearable space, especially during summer months when you need airflow most. Before scheduling expensive repairs or replacing the entire unit, understand that most Harbor Breeze fan startup failures stem from common, easily fixable issues. Electrical problems, remote control malfunctions, and capacitor failures account for over 80% of non-operational fans. This guide provides a systematic approach to diagnosing and fixing your unresponsive Harbor Breeze ceiling fan, often without professional help or costly parts.
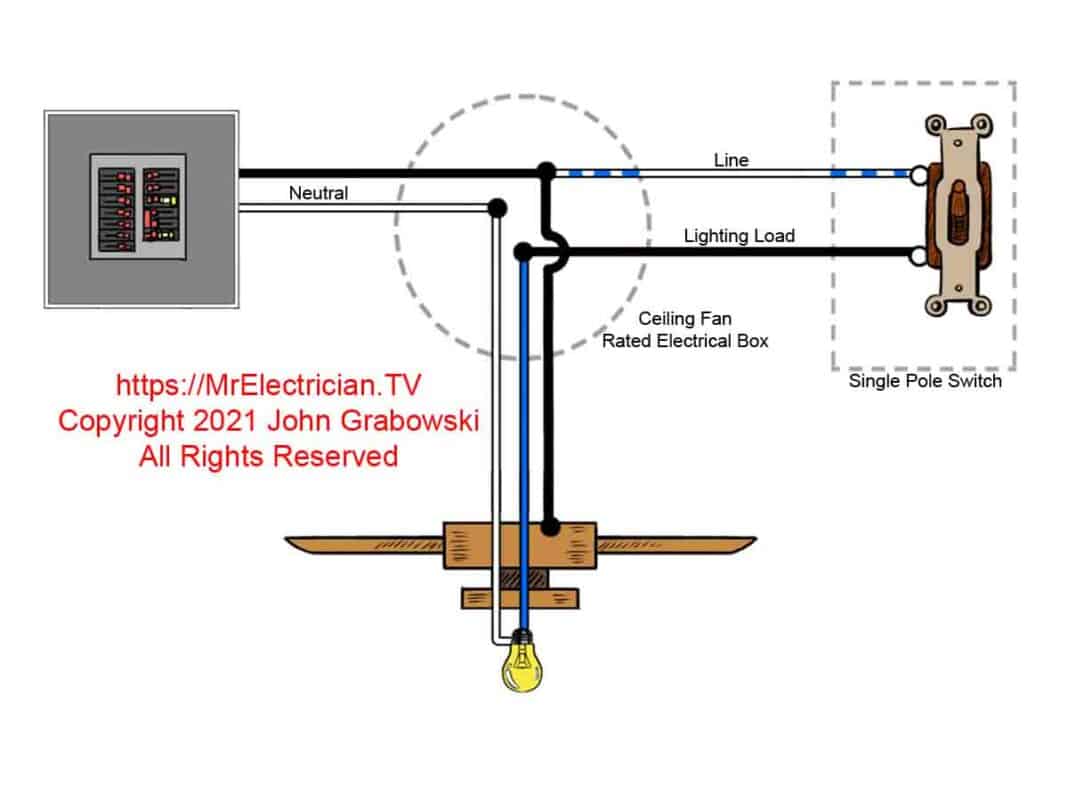
The electricity path through your Harbor Breeze fan follows a specific route: from your home’s circuit breaker to a wall switch or pull chain, through wiring connections, into the fan’s capacitor and motor windings. A break anywhere in this chain prevents operation. By methodically testing each component in sequence, you can identify the problem and implement a solution—often in under 30 minutes with basic household tools.
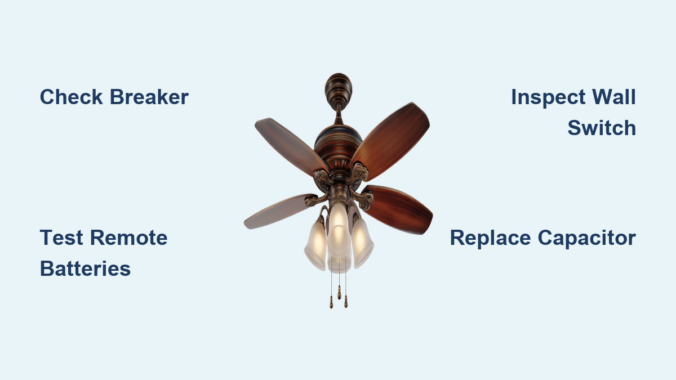
Verify Power Supply and Electrical Connections
:max_bytes(150000):strip_icc()/reset-a-tripped-breaker-4134193-hero-c5f5257dd0474f2dbb6745beef15acd5.jpg)
Before disassembling your Harbor Breeze fan, confirm electricity reaches the fixture. A tripped circuit breaker causes nearly one-third of “won’t turn on” issues and takes seconds to check. Locate your electrical panel and examine the breaker controlling the fan circuit. Unlike a normal “on” position (typically right-aligned), a tripped breaker sits in the middle position or slightly offset from neighboring breakers.
If tripped, flip the breaker fully to “off” then firmly back to “on.” If it trips immediately again, you have a serious electrical fault requiring a licensed electrician—do not repeatedly reset it. Continuing to reset a tripping breaker creates fire hazards and can damage your fan’s electrical components permanently.
Next, test the wall switch controlling your fan. Toggle it several times while listening for the characteristic “click” indicating proper operation. For pull-chain models, verify the chain moves freely through its full range without snagging. Some Harbor Breeze fans feature safety switches that prevent operation if the chain isn’t fully extended. Try pulling the chain multiple times to ensure it engages properly.
Confirm power reaches the fan location by plugging a working device like a lamp into the same circuit. If the lamp operates but your fan doesn’t, the problem lies within the fan itself or its immediate controls rather than your home’s electrical system.
Remote Control Malfunctions and Fixes
Harbor Breeze fans commonly include remote controls, which are frequent culprits in startup failures. Before assuming your fan has failed, eliminate remote issues through systematic testing.
Open the remote’s battery compartment and check orientation—batteries installed backward won’t power the remote regardless of charge. Replace batteries with fresh alkaline types, as zinc-carbon alternatives lack sufficient power for reliable remote operation. If your remote uses a coin-style battery (common in Harbor Breeze models), ensure it’s fully seated with the positive side facing up.
Inspect battery contacts for corrosion—white or green buildup prevents electrical connection even with new batteries. Clean contacts using a cotton swab dipped in white vinegar, then wipe dry with a clean cloth. For stubborn corrosion, lightly sand contacts with fine-grit sandpaper to restore conductivity without damaging the metal.
Check for an indicator LED when pressing remote buttons. Most Harbor Breeze remotes feature a small light that illuminates with button presses. No light indicates dead batteries or a defective remote. If the light works but the fan doesn’t respond, the remote likely needs reprogramming to the fan’s receiver.
Consult your owner’s manual for programming instructions, which typically involves accessing the receiver in the fan’s canopy and pressing a “learn” button while activating the remote. This process usually takes less than five minutes and resolves most communication failures between remote and fan.
Wall Switch and Pull Chain Failures
Wall switches controlling Harbor Breeze fans fail regularly and represent another common startup cause. A switch that feels loose when toggled or produces no audible click often needs replacement.
Turn off power at the breaker before removing the switch cover plate. Use a non-contact voltage tester to verify no electricity reaches the switch—test while the switch is in the “on” position. If no voltage appears, the problem lies upstream in your electrical system.
With power confirmed off, remove the switch and examine wire connections. Tighten any loose terminal screws and ensure wires haven’t pulled free from the switch body. Reinstall the switch, restore power, and test operation. If the switch still fails to activate the fan, replace it with an identical model rated for ceiling fan amperage (typically 15A).
For pull-chain operated fans, the chain mechanism itself often causes startup failures. The internal chain can break, switch contacts can corrode, or the chain can disconnect from the switch lever. Remove the fan’s switch housing (usually at the motor base) and inspect the pull-chain switch. Clean corroded contacts with electrical contact cleaner and verify the chain attaches securely to the switch mechanism.
Capacitor Testing and Replacement Procedures
The capacitor provides the electrical “kick” needed to start your Harbor Breeze fan motor spinning. Without adequate capacitance, the motor may hum but fail to rotate or not start at all. This component ranks among the most common failure points in ceiling fans, particularly units over five years old.
Capacitor failure symptoms include slow spinning on high speed, humming without movement, or requiring manual spinning to start. These signs indicate weakening capacitance that will eventually fail completely.
Harbor Breeze capacitors typically mount in the switch housing or directly on the motor body. They appear as small cylindrical or rectangular components with two to four wires protruding. To test or replace, turn off power at the breaker and remove the switch housing.
Discharge the capacitor by touching its terminals with an insulated screwdriver—this prevents shock. Use a multimeter set to capacitance mode to test the capacitor’s microfarad (μF) rating against its printed specifications. If the reading falls more than 20% below the rated value, replace the capacitor.
Replacement capacitors cost $10-25 and must match voltage (usually 250V or 450V) and capacitance values exactly. Wire the new capacitor identically to the original, photographing connections before removal. Most Harbor Breeze fans use dual-run capacitors with three or four terminals, so precise wiring is critical.
Motor and Internal Wiring Inspection
If electrical checks, remotes, switches, and capacitors test satisfactory, the problem may lie within the motor or internal wiring. These diagnostics require accessing the fan canopy.
Turn off power at the breaker and remove the fan canopy. With the dome removed, examine motor wiring, receiver connections, and house wiring junctions. Check all wire connections for tightness—wire nuts should be secure with no exposed copper visible. Gently tug each wire group to verify connections haven’t loosened.
Inspect motor wiring for damage—wires should show no cuts, burns, or melted insulation. Look for signs of overheating near the capacitor mounting area, indicated by discolored plastic or burnt smells.
Test motor windings with a multimeter set to resistance mode. Touch probes to each speed terminal and the common terminal. Readings should show resistance between 50-300 ohms depending on speed. An open circuit (infinite resistance) or short circuit (zero resistance) indicates motor failure requiring professional repair or replacement.
When to Repair vs. Replace Your Harbor Breeze Fan

After eliminating capacitors, switches, remotes, and wiring connections, you’re left with either motor failure or obscure electrical issues. Evaluate whether repair makes economic sense versus replacement.
Motor replacement typically costs $80-200 for parts plus $100-200 for professional labor—potentially exceeding the cost of a new Harbor Breeze fan. If your fan is more than ten years old or the replacement motor costs over half a new fan’s price, replacement usually makes more sense.
Some repairs justify the expense: a nearly-new fan with a failed capacitor, a custom or expensive fan model, or a fan with sentimental value. In these cases, hire a licensed electrician rather than attempting complex motor rewiring yourself.
When replacing your fan, consider upgraded features like improved energy efficiency, quieter operation, smart home compatibility, or enhanced remote controls that may justify the investment beyond mere functionality.
Preventing Future Harbor Breeze Fan Startup Failures
Once operational, implement these preventive measures to maintain reliable fan performance:
Clean your fan quarterly to prevent dust accumulation on motor housing and blades. Dust buildup insulates motor components, causing overheating that degrades capacitors over time. A microfiber duster removes dust without disassembly.
Annually inspect visible connections including canopy wiring, switch housing, and wall switch. Tighten loosened screws and clean minor corrosion before it causes failures. This fifteen-minute maintenance check catches problems early.
Address electrical issues promptly—frequent breaker trips, flickering lights, or warm outlets indicate wiring problems that stress fan components. A licensed electrician should investigate these symptoms before they cause fan failure.
Consider installing a whole-house surge protector ($150-300) to protect against voltage spikes from lightning or grid fluctuations. These spikes damage capacitors and motor windings over time, leading to premature failure.
Leave a Reply