Is your living room or bedroom lacking proper air circulation? Maybe you’ve noticed your energy bills climbing as your HVAC system works overtime to maintain comfort. Installing a Harbor Breeze ceiling fan solves both problems while adding style to your space. Thousands of homeowners choose Harbor Breeze models for their affordability and ease of installation, but many hesitate because they assume electrical work is too complex. The truth is, with the right preparation and guidance, you can install your Harbor Breeze ceiling fan in under two hours without professional help. This guide walks you through every critical step of the process, highlighting common pitfalls to avoid and providing brand-specific instructions that ensure your fan operates safely and efficiently for years to come.
Essential Safety Preparations Before Starting Your Installation
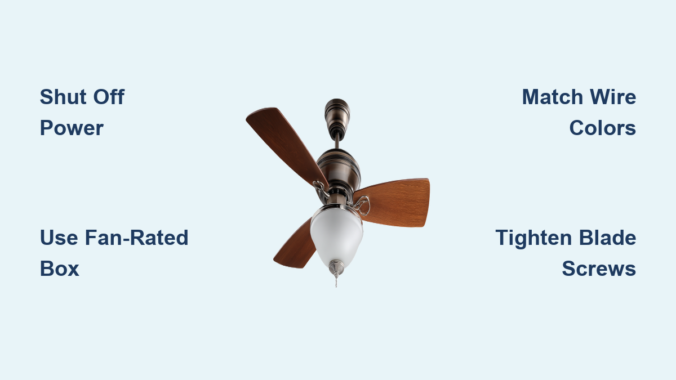
Before touching any tools or components, prioritize safety to prevent electrical hazards or physical injury during your Harbor Breeze ceiling fan installation. Working with electrical components requires proper precautions that many DIYers overlook in their eagerness to complete the project. Failing to follow these safety protocols could result in shock, fire hazards, or damage to your new fan. Take these critical steps before proceeding to guarantee a safe installation process that complies with electrical codes and manufacturer requirements.
Verify Your Electrical Box Can Support a Ceiling Fan
Harbor Breeze ceiling fans require a special electrical box rated for ceiling fan support, not the standard light fixture box found in most homes. Standard light fixture boxes cannot handle the torque and weight of a spinning fan, creating a dangerous falling hazard. Before removing your old fixture, confirm you have a fan-rated electrical box by looking for these indicators:
- A metal brace spanning between two ceiling joists
- A box stamped “Acceptable for Fan Support”
- A minimum weight rating of 35 pounds (most Harbor Breeze models weigh 15-25 pounds)
If your existing box isn’t fan-rated, you must install a retrofit fan brace kit before proceeding. This involves cutting a small access hole in your ceiling to secure the brace between joists—a crucial step that prevents your fan from crashing down months after installation.
Shut Off Power at the Circuit Breaker
Never rely solely on turning off the wall switch when working with electrical components. Locate the correct circuit breaker controlling your ceiling fixture and switch it to the OFF position. Then verify power is disconnected using a non-contact voltage tester at the ceiling wires. Test both the black (hot) and white (neutral) wires to confirm no electrical current is present. Place a piece of tape over the breaker switch to prevent accidental reactivation while you work. This simple verification step prevents potentially fatal electrical shocks during installation.
Required Tools and Components for Harbor Breeze Installation
Gather These Essential Tools Before Starting
Having the right tools organized and accessible prevents frustration and delays during your Harbor Breeze ceiling fan installation. For most standard installations, you’ll need:
- Non-contact voltage tester (critical for safety)
- Wire strippers and cutters
- Phillips and flathead screwdrivers
- Adjustable wrench or pliers
- Ladder rated for your height and weight
- Electrical tape
- Wire nuts (usually provided with fan)
- Circuit tester
- Drill with appropriate bits (for mounting)
Double-check your Harbor Breeze packaging includes all mounting hardware, as some models require specific screws or brackets depending on your ceiling type. Concrete ceilings or cathedral ceilings may require additional specialized hardware not included in standard packages.
Mounting the Harbor Breeze Ceiling Fan Bracket
Secure the Mounting Bracket to Your Electrical Box
The mounting bracket serves as the foundation for your entire fan installation. Harbor Breeze provides specific mounting hardware designed to work with their fan motors, so never substitute generic hardware. Follow these steps:
- Attach the mounting bracket to your fan-rated electrical box using the included 10-32 mounting screws
- Ensure the bracket rotates freely if your model requires positioning the fan head
- Tighten screws firmly but don’t overtighten, which can strip the electrical box threads
- Verify the bracket sits flush against your ceiling with no gaps
A poorly secured mounting bracket is the most common cause of wobbling fans and dangerous installations. Test the bracket’s security by applying firm downward pressure—if it moves at all, you must reinforce your electrical box before proceeding.
Wiring Your Harbor Breeze Ceiling Fan Correctly
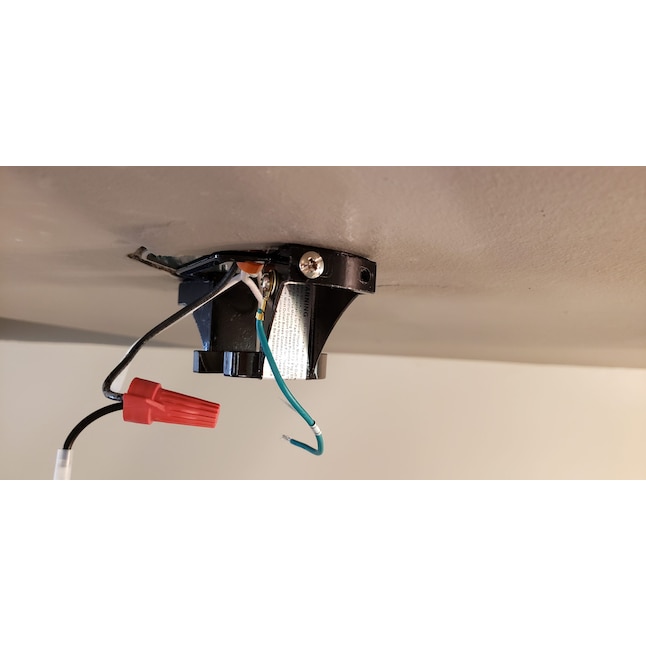
Connect Wires Following Harbor Breeze Color Coding
Harbor Breeze uses standard residential wiring color codes, but improper connections cause most post-installation problems. Match these connections precisely:
- Black fan wire to black (hot) ceiling wire
- White fan wire to white (neutral) ceiling wire
- Green or bare copper fan wire to green or bare copper ground wire
- Blue wire (if present) to black ceiling wire for light kit control
Twist connections clockwise with wire nuts until secure, then wrap each connection with electrical tape for added safety. Tuck wires neatly into the electrical box without pinching. Never connect the blue wire to the white neutral wire—this common mistake causes short circuits when installing light kits.
Test Electrical Connections Before Mounting Fan Motor
Before lifting the heavy fan motor into position, perform this critical safety check:
1. Carefully position the fan motor on your ladder shelf
2. Turn power back on at the breaker
3. Test fan operation using the pull chains
4. Verify both fan speeds and light operation (if applicable)
5. Turn power back OFF before securing the motor
This pre-mounting test identifies wiring errors while the motor is still accessible. Fixing a wiring mistake after mounting requires disassembling half the fan—a frustrating setback you can easily avoid.
Attaching Fan Blades and Light Fixtures Properly

Balance Your Harbor Breeze Fan During Blade Installation
Improperly installed blades cause most wobbling issues that develop after installation. Harbor Breeze includes specific blade brackets designed to maintain perfect balance when installed correctly:
- Install blades in numerical order as marked on each blade root
- Tighten blade screws gradually in a star pattern
- Apply equal pressure to each screw—don’t overtighten
- Verify each blade sits at identical angle before final tightening
Hand-tighten all blade screws first, then go back and fully tighten them in sequence. This prevents uneven tension that throws the fan out of balance. A balanced fan operates quietly and efficiently while reducing wear on the motor.
Final Testing and Troubleshooting Common Issues
Diagnose No-Operation Problems Immediately
If your Harbor Breeze fan doesn’t operate after installation, methodically check these common issues before calling for help:
- Power verification: Double-check circuit breaker and wall switch positions
- Wire connection security: Loose connections are the #1 cause of non-operation
- Pull chain position: Ensure chains aren’t stuck between settings
- Capacitor issues: Some models require resetting after installation
Harbor Breeze fans include resettable thermal protectors that trip during initial operation. Wait 30 minutes for the motor to cool, then test again—this solves most “dead fan” scenarios after installation.
Fix Wobbling Without Special Balancing Kits
Most Harbor Breeze fans operate perfectly without additional balancing weights when installed correctly. If you notice wobble:
- Check all blade screws are equally tight
- Verify blades are installed in correct numerical sequence
- Confirm your mounting bracket is securely fastened
- Examine blades for warping (replace if damaged)
True balance issues are rare with proper installation. Avoid adding aftermarket weights until you’ve verified all mounting points are secure—most wobble comes from loose components rather than actual imbalance.
Maintaining Your Harbor Breeze Ceiling Fan for Longevity
Schedule These Critical Maintenance Tasks
Extend your Harbor Breeze fan’s lifespan with these simple maintenance routines:
– Monthly: Wipe blades with microfiber cloth to prevent dust buildup
– Quarterly: Check and tighten all visible screws
– Annually: Lubricate motor housing (if specified in your model’s manual)
– Biannually: Inspect electrical connections for signs of overheating
Dust accumulation on blades creates imbalance that stresses the motor. Cleaning blades regularly prevents wobble and maintains optimal airflow efficiency. Never use furniture polish or oily cleaners that attract more dust.
When to Call a Professional for Harbor Breeze Installation
While most Harbor Breeze models install easily following these steps, certain situations warrant professional help:
– No existing ceiling fixture (requires new circuit installation)
– Cathedral or vaulted ceilings with limited access
– Suspended or drop ceilings
– Older homes with aluminum wiring
– Any uncertainty about electrical safety
Attempting installation in these scenarios without proper expertise risks electrical fire or structural damage. Harbor Breeze offers excellent customer support—call their technical team before proceeding if you’re unsure about any step.
Final Note: Proper installation ensures your Harbor Breeze ceiling fan delivers years of reliable service while enhancing your home’s comfort and efficiency. By following these specific steps and prioritizing safety at each stage, you’ll avoid the most common installation mistakes that lead to callbacks or safety hazards. Remember to always consult your specific model’s manual for any variations, as Harbor Breeze offers multiple series with slightly different requirements. Once installed, enjoy the immediate benefits of improved air circulation and the long-term savings on your energy bills—most homeowners recover their fan investment through reduced cooling costs within two seasons.
Leave a Reply