Nothing disrupts your home’s ambiance quite like a malfunctioning ceiling fan that needs removal. Whether you’re upgrading to a newer Harbor Breeze model from Lowe’s, replacing a damaged unit, or simply need access to your ceiling for repairs, knowing the proper removal technique saves time, prevents damage, and most importantly, keeps you safe. Harbor Breeze ceiling fans follow a standardized mounting system that, once understood, makes removal surprisingly straightforward—even for first-time DIYers. This comprehensive guide walks you through each critical step with precision, highlighting the common mistakes that turn a simple 45-minute project into a frustrating, potentially dangerous ordeal. By the time you finish reading, you’ll have complete confidence in your ability to safely remove any Harbor Breeze ceiling fan model without risking electrical hazards or damaging your ceiling.
Before climbing that ladder, recognize that approximately 4,000 people visit emergency rooms annually due to ceiling fan installation or removal accidents—most preventable with proper preparation. Harbor Breeze fans, while designed for consumer installation, contain electrical components that demand respect. Taking thirty minutes to prepare properly prevents hours of repair work later. The right approach not only protects you but preserves your fan’s components for potential reuse or resale. When you follow this systematic removal process, you’ll complete the job efficiently while maintaining all wiring configurations for seamless reinstallation.
Gather Essential Tools for Fan Removal

Having every tool within arm’s reach before starting prevents dangerous ladder descents mid-project. Your Harbor Breeze removal kit must include a precision screwdriver set with #2 Phillips and 1/4-inch flathead tips—cheap hardware store sets often strip screw heads on Harbor Breeze’s smaller fasteners. A reliable non-contact voltage tester ($12-$20 at Lowe’s) provides critical safety verification; never skip this essential tool. Choose a ladder tall enough to position your eyes level with the fan canopy—typically 6-8 feet for standard 8-foot ceilings—to maintain proper posture and reduce fatigue.
Expand your toolkit with specialized items most guides overlook: a magnetic wristband to catch falling screws, a small mirror on a flexible stick to view hidden connections, and a cordless drill with a 1/8-inch bit for extracting stripped screws. Keep a dedicated container with compartmentalized sections for different hardware types—blade screws, canopy screws, and mounting bracket bolts require separate organization. If your Harbor Breeze model has a light kit (common in Carrera and Windward series), include a soft cloth to protect glass shades during removal. Professionals always photograph each connection stage, but adding handwritten notes about wire positions creates foolproof documentation for reinstallation.
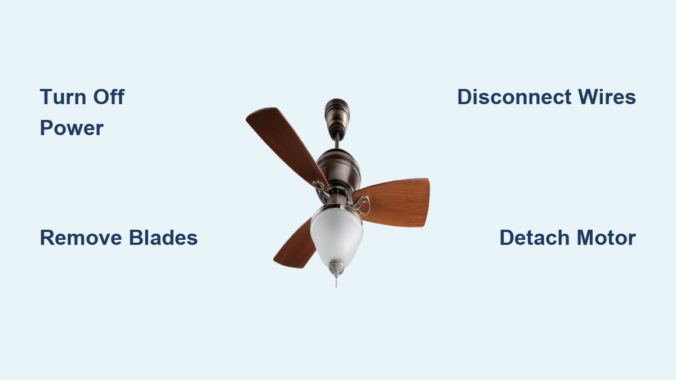
Turn Off Power at the Circuit Breaker
This non-negotiable safety step requires verification beyond simply flipping the breaker. Locate your electrical panel and identify the correct circuit—Harbor Breeze fans often share circuits with bedroom outlets, so test adjacent room receptacles with a plug-in tester if labels are unclear. After switching off the breaker, operate the fan’s wall switch and pull chains to confirm complete power loss. Then, use your voltage tester at three critical points: the wall switch plate screws, the fan’s switch housing, and the canopy seam where it meets the ceiling.
Critical safety tip: Some older homes have reversed wiring where the neutral wire carries current. Always test between black and white wires, not just against ground. Place bright colored tape over the breaker handle and post a visible warning sign—”WORK IN PROGRESS: DO NOT RESTORE POWER”—as family members often accidentally reset breakers. Wait five minutes after cutting power before proceeding; capacitors in the fan’s motor can retain dangerous charges. If your tester still detects current after these steps, consult an electrician before proceeding—no DIY project is worth risking electrocution.
Remove Fan Blades and Light Kit
Start with blade removal since Harbor Breeze fans typically weigh 25-40 pounds with blades attached, creating dangerous leverage when unsupported. Identify the blade bracket type—most Harbor Breeze models use either set-screw brackets (requiring an Allen wrench) or slotted brackets (using standard screws). Remove blades in a star pattern rather than sequentially to maintain balanced pressure on the motor housing. As you remove each blade, immediately wrap it in bubble wrap or a soft towel to prevent warping from accidental bumps.
When removing the light kit (found on 70% of Harbor Breeze models), first unscrew all decorative hardware before attempting to detach electrical connections. The Carrera Grande series features a unique bayonet-mount light kit that requires twisting counterclockwise while applying upward pressure—forcing it straight down cracks the glass. For models with integrated LED modules, note the orientation of the driver board before disconnecting; reinstalling it backward destroys the circuitry. If your fan has a pull-chain switch for the light, pull it to the “on” position before removal to prevent internal spring mechanisms from retracting completely.
Access the Motor Canopy and Mounting
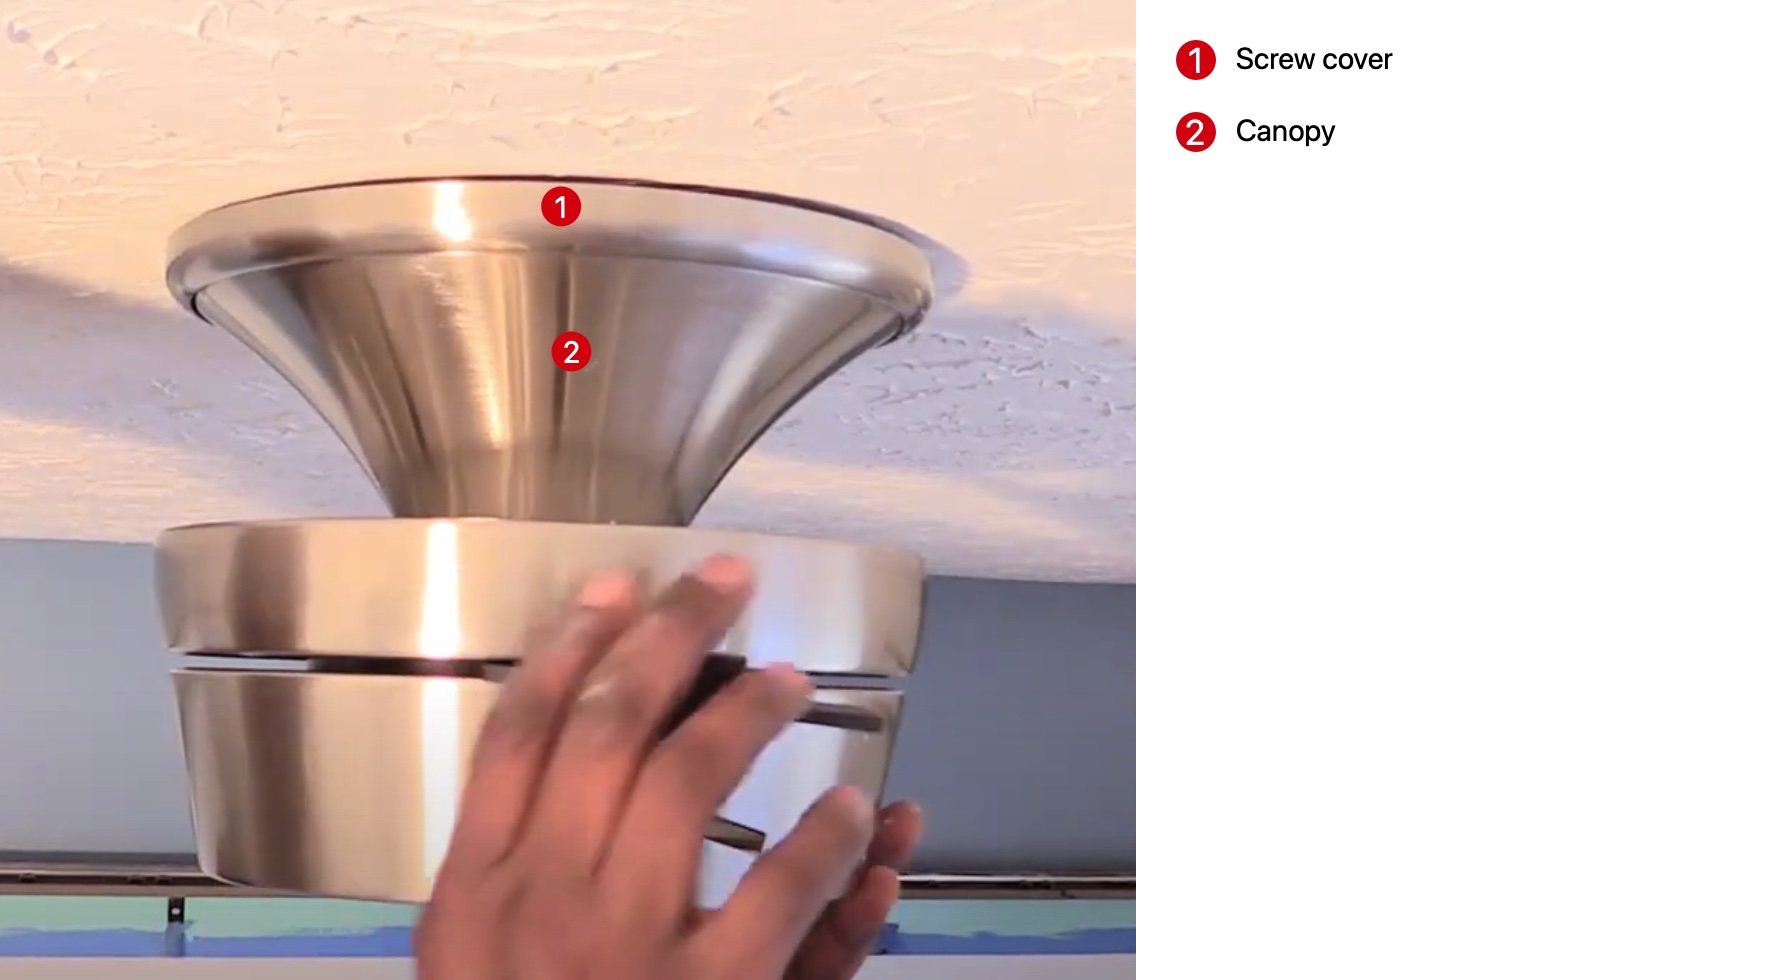
The canopy removal process varies significantly between Harbor Breeze generations. Newer models (2018+) feature hidden set screws under decorative caps that pop off with a flathead screwdriver, while older models use visible perimeter screws. When removing canopy screws, alternate between opposite sides like tightening lug nuts on a car wheel—this prevents binding that strips threads. Support the motor housing with your non-dominant hand while loosening the final screw; Harbor Breeze motors contain heavy magnets that create sudden downward force when released.
If the canopy refuses to slide down the downrod, gently rotate it clockwise while applying downward pressure—many models use a threaded connection disguised as a slip-fit. For flush-mount Harbor Breeze installations (common in low-ceiling models), you’ll need to compress spring-loaded mounting clips using two flathead screwdrivers simultaneously. Never use excessive force on the canopy; Harbor Breeze’s plastic components crack easily when cold or aged. If resistance persists, check for a secondary locking mechanism near the canopy’s top edge—a small tab that must be depressed before lowering.
Disconnect Electrical Wiring Safely
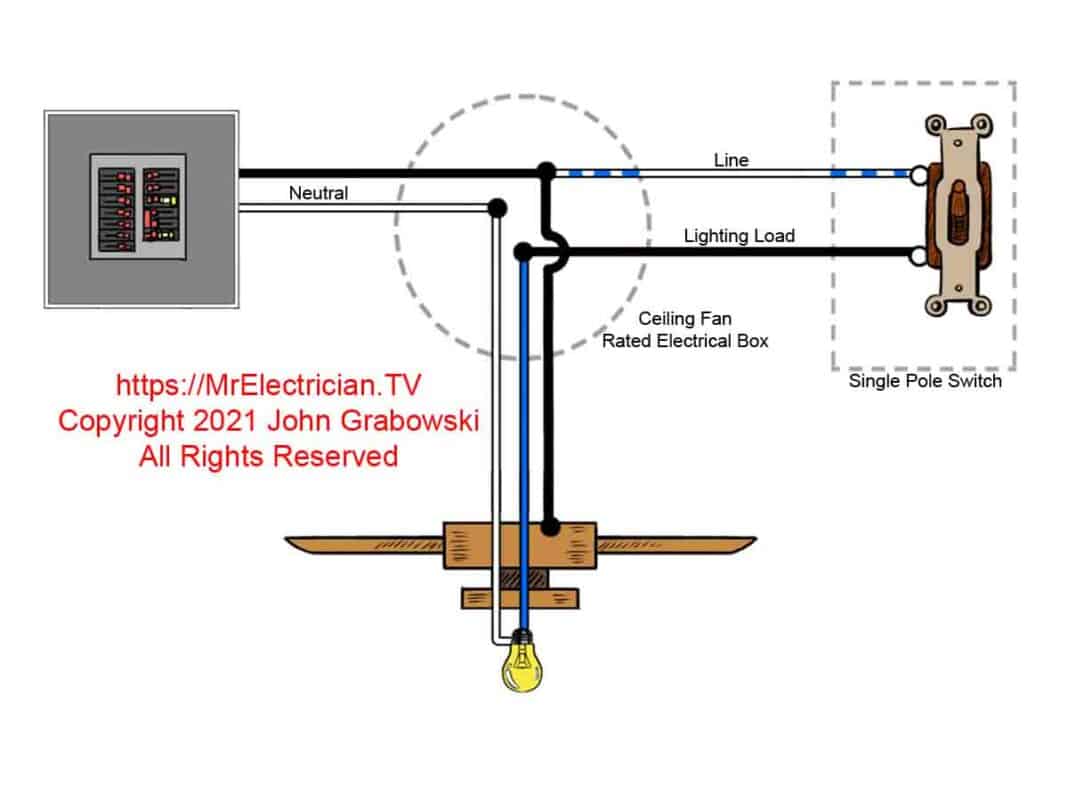
Harbor Breeze wiring configurations follow standard color coding but often include model-specific quirks. The Carrera series typically uses push-in connectors instead of wire nuts, requiring you to insert a small screwdriver into release slots to disconnect wires. Before separating any connections, examine how wires are grouped—some models connect blue (light) and black (fan) wires together when controlled by a single switch. Label each wire with numbered tags matching your photo documentation to prevent reinstallation confusion.
When separating wires, grip the wire nuts rather than pulling on the wires themselves to avoid strand breakage. Harbor Breeze fans often have shorter-than-standard wire leads, so coil house wires neatly into the electrical box before lowering the motor to prevent tension. If you encounter stiff connections, gently twist the wire nut clockwise while pulling apart—this breaks any adhesive buildup from years of heat cycling. After disconnection, immediately cap each house wire with a new wire nut; exposed conductors in the ceiling box create serious shock hazards during subsequent steps.
Detach the Fan Motor Assembly
The downrod connection requires specific technique to avoid damaging Harbor Breeze’s proprietary mounting system. Locate the canopy nut—a large hex nut or decorative cap at the top of the downrod—and support the motor housing with your forearm while loosening it. Apply downward pressure as you turn counterclockwise; this releases tension on the ball joint. Some models require tapping the downrod upward with a rubber mallet to disengage locking pins before the nut will turn freely.
When lowering the motor assembly, maintain control of the downrod—it often remains attached to the mounting bracket while the motor comes down. Harbor Breeze motors contain sensitive electronic components that can be damaged by sudden impacts, so lower them onto a padded surface rather than setting directly on the floor. If reinstalling the same fan, immediately cover the downrod threads with electrical tape to prevent accidental damage. For models with integrated receivers (most remote-controlled units), note the orientation of the control housing before complete removal—it must reinstall in the same position for proper operation.
Remove the Mounting Bracket from Ceiling
Harbor Breeze mounting brackets secure to electrical boxes with either self-tapping screws (in plastic boxes) or machine screws (in metal boxes). Use a nut driver rather than a screwdriver for better torque control when removing these critical fasteners. As you remove the final screw, support the bracket with one hand while checking for unexpected wiring—some installations feed wires through bracket slots rather than the center.
Examine the electrical box for the stamped weight rating—ceiling fans require boxes rated for at least 50 pounds, while standard light fixture boxes support only 5-10 pounds. If your box lacks this rating, do not proceed with new installation until replacing it with a fan-rated box. Harbor Breeze includes a mounting bracket template with new fans, but for removal purposes, photograph the box’s position relative to ceiling joists to simplify reinstallation. Clean any accumulated dust from the box with a vacuum before proceeding—dust combined with moisture creates conductive paths that cause short circuits.
Handle Stubborn or Rusted Hardware
Corroded connections commonly plague Harbor Breeze fans installed in bathrooms or coastal areas. For seized canopy screws, apply penetrating oil and wait 20 minutes before attempting removal with a impact driver set to lowest torque setting. When dealing with stripped set screws on blade brackets, use a left-handed drill bit in reverse—the bit both grips and unscrews the damaged fastener. Harbor Breeze’s aluminum components react poorly with steel tools, so replace standard screwdrivers with brass-tipped versions when working on salt-damaged fans.
For downrods fused to mounting brackets, create controlled leverage points using two adjustable wrenches—one on the downrod hex section, another on the mounting bracket. Apply steady pressure while tapping the connection point with a plastic mallet; thermal expansion from tapping often breaks corrosion bonds. Never use heat guns near plastic components—Harbor Breeze housings melt at temperatures lower than those required to free most seized connections.
Prepare for Installation or Disposal
When planning fan reuse, immediately protect motor shaft bearings by applying light machine oil to prevent rust during storage. If disposing of the fan, remove the capacitor (typically a small cylindrical component in the motor housing)—this contains hazardous materials requiring special disposal. Harbor Breeze’s remote control receivers contain lithium batteries that must be recycled separately from the main unit.
For new installations, verify that your replacement fan’s mounting system matches the existing electrical box configuration—Harbor Breeze offers three distinct mounting systems across their product line. Measure downrod length requirements before purchasing replacements; standard 3/4-inch downrods won’t fit older 1/2-inch mounting systems without adapters. If keeping the existing bracket, clean all contact surfaces with isopropyl alcohol to ensure proper electrical grounding for the new fan.
Troubleshoot Common Removal Problems
When the downrod won’t separate from the motor housing, check for a secondary set screw inside the canopy—many Harbor Breeze models use this hidden security feature. For fans that continue to hum after power disconnection, the remote control receiver may be retaining charge; disconnect the battery pack (usually behind the pull-chain housing) before proceeding. If house wires retract into the ceiling box, use a bent paperclip to fish them back out—never pull forcefully as this can damage wire connections inside the wall.
The most frequent Harbor Breeze-specific issue involves the spring-loaded mounting clips on flush-mount models. These require simultaneous compression of two or four clips depending on model year—use two flathead screwdrivers while applying upward pressure on the motor housing. If clips break during removal (a common occurrence on older units), replace them with Harbor Breeze’s universal mounting kit before installing a new fan.
Successfully removing your Harbor Breeze ceiling fan demonstrates that even complex home projects become manageable with proper knowledge and preparation. By methodically working through each step while maintaining electrical safety as your top priority, you’ve transformed what seemed like a daunting task into a satisfying accomplishment. Remember that 85% of ceiling fan installation issues stem from improper removal techniques that damage wiring or mounting hardware—your careful approach today prevents tomorrow’s headaches. Whether you’re proceeding with a new installation or simply restoring your ceiling, take pride in knowing you’ve handled this project with professional-level competence. For future reference, keep your photo documentation and labeled hardware organized in a dedicated container—this saves significant time if you ever need to reinstall the same fan or troubleshoot related electrical issues in your home.
Leave a Reply