Nothing disrupts a room’s comfort like a wobbly ceiling fan that creates more noise than airflow. When your fan blades need replacement or installation, you might assume it requires a professional electrician, but most homeowners can complete this task in under an hour with basic tools. Improperly installed blades cause annoying wobbles, reduced airflow efficiency, and premature motor wear that shortens your fan’s lifespan. This guide shows you exactly how to install ceiling fan blades correctly the first time, ensuring smooth, quiet operation that keeps your space comfortable year-round. You’ll learn professional techniques for mounting, aligning, and balancing blades that transform an uneven, noisy fan into a silent airflow machine.
Gather Your Installation Tools
Before climbing that ladder, ensure you have every tool within arm’s reach to avoid frustrating trips up and down. Most ceiling fan blade installations require only basic household tools, but having the right ones makes the difference between a secure installation and a wobbly disaster.
Essential tools for blade installation include a Phillips head screwdriver (a powered version saves time on multiple screws), a flathead screwdriver for prying off decorative caps, a sturdy step ladder rated for your weight, and a 24-inch tape measure for checking blade alignment. Keep a pencil for marking positions and a small bubble level to verify that blades hang evenly. Some fans require an adjustable wrench for securing mounting hardware, particularly older models with hex bolts or specialized fasteners—check your fan’s manual before starting.
Helpful accessories to have on hand include a headlamp or work light for illuminating the motor housing area, a magnetic parts tray to prevent losing small screws (those tiny blade screws disappear instantly on carpet), and a microfiber cloth for cleaning dust from blades before installation. If your fan came with a balancing kit (common on newer models like Hunter or Casablanca fans), keep it accessible for the final testing phase. Having everything organized in a single container saves time and reduces the temptation to skip important steps when you can’t find that one missing screw.
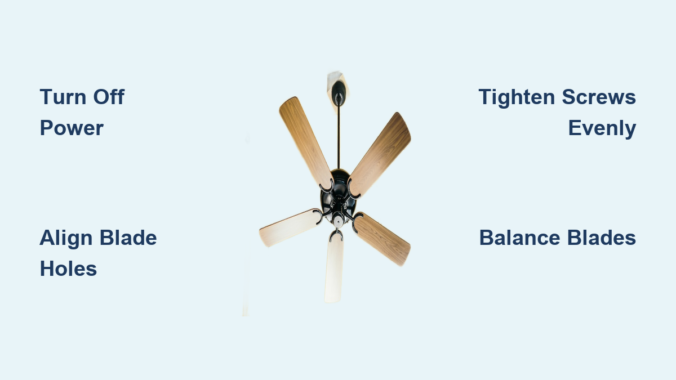
Safety First: Turn Off Power Completely

Electrical safety must be your absolute priority when installing ceiling fan blades, even though this task involves mechanical work. The fan’s motor housing contains live electrical connections, and accidental activation during installation could cause serious injury.
Locate your home’s electrical panel and identify the circuit breaker controlling power to the room where you’re working. Flip the breaker to the “off” position, then verify that the fan doesn’t respond when you flip the wall switch. Many homeowners make the critical mistake of only turning off the wall switch—this leaves power running to the motor housing, creating a shock hazard. For added safety, place a piece of tape over the breaker handle with a note reading “Ceiling Fan Work—Do Not Turn On” to prevent others from accidentally restoring power while you work.
Use a non-contact voltage tester on the fan’s motor housing and wiring area even after turning off the breaker. This $10 tool confirms that no electricity is present before you touch any internal components. Hold the tester near the fan’s canopy (the decorative cover concealing the mounting bracket) and around the motor housing. If the tester lights up or beeps, stop immediately and verify that you’ve turned off the correct circuit. Only proceed when you’ve confirmed a completely de-energized work environment—your safety depends on this critical step.
Remove Old Fan Blades Properly
If you’re replacing existing ceiling fan blades rather than installing them on a new unit, removing the old components correctly prevents damage to the motor and mounting hardware. Taking your time during removal makes the subsequent installation smoother and easier.
Begin by removing any light kit or glass shades that obstruct access to blade mounting screws. Most designs feature screws around the base of the light fixture that release with counterclockwise turning. Lower the fixture carefully and disconnect any wiring connectors by squeezing the release tabs and pulling apart. Set aside the light kit in a safe location where it won’t get broken—glass shades are surprisingly fragile.
Next, remove each ceiling fan blade by locating the screws connecting it to the blade arms. These screws typically sit where the blade meets the metal arm, often hidden beneath a plastic cap. Remove the caps by prying them gently with a flathead screwdriver, then extract the mounting screws. Note that blades may have different numbers of screws depending on the design—some use two for stability while others require only one. As you remove each blade, mark it with a piece of tape indicating its original position, which helps during reinstallation if you’re reusing components or diagnosing wobble issues.
Identify Your Blade Mounting System

Understanding your specific ceiling fan’s blade mounting system prevents confusion and ensures correct installation. Each blade attaches to the motor through one of three common systems: direct mount, blade iron, or quick-connect.
Direct mount systems feature blades that attach directly to the motor housing with screws, common on modern flush-mount fans. You’ll see evenly spaced threaded holes around the motor housing where blades connect. Blade iron systems (also called blade carriers) use L-shaped metal brackets that first attach to the motor housing, then blades mount to these brackets—this design allows for blade pitch adjustment. Quick-connect systems, increasingly popular on newer models like Hunter Originals, use a snap-in mechanism where blades click securely into place without tools.
Examine your fan’s motor housing to identify which type you have before proceeding. Quick-connect systems require aligning tabs and slots correctly, while blade iron systems need careful attention to screw tightness. If you’re unsure, consult your fan’s manual—most manufacturers provide free PDF versions online by searching “[Brand] [Model] installation manual.”
Attach Blades to Arms with Precision
The actual process of securing ceiling fan blades to their arms requires attention to screw tightness and alignment. Improperly attached blades cause wobbling, noise, and reduced airflow, so following these steps carefully ensures optimal performance.
Position the blade against the arm aligning the screw holes on both components. Most blades have pre-drilled holes near the wide end (the leading edge), while blade arms feature elongated slots allowing micro-adjustments. Slide the blade into position, ensuring the curved edge faces the correct direction—blades must mount with the leading edge oriented toward the direction of rotation, typically marked with an arrow on quality fans. If no arrow exists, the curved (usually darker) side faces down when installed.
Insert mounting screws through the blade and into the arm’s slotted holes, starting all screws finger-tight before using your screwdriver. This approach allows for slight repositioning if alignment needs adjustment. Tighten screws in a crossing pattern (alternating between opposite screws) rather than sequentially to ensure even pressure distribution. Over-tightening strips the screw holes, particularly in composite or plastic blades, while under-tightening allows vibration and loosening over time. Screws should be snug but not strained, with the blade lying flat against the arm without bowing.
Mount Blade Assembly to Motor Correctly
With blades attached to their arms, you’re ready to connect the assembly to the fan motor. This stage requires working at height, so maintain three-point contact with your ladder and have a helper nearby if possible.
Position the blade arm mounting hole over the corresponding stud on the motor’s blade holder plate. Most motors feature three or five mounting points arranged radially around the central hub. Align the arm’s attachment point with the motor’s mounting stud, ensuring the arm angles away from the motor in the correct direction. Some arms feature a specific orientation—look for a notch, arrow, or specific shape that indicates correct positioning.
Secure each blade arm to the motor using the provided mounting screws, washers, and lock washers. Thread screws through the arm’s mounting hole and into the motor’s threaded stud, tightening them firmly but avoiding excessive force. If your fan uses a quick-connect system, align the arm’s connector with the motor’s receptacle and push until you hear a distinct click, then verify that the arm feels secure by attempting to wiggle it. Once all arms are mounted, double-check that each blade hangs at approximately the same angle relative to the motor housing—slight variations are normal and corrected during the balancing step.
Eliminate Wobble with Proper Balancing
Proper blade alignment and balancing transform a noisy, wobbling fan into a smooth, quiet performer. Even blades installed correctly may require fine-tuning to achieve optimal operation, making this step essential rather than optional.
Perform the initial alignment check by sitting on a chair beneath the fan and slowly rotating it by hand. Observe each blade’s position relative to the others—if some blades appear higher or lower than their neighbors, you’ll need to adjust them. Most blade arms feature slotted mounting holes allowing the blade to shift forward or backward, which changes its effective pitch and position. Loosen the blade mounting screws slightly, reposition the blade, and retighten while checking your work.
Use the balancing kit included with many fans to eliminate residual wobble after visual alignment. These kits typically include small metal weights and adhesive strips. With the fan turned on at low speed, observe which blade tip oscillates widest and mark that blade with a piece of tape. Attach a balancing weight to the top surface of that blade near its tip, starting with the lightest weight. Run the fan again and observe improvement—if wobble continues, add weight or try positioning it differently. This process requires patience but dramatically improves performance and reduces stress on the motor bearings.
Test Your Installation Thoroughly
After completing all mechanical installation steps, restoring power and testing the fan validates your work and identifies any remaining issues requiring attention. Thorough testing prevents problems from developing after you put away your tools.
Restore power at the breaker and flip the wall switch to activate the fan. Start at the lowest speed setting and observe operation for several minutes, listening for unusual sounds such as clicking, rattling, or humming. These sounds sometimes indicate loose hardware requiring retightening. Increase speed through all settings, noting whether the fan starts smoothly or hesitates at certain speeds. A properly installed ceiling fan should operate quietly across all speed settings without visible wobbling.
Test the fan’s direction switch if your model includes reverse operation for seasonal airflow adjustment. The switch, usually located on the motor housing, changes blade rotation direction—counter-clockwise for summer cooling (air movement down) and clockwise for winter heat circulation (air movement up). Verify that blades spin in the correct direction for each setting by observing from below. Finally, run the fan for at least 30 minutes while monitoring for developing issues such as increasing noise, vibration, or light fixture rattling. Any problems detected now can be corrected before completing the project.
Proper ceiling fan blade installation combines mechanical precision with electrical safety awareness, rewarding careful homeowners with years of efficient, quiet operation. By following these systematic steps—gathering tools, prioritizing safety, removing old components correctly, understanding hardware relationships, and carefully mounting, aligning, and balancing each blade—you achieve results matching professional installation quality. Regular maintenance including quarterly screw tightening and annual balancing checks extends your fan’s lifespan and maintains optimal performance. If persistent problems emerge despite thorough troubleshooting, consulting a licensed electrician prevents safety hazards and ensures expert resolution of electrical or motor issues. A well-installed ceiling fan should operate so quietly you’ll forget it’s there—except for the comfortable breeze it creates.
Leave a Reply