Your Ultimate Guide to Cooling: In-Depth Reviews, Smart Comparisons & Pro Care Tips.

Category: Exhaust

Fix Bathroom Exhaust Fan Heater Not Working


You flip the switch after a hot shower, expecting warm air to clear the steam. But the fan runs while the heat stays off. A bathroom exhaust fan heater not working is a common yet frustrating issue, especially in colder months. When the ventilation works but the heater does not, the problem is usually isolated to the heating circuit, not the entire unit. The good news is that most causes are diagnosable and fixable with basic tools and a methodical approach.

This guide cuts through the confusion. Using verified technical data and expert insights, you will learn how to pinpoint whether the issue lies in a failed heating element, a faulty resistor, a blown thermal fuse, or hidden house wiring problems. You will also learn how to test each component safely, avoid unnecessary part replacements, and restore heat without risking fire hazards.

Identify the Real Problem First

Before replacing any parts, confirm what is actually failing. Jumping straight to a $60 heating element replacement when a $6 resistor is the culprit wastes time and money. A systematic approach saves both.

Fan Works But No Heat? Check These First

If the fan spins but no warmth comes out, the heater circuit is broken, but power may still reach the unit. Use these indicators to narrow down the cause.

• Heater and light fail together → Likely shared power issue or blown thermal fuse
• Only heater fails → Could be switch, resistor, or element
• No sound from heater switch → Suspect the wall switch

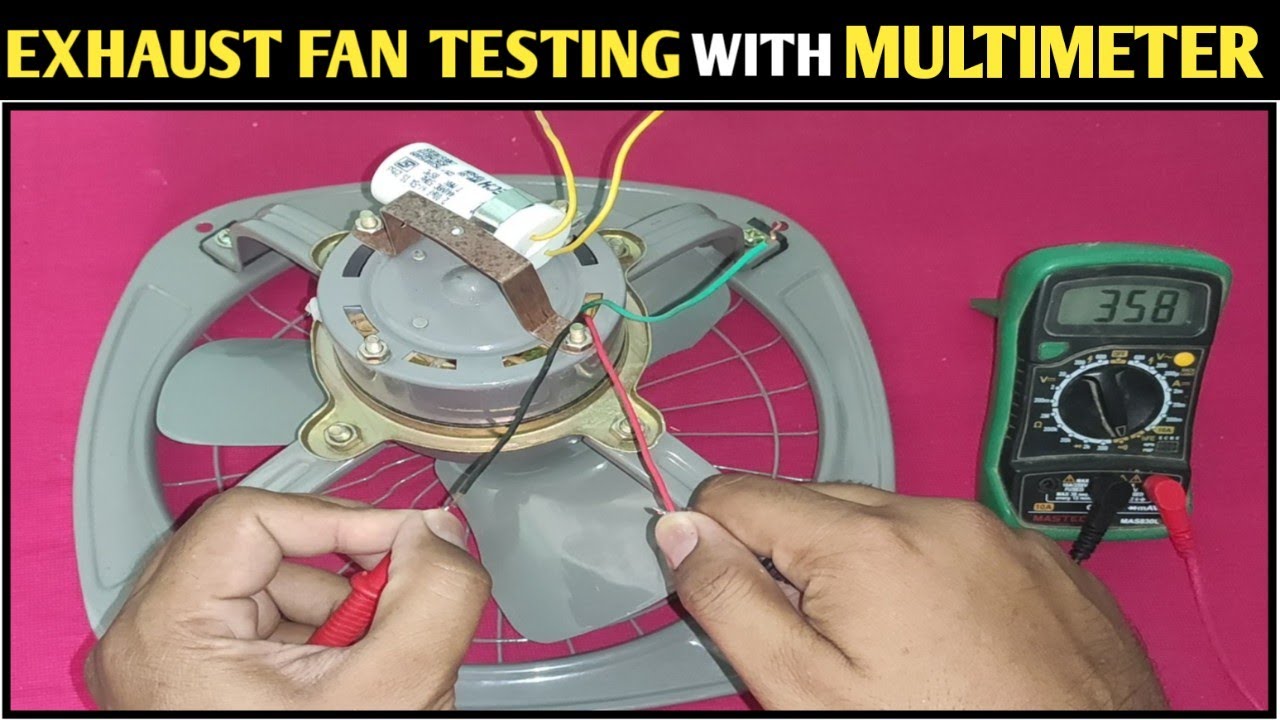
Use a multimeter to test voltage at the heater terminals when the switch is on. No voltage means the problem is upstream from the heater.

Use a Multimeter to Test Power Flow

Never assume power is present. Always verify with a multimeter before proceeding with repairs.

  1. Turn power on at the breaker
  2. Set multimeter to AC voltage (200V range)
  3. Test across heater switch terminals
  4. 120V present when switch is on means power is reaching the switch
  5. No voltage means check breaker, wiring, or outlet connections

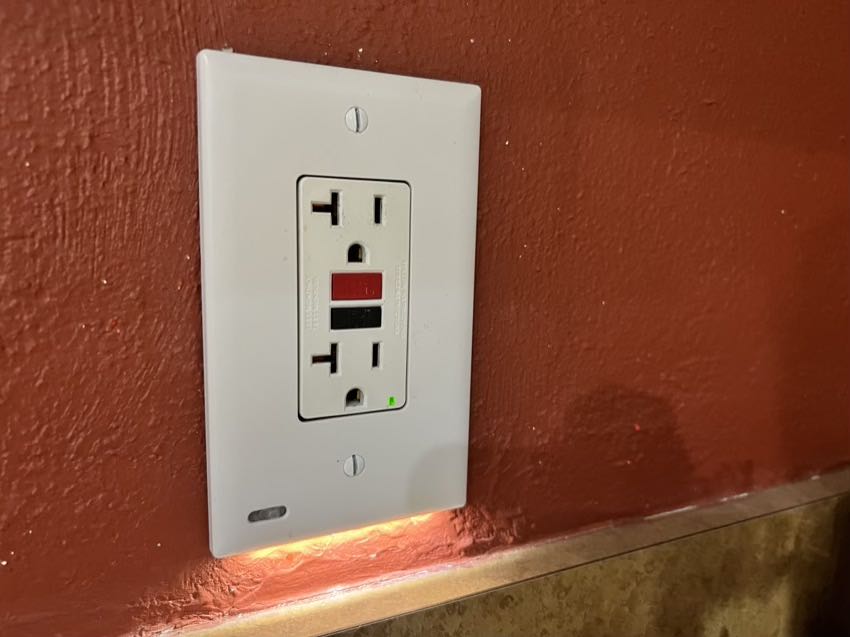
Many failures trace back to back-stabbed outlets in the same bathroom. A loose connection there can kill power to the heater even if the fan still works.

Test the Crown-Shaped Resistor

bathroom exhaust fan heater resistor location

Contrary to popular belief, a burned-out heating element is not the most common cause. A small, overlooked crown-shaped resistor fails far more often, yet is rarely checked first.

Why the Resistor Fails So Often

Located on the heater assembly, this resistor regulates current to the heating element. Dust, heat cycles, and poor ventilation degrade it over time. When it fails, power stops before reaching the coil, even if the element is fine. This is why many technicians replace the $60 element when only a $6 part was needed.

Perform the Jumper Test

This quick test confirms if the resistor is dead.

  1. Turn off power at the breaker
  2. Locate the resistor (usually on the right side of the control board)
  3. Disconnect both leads
  4. Attach a jumper wire across the terminals
  5. Restore power briefly and turn on the heater
  6. If heat comes on, the resistor is faulty

Never leave the jumper in place. It bypasses a safety feature and could overheat the unit.

Replace the Resistor

• Part cost: approximately $6 for a 5-pack
• Tools needed: soldering iron, wire cutters, electrical tape
• Desolder old resistor and solder new one in place
• Insulate connections with electrical tape

This fix resolves 90% of no-heat issues. Avoid replacing the heating element until you have ruled this out.

Diagnose the Heating Element

If the resistor tests good, the heating element itself may be burned out. But do not replace it blindly. Test it first.

Check for Continuity With a Multimeter

  1. Turn off power at the breaker
  2. Remove front lens and access heater housing
  3. Locate the heating element (metal coil at the bottom)
  4. Disconnect both wires
  5. Set multimeter to ohms
  6. Touch probes to both terminals
  7. Low resistance (10-50Ω) means the element is good
  8. Infinite resistance (OL) means the element is burned out

Look for broken wires, sagging coils, or blackened sections. These visual clues confirm failure.

Replace the Element (NuTone S0969B000)

If the element is dead, replacement is the only option.

Tools needed include screwdrivers (flat and Phillips), nut driver, and needle-nose pliers.

  1. Remove front lens by gently prying one side to release tabs
  2. Unscrew reflector nut, remove bulb, unplug pigtail connector, release wire clips and mounting screw
  3. Remove screws securing the heater housing cover
  4. Loosen terminal nuts, slide out old coil, position new coil
  5. Loop around internal hooks. Do not stretch the coil
  6. Secure both ends and tighten nuts just enough
  7. Over-tightening deforms the coil and causes premature failure
  8. Reassemble and test

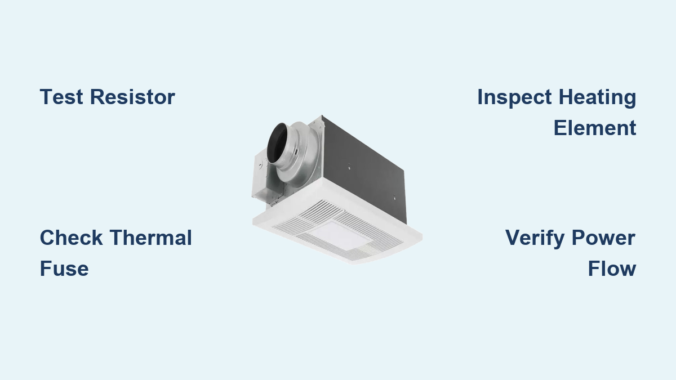
Check the Thermal Fuse

bathroom exhaust fan heater thermal fuse location

A blown thermal fuse (also called a thermal protector) kills power to the heater if it detects overheating. It is a one-time-use part. Once blown, it must be replaced.

Why It Blows

• Dust buildup blocking airflow
• Fan motor slowing down
• Poor fuse placement (too far from heat source)

Test With Voltage or Continuity

Option 1: Live voltage test (fastest)

  1. Power on, heater switch on
  2. Measure voltage across fuse terminals
  3. 120V across fuse means the fuse is blown (it should pass voltage, not block it)
  4. 0V across fuse means the fuse is good

Option 2: Continuity test (safer)

  1. Power off
  2. Disconnect wires
  3. Test continuity
  4. No beep (OL) means the fuse is open. Replace it.

Replace the Fuse

• Part cost: $10-$15
• Use crimp connectors, not solder, to attach new wires
• Never solder the fuse. Solder does not respond to heat like a fusible link and defeats the safety function

Bypassing the thermal fuse creates a fire hazard. It is there to prevent the unit from overheating and igniting nearby materials.

Prevent Future Blows

• Clean fan and duct every 6-12 months
• Relocate the fuse closer to the heating element for faster response
• Ensure the fan runs at full speed before turning on the heater

Inspect the Heater Switch

If power is not reaching the heater, the wall switch might be dead.

Test the Switch With a Multimeter

  1. Turn off power
  2. Remove switch cover
  3. Disconnect wires
  4. Set multimeter to continuity
  5. Toggle switch
  6. No beep in ON position means the switch is bad

Replace With Matching Specs

Match voltage (120V) and amperage (usually 15A). Use screw terminals, not back-stab connections, for reliability. Reconnect wires and test.

If the switch feels loose or makes no click, it is likely failing mechanically too.

Rule Out House Wiring Issues

Sometimes the problem is not the unit. It is the house.

Check for Back-Stabbed Outlet Failures

In older homes, bathroom outlets, lights, and heaters often share a circuit. A failing back-stabbed outlet can cut power to the heater while the fan still works.

  1. Test nearby outlets with a plug-in tester
  2. Remove outlet cover
  3. Look for loose wires in back-stab holes
  4. Move wires to screw terminals (more reliable)

Verify Breaker and Circuit Health

• Check for tripped breakers
• Test voltage at the junction box
• If power is missing upstream, call a licensed electrician

Working inside breaker panels or running new wiring requires professional skills. Do not risk electrocution.

Prevent Future Failures

A little maintenance goes a long way in extending your unit’s life.

Clean the Unit Annually

  1. Turn off power
  2. Remove lens and grill
  3. Wipe dust from fan blades, heater coil, and housing
  4. Vacuum duct opening to remove lint

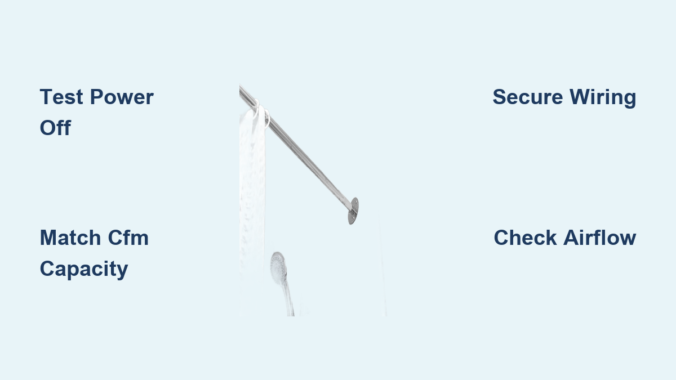
Ensure Proper Airflow

• Keep ducts short, straight, and insulated
• Remove kinks or blockages
• Replace weak fan motors

Upgrade Old Wiring

• Replace back-stabbed switches and outlets with screw-terminal versions
• Consider a dedicated circuit for the heater (per modern code)

When to Call a Professional

Not every repair is DIY-safe. Call an electrician if no power reaches the unit, wiring is damaged or discolored, breaker trips repeatedly, or you are uncomfortable working with live circuits.

You are just throwing parts at your problem before diagnosing the cause. Test first, replace only what is broken.

Frequently Asked Questions About Bathroom Exhaust Fan Heater Not Working

Why does my bathroom exhaust fan work but the heater does not?

This indicates the problem is isolated to the heating circuit. The fan motor and heater use separate electrical paths. Common causes include a failed resistor, burned-out heating element, blown thermal fuse, or faulty wall switch.

How do I test if the heating element is bad?

Turn off power at the breaker. Access the heating element and disconnect both wires. Set a multimeter to ohms and touch probes to both terminals. Infinite resistance (OL) means the element is burned out and needs replacement.

Can I bypass the thermal fuse temporarily?

Never bypass the thermal fuse. It is a critical safety device that prevents fire from overheating. Bypassing it creates a serious fire hazard. Always replace a blown thermal fuse with the correct rated part.

What is a crown-shaped resistor and why does it fail?

The crown-shaped resistor is a small component on the heater assembly that regulates current to the heating element. It fails frequently due to dust accumulation, heat cycles, and poor ventilation. It is responsible for approximately 90% of no-heat cases.

How much does it cost to repair a bathroom exhaust fan heater?

Costs vary by part. Resistor replacement costs approximately $6. Heating element replacement runs about $60. Thermal fuses cost $10-$15. Wall switches average $15-$25. Professional electrician visits typically cost $150-$200 or more.

Key Takeaways for Fixing Your Bathroom Exhaust Fan Heater

A bathroom exhaust fan heater not working is rarely a mystery. It is a solvable electrical puzzle when you approach it methodically. The most important takeaway is to test before you replace. Use a multimeter to verify power flow and component integrity rather than guessing which part failed.

The crown-shaped resistor fails far more often than the heating element, yet it is rarely checked first. This small $6 part resolves approximately 90% of no-heat issues. Always perform the jumper test on the resistor before spending $60 on a new heating element.

Respect the thermal fuse. It is a one-time-use safety device that prevents fire. Never bypass it or solder it. Replace it with the correct part using crimp connectors, and address the root cause (poor airflow, dust buildup) to prevent future failures.

With the right tools and approach, you can diagnose like a pro and save hundreds in service calls. Stay safe, test before you replace, and never compromise on thermal safety.

How to Fix Bathroom Exhaust Fan Light Blinking


Is your bathroom exhaust fan light blinking or flickering even when the switch is on? You are not alone. Bathroom exhaust fan light blinking is a surprisingly common issue, especially in modern units with integrated LED lighting. While it might seem like a minor annoyance, blinking lights can signal underlying electrical problems, failing components, or compatibility issues that, if ignored, could lead to complete failure or safety risks.

The root cause often depends on your unit type: is it a sealed LED model like the Broan AR80LWH, or does it use replaceable bulbs? This guide walks you through every possible cause, how to diagnose it safely, and what fixes actually work.

Identify Your Bathroom Fan Type

Before diving into repairs, confirm what kind of light system you have. This determines your troubleshooting path.

Integrated LED vs Replaceable Bulb

Bathroom fans fall into two categories:

  • Integrated LED models (e.g., Broan AR80LWH, Panasonic FV series) use sealed light panels with no user-replaceable bulbs. If the light blinks, it is likely an internal driver or circuit failure.
  • Bulb-based models (GU24, E26 sockets) accept standard CFL or LED bulbs. Blinking may stem from a failing bulb, loose fit, or incompatible type.

Quick visual check: Remove the grill and look for a flat circular LED disc (integrated) or a visible bulb and socket (replaceable). If you have an integrated LED and the light flashes continuously, it is almost certainly a module failure.

Check for LED Module Failure

In sealed LED units, blinking is often a built-in failure signal, similar to a check engine light.

Broan AR80LWH Flashing Light

This model frequently exhibits continuous rhythmic blinking due to failed LED driver, overheating from enclosed design, or moisture damage in humid bathrooms.

Key symptoms include:

  • Flashing persists regardless of switch position
  • Fan operates normally
  • No visible bulb to replace

Manufacturers like Broan design these modules as non-serviceable. You cannot repair the internal electronics. Only replace the entire disc or the whole unit.

Replace the LED Light Module

Broan AR80LWH LED module replacement diagram

If your unit supports modular replacement, contact Broan customer support with your model number and request the LED light disc replacement part.

Replacement process:

  1. Turn off power at the breaker
  2. Remove the grill and housing
  3. Disconnect the wiring harness from the old module
  4. Install the new LED disc
  5. Reassemble and test

Important: This part is not sold at Home Depot, Lowes, or Amazon. Order directly from Broan or an authorized distributor. Cost is typically $25 to $40.

If the module is unavailable, replacing the entire unit may be your best option.

Test for Bulb-Related Issues

If your fan uses standard bulbs, the fix might be simple.

Replace or Reseat the Bulb

Common causes include CFL bulbs that flicker during startup or when failing, loose LED bulbs causing intermittent contact, or non-dimmable LEDs on dimmer circuits causing incompatible load leading to pulsing.

Action steps:

  1. Turn off power
  2. Remove the bulb and inspect for darkening or damage
  3. Clean the socket if corroded
  4. Reinstall firmly or replace with a dimmable-rated LED (if dimming is used)

Pro tip: Swap in a known-good incandescent bulb temporarily. If it stays steady, the issue was bulb compatibility.

Diagnose Switch Problems

Faulty switches are a leading cause of bathroom light blinking, especially combo switches controlling both fan and light.

Test Wall Switches

A worn switch can deliver inconsistent power, making lights flash.

Diagnostic steps:

  1. Turn off power at the breaker
  2. Remove the switch cover and label wires
  3. Inspect for burn marks, loose terminal screws, or corrosion or pitting
  4. Use a multimeter to test continuity by setting to ohms and probing terminals while toggling the switch

Replace the switch if there is no continuity, intermittent connection, or physical damage.

Upgrade to Separate Switches

Instead of a single combo switch, install individual switches for light and fan. This reduces load per switch, eliminates shared failure points, and allows independent control.

For smart or timer switches, ensure they are LED-compatible to avoid ghost voltage issues.

Inspect Wiring Connections

Bathroom exhaust fan attic wiring inspection

Loose or damaged wiring can cause intermittent power, especially in attic-mounted units.

Access the Fixture

Most ceiling-mounted fans sit above a ceiling cavity or attic space.

Steps:

  1. Turn off power
  2. Remove the grill
  3. Look for wire nuts, pigtails, or junction boxes

Check for loose wire nuts, frayed or discolored wires, or poor ground connections.

Investigate Attic Wiring

If accessible:

  1. Move insulation carefully (8 to 10 inches deep is common)
  2. Follow the cable from the fixture to the switch or junction box
  3. Look for abraded sheathing, pinched wires under joists, or insulation pressing on cables causing heat buildup

Safety tip: Wear gloves and a mask. Avoid stepping on drywall between rafters.

If wires are damaged, replace the cable or install a protective conduit sleeve.

Rule Out Voltage Issues

LED drivers are sensitive to small voltage fluctuations that motors or incandescent bulbs ignore.

Test Voltage at Key Points

Use a multimeter to check voltage at the switch (line side), which should read approximately 120V, and at the fixture terminals, which should match.

Low voltage below 110V suggests a loose connection somewhere in the circuit, undersized wiring on long runs, or shared neutral issues.

Load Testing

To confirm power delivery:

  1. Disconnect the fan and light
  2. Connect a test lamp (simple plug-in light)
  3. Turn power on

If the test light stays steady, the circuit is good and the issue is in the unit. If it flickers, the fault is upstream, likely in wiring or switch.

Address Environmental Factors

Bathrooms are high-humidity zones. Over time, moisture and heat degrade components.

Prevent Moisture Damage

Ensure the fan vents outside, not into the attic. Use a humidity-sensing switch to auto-run the fan after showers. Clean the grille and fan blades every 6 months to maintain airflow and reduce motor strain.

Avoid Insulation Contact

In attics, keep insulation at least 3 inches away from wiring and housing. Use IC-rated (Insulation Contact) housings if insulation must be close.

Compressed insulation can overheat wires or damage sheathing, leading to shorts.

Consider Full Unit Replacement

Sometimes repair is not practical, especially if parts are unavailable or wiring is compromised.

When to Replace the Entire Unit

Replace if the LED module is discontinued, wiring is damaged or outdated, the unit is over 10 years old, or you want better performance (quieter operation, higher CFM, energy savings).

Top Replacement Models

Broan AR80LWH Panasonic FV-08VQ2 Delta BreezSlim 80 comparison

  • Broan AR80LWH: 80 CFM, LED light, 1.0 sone, priced at $120 to $150
  • Panasonic FV-08VQ2: 80 CFM, humidity sensor, LED, priced at $130 to $160
  • Delta BreezSlim 80: 80 CFM, ultra-quiet, Energy Star rated, priced at $110 to $140

Newer models offer better moisture resistance, longer warranties up to 7 years, and smart features.

Prevent Future Blinking

A few habits can extend your unit life and prevent recurrence.

Maintenance Checklist

Every 6 months, tighten light bulbs, clean fan grille and blades, and check switch operation. Annually, inspect attic wiring for damage and test GFCI protection if on a bathroom circuit. After installation, confirm all wire nuts are tight and use LED-compatible switches.

Warranty Tips

Keep your proof of purchase. Register the product with the manufacturer. Contact support early, as Broan and Panasonic often cover defects within 1 to 7 years.

Avoid DIY repairs that void the warranty, like modifying sealed LED modules.

Final Diagnosis Flowchart

Still unsure? Follow this decision path:

  1. Is the light integrated or bulb-based? Integrated means likely module failure. Contact Broan. Bulb-based means replace or reseat.
  2. Does the fan work? Yes means problem is light-specific. No means check power supply and motor.
  3. Did testing show steady voltage? Yes means fault is in the fixture. No means inspect switches and wiring.
  4. Is the LED module available? Yes means replace it. No means replace the entire unit.

Frequently Asked Questions About Bathroom Exhaust Fan Light Blinking

Why does my bathroom exhaust fan light blink continuously?

Continuous blinking in integrated LED units like the Broan AR80LWH typically indicates LED module failure. The internal driver has malfunctioned, and the blinking serves as a diagnostic signal. The fan may still work, but the light cannot be repaired.

Can I replace just the light bulb in my bathroom fan?

Only if your model uses replaceable bulbs (GU24 or E26 sockets). Sealed LED models have no user-replaceable bulbs. Attempting to swap bulbs in integrated units will not fix the problem.

Is a blinking bathroom fan light dangerous?

While not immediately dangerous, blinking lights indicate an electrical issue that could worsen. Loose wiring, failing switches, or voltage fluctuations pose fire risks if left unaddressed. Diagnose and repair promptly.

How much does it cost to repair a blinking bathroom fan light?

LED module replacements cost $25 to $40 (if available). Wall switch replacement costs $15 to $30 for parts. Full unit replacement ranges from $110 to $160 for new models. Professional electrician labor adds $75 to $150 per hour.

Why does my bathroom fan light only blink when the fan is on?

This suggests voltage fluctuation caused by the fan motor drawing power. The motor may be placing stress on the circuit, or shared wiring is inadequate. Test voltage at the fixture while the fan runs to confirm.

Should I hire an electrician for bathroom fan light blinking?

If you are uncomfortable testing switches, wiring, or voltage, hire a licensed electrician. Also call a pro if the unit is attic-mounted, requires extensive wiring inspection, or if you notice burning smells or scorch marks.

Key Takeaways for Fixing Bathroom Exhaust Fan Light Blinking

Bathroom exhaust fan light blinking is rarely random. In sealed LED units like the Broan AR80LWH, it is a clear sign of module failure that requires replacement or full unit exchange. In bulb-based models, the fix is often as simple as reseating or更换 a bulb. For other cases, the problem could be a worn switch, loose wiring, or voltage fluctuations that affect sensitive LED drivers.

By systematically checking each component, starting with the simplest fixes, you can restore steady light and avoid bigger electrical issues. Always turn off power before testing, and when in doubt, replace the unit with a modern, reliable model designed for todays energy-efficient, moisture-resistant standards.

How to Fix Bathroom Exhaust Fan Not Removing Steam


If your bathroom exhaust fan isn’t removing steam, you’re not alone. Many homeowners expect their fan to clear foggy mirrors and visible steam during a shower, only to find the room stays damp. But here’s the truth: bathroom exhaust fans are designed to remove humidity after showering, not eliminate steam instantly. Their real job is preventing mold, peeling paint, and long-term moisture damage by circulating air and reducing humidity over time.

The problem often isn’t a broken fan. It’s improper use, poor airflow, or hidden duct issues. A fan that runs for just 5 minutes during a shower won’t cut it. Without enough make-up air, correct CFM rating, or proper venting, even the best fan fails. The good news is most causes are fixable with simple checks and adjustments.

Run Fan Long Enough After Shower

The most common reason fans seem ineffective is they’re turned off too soon. Running the fan only during your shower does little to reduce humidity. Steam builds faster than any standard fan can remove it. The real test comes after the water stops: can the fan dry the air in 20 to 30 minutes?

Experts agree: run your fan for at least 15 to 30 minutes post-shower, and up to 60 minutes in high-humidity climates or after long, hot showers. This allows the system to cycle out moist air and prevent condensation on walls, ceilings, and windows.

Ninety percent of moisture damage problems are due to not running the fan long enough. Ignoring this step leads to mold, warped grout, and peeling paint. These are costly issues that start small but grow fast.

Install Timer or Humidistat Control

Manually remembering to turn off the fan is unreliable. Upgrade with one of these options:

  • Timer switches: automatically shut off after 20 or 30 minutes
  • Humidistats: sense moisture levels and run fan until humidity drops to a safe level around 50% RH

These smart controls eliminate guesswork and ensure consistent performance, especially in homes with frequent bathroom use or tight construction.

Choose a combo unit that includes light, fan, and timer to simplify wiring and maximize convenience. Avoid motion sensors because they shut off too early for effective dehumidification.

Ensure Proper Air Intake Under Door

An exhaust fan needs replacement air to create suction. Without it, the fan starves, like trying to breathe through a straw with your nose pinched. In tightly sealed modern homes, lack of intake is a top cause of poor performance. Air must flow into the bathroom to replace what the fan pulls out. That means a gap under the door is essential.

Minimum Gap Requirements

Minimum acceptable gap under the bathroom door is 12 mm, which is about 0.47 inches. The ideal gap is 1 inch, which is 25.4 mm. A half-inch gap may work in older, leaky homes, but often fails in new builds with sealed windows and HVAC systems.

If there’s no gap or too small a gap under the bathroom door, no fresh air is flowing back into the room. Cutting more than half an inch from a hollow-core door risks damaging the internal frame. If your door is solid or salvageable, use a circular saw with a straight-edge guide for a clean, safe cut.

Test for Intake Issues

Try this quick diagnostic:

  1. Close all windows and doors
  2. Run the fan with the bathroom door closed
  3. Repeat with the door slightly open

If steam clears faster with the door open, insufficient intake air is your problem. Don’t install ceiling vents because they cause short-circuiting, where air flows directly from the intake to the fan without mixing in room air. This defeats the purpose. Instead, undercut the door or install a floor-level transfer grille.

Verify Fan Is Vented to Outside

bathroom exhaust fan vent to outside attic vs exterior

Many bathrooms have ductless recirculating fans, often mistaken for vented models. These use carbon filters to reduce odors but do not remove moisture. Ductless fans recirculate air and are suitable only for powder rooms or closets. Vented fans expel humid air outdoors via ductwork and are required for full bathrooms.

If your fan isn’t connected to exterior ducting, it cannot remove steam.

Check Where Duct Terminates

Common mistakes include ducts ending in the attic instead of outside, or connections at roof cap or wall exit being disconnected or blocked. To verify proper venting:

  1. Turn on the fan
  2. Go outside and feel for airflow at the exterior vent
  3. Look for condensation stains in the attic, which are signs of indoor venting

Even a powerful fan fails if it’s blowing moisture into your insulation. Use a smoke test: light incense indoors and watch if smoke exits outside. If it lingers, the system isn’t working.

Size Fan Correctly Match CFM to Room

bathroom exhaust fan CFM calculation chart

A fan too small for the space won’t move enough air. Use this formula to calculate minimum CFM needed: Required CFM equals Length times Width times Height times 8, divided by 60. This ensures 8 air changes per hour, which is the minimum standard.

For example, a 5-foot by 10-foot by 7.5-foot bathroom has 375 cubic feet of volume. Multiply by 8 and divide by 60, and you get 50 CFM minimum. For frequent hot showers or large tubs, aim for 110 CFM or higher.

Don’t Trust Rated CFM Alone

Manufacturers list CFM under ideal, no-resistance conditions. Real-world performance drops significantly due to long duct runs, 90-degree elbows, flexible sagging ducts, and dirty dampers. A 100 CFM fan may deliver only 60 to 70 CFM in practice.

Rule of thumb: for every 25 feet of duct plus one 90-degree bend, reduce effective airflow by 10 to 15%. Use short, straight runs and smooth rigid ducts to preserve performance.

Clean Fan and Duct Regularly

Over time, fans collect hair, soap scum, aerosol residue from hairspray and deodorant, and dust. This gunk coats blades, slows the motor, and restricts airflow, cutting performance by up to 50%. Bath fans accumulate lint on the blades, and hair spray and other aerosols exacerbate this. It’s inevitable.

How to Clean the Fan

  1. Turn off power at the breaker
  2. Remove the grille, which usually has clips or screws
  3. Wipe down the cover with soapy water
  4. Use a vacuum with brush attachment to clean blades
  5. Manually spin the fan to ensure it rotates freely
  6. Inspect the backdraft damper to ensure the flapper opens and isn’t stuck shut

Repeat every 6 months for peak performance. Label the circuit breaker for easy shutdown during cleaning.

Fix Duct Design Flaws

Mismatched ducts kill airflow. An undersized duct creates restriction, while an oversized duct reduces air velocity, allowing moisture to condense inside. Always match duct diameter to fan outlet, typically 3 inches or 4 inches.

Avoid Corrugated and Sagging Ducts

Corrugated flex duct creates turbulence, traps lint, and reduces flow. Sagging duct collects water and debris, acting like a dam. Replace with smooth rigid metal duct or smooth-walled flex duct if bends are needed.

Each 90-degree elbow adds resistance equal to several feet of straight duct. Keep total run under 25 to 30 feet, and use no more than 2 to 3 bends. Prefer wide-radius elbows over sharp turns, and slope duct slightly downward toward exterior to drain condensation. Seal joints with foil tape, not duct tape, which dries and cracks.

Place Fan Near Shower or Tub

Steam rises and concentrates near the ceiling. If the fan is too far from the moisture source, it won’t capture rising vapor. Ideal placement is within 12 inches of the shower or tub. Ceiling-mounted fans should be directly above or adjacent to the wet zone. Wall-mounted units must be high on the wall, near the ceiling.

The fan is roughly 3 feet outside the edge of the shower, which is a common mistake. A fan across the room pulls air from the floor, missing the humid layer at the top. If you can see the shower from the fan, it’s likely well-placed. For larger bathrooms, consider dual fans or a higher CFM model.

Inspect Exterior Vent for Blockages

Even a perfect fan fails if the exhaust path is blocked. Common issues include stuck flappers closed due to paint, ice, or shipping tape, clogged mesh from dust, lint, or bird nests in wildfire-rated vents, and snow or leaves blocking roof or wall caps.

Test Exterior Airflow

  1. Turn on the fan
  2. Go outside and place hand near the vent
  3. Feel for steady airflow

No air means possible causes like disconnected duct, crushed or collapsed duct, or damaged roof cap. Use a mirror or smartphone camera to inspect roof vents. Hold a tissue near the exterior cap. It should blow outward when fan runs. Clear debris with a brush or vacuum, and replace damaged caps.

Perform Diagnostic Tests

Tissue Test Check Fan Suction

This test is quick and reliable:

  1. Turn on fan
  2. Hold a single square of toilet paper against the grille
  3. Let go

Paper sticks means the fan is pulling air. Paper falls means no suction, so check the motor, duct, or damper.

Incense Test Reveal Airflow Patterns

This is more sensitive than the tissue test:

  1. Light 2 to 3 incense sticks
  2. Close bathroom door
  3. Turn on fan
  4. Observe smoke behavior

Smoke drawn to fan and exiting means the system works. Smoke lingering or spreading means an intake, blockage, or power issue.

Set Realistic Expectations

No residential bathroom fan can eliminate visible steam during a hot shower. The goal is post-shower drying, not instant defogging. Foggy mirrors and initial steam are normal. What matters is whether the room dries within 20 to 30 minutes after the shower ends, whether walls and ceiling stay dry, and whether condensation is gone.

If yes, the system is working, even if steam was visible earlier. You might end up spending a significant amount trying to meet unrealistic expectations. Focus on air changes per hour, runtime, and maintenance, not magical instant clearing.

Frequently Asked Questions About Bathroom Exhaust Fan Not Removing Steam

Why does my bathroom fan still feel humid after running for hours?

The most likely cause is insufficient runtime. Fans need 15 to 30 minutes after your shower ends to actually remove moisture. If you’re only running the fan during your shower, that’s not enough time to dry the air. Install a timer or humidistat switch to ensure the fan runs long enough after each use.

Can I vent my bathroom fan into the attic?

No, you should never vent a bathroom fan into the attic. This pumps moisture into your insulation and ceiling structure, leading to mold growth, wood rot, and costly repairs. Always vent bathroom exhaust fans to the outside through the roof or an exterior wall.

How do I know if my bathroom fan is powerful enough for my bathroom?

Calculate the required CFM using your bathroom’s volume. Measure the length, width, and ceiling height, multiply them together, then multiply by 8 and divide by 60. For example, a small 5 by 10 foot bathroom with 8-foot ceilings needs at least 67 CFM. If your fan is rated lower than this calculation, it’s likely undersized.

Does a bigger CFM fan always work better?

Not necessarily. A higher CFM rating only tells you the fan’s potential under ideal conditions. In real installation, long duct runs, multiple bends, and corrugated ducts can reduce actual airflow by 30% or more. A properly sized fan with good ductwork outperforms an oversized fan with poor duct design.

Why does steam disappear faster when I leave the bathroom door open?

This indicates insufficient make-up air. Your fan needs fresh air flowing into the bathroom to create proper suction. If the door is sealed tight, the fan starves and can’t pull air effectively. Undercut your bathroom door to create at least a 1-inch gap, or leave the door slightly open while the fan runs.

How often should I clean my bathroom exhaust fan?

Clean your bathroom exhaust fan and its components every 6 months. This includes the grille, fan blades, and motor. In households with heavy shower use or if someone sprays aerosols daily, consider cleaning every 3 to 4 months. Regular cleaning maintains airflow efficiency and prevents fire hazards from accumulated lint.

Key Takeaways for Fixing Your Bathroom Exhaust Fan

A well-maintained bathroom exhaust system won’t stop steam during your shower, but it will prevent mold, mildew, and structural damage. The most critical fixes are running the fan for at least 15 to 30 minutes after showering, ensuring a 1-inch gap under your bathroom door for proper air intake, and verifying the fan vents to the outside rather than into attic space.

Clean the fan blades and ductwork every 6 months to maintain airflow efficiency. Test your system regularly using the tissue or incense test to confirm it’s actually moving air. If your fan is undersized, poorly placed, or connected to sagging corrugated ducts, upgrade these components for real improvement.

Address the airflow, extend the runtime, and clean regularly. That’s how you win the humidity war and protect your bathroom from moisture damage.

How to Fix Broan Exhaust Fan Not Working


If your Broan exhaust fan isn’t turning on, you’re not alone. Thousands of homeowners face this issue, often when they need it most. The good news? Most broan exhaust fan not working problems stem from a handful of common, fixable causes. You might be dealing with a tripped GFCI outlet two floors away, a dusty motor, or a failed switch, not necessarily a broken fan. This guide walks you through every step, from quick checks to full motor replacement.

We’ll cover power checks, switch testing, motor diagnostics, and model-specific fixes for units like the Broan 678G. Whether the light works but the fan doesn’t, or nothing turns on at all, you’ll find the answer here.

Check Remote GFCI Outlets First

GFCI outlet location examples house

A tripped GFCI outlet is the most overlooked cause of a dead Broan fan. Even if your bathroom fan isn’t near an outlet, it may be powered through a remote GFCI, sometimes in a basement, garage, or utility room.

Test All GFCI Outlets in the House

One verified case traced a non-working Broan fan to a GFCI two floors down, right next to the main electrical panel. Always check every GFCI outlet in your home, not just ones near the fan.

• Press the “Test” button on every GFCI outlet
• Then press “Reset,” you should feel a click
• If it won’t reset or buzzes, the outlet is faulty and must be replaced

Replace a Failed GFCI Outlet

If the GFCI trips immediately or emits a burning smell, follow these steps.

  1. Turn off power at the main breaker
  2. Remove the outlet cover and mounting screws
  3. Inspect wires for scorch marks or melting
  4. Replace with a new 15A or 20A GFCI rated for damp locations
  5. Reconnect: black (hot) to brass “Line” screw, white (neutral) to silver “Line” screw
  6. Restore power and test the fan

Pro Tip: Label circuits clearly at the panel. Future you will thank you.

Verify Power at the Switch

No power at the switch means no fan, regardless of motor health. Testing the switch is a critical diagnostic step that takes only a few minutes.

Test Voltage with a Multimeter

  1. Turn off power and remove the wall switch cover
  2. Set multimeter to AC voltage (~V)
  3. Turn power back on
  4. Test between black (hot) and ground: 120V present means power is reaching the switch, no voltage means check the breaker and upstream GFCI

Check Switch Continuity

  1. Turn power off
  2. Remove switch wires
  3. Set multimeter to continuity (beep mode)
  4. Flip switch while probing terminals: beep only when on means the switch is good, no beep or constant beep means replace the switch

Fix: Use a fan-rated switch (not a light-only switch). Motors draw more current and can overheat weak switches.

Inspect Wiring to the Fan

Even with power at the switch, broken wires can kill the fan. Many Broan models like the 678G use plug-in connectors inside the housing that can become loose or damaged over time.

Test for Power at the Fan Plug

  1. Remove the fan cover (squeeze spring clips and pull down)
  2. Locate the motor’s electrical plug
  3. Use a multimeter to test voltage at the plug: no voltage means wire break between switch and fan, 120V present means power is reaching the motor

Repair Damaged Wiring

If wires are loose, frayed, or corroded, repair them properly.

  1. Turn off power
  2. Disconnect at both ends
  3. Strip 1/2 inch of insulation
  4. Reconnect with wire nuts or lever connectors
  5. Ensure bare copper touches terminal screws, never paint-covered wire

Warning: Sand lightly if wire is oxidized. Poor contact causes overheating.

Diagnose the Motor Yourself

A dead motor is common, but confirm before replacing. Motor failure often shows clear warning signs before complete failure.

Listen for Motor Hum

Turn on the switch and listen carefully.

• Loud hum but no spin means motor seized or capacitor failed
• Click but no sound means possible control board issue
• Silent means no power or open motor circuit

Test Motor Continuity

  1. Unplug the motor
  2. Set multimeter to ohms (Ω)
  3. Probe the two motor terminals: infinite resistance (OL) means motor is burnt out, low resistance (5-30Ω) means motor is likely good

Note: Some motors fail open due to dust buildup and overheating.

Replace the Fan Motor in 10 Minutes

Broan 678G fan motor replacement steps

Most Broan fans let you swap motors without rewiring. The modular design makes this one of the fastest repairs you can make.

Remove the Fan Cover

• Squeeze both sides of the spring-loaded cover
• Pull down and jiggle to release clips
• Repeat on opposite side until free

Release the Motor Housing

• Use a flathead screwdriver to gently pry up 5 tabs (2 on one side, 3 on the other)
• Slide the unit down and forward to disengage
• Unplug the motor connector

Install the New Motor

  1. Align the two tabs on the new motor with housing slots
  2. Slide in and push until all clips lock
  3. Plug in the connector, ensure full seat
  4. Reattach the cover: pinch one side’s clips, slide into place, push up until it clicks

Pro Tip: Use Broan part S99080666 for compatible models. It fits many 678-series units.

Choose the Right Replacement Motor

Broan fan CFM comparison chart

Not all motors are equal. Match specs carefully to ensure proper performance and airflow for your space.

70 CFM vs 50 CFM: What’s Best?

Feature Original (70 CFM) Replacement (50 CFM)
Airflow High Moderate
Noise 6 sones (louder) 4 sones (quieter)
Best For Large bathrooms (>70 sq ft) Powder rooms (<50 sq ft)
Motor Zones 6-zone 4-zone

Rule of Thumb: 1 CFM per square foot. A 40 sq ft bathroom needs at least 40 CFM.

Upgrade or Reuse Housing?

• Replace entire motor assembly: easier and more reliable
• Reuse housing: only if it’s undamaged and matches new motor

Warning: Aftermarket motors may not seal properly. Stick to Broan or Nutone OEM.

Fix Broan 678G & 2678F-A Models

These combo fan-and-light units have unique quirks that differ from standard fans. Understanding their design helps diagnose issues faster.

Light Works, Fan Doesn’t? Check Power Split

In the 678G, fan and light plug into separate internal outlets. If the light works but fan doesn’t, the motor is likely dead, or internal wiring to the fan plug is broken.

Test the Light Bulb Elsewhere

One user found the bulb worked when tested in a lamp, proving the socket and power were good. The real issue was a remote GFCI, not the fan.

Action: Always test components independently before assuming the worst.

Prevent Future Failures

A little maintenance goes a long way toward extending your fan’s life and preventing unexpected breakdowns.

Clean Every 6-12 Months

  1. Turn off power
  2. Remove cover and blades
  3. Wipe with damp cloth or soft brush
  4. Vacuum dust from motor housing

Why: Dust clogs airflow, causing motor overheating and early failure.

Test GFCI Monthly

Press “Test” and “Reset” on all GFCIs. It takes 10 seconds and prevents surprise outages.

Use a Timer Switch

Install a 30-minute auto-shutoff switch to prevent the fan from running too long, reduce motor wear, and save energy. Humidity-sensing models turn on automatically when steam is detected.

Verify Repair Success

After fixing the fan, test thoroughly to ensure the problem is truly resolved.

Step-by-Step Validation

  1. Restore power at the breaker
  2. Turn on the switch, fan should start instantly
  3. Hold tissue to grille, it should stick firmly
  4. Listen for smooth, quiet operation
  5. Watch for GFCI tripping during use

Failure?: Recheck voltage at the plug. Intermittent power often points to loose wire nuts.

When to Replace the Entire Unit

Sometimes repair isn’t worth it. Knowing when to upgrade saves money in the long run.

Replace If:

• Housing is cracked or corroded
• Duct connection is damaged
• You’re upgrading to a quieter or smarter model
• CFM is too low for room size

Choose a New Broan Unit Based On:

• Room size: 50 sq ft = 50 CFM minimum
• Noise tolerance: look for 1-3 sones
• Smart features: options with motion sensors or humidity control
• Duct compatibility: 4″ round is standard

Tip: Match electrical box size and mounting style for easy swap.

Key Takeaways for Fixing Your Broan Exhaust Fan

Most broan exhaust fan not working issues are electrical, not mechanical. Start with the GFCI, test power at the fan plug, and only then inspect the motor. The modular design means motor replacement takes under 10 minutes once you access the unit. Keep the fan clean, check connections yearly, and always use a fan-rated switch to avoid repeat failures. If you encounter any uncertainty during electrical work, consult a licensed electrician, especially for main panel or GFCI replacements.

Frequently Asked Questions About Broan Exhaust Fan Not Working

Why did my Broan exhaust fan stop working suddenly?

Most sudden failures stem from electrical issues like a tripped GFCI outlet, failed wall switch, or loose wiring connection. The motor itself is usually the last component to fail.

How do I know if the motor is bad on my Broan fan?

Test motor continuity with a multimeter set to ohms. Probe the motor terminals. Infinite resistance (OL) indicates a burnt-out motor, while low resistance (5-30Ω) suggests the motor is functional.

Can I replace just the motor on my Broan exhaust fan?

Yes. Most Broan and Nutone models use a plug-and-play design that lets you swap the motor without rewiring. Use part S99080666 for compatible 678-series units.

Why does my Broan fan light work but not the fan?

This indicates power is reaching the unit, but the fan motor or its internal wiring is faulty. Check the motor continuity and inspect the plug connection to the fan outlet inside the housing.

How often should I clean my Broan exhaust fan?

Clean the fan blades, cover, and motor housing every 6-12 months. Dust buildup restricts airflow, causes overheating, and shortens motor life.

Should I hire an electrician for Broan fan repairs?

For GFCI outlet replacement, switch wiring, or main panel work, hire a licensed electrician. Motor replacement and basic troubleshooting can be done by homeowners with basic tools.

How to Fix Exhaust Fan Switch Not Working


You flip the bathroom exhaust fan switch, but nothing happens. No hum, no airflow. Just silence. This common household problem frustrates homeowners, and while the wall switch is usually the first suspect, the actual cause often lies elsewhere in the electrical system or fan assembly. The good news? Most causes are fixable with basic tools and a systematic approach. In this guide, you will learn how to accurately diagnose whether your exhaust fan switch is truly faulty or if the problem stems from power loss, motor failure, or hidden wiring issues.

Check Power Supply First

Before replacing the switch, confirm the circuit has power. Many switch failures are actually tripped breakers or GFCI outlets. This simple verification step saves time and prevents unnecessary part purchases.

Reset the Circuit Breaker

Go to your electrical panel and locate the bathroom circuit breaker. Even if it appears in the “on” position, it may be in a tripped intermediate state. Turn it fully off, wait ten seconds, then switch it back on. Test the fan afterward to see if operation is restored.

Pro Tip: Bathrooms often share circuits with adjacent rooms. Check if outlets or lights also stopped working, which indicates a broader circuit issue.

Test GFCI Outlets

Bathroom fans may be on GFCI-protected circuits even if they are not plugged into an outlet. Press “Test” and then “Reset” on any GFCI outlets in the bathroom, hallway, or nearby rooms. Some older installations wire fans through GFCI for safety compliance.

Real Case: Spraying undiluted bleach near a switch once created a conductive path that tripped a GFCI due to residue. No hardware was damaged. Resetting the outlet restored full function.

Verify Voltage with a Multimeter

multimeter measuring AC voltage electrical outlet

A non-contact voltage tester detects live wires but cannot confirm a complete circuit. For accurate diagnosis, use a multimeter set to AC voltage (200V range). Turn off power, remove the switch cover, and measure between hot (black) and neutral (white) wires. A reading of approximately 120V indicates proper power. No voltage means the issue is upstream at the breaker, GFCI, or junction box.

Inspect the Wall Switch

If power reaches the switch location but the fan does not respond, the switch is a likely suspect. However, testing first prevents unnecessary replacement costs.

Look for Physical Damage

Turn off power at the breaker. Remove the switch cover and mounting screws. Gently pull the switch from the box and inspect for burn marks on terminals or switch body, melted wire insulation, and loose or corroded wires. Back-stabbed connections (wires pushed into rear holes) are particularly unreliable and should be avoided.

Expert Note: Always use side screw terminals for secure connections. Back-stabbed wires loosen over time due to vibration and heat cycling.

Test Switch Function with a Jumper

With power off, disconnect both wires from the switch. Connect them temporarily with a short jumper wire or wire nut. Restore power briefly. If the fan turns on, the switch is faulty and needs replacement. If the fan still does not operate, the problem lies downstream in the wiring, thermal switch, or motor.

Safety First: Never perform this test with exposed wires touching metal surfaces or each other.

Use a Multimeter for Continuity Testing

Set the multimeter to continuity or ohms mode. Disconnect the switch completely. Toggle the switch while testing across terminals. The switch should show continuity only in the ON position. No continuity when ON indicates an open switch (failed). Continuity in both positions indicates a shorted switch, which is dangerous and requires immediate replacement.

Bypass the Thermal Protection Switch

exhaust fan thermal protection switch location

Many exhaust fans have an internal thermal cutoff switch on the motor that stops operation when overheated. This safety device is a common culprit that mimics switch failure.

Locate and Test the Thermal Switch

The thermal switch is found on or near the motor housing. It appears as a small device (white or black) with one wire entering and one wire exiting. Disconnect both wires and test for continuity with a multimeter set to ohms. No continuity (infinite resistance) means the thermal switch has failed and requires replacement.

Temporary Bypass Test

Bridge the two terminals with a wire temporarily. Restore power and test the fan. If the fan runs, the thermal switch is the cause. If the fan still does not operate, proceed to motor or wiring diagnostics.

Warning: Never leave the thermal switch bypassed permanently. This removes overheat protection and creates a serious fire risk.

Check Internal Wiring and Connections

Even with a functioning switch, loose connections inside the fan housing can interrupt power delivery. This is an often-overlooked cause of apparent switch failures.

Access the Fan Motor

Turn off power at the breaker. Remove the vent cover by releasing clips or prongs. Unscrew the motor housing, typically secured with Phillips screws. Pull the motor assembly down gently to access the wiring connections.

Inspect Wire Nuts and Terminals

Check all wire nuts for looseness, corrosion, or frayed wires. Vibration over time commonly loosens wire nuts in fan housings. Re-terminate any questionable connections with fresh wire nuts. Ensure the ground wire is securely attached to the housing.

Common Failure Point: Many homeowners replace the switch when the real problem is a loose wire nut inside the fan housing.

Test the Fan Motor Directly

If all switches and wiring check out, the motor may be the issue. A bench test confirms whether the motor itself is functional or failed.

Perform a Direct Power Test

Disconnect the motor from the ceiling wires. Attach a pigtail adapter (hot, neutral, ground) to the motor leads. Plug into a known-working 120V outlet. If the motor spins, the original circuit or switch is the problem. If the motor is silent or hums without spinning, the motor is failed and needs replacement.

Pro Tip: A humming motor indicates power is reaching it, but the rotor is stuck, often due to seized bearings from age and lack of lubrication.

Recognize Motor Failure Symptoms

Do not blame the switch for signs of motor wear. Understanding these symptoms prevents misdiagnosis and wasted money on unnecessary switch replacements.

Delayed Startup

If the fan takes two to three minutes to start, this is frequently misdiagnosed as a faulty switch. The actual cause is typically motor bearing degradation, especially in units over ten to fifteen years old.

Fan Runs Continuously

When the fan will not turn off, the switch is likely stuck in the closed position (shorted), not the motor. This is a switch problem, not a motor problem.

Burning Smell or Overheating

This indicates internal motor damage or excessive load from a duct blockage. The motor is working harder than designed due to restricted airflow, triggering the thermal protection switch.

Expert Insight: Fans over fifteen years old should be replaced rather than repaired due to declining efficiency, part obsolescence, and increased reliability of modern units.

Clear Duct Blockages

Poor airflow increases motor strain, leading to overheating and thermal shutdown. This creates symptoms that appear to be electrical problems but are actually mechanical.

Inspect and Clear the Duct System

Check the roof cap for bird nests, debris, or pest infestations. Inspect flexible duct for kinks, crushing, or sagging that restricts airflow. Clean the interior with a vacuum or duct brush. Use rigid metal ducting when possible and minimize bends, as each ninety-degree turn increases resistance significantly.

Performance Fact: Poor ducting can reduce airflow by up to fifty percent, forcing the motor to work harder and fail prematurely.

Avoid Common Misdiagnoses

Many switch-related assumptions are incorrect. Use this guide to avoid costly mistakes and unnecessary part purchases.

Symptom Likely Misdiagnosis True Cause
Fan starts after delay Faulty switch Worn motor bearings
Intermittent operation Bad switch Loose wire nut in housing
No power at fan Dead switch Tripped breaker or open thermal switch
Fan runs nonstop Motor issue Stuck or shorted wall switch

Critical Reminder: A working bathroom outlet does not mean the fan circuit is live. Fans are often on separate lighting circuits with independent breakers.

Replace the Wall Switch

If testing confirms switch failure, replacement is straightforward and requires basic electrical knowledge.

Installation Steps

Turn off power at the breaker. Label all wires before disconnecting (common: black is hot, red is load). Use side screws, not back-stab holes, for secure connections. Connect wires securely and wrap with electrical tape for additional security. Mount the switch, reinstall the cover, restore power, and test fan operation.

Best Practice: Use a high-quality single-pole toggle switch. Avoid dimmers or smart switches unless the fan is specifically rated for them.

Replace the Fan Motor or Unit

When the motor is dead, decide between motor-only replacement or a full unit upgrade based on the fan’s age and condition.

Motor-Only Replacement

This is cost-effective for units under ten years old. Match the model number and voltage (120V standard). Follow manufacturer instructions for mounting and wiring connections.

Full Unit Upgrade

Consider replacement if the fan is over ten years old. Modern units offer higher CFM (at least eighty for large bathrooms), lower noise (below one sone), humidity sensors for automatic operation, and LED night lights. Choose a DC motor fan for quieter operation, better efficiency, and longer lifespan.

Essential Tools for Diagnosis

You do not need a full electrician’s kit. These basics handle most diagnostics.

• Multimeter for voltage, continuity, and resistance testing
• Non-contact voltage tester for quick safety checks
• Insulated screwdrivers and pliers for safe wire handling
• Pigtail adapter for bench-testing the motor
• Flashlight for seeing into ceiling cavities

Pro Move: Label and photograph wiring before disconnecting anything. This saves significant time during reassembly.

Frequently Asked Questions About Exhaust Fan Switch Issues

Why does my exhaust fan not turn on even when the switch is flipped?

The issue could be a tripped breaker, failed GFCI outlet, faulty wall switch, open thermal protection switch, or failed motor. Follow the diagnostic sequence in this guide to identify the exact cause.

Can a faulty GFCI outlet prevent the exhaust fan from working?

Yes. Even if the fan is not plugged in, it may be on a GFCI-protected circuit. Moisture, chemical exposure, or conductive residue can trip the GFCI, cutting power to the fan without obvious signs.

How do I know if the thermal protection switch is the problem?

Test the thermal switch with a multimeter for continuity. No continuity indicates a failed thermal switch. Temporarily bypassing it confirms the diagnosis, but never leave it bypassed permanently.

Is it worth repairing an old exhaust fan, or should I replace it?

Replace fans over fifteen years old. Older units have declining efficiency, worn motors, and obsolete parts. Modern fans offer better airflow, quieter operation, and smart features like humidity sensors.

Why does my exhaust fan start working after a two to three minute delay?

Delayed startup is usually motor bearing wear, not a switch problem. The motor struggles to overcome resistance in aged bearings before spinning up. This is common in units over ten to fifteen years old.

Key Takeaways for Fixing Your Exhaust Fan Switch

A non-responsive exhaust fan switch rarely means the switch itself is the only problem. Always verify power at the circuit breaker and GFCI outlets before replacing components. Use a multimeter for accurate testing rather than guessing. The thermal protection switch, loose wire nuts inside the fan housing, and motor failure all mimic switch failure. Follow the systematic diagnostic sequence in this guide to pinpoint the exact cause and avoid wasted repairs. Remember to cut power first, test before replacing, and consider upgrading units over ten years old for better performance and reliability.

How to Fix Exhaust Fan Not Spinning


Your exhaust fan has stopped spinning, and now you’re dealing with poor airflow, lingering odors, or dangerous smoke buildup. This is a common problem that affects bathroom fans, kitchen range hoods, and laser cutter ventilation systems alike. The good news is that most causes are fixable with basic tools and a few minutes of troubleshooting.

This guide walks you through every diagnostic step, from checking power connections to cleaning clogged blades, so you can get your exhaust fan spinning again fast.

Confirm the Fan Should Be Running

Before assuming something is broken, verify that the fan is supposed to be operating right now.

Some Fans Only Run During Active Use

Exhaust fans on laser engraving machines like Glowforge do not run continuously. They activate only when a cutting or engraving job is running.

Test it: Start a short job with an empty bed and watch if the fan kicks in. If it does, the system is working as designed.

A properly functioning exhaust pulls air at up to 30 mph, creating negative pressure that draws smoke inward instead of letting it escape.

Check Power and Wiring First

bathroom exhaust fan wiring diagram

No power means no spin. Many supposedly broken fans are simply disconnected or have a tripped breaker.

Verify Power Is Reaching the Fan

Check these items in order:

  • Confirm the circuit breaker is on
  • Make sure the wall switch is flipped to the on position
  • Test and reset any GFCI outlets if applicable
  • Inspect plug connections for plug-in bathroom fan models

Look for Loose or Faulty Wiring

Inspect wiring at the switch, junction box, and motor terminals. Look for loose screws, frayed ends, or corrosion.

Use a voltage tester to confirm power actually reaches the motor terminals.

Manually Spin the Fan Blade

Turn off power at the breaker, then gently try to spin the fan blade by hand.

Blade Spins Freely Indicates Electrical Problem

If the blade rotates smoothly with no resistance, the motor should run but lacks starting torque. This points to a failed capacitor.

The capacitor gives the motor the initial push to start. When worn out, the fan typically hums but won’t spin.

Signs of capacitor failure:

  • Humming noise without blade movement
  • Fan starts only after you give it a manual nudge

Blade Is Stiff or Won’t Move Means Mechanical Issue

Resistance when turning the blade by hand indicates something is physically blocking or seizing the system.

Clean Clogged Blades and Ducting

kitchen range hood grease filter cleaning

Grease, dust, sawdust, or debris can jam the fan and prevent rotation.

Kitchen and Bathroom Fan Cleaning

Over time, oily residue coats blades and makes them too heavy to spin.

Cleaning steps:

  1. Turn off power at the breaker
  2. Remove the filter screen and access panel
  3. Apply TSP or a strong degreaser
  4. Scrub blades and housing with a nylon brush
  5. Wipe clean with a damp cloth, avoiding soaking the motor

Laser Cutter Exhaust Cleaning

Materials like Proofgrade Draftboard produce fine, sticky particulate that clogs systems badly.

Deep clean tips:

  • Use a vacuum with a brush attachment on the fan housing
  • Clear ducting with pipe cleaners or flexible rods
  • Blow out debris with compressed air at low pressure
  • Check roof or wall caps for external blockages

Diagnostic trick: With the machine off, run a vacuum hose over the exhaust outlet. If the fan spins from the suction, the issue is internal clogging.

Lubricate Dry Bearings or Bushings

Dry bushings are the number one cause of a seized fan shaft. Without lubrication, friction locks the motor in place.

Apply Lubricant to Fix Squealing or Grinding

What you need:

  • Silicone-based lubricant or light machine oil
  • Dropper or small brush

Steps:

  1. Power off the unit completely
  2. Locate the bushing near the motor shaft
  3. Apply 1 to 2 drops of lubricant
  4. Spin the blade by hand to distribute the oil
  5. Restore power and test

Warning: Do not over-lubricate. Excess oil attracts dust and actually worsens performance over time.

Lubricate annually to extend motor life.

Diagnose and Replace the Capacitor

If the fan hums but won’t start, the capacitor is likely dead.

Test the Capacitor

  1. Disconnect power
  2. Discharge the capacitor by shorting its terminals with an insulated screwdriver
  3. Use a multimeter in capacitance mode
  4. Compare the reading to the labeled value

Signs of failure:

  • Bulging or leaking capacitor casing
  • Low or zero capacitance reading

Can You Replace It

Some older and industrial fan models allow capacitor replacement. Many modern sealed units do not.

If the capacitor is accessible and low-cost, replace it. Otherwise, consider full unit replacement.

Inspect for Mechanical Obstructions

Even small blockages can stop rotation entirely.

Check These Common Culprits

Look inside the fan housing, ducting, and roof or wall cap for:

  • Bird nests
  • Ice buildup in cold climates
  • Lint or sawdust clumps
  • Collapsed flexible ducting

Use rigid metal ducting with minimal bends. The longer and more curved the ducting, the more static pressure the fan must overcome.

Fix Imbalanced or Warped Blades

A wobbling or rattling fan may not spin freely due to blade damage.

Causes of Blade Problems

  • Grease buildup creating uneven weight distribution
  • Heat damage from kitchen hoods
  • Chemical exposure in laser systems

Fix: Remove blades, clean thoroughly, and inspect for warping. Replace if bent.

Tighten Loose Mounts

Vibration loosens screws over time. Check that the motor mount and venturi plate are secure. Ensure the blade doesn’t scrape the housing when spinning.

Test for Negative Pressure Failure

Even if the fan spins, poor exhaust design can let smoke escape.

Check for Backflow

A working exhaust creates negative pressure. Air should be pulled into the machine through every gap.

Diagnostic method: Turn off room lights and shine a flashlight during operation. Watch for airborne particles, which reveal airflow direction.

If smoke escapes, clean clogged ducts, repair leaks, or install a backdraft damper to prevent wind reversal.

When to Replace the Exhaust Fan

Sometimes repair isn’t worth the effort.

Signs You Need a New Fan

  • Motor hums but won’t start after capacitor check
  • Bearings are seized beyond lubrication repair
  • Cracked housing or burnt motor windings
  • Unit is over 10 years old

Plug-In Models Are Easy Replacements

Many bathroom fans connect via standard AC plug to a ceiling socket. Unclip the unit, unplug it, and install the new one.

Replacement time is about 15 minutes. No electrician needed for most plug-in models.

Cost ranges from $20 to $50 for basic units.

Hardwired Units Require Care

If you’re uncomfortable with electrical work, hire a licensed electrician. Always turn off the breaker, label wires, and proceed cautiously.

Prevent Future Failures

Avoid repeat issues with simple maintenance.

Clean Every 1 to 3 Months

Focus on fan blades, filter screens, ducting, and roof or wall caps. Use non-corrosive cleaners and never soak the motor.

Lubricate Annually

Apply light oil to bushings once a year. This prevents seizing and doubles motor life.

Optimize Your Duct Layout

Use straight, rigid ducts with minimal bends. Match duct size to the fan collar exactly. Avoid sagging or crushing.

Better airflow means less strain and longer motor life.

Monitor Performance

Watch for slower startup, unusual noises, or weaker suction over time. Early detection saves motors.

Frequently Asked Questions About Exhaust Fan Not Spinning

Why does my exhaust fan hum but not spin?

This is a classic sign of a failed capacitor. The motor receives power but cannot generate enough starting torque to overcome inertia. Replace the capacitor or the entire fan unit.

Can I fix a non-spinning exhaust fan myself?

Yes. Most issues are fixable with basic tools. Clean clogged blades, lubricate dry bearings, check wiring connections, and test the capacitor. Most repairs take under 30 minutes.

How often should I clean my exhaust fan?

Clean every 1 to 3 months depending on usage. Kitchen fans need more frequent cleaning due to grease buildup. Laser cutter fans may need cleaning monthly due to fine dust.

What causes an exhaust fan to stop spinning suddenly?

Common causes include a failed capacitor, dry or seized bearings, clogged blades, power supply issues, or a mechanical obstruction in the ducting.

Is it worth repairing an old exhaust fan?

If the motor hums but won’t start, bearings are seized, or the unit is over 10 years old, replacement is usually more practical than repair. Replacement fans are inexpensive and easy to install.

Key Takeaways for Fixing Your Exhaust Fan

A non-spinning exhaust fan is rarely a mystery. Start by confirming power reaches the motor, then manually test blade freedom. Clean accumulated debris from blades and ducting, lubricate dry bushings, and test the capacitor if the fan hums but won’t start. For laser cutter systems, remember that the exhaust only runs during active jobs.

Replace the entire unit if the motor is failed or the fan is over 10 years old. Plug-in bathroom fan replacements take about 15 minutes and cost $20 to $50.

Clean regularly, lubricate annually, and use rigid ducting to keep your exhaust fan spinning reliably for years to come.

How to Fix Exhaust Fan Not Working


Is your bathroom, kitchen, or RV exhaust fan refusing to turn on, running weakly, or making strange noises? A non-functional exhaust fan is a common household problem that can lead to mold growth, poor air quality, and lingering odors. The good news: most exhaust fan failures are fixable without replacing the entire unit.

This guide walks you through step-by-step diagnostics to identify whether the issue is electrical, mechanical, or ventilation-related. From testing power at the switch to clearing blocked ducts or replacing a seized motor, you’ll learn exactly how to restore proper function safely and effectively.

Confirm Power Is Reaching the Fan

Before disassembling anything, verify your exhaust fan is actually receiving power. Many “broken” fans are simply starved of electricity due to a tripped breaker or blown fuse.

Check Circuit Breaker or Fuse

Locate your home’s electrical panel and find the circuit labeled for the bathroom, kitchen, or exhaust fan area. Even if the breaker appears ON, switch it fully OFF then back ON to reset it properly.

For RVs, check the 12V DC fuse panel since many ceiling vents run on low-voltage power shared with interior lights. Some RV fans have an inline fuse inside the housing near the wiring terminals.

Test Voltage at Fan Terminals

multimeter testing AC voltage exhaust fan wiring

Turn off power at the breaker, then remove the fan cover to access the wiring compartment. Restore power and set your multimeter to AC for homes or DC for RVs. Test between the black hot wire and white neutral wire while the wall switch is ON.

Expected readings are 110 to 120 volts for 120V AC systems and 12 to 14 volts for 12V DC systems. No voltage indicates the issue lies upstream at the switch or wiring.

Test the Wall Switch and Electrical Connections

Faulty switches and loose connections rank among the top causes of exhaust fan failure.

Inspect and Test the Wall Switch

Turn off power at the breaker and remove the switch plate. Look for loose wires, especially in back-stab terminals where wires push into rear slots. Check for burn marks, discoloration, or melted plastic which indicate arcing.

Move wires from back-stab terminals to side screw terminals and tighten securely. Replace the switch if you see any damage.

A quick diagnostic test involves plugging a lamp or hair dryer into a nearby outlet on the same circuit. If it works when the switch is ON, the switch is likely functional.

Check Internal Wiring at the Fan Housing

Remove the fan cover held by spring clips and inspect wire nuts connecting the fan to house wiring. Ensure all connections are tight with no burning, corrosion, or frayed insulation. The ground wire should connect to the green terminal.

Re-secure any loose connections and wrap with electrical tape. Install a grommet or cable clamp where wires enter the housing to prevent abrasion.

Diagnose Motor and Mechanical Problems

If power reaches the fan but it won’t spin, the motor or mechanical components are likely at fault.

Identify Motor Failure Signs

A humming sound with no spinning indicates the motor receives power but the rotor is seized. A burning smell signals internal short or insulation failure. Grinding or screeching noises point to worn bearings.

Perform Manual Blade Rotation Test

Turn off power and gently rotate the fan blade by hand. If it feels stiff or stuck, the bearings may be seized. If it spins freely, the motor could still be electrically faulty.

Lubricate or Replace the Motor

Apply 1 to 2 drops of lightweight oil or silicone lubricant to the motor shaft and accessible bearing points. Avoid over-lubricating since excess oil attracts dust and grime.

If lubrication doesn’t help, replace the motor. Match specifications exactly including voltage, RPM rating, and mounting dimensions. Most replacement motors include new blades and hardware.

Clear Airflow Blockages and Ventilation Issues

dirty kitchen exhaust fan filter cleaning

Even when the fan spins, poor performance often stems from airflow restrictions.

Clean or Replace Filters

Kitchen and microwave grease filters accumulate debris over time. Remove them, soak in hot soapy water, scrub with a soft brush, rinse, and dry. Clean every 1 to 3 months.

Microwave charcoal filters in recirculating models are not washable. Replace them every 6 to 12 months.

Bathroom fan grilles collect dust, hair, and lint. Remove and clean every 1 to 2 years.

Clear Stuck or Damaged Dampers

Interior and exterior dampers prevent cold drafts. They can stick closed from debris, paint, or ice, or stick open causing energy loss.

Open dampers manually with a stiff wire inside or by hand outside. Remove leaves, bird nests, or snow. Replace damaged dampers.

Repair or Replace Ductwork

Common duct problems include kinks or collapses in flexible ducting, disconnected joints causing air leaks, and excessively long or bent runs reducing airflow.

Reattach loose ducts with aluminum foil tape, not duct tape. Replace damaged sections with rigid metal ducting. Keep runs short and straight.

Every fan has a maximum duct length and bend limit, so check the manual.

Fix Undersized or Inefficient Fan Problems

A perfectly working fan can underperform if it’s too small for the space.

Match CFM to Room Size

CFM measures airflow. Minimum recommendations are 50 CFM for bathrooms under 50 square feet, matching CFM to square footage for larger bathrooms, and 100 plus CFM for kitchens.

Calculate Air Changes per Hour using the formula: ACH equals CFM times 60 divided by Room Volume. Aim for 8 ACH in bathrooms.

Choose Quiet Operation

Sone measures perceived noise. One sone or less is very quiet, 1 to 2 sones is quiet and ideal for bathrooms, and 4 or more sones is noticeably loud.

Each 1-sone increase equals twice the perceived loudness. When replacing, aim for 1.5 to 2 sones maximum.

Troubleshoot Erratic Fan Operation

If the fan runs continuously or cycles randomly, the control system may be faulty.

Check Timer or Humidity Sensor

Many modern fans have timers that keep running after switch-off or humidity sensors that auto-start when moisture is detected. If the fan runs too long, adjust or replace the timer. If it turns on unexpectedly, reset the sensor threshold or replace if unresponsive.

Inspect for Faulty Wiring or Switch

A shorted switch or crossed wires can cause constant operation. Check the switch for internal failure and wires for contact with grounded surfaces. Replace defective components.

Reduce Excessive Noise and Vibration

Excessive noise indicates mechanical issues or poor installation.

Fix Common Noise Sources

Loose fan cover causes rattling. Adjust spring clips or replace missing hardware. Unbalanced or damaged blades create wobbling. Inspect for warping and replace with a new motor kit.

Worn motor bearings produce grinding. Lubricate or replace the motor. Duct resonance amplifies noise. Secure loose ducts with straps and insulate if needed.

Address RV-Specific Exhaust Fan Issues

RV ceiling fans have unique power and safety features.

Verify 12V DC Power and Fuses

Most RV fans run on 12V DC from the house battery. Check the main fuse panel shared with lights and test any inline fuse inside the fan housing with a multimeter.

Ensure the roof cut-off switch is enabled if you have a pop-up camper. This switch disables roof-mounted components during towing.

Test Vent Cover Interlock

Many RV fans won’t operate unless the roof vent cover is opened 1 to 2 inches. Open the cover fully and test the fan.

Know When to Replace the Fan

Sometimes repair isn’t worth it. Replace the fan if the motor is burned out and housing is old, if it’s vented into the attic and must be rerouted, or if the unit is noisy, low-CFM, or over 10 years old.

Choose a replacement matching your duct size and mounting dimensions. Prioritize high CFM for your room size, low sone rating for quiet use, and ENERGY STAR models for efficiency.

Maintain Your Fan to Prevent Future Failures

Most exhaust fan problems are preventable with routine care.

Follow a Maintenance Schedule

Clean grease filters every 1 to 3 months. Replace charcoal filters every 6 to 12 months. Clean bathroom grilles every 1 to 2 years. Inspect ductwork annually for kinks, leaks, and debris. Test damper operation annually. Lubricate the motor every 2 to 3 years.

Address Installation Flaws

Airtight bathrooms lack makeup air, causing poor suction. Leave the door slightly open or add a half-inch gap under the door. In cold climates, insulate ducts to prevent condensation and dripping. Always terminate ducts outside never in the attic.

Understand the Health Risks of Poor Ventilation

Ignoring a broken fan leads to serious consequences. Mold and mildew grow from excess moisture. Respiratory issues arise from poor air quality. Structural damage occurs from attic condensation and wood rot. Ice dams form in winter from warm moist air in the attic.

A well-maintained properly vented fan protects your health and home.

Frequently Asked Questions About Fixing Exhaust Fans

Why won’t my exhaust fan turn on at all?

Start by checking the circuit breaker or fuse. Reset the breaker even if it appears ON. Test voltage at the fan terminals with a multimeter. If no power reaches the fan, check the wall switch and wiring connections.

How do I know if the motor is burned out?

A burned-out motor typically produces no sound at all, or you may smell burning. If the fan hums but doesn’t spin, the motor may be seized rather than completely burned out. Try manually rotating the blade to confirm.

Can I replace just the motor instead of the whole fan?

Yes. Motor replacements are often cheaper than buying a new entire unit. Match the replacement motor exactly to your fan’s specifications including voltage, RPM, and mounting dimensions.

Why does my exhaust fan run continuously?

Continuous operation usually indicates a faulty switch, crossed wiring, or a malfunctioning timer or humidity sensor. Inspect the switch for shorts and check if any smart features are stuck in the ON position.

How often should I clean my exhaust fan?

Clean kitchen grease filters every 1 to 3 months. Replace charcoal microwave filters every 6 to 12 months. Clean bathroom fan grilles every 1 to 2 years. Inspect and clean ducts annually.

Key Takeaways for Fixing Your Exhaust Fan

Fixing an exhaust fan not working is often a quick low-cost repair. Start with power and switch checks, then move to motor issues, airflow blockages, and finally control problems. Most issues are well within DIY reach with basic tools.

Always turn off power before working on electrical components. Use a multimeter to test voltage and a non-contact voltage tester to confirm power is off before touching wires.

Regular maintenance prevents 80% of common failures. Clean filters, inspect ducts, and lubricate the motor periodically. When in doubt, consult a licensed electrician, but most exhaust fan problems can be solved with patience and the right approach.

How to Replace a Ceiling Fan in Bathroom


That lingering fog on your bathroom mirror after a shower isn’t just annoying—it’s a warning sign. When your bathroom ceiling fan can’t keep up with moisture removal, you’re inviting mold growth, damaged drywall, and compromised indoor air quality. Replacing a bathroom ceiling fan ranks among the most valuable home maintenance projects you can tackle, protecting your home from costly moisture damage while improving air quality. With basic DIY skills and the right guidance, you can complete this essential upgrade in a single afternoon, restoring proper ventilation to your bathroom and safeguarding your home’s structural integrity.

The process might seem intimidating if you’ve never worked with electrical components before, but modern replacement fans are designed with homeowners in mind. This guide provides everything you need to successfully replace your bathroom ceiling fan, from recognizing when replacement is necessary through final testing procedures. By the end, you’ll have the confidence to handle this project safely and effectively.

Why Your Bathroom Fan Fails to Ventilate Properly

Your bathroom fan’s declining performance manifests through unmistakable warning signs that demand attention before moisture damage becomes severe. Persistent mirror fogging lasting more than 60 seconds after showering indicates inadequate airflow—your fan simply can’t move enough air to prevent humidity buildup. This sustained moisture creates ideal conditions for mold growth behind walls and in ceiling cavities, potentially requiring thousands in remediation costs.

Visible water damage around the housing—peeling paint, brown stains, or crumbling drywall—signals years of moisture infiltration that standard cleaning can’t fix. These stains reveal humidity escaping into spaces where it accumulates rather than venting outdoors. Musty odors that linger despite regular cleaning suggest mold growth within the fan housing or ductwork, circulating spores throughout your home with every use.

Excessive noise during operation—rattling, grinding, or unusually loud humming—indicates failing motor bearings or loose components. Modern fans operate at whisper-quiet levels (below 1.0 sones), making older noisy units obvious candidates for replacement. If your fan has surpassed ten years of service, replacement becomes essential regardless of current performance—newer models offer significantly better energy efficiency, quieter operation, and advanced features like humidity sensors.

Select the Perfect Replacement Fan Capacity

bathroom exhaust fan CFM calculation chart

Choosing the right fan size ensures effective moisture removal without unnecessary noise or energy waste. Calculate your bathroom’s CFM requirement by multiplying length × width × ceiling height, then multiplying by 0.13. For example, an 8×9-foot bathroom with 8-foot ceilings needs approximately 75 CFM (8 × 9 × 8 × 0.13 = 74.88). This calculation guarantees complete air exchange within 7-8 minutes of operation—critical for preventing moisture damage.

Adjust for special bathroom features if your space includes:
– A jetted tub or large shower (add 50% to calculated CFM)
– Vaulted or high ceilings (increase by 25-30%)
– Double sinks or multiple fixtures (add 20-30 CFM)

Avoid oversized fans that create negative pressure in your bathroom, pulling cold air from HVAC vents during winter and making the space uncomfortable. An oversized unit also consumes more electricity and generates unnecessary noise. Prioritize noise ratings when selecting your replacement—ultra-quiet models (0.3-0.5 sones) operate nearly silently while providing strong airflow, making them ideal for bathrooms adjacent to bedrooms.

Essential Tools for Safe Fan Replacement

bathroom ceiling fan replacement tool kit

Gather these critical items before starting your bathroom ceiling fan replacement project to avoid mid-work interruptions:

  • Voltage tester (non-negotiable for electrical safety)
  • Drill/driver with Phillips and flathead bits
  • Jab saw or jigsaw for ceiling modifications
  • Wire stripping pliers and assorted screwdrivers
  • Safety goggles, work gloves, and respirator mask

Electrical supplies you’ll need:
– Wire nuts in multiple sizes
– Foil HVAC tape (not standard duct tape)
– Cable clamp for securing wiring

Ventilation components:
– 4-6 inch flexible or rigid ducting
– 90-degree duct elbow for routing
– Exterior vent cap matching duct diameter

Safety tip: Never skip the voltage tester—always verify power is off at the circuit breaker before touching any wires. Test your tester on a known live circuit first to confirm it’s functioning properly.

Critical Safety Steps Before Electrical Work

Power shutdown is non-negotiable—locate the correct circuit breaker and turn it completely off. Wall switches control only fan operation, not electrical supply. After turning off the breaker, use your voltage tester on both the fan wires and any connected receptacles to confirm no electricity is present. If the tester indicates power, you’ve turned off the wrong breaker—start over.

Attic safety considerations matter if you’re accessing from above:
– Distribute weight carefully across ceiling joists
– Never step between joists—this risks falling through
– Wear long sleeves and a cap to protect from insulation

Ladder safety is equally important for roomside installations:
– Position on level ground with three points of contact
– Never stand on the top two rungs
– Have a spotter hold the base steady when possible

Verify GFCI protection exists for your bathroom circuit—modern building codes require ground fault circuit interrupter protection for all bathroom fixtures. If your home lacks this protection, consult an electrician before proceeding.

Remove Your Old Fan Without Damage

Begin with grille removal—most models use spring clips along opposite sides or mounting screws. Gently pry or unscrew the grille, preparing for accumulated dust to fall. Photograph wire connections before disconnecting anything—this visual reference prevents wiring mistakes during reinstallation.

Disconnect the motor assembly following your specific fan type:
– For plug-in designs: Unplug the motor from its housing receptacle
– For hardwired units: Turn wire nuts counterclockwise to separate connections

Detach the housing by locating mounting screws securing it to ceiling joists. If no fasteners are visible from below, you’ll need attic access. Carefully disconnect ductwork using utility knives to cut foil tape, and secure house wires with electrical tape to prevent them from slipping into wall cavities.

Warning: Never pull on wires to retrieve them—they can become permanently stuck. Instead, leave them accessible and gently guide them during new installation.

Install Your New Fan Housing Correctly

Test-fit the housing before securing it, ensuring the exhaust port aligns with your existing duct run. Proper positioning prevents unnecessary duct bending that restricts airflow. Secure mounting is critical—use 1-inch drywall screws to fasten the housing directly to ceiling joists, ensuring no gaps exist between the housing edge and ceiling.

Connect ductwork properly by sliding the duct over the housing’s collar and securing it with foil tape or a hose clamp. Pull firmly on the connection to verify it won’t come loose during operation. Route house wiring through the cable clamp, stripping approximately 4 inches of outer insulation and 1/2 inch from individual wires—avoid nicking copper conductors.

Pro tip: Apply spray foam insulation around the housing perimeter to reduce noise transmission into living spaces below, especially valuable for bathrooms above bedrooms.

Complete Electrical Connections Safely

bathroom ceiling fan wiring diagram color code

Identify wire functions before connecting:
– Black = hot (energized) wire
– White = neutral return path
– Bare copper/green = ground connection

Make connections in this sequence:
1. Twist ground wires together with a wire nut
2. Connect neutral wires (white to white)
3. Join hot wires (black to black)

Verify all connections by gently tugging on each wire—properly secured wires shouldn’t pull free. Tuck wires neatly into the housing, ensuring no contact with moving fan components. Double-check wire nuts for tightness and coverage—exposed copper creates shock and fire hazards.

Test Your New Fan Before Final Assembly

Restore power at the circuit breaker and listen for the fan motor to start. If the breaker trips immediately, turn it off and recheck wiring connections for crossed wires or loose connections. Perform these critical tests:

  • Airflow verification: Hold a tissue against the grille—it should stick firmly
  • Exterior vent check: Confirm air exits the roof or wall cap within seconds
  • Noise assessment: Listen for unusual rattling or grinding sounds
  • Functionality test: Verify all features (light, heater) operate correctly

Address any issues immediately before completing final assembly—fixing problems now prevents disassembly later. Weak airflow suggests duct blockages or improper sizing, while excessive noise indicates mounting or assembly issues.

Maintain Your New Fan for Longevity

Schedule these maintenance tasks to keep your replacement fan operating efficiently:
– Clean blades and housing every six months with a damp cloth
– Vacuum dust from housing interior and motor surfaces
– Inspect ductwork annually for damage or disconnection
– Clean exterior vent cap screens twice yearly

Avoid these common maintenance mistakes:
– Using excessive water near electrical components
– Ignoring persistent weak airflow (indicates developing problems)
– Forgetting to check exterior vent flapper operation
– Neglecting to replace damaged vent caps promptly

Warning: Never operate the fan with the grille removed—debris can damage the motor or create safety hazards.

Replacing your bathroom ceiling fan protects your home from moisture damage while improving air quality and comfort. By following these steps carefully, you’ve ensured proper ventilation that will prevent mold growth and structural damage for years to come. A well-maintained replacement fan typically lasts 10-15 years, making this DIY project one of the best investments you can make in your home’s health and longevity. When you hear that quiet hum after your next shower and watch the mirror clear within seconds, you’ll know your effort was well worth it.

© 2026 Hampton Fan Reviews

Theme by Anders NorenUp ↑