Your Casablanca ceiling fan suddenly stops responding to the remote—the lights won’t dim, the fan won’t change speeds, and the reverse function seems completely unresponsive. This frustrating scenario affects thousands of homeowners each year, but the solution is often simpler than you think. Knowing how to reset Casablanca ceiling fan remote control can restore functionality in minutes without requiring professional help or expensive repairs. Casablanca fans are renowned for their quality construction, but even these premium units occasionally experience synchronization issues between the remote and receiver.
This guide provides step-by-step instructions for resetting all Casablanca remote control systems, from basic dip switch models to advanced Intellisense technology. You’ll learn specific techniques for Universal Remotes, wall controls, and smart-compatible fans, along with troubleshooting tips for persistent issues. Most Casablanca remote problems can be resolved with these proven reset methods, saving you time and money while restoring convenient operation to your living space.
Prepare for Remote Reset
Before attempting any reset procedure, proper preparation ensures your safety and increases the likelihood of success. Taking just five minutes to verify basic conditions prevents unnecessary complications and electrical hazards during the reset process.
Safety First: Power and Battery Checks
Always turn off power to your ceiling fan at the circuit breaker before accessing the receiver unit or battery compartment. This critical step protects you from electrical shock, as the receiver module connects directly to your home’s electrical supply and contains capacitors that retain dangerous charges even after power disconnection. Use a non-contact voltage tester to confirm power is off before touching any components.
While waiting for capacitors to discharge (10-15 minutes), inspect your remote’s batteries—a leading cause of apparent remote failure. Remove the battery cover and examine cells for leakage, corrosion, or swelling. Even if batteries appear functional, replace them with fresh alkaline cells before proceeding. Weak batteries often cause intermittent operation that mimics more serious problems. Ensure correct polarity when installing new batteries, matching positive and negative terminals to compartment markings.
Gather Required Tools and Materials
Having the right tools ready prevents frustrating interruptions during the reset process. You’ll need a step ladder for canopy access, a small flathead screwdriver for dip switches, and a smartphone to photograph component positions before adjustments. Keep spare AA, AAA, or CR2032 batteries (depending on your model) nearby, as fresh batteries are essential for successful reset procedures.
Create a clear workspace below the fan and ensure adequate lighting for safe operation. If you have a helper available, coordinate roles—one person can manage the receiver while the other handles the remote during pairing procedures. Documenting your current settings with photos or notes provides a safety net if you need to restore original configurations.
Dip Switch Reset Method

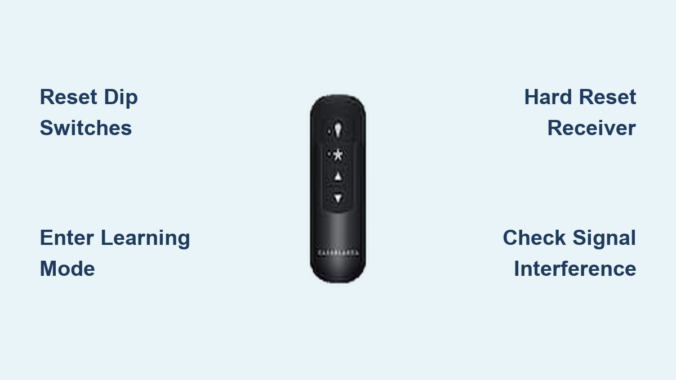
Many Casablanca ceiling fan remotes use dip switch systems to establish unique communication channels between the remote and receiver. This reliable method appears on numerous Casablanca models including Universal Remotes and several wall control units. The dip switches are small rocker switches located inside both the remote battery compartment and the receiver unit, typically arranged in rows of four to eight switches.
Access Remote and Receiver Dip Switches
Begin by removing the battery cover from your Casablanca remote to expose the dip switch array. These switches control the frequency and coding that your remote uses to communicate with the fan’s receiver. Each switch can be set to either the “up” position (representing binary “on” or “1”) or the “down” position (representing “off” or “0”). Photograph the current dip switch configuration before making any changes.
Accessing the receiver dip switches requires removing the fan canopy cover with power off at the breaker. Loosen the mounting screws (typically two to four) and carefully lower the canopy housing. The receiver circuit board is usually visible once the canopy is lowered, with a small dip switch assembly similar to the one in your remote. Some models feature a dedicated access panel that doesn’t require full canopy removal.
Match Switch Settings for Communication
The key to successful dip switch reset is ensuring that every corresponding switch on both the remote and receiver is set to the identical position. A single mismatched switch prevents all communication between devices. Compare each switch position carefully, as small differences are easy to miss when working overhead.
Common default dip switch settings for Casablanca remotes include all switches in the “up” position or alternating patterns like up-down-up-down. After setting all switches to match:
- Restore power at the breaker
- Test all remote functions including each fan speed
- Verify light control operation
- Confirm reverse function works properly
If the fan doesn’t respond, double-check the switch matching—it’s common to miss a switch position on the first attempt. When troubleshooting, try a different switch pattern if default settings don’t work, as interference from neighboring devices on common frequencies may require an alternate pattern.
Learning Mode Pairing Procedure
Casablanca’s more advanced remote control systems feature electronic learning modes that automatically detect and configure settings without manual dip switch adjustment. This streamlined approach, found in Intellisense and newer Universal Remote models, simplifies the pairing process while reducing configuration errors.
Initiate Receiver Pairing Mode
Locate the “Learn” or “Program” button on your Casablanca receiver circuit board, typically a small black or red pushbutton in the fan canopy. With power restored at the breaker, press and hold this button for three to five seconds. Most receivers indicate successful entry into pairing mode through a rapidly flashing LED indicator or an audible click from the relay. Release the button once you observe this confirmation.
The receiver remains in pairing mode for two to five minutes, after which it returns to normal operation if no remote signal is detected. Work efficiently during this window and ensure your remote is ready before initiating pairing mode. Have someone assist you if possible—one person can watch the receiver indicator while the other operates the remote.
Complete Remote Pairing Process
With the receiver in pairing mode, point your remote directly at the receiver location (typically in the canopy area above the fan) and press any button. The remote transmits a pairing signal that the receiver learns and stores in its memory. Successful pairing is usually confirmed when the receiver LED stops flashing and remains steady, or when you hear a distinct click indicating the relay has engaged.
After pairing completes, test all remote functions thoroughly to confirm proper operation across all speeds, light settings, and the reverse function. If certain features don’t respond, repeat the pairing process as the initial attempt may not have captured all control codes. Some Casablanca models require pressing specific button combinations to complete pairing, such as holding the “High” and “Light” buttons simultaneously for ten seconds.
Hard Reset for Stubborn Issues

When standard reset procedures fail to resolve persistent remote control problems, a comprehensive hard reset clears corrupted programming and forces complete re-establishment of communication between devices.
Perform Factory Reset on Receiver
To initiate a hard reset, ensure power is on at the breaker and locate the learn/program button on your Casablanca receiver. Press and hold this button for fifteen to twenty seconds. During this period, the indicator LED displays various patterns—rapid flashing indicates normal pairing mode, while slow pulsing typically signals reset mode in progress.
Release the button when the LED indicates reset completion, which most models signal by turning solid or stopping all flashing activity. The receiver’s memory is now completely cleared, eliminating any corrupted settings. After completing the hard reset, perform a fresh pairing procedure using the learning mode steps. Test all functions after re-pairing to confirm that the hard reset resolved your original issues.
Alternative Reset Methods
Some Casablanca receiver models feature a small reset hole requiring paperclip insertion rather than a visible button press. Insert a straightened paperclip into this hole and hold for ten to fifteen seconds to trigger the reset sequence. The reset hole is typically located on the receiver circuit board and may be recessed to prevent accidental activation.
If your Casablanca fan uses a wall control system alongside or instead of a handheld remote, the reset procedure may involve button combinations on the wall unit. Press and hold the “Fan Off” and “Light On” buttons simultaneously for approximately ten seconds, watching for the wall control’s LED indicator to acknowledge the reset command through a flashing pattern.
Troubleshoot Unresponsive Remote
Systematic troubleshooting identifies the underlying cause when reset procedures don’t fully resolve remote control issues. Many problems that appear to be remote-related actually stem from power delivery, receiver damage, or environmental interference.
Verify Power Delivery
Begin troubleshooting by confirming that power actually reaches your ceiling fan system. Check the circuit breaker and ensure it hasn’t tripped—turn it fully off and then back on to reset any partially tripped breakers. Use a lamp to verify that the electrical circuit is functioning normally.
Inspect the receiver connections within the fan canopy with power off at the breaker. Look for signs of burnt components, melted plastic, frayed wires, or loose connections. Tighten any loose wire nuts and ensure no copper wire strands are exposed outside their connections. Pay particular attention to neutral wire connections, as loose neutrals can cause intermittent operation that mimics remote failure.
Address Signal Interference
Electromagnetic interference from other electronic devices can block or degrade remote control signals. Wireless routers, cordless phones, baby monitors, and neighboring garage door openers often operate on similar frequencies and create interference zones. Try turning off potential interference sources temporarily to see if remote operation improves.
The physical orientation of your remote and receiver antenna affects signal quality in RF systems. Ensure the receiver’s antenna wire isn’t tangled, coiled, or pressed against metal components within the canopy—the antenna should hang freely for optimal reception. For IR remotes, confirm that nothing obstructs the line of sight between the remote and receiver, and clean the remote’s IR LED if it appears dirty.
Maintain Remote Performance
Regular maintenance extends your remote’s operational life and prevents many common issues that necessitate reset procedures.
Routine Remote Care
Clean your remote periodically by wiping its exterior with a slightly damp cloth to remove oils, dust, and debris that accumulate around buttons. Avoid harsh chemicals or abrasive materials that could damage button labels or plastic housing. Remotes used in kitchens benefit from more frequent cleaning to prevent button stickiness.
Inspect the battery compartment regularly for signs of corrosion or leakage, even before batteries show obvious failure signs. Replace batteries proactively every twelve to eighteen months as preventive maintenance. Never mix old and new batteries or different brands in the same device, as inconsistent voltage delivery can cause intermittent operation.
Fan System Inspections
Annual inspection of your complete ceiling fan system prevents remote control issues before they develop. With power off at the breaker, remove the fan canopy cover and inspect all wire connections for loosening, corrosion, or heat damage. Tighten any loose wire nuts and replace connections showing signs of overheating.
Clean the receiver circuit board with compressed air to remove accumulated dust and debris that can cause overheating. Inspect the receiver’s LED indicator through any viewing window to confirm normal operation—a flickering or non-illuminated indicator often precedes complete receiver failure.
By following these reset procedures and maintenance practices, you can restore and maintain reliable operation of your Casablanca ceiling fan remote control. Most issues resolve with simple reset procedures, while regular care prevents problems from developing in the first place. When persistent issues resist all troubleshooting efforts, professional diagnosis may be necessary to determine whether receiver replacement or other repairs are needed.
Leave a Reply