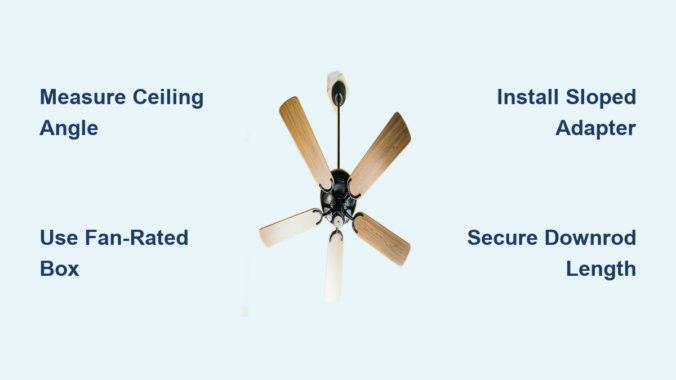
Installing a ceiling fan on a vaulted ceiling presents unique challenges that standard flat-ceiling installations don’t encounter. When your ceiling slopes dramatically overhead, mounting a fan requires specialized hardware and precise techniques to ensure safe, stable operation. Without the right approach, you’ll face wobbling, dangerous instability, and premature component failure. This guide delivers exactly what you need to know to successfully install a ceiling fan on your angled ceiling surface—no guesswork, no generic advice, just actionable steps for a professional-quality installation that delivers optimal airflow without compromising safety.
Most homeowners attempting this project underestimate the structural requirements of vaulted ceiling fan installation. Unlike light fixtures, ceiling fans generate significant rotational force that demands robust mounting solutions specifically designed for sloped surfaces. The wrong mounting hardware leads to dangerous wobble, excessive noise, and potential detachment from the ceiling. Before you climb that ladder, understand that vaulted ceiling installations require three critical components: a fan-rated electrical box securely attached to structural framing, an angled mounting adapter rated for your specific ceiling pitch, and proper wiring techniques that maintain safety throughout operation. This guide walks you through each essential phase with precise instructions that eliminate common pitfalls.
Verify Your Ceiling Angle and Structural Support

Before purchasing any hardware, determine your exact ceiling pitch to select appropriate mounting solutions. Vaulted ceilings typically range from gentle 15-degree slopes to dramatic 45-degree angles, and the wrong adapter won’t compensate properly. Use a digital angle finder app on your smartphone or a traditional protractor against the ceiling surface to get an accurate measurement—this number dictates which sloped ceiling adapter you’ll need. Most standard kits accommodate angles between 15-30 degrees, while steeper pitches require specialized hardware that may need custom ordering.
Identify ceiling joists or rafters that will support your fan’s weight using a stud finder with deep-scan capability. Standard ceiling fans weigh 15-50 pounds, but the dynamic load during operation multiplies this force significantly. Mark joist locations clearly with painter’s tape, spacing them approximately 16-24 inches apart depending on your home’s construction. If your desired fan location doesn’t align with joist centers, plan to install a mounting board between joists for secure attachment. Never mount directly to drywall or ceiling tiles—they lack the structural integrity to support fan vibration and weight over time.
How to Locate Ceiling Joists on Angled Surfaces
Locating joists on sloped ceilings requires different techniques than flat surfaces. Start by finding a known reference point—often near the wall where the vault begins—and measure standard joist spacing (usually 16 or 24 inches) upward along the angle. Tap the ceiling with your knuckle while listening for the solid sound of wood versus the hollow sound of empty space between joists. For more precision, drill a small 1/8-inch pilot hole at your suspected joist location—if the drill encounters significant resistance after penetrating the drywall, you’ve hit framing. Mark all joist centers with small dots before proceeding to ensure accurate hardware placement.
Why Standard Mounting Won’t Work on Vaulted Ceilings
Attempting to mount a standard ceiling fan directly to a sloped surface creates dangerous imbalance. The fan housing will hang at the same angle as your ceiling, causing blades to rotate on a tilted plane that generates excessive vibration. This wobble stresses mounting hardware, accelerates wear on motor bearings, and creates annoying noise during operation. More critically, the uneven force distribution can eventually loosen mounting screws, risking complete detachment. Sloped ceiling adapters solve this problem by incorporating a pivoting mechanism that keeps the fan housing perfectly level regardless of ceiling angle—this critical component is non-negotiable for safe vaulted ceiling installations.
Select Vaulted Ceiling-Specific Mounting Hardware

Purchase a sloped ceiling adapter kit designed specifically for your fan model and ceiling angle. Universal kits work with many brands but may require additional adjustments, while manufacturer-specific kits ensure perfect compatibility at a higher cost. These kits typically include an angled mounting bracket, extended downrod, and specialized canopy that conceals the angle transition. Verify the adapter’s maximum angle rating matches or exceeds your measured ceiling pitch—installing hardware beyond its rated capacity creates instability.
Your downrod length requires careful calculation for vaulted ceilings. Standard installations use 3-6 inch downrods, but sloped ceilings often need 12-24 inches to achieve proper blade clearance from the angled surface above. Measure from your electrical box to the lowest point of the ceiling angle directly above your installation point, then add 8-12 inches for adequate airflow space. Too short a downrod causes blades to interfere with the ceiling, reducing efficiency and creating dangerous turbulence; too long looks awkward and diminishes airflow effectiveness at floor level.
Critical Hardware Specifications to Verify
Before purchasing, confirm these essential specifications: weight capacity must exceed your fan’s total weight by at least 50%, angle range must cover your specific ceiling pitch, and mounting pattern must match your fan’s motor housing. High-quality adapters feature metal construction throughout—avoid plastic components that can crack under vibration. Look for locking mechanisms with set screws rather than spring-loaded pins, which are more secure against long-term vibration. The canopy should have sufficient depth to completely conceal the angle transition point while maintaining a clean aesthetic against your sloped ceiling surface.
Install Fan-Rated Electrical Box with Structural Support
Turn off power at the circuit breaker and verify it’s off using a non-contact voltage tester before beginning any electrical work. For vaulted ceiling installations, the electrical box must be securely mounted to ceiling joists or rafters—not just attached to the ceiling surface. If replacing an existing light fixture, remove the old box and patch the drywall opening temporarily while you access the framing above. Cut a rectangular access hole in the ceiling large enough to work comfortably, typically 6×8 inches, positioning it to expose both your target mounting location and adjacent joists.
Secure a fan-rated electrical box designed for sloped ceilings directly to your ceiling joist using #10 or larger wood screws, penetrating at least 1.5 inches into solid wood. For installations between joists, install a cross-brace mounting system that spans between two joists and provides a stable mounting surface. These braces feature adjustable arms that lock into place when tightened, creating a solid anchor point regardless of joist spacing. Once positioned correctly, pull your electrical cable through the box’s knockout opening, secure it with a cable clamp, and leave 8 inches of wire slack inside the box for connections.
Wiring Connection Safety Protocols
Connect wires using twist-on wire connectors sized for your specific gauge—typically yellow for 14-gauge or red for 12-gauge wiring. Match colors: black to black (hot), white to white (neutral), and green/bare copper to grounding screw. Wrap connections with electrical tape for added security against vibration loosening. Before closing up the electrical box, perform these critical safety checks: all wire nuts are tight with no exposed copper, grounding wires are securely attached to the box’s grounding terminal, and no wires are pinched between the box and ceiling surface. These precautions prevent electrical hazards that might not manifest immediately but could cause fires months later.
Mount the Sloped Ceiling Adapter System
Assemble the angled mounting bracket according to manufacturer instructions, ensuring all pivot points move freely but without excessive play. Attach the mounting bracket to your electrical box using the provided screws, taking care to align the bracket properly for your specific ceiling angle. Most brackets feature indexed positions marked for common angles—match your measurement to the corresponding setting before final tightening. Hand-tighten screws initially, then use a level on the bracket’s mounting surface to verify it’s positioned correctly before fully securing.
Thread the appropriate-length downrod through the canopy and onto the fan motor housing, following manufacturer specifications for engagement depth. Most require several full turns until the downrod seats properly, then an additional quarter-turn to align the set screw with the motor housing opening. Insert the set screw and tighten securely—this connection bears the entire fan weight and must be absolutely secure. When hanging the fan, have a helper support the weight while you connect the downrod to the mounting bracket, ensuring the pivot mechanism engages correctly before releasing support.
Final Alignment and Safety Verification
With the fan hanging in place, verify proper alignment using a small level placed on the fan’s motor housing. The housing should be perfectly level regardless of ceiling angle—this confirms your adapter is functioning correctly. Check all visible mounting points for security by gently attempting to move the fan in different directions; there should be no movement at the ceiling connection point. Operate the fan at each speed setting while observing from below, watching for excessive vibration or wobble that might indicate improper installation. Address any issues immediately before considering the installation complete—small problems only worsen with regular use.
Proper vaulted ceiling fan installation demands attention to structural details most homeowners overlook. The critical difference between a successful installation and a dangerous failure lies in your mounting hardware selection and structural attachment points. Never compromise on fan-rated electrical boxes securely mounted to framing members—this foundation supports everything that follows. Invest in quality sloped ceiling adapters specifically designed for your ceiling angle rather than attempting DIY solutions that cannot handle rotational forces. When in doubt about electrical connections or structural mounting, consult a licensed electrician; their expertise prevents costly mistakes and ensures compliance with local building codes. With proper installation techniques, your vaulted ceiling fan will deliver efficient airflow and quiet operation for years to come, transforming your dramatic architectural space into a comfortable, well-ventilated environment.
Leave a Reply