Your ceiling fan suddenly stops working on a sweltering afternoon, leaving you without that essential breeze. Before you panic about calling an expensive electrician or replacing the entire unit, most common ceiling fan problems can be fixed with basic tools and minimal technical knowledge. Whether your fan won’t start at all, wobbles violently, makes strange noises, or only works at certain speeds, this guide delivers step-by-step solutions to get your fan spinning again. You’ll learn how to diagnose electrical issues like capacitor failure and switch malfunctions, correct mechanical problems causing wobbling and noise, and implement simple maintenance practices to prevent future breakdowns—all without professional help in most cases.
Diagnose Why Your Ceiling Fan Won’t Work
Before grabbing tools, systematically identify the root cause of your ceiling fan problem to avoid unnecessary repairs. Start by noting exactly what symptoms you’re experiencing: does the fan make noise but not spin? Does it work only at certain speeds? Or is it completely unresponsive? This information directs your troubleshooting efforts efficiently.
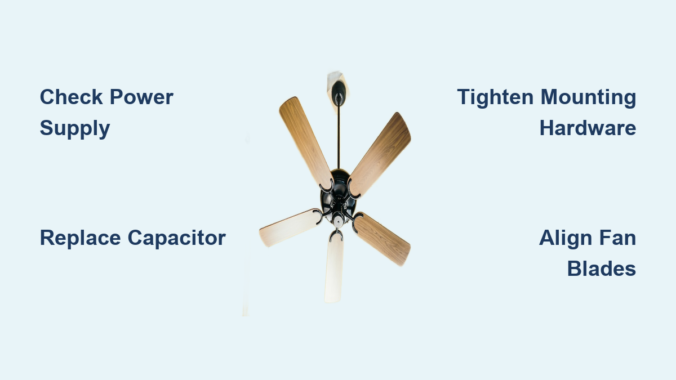
Check Power Supply First
Over 40% of “broken” ceiling fans simply have power supply issues that anyone can fix. Head to your electrical panel and check if the breaker controlling the fan has tripped—look for the handle in a neutral position between on and off. Reset it by turning it fully off, then firmly back on until it clicks. Test the circuit by plugging a working lamp into the same circuit to verify power flow. For fans controlled by wall switches, toggle the switch multiple times while listening for humming from the fan housing, which indicates electricity is reaching the unit. If the fan still doesn’t respond, turn off power at the breaker before proceeding to internal inspection.
Visual Inspection Inside the Fan Housing
With power confirmed, turn off the breaker and remove the fan canopy by loosening its mounting screws. Look for obvious problems like burnt wires, loose connections, or capacitor leakage (brownish residue or bulging top). Check for dust buildup interfering with blade rotation and inspect wire nuts for looseness—gently tug each connection to verify security. A strong burning smell or visible scorch marks indicate serious electrical damage requiring professional assessment before restoring power.
Fix Common Electrical Problems Causing Fan Failure
Electrical issues cause most ceiling fan breakdowns, but many have straightforward DIY solutions that don’t require advanced electrical knowledge. Understanding key components helps you diagnose and fix problems efficiently.
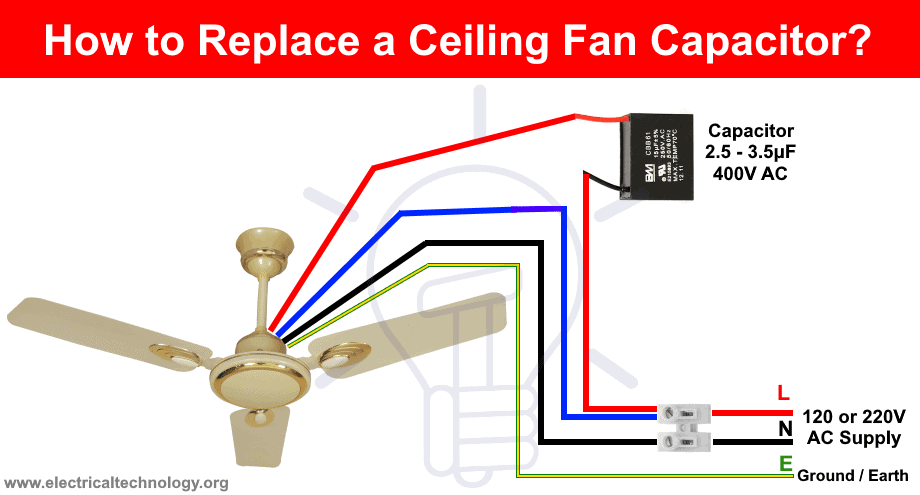
Replace a Failed Capacitor in Minutes
The capacitor—the small cylindrical component in your fan’s switch housing—is the most common failure point, especially in fans over five years old. When it fails, your fan may hum but not spin, require manual starting, or run only at certain speeds. To replace it: turn off power, remove the canopy, photograph the wiring configuration, note the microfarad (MFD) and voltage ratings on the old capacitor, purchase an exact match (typically $5-$15), disconnect wires from the old unit, install the new capacitor in the same orientation, reconnect wires following your photo, and reassemble. This 15-minute repair solves 70% of non-spinning fan issues.
Fix Wall Switch and Pull Chain Problems
Wall switches controlling ceiling fans wear out faster than standard light switches due to constant electrical load. If your fan works intermittently or only at certain speeds, replace the switch: turn off power, remove the switch plate, photograph wire positions, disconnect wires, connect the new switch identically, secure it in the box, and restore power. For pull-chain switches, if pulling the chain produces inconsistent results, replace the internal switch mechanism following similar steps to capacitor replacement—turn off power, remove the canopy, disconnect the old switch, install the new one, and reassemble.
Secure Loose Wiring Connections
Vibration from fan operation gradually loosens wire connections, causing flickering lights, intermittent operation, or complete failure. Turn off power, remove the canopy, and check each wire nut by gripping and attempting to twist it. A loose connection will turn easily. Clean corroded wires by cutting back to fresh copper, strip new insulation, and secure with fresh wire nuts. All connections should be tight with no exposed copper beyond the nut, and you should tug each connection after tightening to verify security.
Solve Mechanical Problems Creating Noise and Wobble
Mechanical issues affect performance and longevity, but most can be addressed with simple adjustments rather than part replacement.
Stop Annoying Wobbling Immediately
Wobbling fans create noise, accelerate component wear, and risk safety. The three most common causes are misaligned blades, loose mounting hardware, or warped blades. Fix blade alignment by turning off the fan and using a yardstick across blade tips to identify height differences. Loosen the blade-pitch adjusters (small screws at blade attachments), reposition blades to uniform height, then tighten securely. Check all mounting hardware—ceiling bracket screws, down-rod coupling, and electrical box mounting—to ensure nothing has vibrated loose over time.
Eliminate Clicking, Grinding, and Buzzing Noises
Different sounds indicate specific problems requiring targeted solutions. Clicking sounds that sync with blade rotation mean loose components—tighten all visible screws on blades, housing, and light fixtures. Grinding or scraping noises suggest bearing failure or debris in the motor; check for string or dust wrapped around the motor shaft before concluding bearing replacement is needed. Electrical buzzing typically points to capacitor failure or loose wire connections—replace the capacitor first, as it resolves most buzzing issues. Persistent humming with the fan off often indicates backstabbed wiring in the switch box that requires moving connections to terminal screws.
Repair Light Fixture Issues Without Fan Disassembly
When your fan operates but lights don’t work, focus troubleshooting on the light circuit alone. Start by replacing bulbs with correct type and wattage—never exceed the fixture’s maximum rating. If lights still don’t work, turn off power and inspect sockets for corrosion or loose wires. Gently bend the center contact upward slightly with a flathead screwdriver if compressed. For flickering lights, tighten all wire connections in the light kit housing and test the pull chain mechanism through all positions. Flickering only when the fan runs indicates vibration-loosened connections that require securing rather than component replacement.
When Repair Makes More Sense Than Replacement
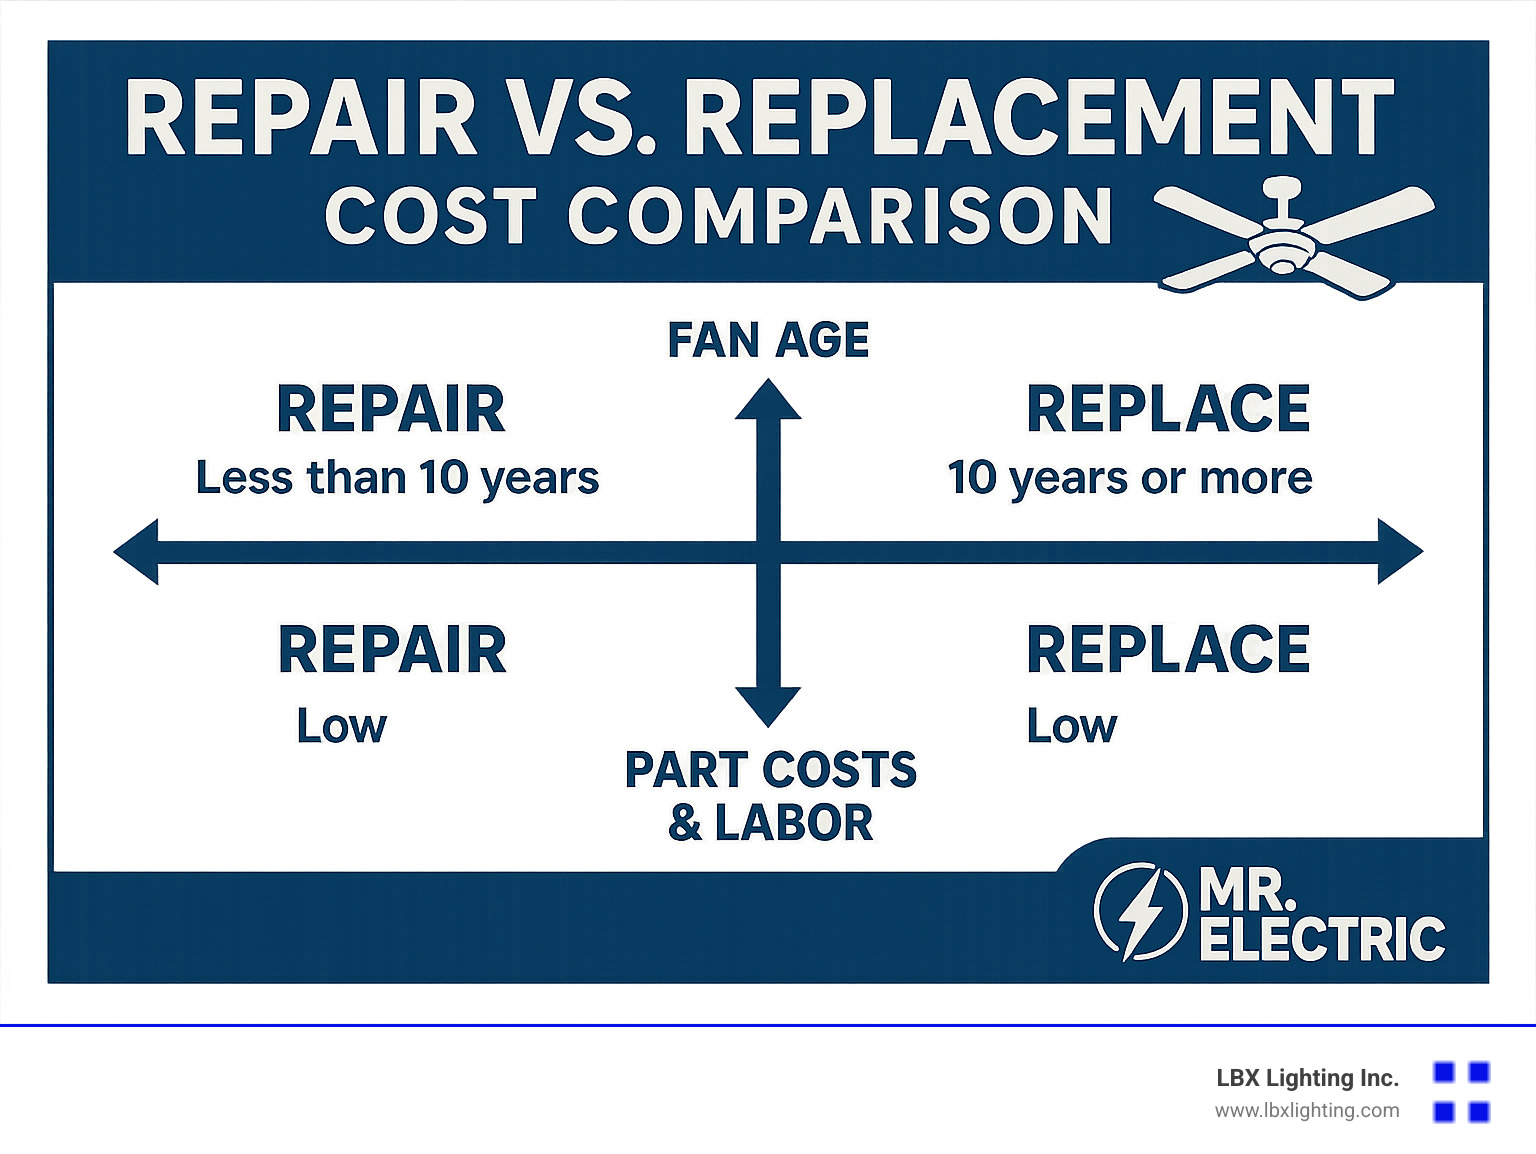
Decide whether to repair or replace based on your fan’s age, repair costs, and component availability. Fans under five years old with isolated problems (like a failed capacitor) almost always warrant repair, as parts cost little and restore years of service. Fans over ten years old with multiple failing components may have reached the point where accumulated wear makes continued repair impractical. Replacement becomes the better choice when parts are unavailable, repair costs exceed 50% of replacement value, or your fan’s appearance no longer matches your decor. Most quality ceiling fans last 10-20 years with proper maintenance—don’t replace a reliable unit unnecessarily when simple repairs can extend its life significantly.
Prevent Future Breakdowns With Simple Maintenance
Extend your ceiling fan’s lifespan dramatically with minimal seasonal maintenance. Clean blades quarterly in dusty environments (or semi-annually in cleaner spaces) using a slightly damp cloth, working from blade base to tip to push dust away from the motor. Annual maintenance should include tightening all mounting hardware and checking wire connections with power off—this catches loose connections before they cause failure. Modern fans typically have sealed bearings requiring no lubrication, but if your fan has oil ports, apply a few drops of machine oil annually. Never lubricate fans without designated oil ports, as this attracts dust that accelerates bearing wear.
A broken ceiling fan rarely requires professional help or complete replacement—most common issues have simple, affordable solutions you can implement yourself. By starting with basic power checks, moving through electrical component testing, and addressing mechanical issues methodically, you’ll resolve most fan problems in under an hour with minimal tools. Regular cleaning and hardware tightening prevent the gradual deterioration that leads to sudden failures when you need cooling most. When repairs become impractical, your diagnostic experience helps you select a replacement fan that addresses the specific weaknesses of your current model. Implement these strategies to keep your ceiling fans running quietly and efficiently for years beyond their expected lifespan, maintaining comfort in your home without unnecessary expense.
Leave a Reply