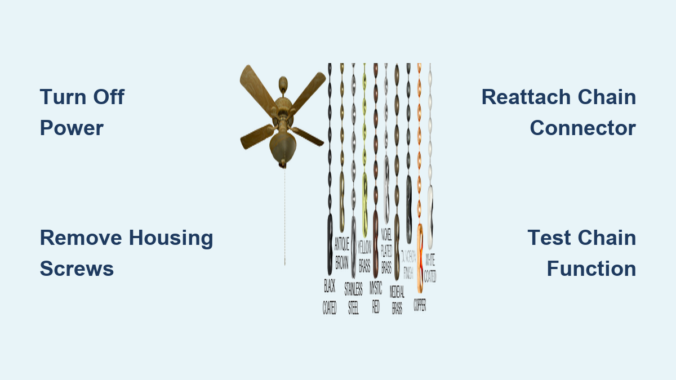
Nothing disrupts your home comfort like reaching for your ceiling fan’s pull chain only to find it’s completely detached. When your ceiling fan chain comes off, you lose control of fan speeds and lighting functions, leaving you sweltering in summer heat or struggling with inadequate room lighting. The good news is that reattaching a ceiling fan chain is typically a straightforward DIY repair that takes less than 30 minutes with basic household tools. This guide provides step-by-step instructions to fix your detached ceiling fan chain properly, avoid common mistakes, and prevent future detachment issues—no electrician required for most cases.
Why Your Ceiling Fan Pull Chain Keeps Coming Off: 3 Common Causes
Understanding why your ceiling fan chain detached is crucial for implementing the right fix. The most frequent culprit is a worn pull switch housing assembly where the internal mechanism connecting the chain to the switch has failed. Over months or years of use, the small metal ball connector at the chain’s end gradually wears down, eventually slipping through the housing slot that normally secures it in place. This wear happens naturally but accelerates if you frequently yank the chain forcefully instead of using a gentle pull.
Physical damage from excessive force represents another major cause of chain detachment. When users pull too hard on the chain—especially when trying to change speeds on a stiff switch—the sudden stress can dislodge the connector from its mounting point or even damage the internal switch mechanism itself. This problem is particularly common in households with children who might tug the chain playfully without understanding the proper technique.
Environmental factors also contribute significantly to chain failures. In bathrooms or kitchens where humidity levels run high, metal components of the chain and switch mechanism can corrode over time, weakening their structural integrity. Additionally, vibrations from an unbalanced fan motor can gradually loosen connections until the chain finally comes free. Recognizing these specific causes helps you address not just the immediate problem but also implement preventative measures for long-term reliability.
Critical Safety Steps Before Fixing Your Detached Ceiling Fan Chain
Before you even consider touching your ceiling fan’s internal components, you must disconnect electrical power at the source—this isn’t optional but an absolute safety requirement. Locate your home’s circuit breaker panel and switch off the circuit that powers your ceiling fan. To verify the power is truly off, attempt to operate both the wall switch and any remaining chain segments; if the fan doesn’t respond, you’ve successfully isolated the electrical supply.
Never skip this step—working on live electrical fixtures creates potentially fatal shock hazards, especially when your hands will be inside the fan housing near exposed wiring. Once power is confirmed off, gather these essential tools: a Phillips head screwdriver, needle-nose pliers for precise handling of small components, a bright flashlight to illuminate the housing interior, and a stable ladder or step stool that allows you to work comfortably without overreaching.
Position your ladder directly beneath the fan and have a phone or tablet nearby to take photos as you disassemble components. These reference images prove invaluable when reassembling the switch housing, helping you remember exactly how parts aligned before disassembly. If possible, work during daylight hours when natural light supplements your flashlight, making it easier to see small parts and connections within the housing.
How to Open Your Ceiling Fan Switch Housing in 3 Simple Steps

Accessing the pull switch mechanism requires carefully removing the switch housing without damaging surrounding components. Locate the small cup-shaped housing typically mounted on the bottom of your fan’s motor assembly, directly beneath any light fixtures your model may have. This housing usually features two or three visible screws securing it to the fan body—these are your entry point.
Using your Phillips head screwdriver, begin loosening these mounting screws while supporting the housing with your free hand. As each screw becomes loose, increase your grip on the housing to prevent it from falling when the final screw releases. Important: Don’t let the housing drop—ceiling fans often have limited space beneath them, and a falling component could damage the blades or create a safety hazard below.
Once all screws are removed, the housing will hang down suspended only by the wiring and chain. Gently lower it until you can clearly see the cylindrical pull switch assembly inside. Take a moment to examine how the chain connects to this switch before proceeding—you’ll notice most switches feature a small slot, hook, or metal tab where the chain’s end connector attaches to the internal mechanism. This visual reference ensures you’ll properly reconnect the chain during repair.
Fixing a Disconnected Ceiling Fan Chain: Reattach or Replace Options
With the switch housing accessible, determine whether your chain can be reattached or requires replacement. If the chain’s metal end piece—a small ball or loop connector—is intact but merely dislodged, you can often reattach it using needle-nose pliers. Carefully grasp the connector, gently open it if necessary, slide it onto the switch’s attachment point (usually a small metal tab or hook), then secure it firmly in place. Test the connection by lightly tugging the chain to ensure it won’t slip off again.
When the end connector is damaged, missing, or the chain shows signs of fraying, replacement becomes necessary. Purchase a replacement chain matching your fan’s specifications—most hardware stores carry universal pull chains in various lengths with pre-attached connectors. Before installing the new chain, thread it through the housing slot first to determine proper length, then attach the connector to the switch mechanism. Pro tip: Leave slightly more chain length than you think you need; you can always shorten it later, but extending it requires repeating the entire installation process.
Testing Your Repaired Ceiling Fan Chain Before Final Installation
Never reinstall the switch housing without first verifying your repair works correctly—this saves you from repeating the entire disassembly process if something’s wrong. With the housing still hanging down, gently pull the chain through all its positions while listening for distinct clicking sounds that indicate proper switch engagement. Each pull should produce a clear mechanical click as the internal switch changes positions, controlling either fan speed or light function depending on your model.
If the chain moves without resistance or fails to produce clicking sounds, the connector isn’t properly seated on the switch mechanism. Recheck that the chain’s end connector is fully secured to the attachment point and that nothing is obstructing its movement. Once you confirm smooth operation with proper clicks, carefully lift the housing back into position while managing the wiring to prevent pinching or strain.
Secure the housing with its mounting screws, tightening them firmly but avoiding excessive force that could crack the plastic housing. After restoring power at the circuit breaker, test all fan speeds and light functions (if applicable) to ensure complete functionality. If the fan operates erratically or not at all, immediately turn off power and recheck your connections before proceeding.
Signs Your Ceiling Fan Pull Switch Needs Full Replacement (Not Just the Chain)

Sometimes the problem extends beyond a simple chain detachment to a faulty pull switch assembly itself. Key indicators requiring full switch replacement include inconsistent fan operation (where the fan works on some speeds but not others), a humming sound without blade movement, or a “mushy” feeling when pulling the chain with no distinct clicking sensation. These symptoms suggest internal switch contacts have worn out or become damaged.
Replacing the entire pull switch assembly costs only $10-$25 and follows a straightforward process if you document connections carefully. Before disconnecting anything, take clear photos of the wire connections—most switches connect via two or three wires that plug directly into the fan’s wiring harness. Remove the switch mounting screws, disconnect the wires following your photographic reference, then install the new switch by reversing the process. Warning: If you’re uncomfortable working with electrical connections or can’t identify wire functions, hire a licensed electrician—this isn’t a repair to attempt without proper electrical knowledge.
7 Proven Ways to Stop Your Ceiling Fan Chain from Coming Off Again

Prevent future chain detachment issues with these practical maintenance strategies that extend the life of your pull switch mechanism. First and foremost, adopt a gentle pulling technique—yanking the chain creates excessive stress on the connector and internal mechanism. Instead, use a smooth, controlled motion and allow the chain to return to its resting position naturally without snapping it back.
If your chain is excessively long, shorten it properly by removing links or cutting and reattaching the end connector according to manufacturer specifications. Most chains allow length adjustment without compromising function. Schedule quarterly inspections of the chain and housing, especially in humid environments like bathrooms or kitchens where corrosion accelerates component wear.
Wipe down the chain periodically with a dry cloth to remove dust and grime that can contribute to premature wear. Consider installing a chain stopper—a small plastic or metal device that limits how far the chain can be pulled—available at most hardware stores for under $5. For fans in high-traffic areas, replace standard metal chains with sturdier braided nylon alternatives that resist stretching and corrosion.
Finally, address any fan vibration issues immediately, as excessive shaking gradually loosens connections throughout the fixture. Balance wobbling fans using manufacturer-provided balancing kits to reduce stress on all components, including your pull chain mechanism.
Final Note: This repair guide covers standard ceiling fan models with accessible pull chain mechanisms. If your fan features proprietary components, integrated remote control systems, or if problems persist after following these instructions, consult your manufacturer’s specific documentation or contact a qualified electrician. Remember that proper maintenance and gentle operation significantly extend the lifespan of your ceiling fan’s control mechanisms, keeping your home comfortable without unexpected interruptions.
Leave a Reply