You’re relaxing in your living room when you reach for your ceiling fan’s pull chain to turn it off or adjust the speed—and it snaps right off in your hand. Now the fan keeps spinning uncontrollably, making that annoying hum while you wonder how to stop it without a working chain. This frustrating scenario happens to thousands of homeowners every year, especially with older fans where the plastic chain mechanism wears out from daily use. The good news is you have multiple solutions ranging from immediate fixes you can try right now to permanent repairs that take less time than making dinner.
Whether your chain broke completely, the switch mechanism stripped out, or the chain simply won’t engage anymore, you’re not stuck with a fan that won’t turn off. Most solutions require basic household tools you already own and can be completed without electrical expertise. In this guide, we’ll walk through every practical method to regain control of your fan immediately, properly repair the broken mechanism, and prevent future chain failures—regardless of whether you’re a seasoned DIYer or someone who barely knows which end of a screwdriver to hold.
Immediate Solutions to Turn Off Your Fan
When your pull chain breaks unexpectedly and the fan won’t turn off, you need a solution fast—especially if it’s the middle of winter or you’re trying to sleep. These methods work for most standard ceiling fan installations and require minimal tools.
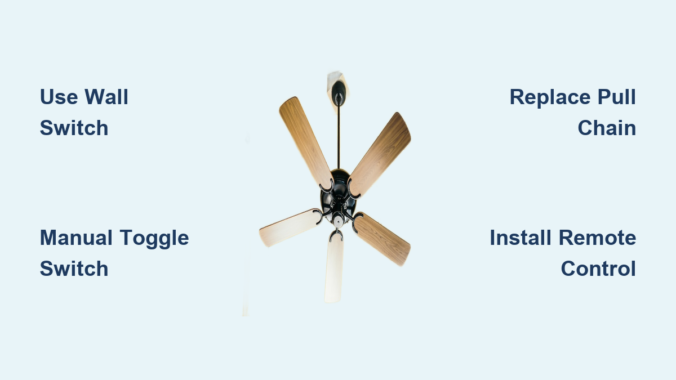
Use the Wall Switch to Regain Control
Many homeowners forget their ceiling fan has a wall switch because they’ve grown accustomed to using the pull chain. Check all switches near the room entrance—some homes have dedicated fan switches, while others combine fan and light control on the same switch. Flip each switch slowly and observe the fan speed; when it stops, you’ve found your control. This solution works for over 80% of residential ceiling fan installations and requires zero tools or electrical knowledge. If you don’t see an obvious switch, check your breaker box—older homes and rentals sometimes wire fans directly to a circuit without a wall switch.
Operate the Switch Mechanism Directly
If you can see even a tiny remnant of the broken chain hanging from the fan housing, you might be able to operate the switch manually. Use a pencil, chopstick, or similar object to gently push the remaining chain in short, quick motions. This works because pull chain switches operate on a simple toggle mechanism—each push cycles through the settings. Be patient and apply minimal pressure; forcing it can damage the internal switch permanently. This technique works best when the chain broke just below the housing but still has enough length to engage the switch mechanism.
Extract the Remaining Chain with Precision
When the chain snaps flush with the fan housing, you can often retrieve it using household tools. First, turn off the fan at the wall switch. Then use needle-nose pliers to carefully reach into the small opening where the chain exits the fan. Grip the chain firmly and pull it out slowly—sometimes you’ll feel it catch on internal mechanisms. Once you have a few inches of chain, test the switch by giving it gentle tugs. This method succeeds about 50% of the time and is worth attempting before moving to more complex solutions.
Access and Operate the Fan Switch Mechanism
For a more permanent solution without replacement parts, accessing the switch inside the fan housing gives you direct control. This requires basic safety precautions but most homeowners can complete this repair in under 30 minutes.
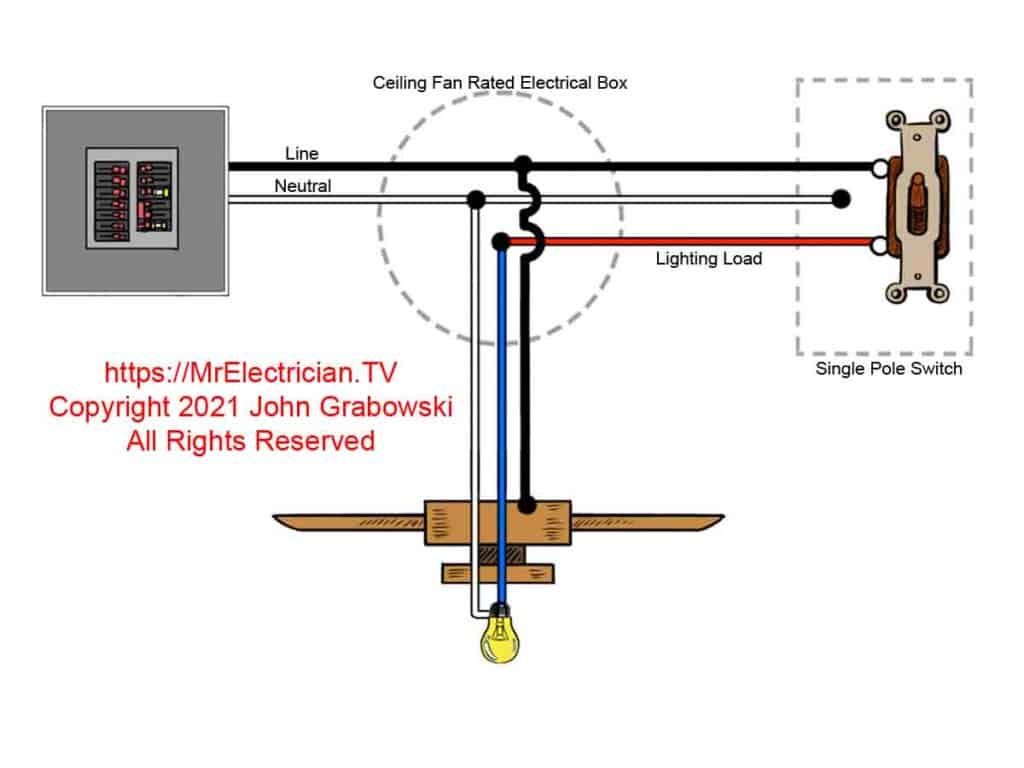
Cut Power Safely Before Any Work
Before touching any electrical component, you must cut power to the fan at the circuit breaker—not just the wall switch. Use a non-contact voltage tester on the fan’s wiring to confirm no electricity is flowing. This critical step prevents dangerous electrical shocks, as live wires inside the housing can still deliver a lethal current even when the fan appears off. Test multiple points and verify power is completely disconnected before proceeding.
Remove the Switch Housing Cover
Most ceiling fans feature a removable bottom cover that houses the pull chain mechanism. Locate the three screws typically positioned on the underside of the fan body where it meets the downrod. Remove these screws carefully and lower the housing cover, noting any wire connections. Keep track of which screw came from which hole, as they may vary in length. Some fans have decorative covers that snap into place rather than screw in—gently twist these counterclockwise to release.
Manually Toggle the Switch to Off Position
With the housing removed, locate the cylindrical pull chain switch connected to your fan’s wiring. You can manually cycle through the fan speeds by pushing the switch mechanism with a small screwdriver. Most switches have three positions corresponding to off, low, medium, and high speeds. Push firmly until you feel it click into the off position. This gives you immediate control and confirms whether the switch itself is functional or needs replacement.
Replace the Broken Pull Chain Switch
If your pull chain switch is damaged beyond repair, replacing it is the most reliable permanent solution. Replacement switches cost $10-$25 and are available at any hardware store.
Identify Your Exact Switch Configuration
Pull chain switches come in several configurations, and getting the right replacement matters. Most residential ceiling fans use a 3-speed pull chain switch with four terminals: “L” (line power in), “1” (high speed), “2” (medium speed), and “3” (low speed). Some fans use 4-speed or single-speed switches. Check your fan’s model number on the manufacturer’s label, usually found on the top of the motor housing. If documentation is unavailable, take the old switch to the hardware store for matching—bring the entire assembly if possible.
Install the New Switch Properly
Disconnect the old switch by noting which wires connect to which terminals, then loosening the terminal screws. Most switches use spade connectors that pull off easily. Install the new switch by connecting the wires to their corresponding terminals—the wire colors should match the terminal labels. Thread the new pull chain through the housing hole, reassemble the fan, and restore power. Test all speed settings to confirm proper operation before final reassembly.
Consider a Universal Replacement Kit
If matching your exact switch proves difficult, universal pull chain switch kits work with most ceiling fan brands. These kits include multiple switch configurations and adapters, allowing you to wire the correct setup for your fan. They cost slightly more than OEM replacements but eliminate the frustration of finding an exact match. Most universal kits include detailed wiring diagrams that show common fan configurations.
Install Modern Control Alternatives

When pull chains give you repeated trouble—or if you want to upgrade your fan’s functionality—alternative control systems eliminate the problem entirely.
Add a Remote Control Receiver System
Ceiling fan remote control kits ($15-$40) work with most existing fans. The receiver module installs inside the fan’s switch housing, essentially “hijacking” control from the pull chain. Installation involves connecting the receiver to your fan’s wiring—a project requiring basic electrical knowledge but taking only 30-60 minutes. Remote controls offer significant advantages: operate your fan from anywhere in the room, set timers, and some models integrate with smart home systems. The pull chain remains functional as a backup.
Install a Wall Control Module
If you prefer wall-based controls over remotes, a wall control module replaces your existing light switch with combined fan and light control. These units cost $20-$50 and require basic electrical work. The advantage is permanent, reliable control without hunting for remote batteries. Some wall controls also include dimming functionality for light kits and precise speed settings for the fan. This solution works particularly well in bedrooms where you want to control the fan from the doorway.
Temporary Workarounds While You Repair
If you need to use your fan before completing a repair, these temporary solutions help maintain control without a functioning pull chain.
Extend the Broken Chain Safely
Attach a sturdy string, ribbon, or thin cord to whatever remains of your pull chain using a secure double knot. This effectively extends the chain to a usable length. While purely temporary (excessive cord weight can damage the switch over time), it works well for a few days while sourcing replacement parts. Avoid using heavy materials that could strain the switch mechanism.
Commit to Wall Switch Operation
If your fan has a working wall switch, make this your primary control method. Mark the switch clearly with a small label so household members know which one controls the fan. This isn’t ideal for fans without dedicated switches (where the wall switch also controls lights), but works well in rooms with separate fan controls. Create a habit of using the wall switch consistently to prevent future chain breakage from overuse.
Prevent Future Pull Chain Problems
Once repaired, implement these practices to extend your fan’s lifespan and prevent repeat failures.
Always pull the chain gently and completely—yanking on a stuck chain damages the internal mechanism. Keep chains untangled and away from objects that could catch and pull them accidentally. Lubricate the switch annually with electrical contact cleaner to maintain smooth operation. If your fan sees heavy daily use, consider upgrading to a remote or wall control system to reduce wear on the pull chain entirely.
Regular inspection catches problems early. Every few months, test your pull chain by operating all speed settings. Listen for clicking sounds that indicate proper engagement. If the chain feels sticky, requires excessive force, or doesn’t cycle through all speeds consistently, address the issue before complete failure occurs.
Key Takeaways
A broken ceiling fan pull chain doesn’t mean you’re stuck with a constantly running fan. Start with the simplest solution—your wall switch—before moving to more involved repairs. For immediate control, manually operating the switch through the housing gives instant results. Permanent fixes range from simple switch replacement ($10-25) to complete control system upgrades ($15-500 depending on the solution).
Always prioritize safety: cut power at the breaker before touching electrical components, and verify with a voltage tester. If you encounter warning signs like burning smells, unusual noises, or flickering lights, call a qualified electrician rather than risking injury. With the right approach, you’ll have your ceiling fan under control again within minutes to an hour, and with proper preventive measures, you can avoid this problem recurring for years to come.
Leave a Reply