You’re settling in for a quiet evening when that familiar low-frequency drone starts vibrating through your living room. That persistent ceiling fan humming noise isn’t just irritating—it’s disrupting your peace and signaling something’s wrong with your fan. This common household nuisance affects millions of homeowners, turning what should be a cooling helper into a constant source of frustration. Whether your fan just developed this issue or has always buzzed since installation, you’ll discover exactly why this happens and how to fix it permanently. By the end of this guide, you’ll have actionable solutions to eliminate that humming noise regardless of your fan model or electrical setup.
Why Your Ceiling Fan Creates That Distinctive Humming Sound
Ceiling fan humming noise stems from either electrical or mechanical vibrations that resonate through your home’s structure. Unlike random clicking or grinding sounds, humming indicates consistent frequency vibration—often matching your home’s electrical current cycle (60Hz in North America). This happens when components vibrate at the same frequency as the alternating current powering your fan. The sound becomes amplified when parts like loose mounting brackets or unbalanced blades act as natural resonators. Most humming intensifies at higher speeds because increased motor strain magnifies existing imperfections in electrical connections or mechanical alignment.
How Electrical Current Causes Fan Humming
Your home’s alternating current constantly reverses direction 60 times per second, creating natural magnetic field fluctuations in the motor. When wiring connections are loose or components wear out, these fluctuations generate audible vibrations. Dimmer switches not designed for ceiling fans are prime culprits—they chop the electrical waveform, creating harmonic distortions that manifest as loud humming. Even properly installed fans can hum if the motor’s internal windings develop minor shorts or if capacitors degrade over time. The key diagnostic clue: if the humming pitch changes with speed settings, the issue is almost certainly electrical rather than mechanical.
Mechanical Vibrations Amplifying the Noise
Mechanical humming occurs when physical components vibrate against each other at resonant frequencies. Common triggers include:
- Loose mounting hardware allowing the entire fan assembly to shake against the ceiling box
- Worn motor bearings creating internal vibration that transfers to the housing
- Unbalanced blades causing centrifugal force variations at high speeds
- Overtightened set screws distorting metal components and creating harmonic resonance
Unlike electrical humming, mechanical vibrations often produce rhythmic pulsing sounds that worsen as the fan runs longer (due to heat expansion). You’ll typically notice these vibrations through the ceiling structure itself—place your palm flat on the ceiling near the fan mount to feel telltale buzzing.
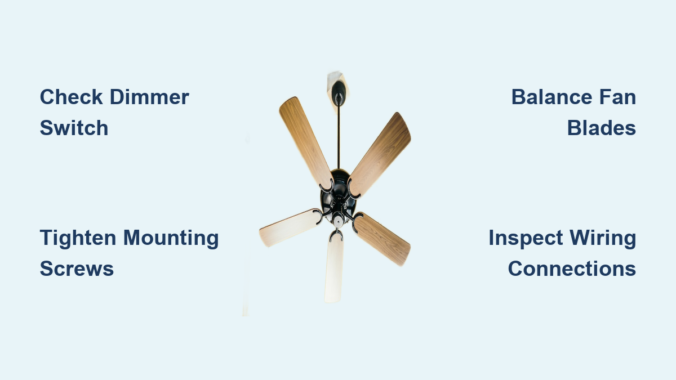
Step-by-Step Electrical Humming Fixes That Work

Diagnosing Dimmer Switch Compatibility Issues
90% of electrical humming stems from incompatible dimmer switches. Modern LED-compatible dimmers frequently cause humming in ceiling fans because they don’t handle inductive motor loads properly. Here’s how to confirm and fix this:
- Turn off power at the circuit breaker
- Remove the dimmer switch faceplate
- Check for labeling indicating “For Incandescent Only” or similar restrictions
- If incompatible, replace with a fan-rated dimmer (look for “CL” rating ≥ 35 for most fans)
- Ensure proper wire connections—loose neutrals are common humming sources
Pro Tip: Install a Lutron Maestro fan control (model C-LFQH) for silent operation. These cost under $25 and include dedicated fan speed controls that prevent waveform distortion.
Securing Loose Wiring Connections
Loose electrical connections create micro-arcing that generates intense humming. This critical fix requires:
- Turning off power at the breaker (verify with voltage tester)
- Removing the fan’s canopy to access wiring
- Checking all wire nuts for tightness—gently tug each connection
- Inspecting for burnt insulation near terminals
- Ensuring ground wires are securely attached to the grounding screw
Warning: Never skip the voltage test. A single unsecured hot wire can cause dangerous arcing even when the switch is off.
Mechanical Humming Solutions for Immediate Relief
Tightening Mounting Hardware Safely
Loose mounting causes the most dangerous humming—where the entire fan assembly vibrates the ceiling. Fix this in under 15 minutes:
- Turn off fan power completely
- Use a sturdy ladder to access the mounting bracket
- Check all four mounting screws securing the bracket to the electrical box
- Verify the downrod coupling is fully tightened (often overlooked)
- Ensure the canopy screws are snug but not overtightened
Visual Cue: Look for paint cracks around the mounting plate—this indicates long-term vibration damage requiring immediate attention.
Balancing Blades to Eliminate Resonance
Unbalanced blades create harmonic humming that intensifies with speed. The $5 fix:
- Purchase a blade balancing kit (includes adhesive weights)
- Attach the provided clip to one blade tip
- Run fan on high speed and note if humming decreases
- If improved, permanently attach weight at that location
- Repeat for other blades until humming stops
Time-Saver: Tape a quarter to the top of a blade near the motor housing. If humming reduces, that’s your imbalance location—no kit needed.
When to Call a Professional Immediately
Dangerous Electrical Signs Requiring Expert Help
Certain humming symptoms indicate serious hazards you shouldn’t ignore:
- Burning smell accompanying the hum → Indicates overheating wires or motor failure
- Flickering lights on the same circuit → Signals dangerous voltage fluctuations
- Humming that persists with fan turned off → Points to faulty wiring in walls
- Visible scorch marks on switches or fan housing
Critical Action: If you notice any of these, shut off power at the breaker immediately and call a licensed electrician. These conditions can cause electrical fires within hours.
Motor Replacement vs. Full Fan Replacement

Worn motor bearings create distinctive low-pitched humming that worsens over time. While motors can be replaced ($80-$200 parts), consider these factors:
| Condition | Motor Replacement | Full Fan Replacement |
|---|---|---|
| Fan age < 5 years | ✓ Cost-effective | ✗ Overkill |
| Humming + grinding noise | ✗ Temporary fix | ✓ Permanent solution |
| Outdated efficiency | ✗ Wastes money | ✓ Saves $50+/year on bills |
| Visible oil leaks | ✗ Impossible | ✓ Only option |
Expert Note: Modern ENERGY STAR fans use 60% less energy than 10-year-old models. If your fan is older than 2015, replacement often pays for itself in energy savings.
Preventing Future Humming Noise Forever
Installation Best Practices That Eliminate Humming
Proper installation prevents 95% of humming issues. When installing new fans:
- Always use a fan-rated electrical box rated for 50+ lbs (standard boxes flex under vibration)
- Install rubber isolation pads between mounting bracket and ceiling box
- Choose fans with DC motors which operate silently due to electronic commutation
- Verify circuit capacity—fans need dedicated 15A circuits without shared loads
Pro Tip: Hang a small spirit level on the downrod during installation. If it swings more than 1/8 inch, your mounting isn’t secure enough.
Maintenance Routine That Stops Humming Before It Starts
Prevent humming with this quarterly checklist:
- Tighten all visible screws (blade brackets, canopy, switch housing)
- Wipe blades with damp cloth to remove dust buildup causing imbalance
- Lubricate motor bearings (if accessible) with 1-2 drops of electric motor oil
- Check set screw tightness on blade irons and downrod couplings
Warning: Never use household oils like WD-40—they attract dust and gum up motors. Only use manufacturer-specified lubricants.
Final Note: Your Path to Silent Operation
That ceiling fan making humming noise doesn’t have to ruin your home’s tranquility. By systematically checking electrical connections, securing mechanical components, and implementing preventative maintenance, you’ll eliminate humming permanently in most cases. Remember that dimmer switch incompatibility causes the majority of electrical humming—replacing it with a fan-specific control solves the problem 80% of the time. For mechanical issues, blade balancing and hardware tightening provide immediate relief. When safety concerns arise like burning smells or persistent off-cycle humming, always call a professional electrician. Implement the quarterly maintenance routine to prevent recurrence, and consider upgrading to a DC motor fan for whisper-quiet operation that saves energy. Your peaceful, humming-free home is just a few targeted fixes away—start with the dimmer switch check tonight and reclaim your quiet space.
Leave a Reply