That persistent clicking, rattling, or humming from your ceiling fan disrupts your peace and makes relaxation impossible. A noisy ceiling fan isn’t just annoying—it often signals underlying issues that could lead to more serious problems if ignored. The good news is most ceiling fan noise problems are fixable with basic tools and a systematic approach. You can typically quiet your fan in under an hour without professional help, saving you money and restoring comfort to your living space. This guide delivers practical, step-by-step solutions for every common noise issue, so you can identify the problem and implement the right fix with confidence.
Most ceiling fan noise stems from preventable issues like loose components, improper installation, or simple wear and tear. Whether your fan developed noise suddenly or has been problematic since installation, understanding the specific sound it makes is crucial to diagnosing the cause. By methodically working through potential problems starting with the simplest solutions, you’ll likely silence that irritating noise without replacing your entire fixture. Let’s tackle the most common noise problems and their effective remedies.
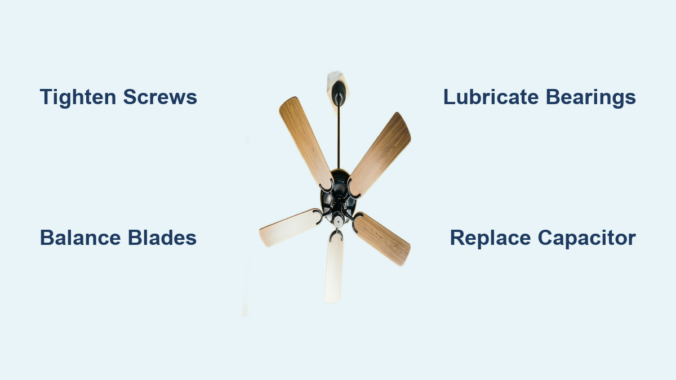
Diagnose Your Ceiling Fan Noise Type First
Before grabbing tools, determine exactly what kind of noise your fan produces—different sounds indicate specific problems requiring distinct solutions. Clicking or tapping noises typically occur rhythmically with blade rotation, suggesting something periodically contacts a moving part. This most often means loose hardware like blade attachment screws, mounting brackets, or unsecured light fixtures. These sounds become most noticeable at low speeds when each impact registers clearly.
Humming or buzzing noises require more careful diagnosis. A low-pitched hum frequently points to electrical issues such as a failing capacitor or motor winding problems. High-pitched buzzing often indicates components vibrating at the motor’s electromagnetic frequency—sometimes as simple as loose screw heads or glass panels in light fixtures resonating with the fan’s operation. Pay attention to whether the humming changes with speed settings, as this clue helps pinpoint the exact component causing trouble.
Rattling or vibrating sounds usually signal loose components moving freely rather than making rhythmic contact. The culprit might be fan blade screws that have gradually worked loose over time, an improperly seated downrod assembly, or mounting hardware that hasn’t been tightened sufficiently. Rattling typically intensifies at medium to high speeds when centrifugal force amplifies any looseness in the system. Identifying your specific noise type prevents wasted effort on irrelevant fixes.
Tighten Every Screw and Connection Immediately
Loose hardware causes more ceiling fan noise problems than any other single issue, yet it’s the quickest fix. Vibration from normal operation gradually works fasteners loose, and even one slightly loose screw can create significant noise. Before attempting complex repairs, complete this systematic tightening process with the fan powered off at both the wall switch and circuit breaker.
Start with the mounting screws connecting the fan to the electrical box in the ceiling—these often loosen over time and create distinctive rattling sounds. Next, check the downrod connection where the motor hangs from the mounting bracket; this usually has a set screw requiring attention. Then methodically tighten each screw attaching fan blades to their arms, applying equal pressure to all blades. Finally, inspect any screws securing light kits, glass shades, or decorative elements. After tightening each component, gently wiggle it to confirm security and listen for remaining movement.
When tightening blade attachment screws, stop when snug plus a quarter turn—overtightening risks stripping screw holes or cracking plastic or thin wooden blades. If you encounter a stripped screw hole, fill it with wood toothpicks coated in wood glue before reinserting the screw. This simple reinforcement creates a solid anchor point without requiring blade replacement. Completing this thorough tightening process resolves noise issues in over 60% of cases.
Correct Blade Imbalance Causing Wobble

Unbalanced blades create wobbling that produces both noise and excessive vibration, straining motor bearings and accelerating wear. To check for imbalance, turn on the fan and observe blade tips from below—uneven heights or angles indicate misalignment. Alternatively, with the fan off, use a level against each blade to verify uniform angle relative to the ceiling.
Most fans include a blade balancing kit with a clip and adhesive weights. If yours lacks one, purchase an inexpensive kit at any hardware store. Begin with all blade screws tightened, then identify the blade causing most wobble. Attach the balancing weight to the top of that blade near the outer edge and test the fan. If wobble persists, move the weight slightly inward or add a second weight. This requires patience—make small adjustments and test between changes until wobble disappears.
For severely warped or damaged blades that won’t balance, replacement becomes necessary. Continuing to operate an unbalanced fan places excessive stress on bearings and mounting hardware, potentially causing more expensive damage. Replacement blades typically match your model number and install with basic tools. Properly balanced blades not only reduce noise but also improve air circulation efficiency by 15-20%.
Lubricate Motor Bearings for Grinding Sounds
A whining or grinding noise that intensifies with speed usually indicates dry or worn motor bearings. Confirm this by manually rotating blades with the fan off—they should spin freely without resistance or clicking. If rotation feels rough or catches, lubrication may solve the problem.
First, clean the motor housing exterior to prevent debris from entering during lubrication. Most ceiling fans have two lubrication points—one at the top bearing near the mounting point and another visible from below as a small cap in the motor center. Remove caps or plugs, then apply just a few drops of high-quality electric motor oil to each bearing point. Never use WD-40 or general-purpose oils, as these attract dust and may damage motor windings.
After lubricating, manually spin blades several times to distribute the oil, then replace caps. Test the fan at low speed—the grinding should diminish significantly. If noise persists or returns quickly, bearings may be too worn for lubrication to help, indicating professional service or replacement becomes necessary. Proper lubrication extends motor life by years when performed annually during routine maintenance.
Replace Faulty Capacitor Causing Humming
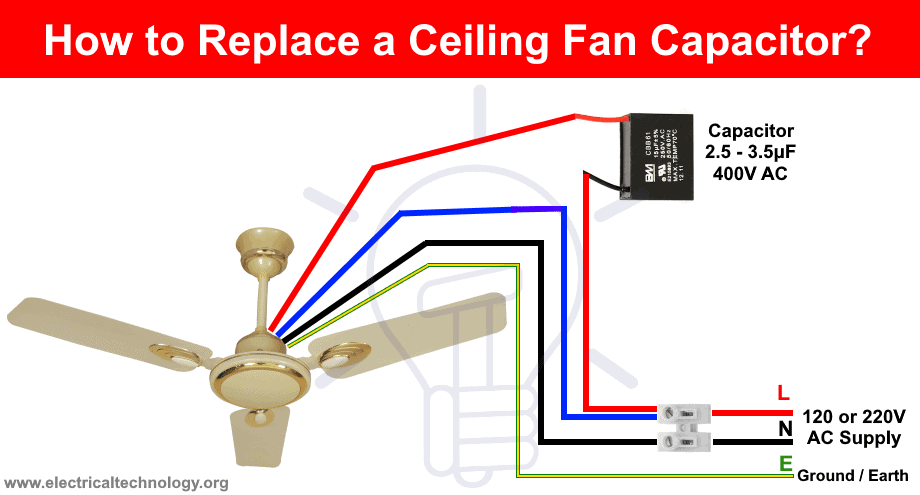
A failing capacitor creates loud humming while blades spin slowly or refuse to start. This small cylindrical component helps the motor start and maintain speed. Signs include inconsistent starting, reduced speeds, or humming that continues after manually starting the blades.
To replace it, turn off power at the circuit breaker, remove the switch housing cover, and locate the capacitor in the switch housing. Note wire connections carefully before disconnecting—take a photo for reference. Match the replacement capacitor exactly by voltage rating and microfarad (µF) specifications. Reconnect wires identically to the original configuration, secure the new capacitor, and test all speed settings. The fan should now start quickly and run quietly.
Capacitor replacement costs $5-15 and takes 20 minutes for most homeowners, making it one of the most cost-effective ceiling fan repairs. Keeping a spare capacitor on hand allows quick resolution when this common failure occurs.
Secure Mounting Hardware and Electrical Box
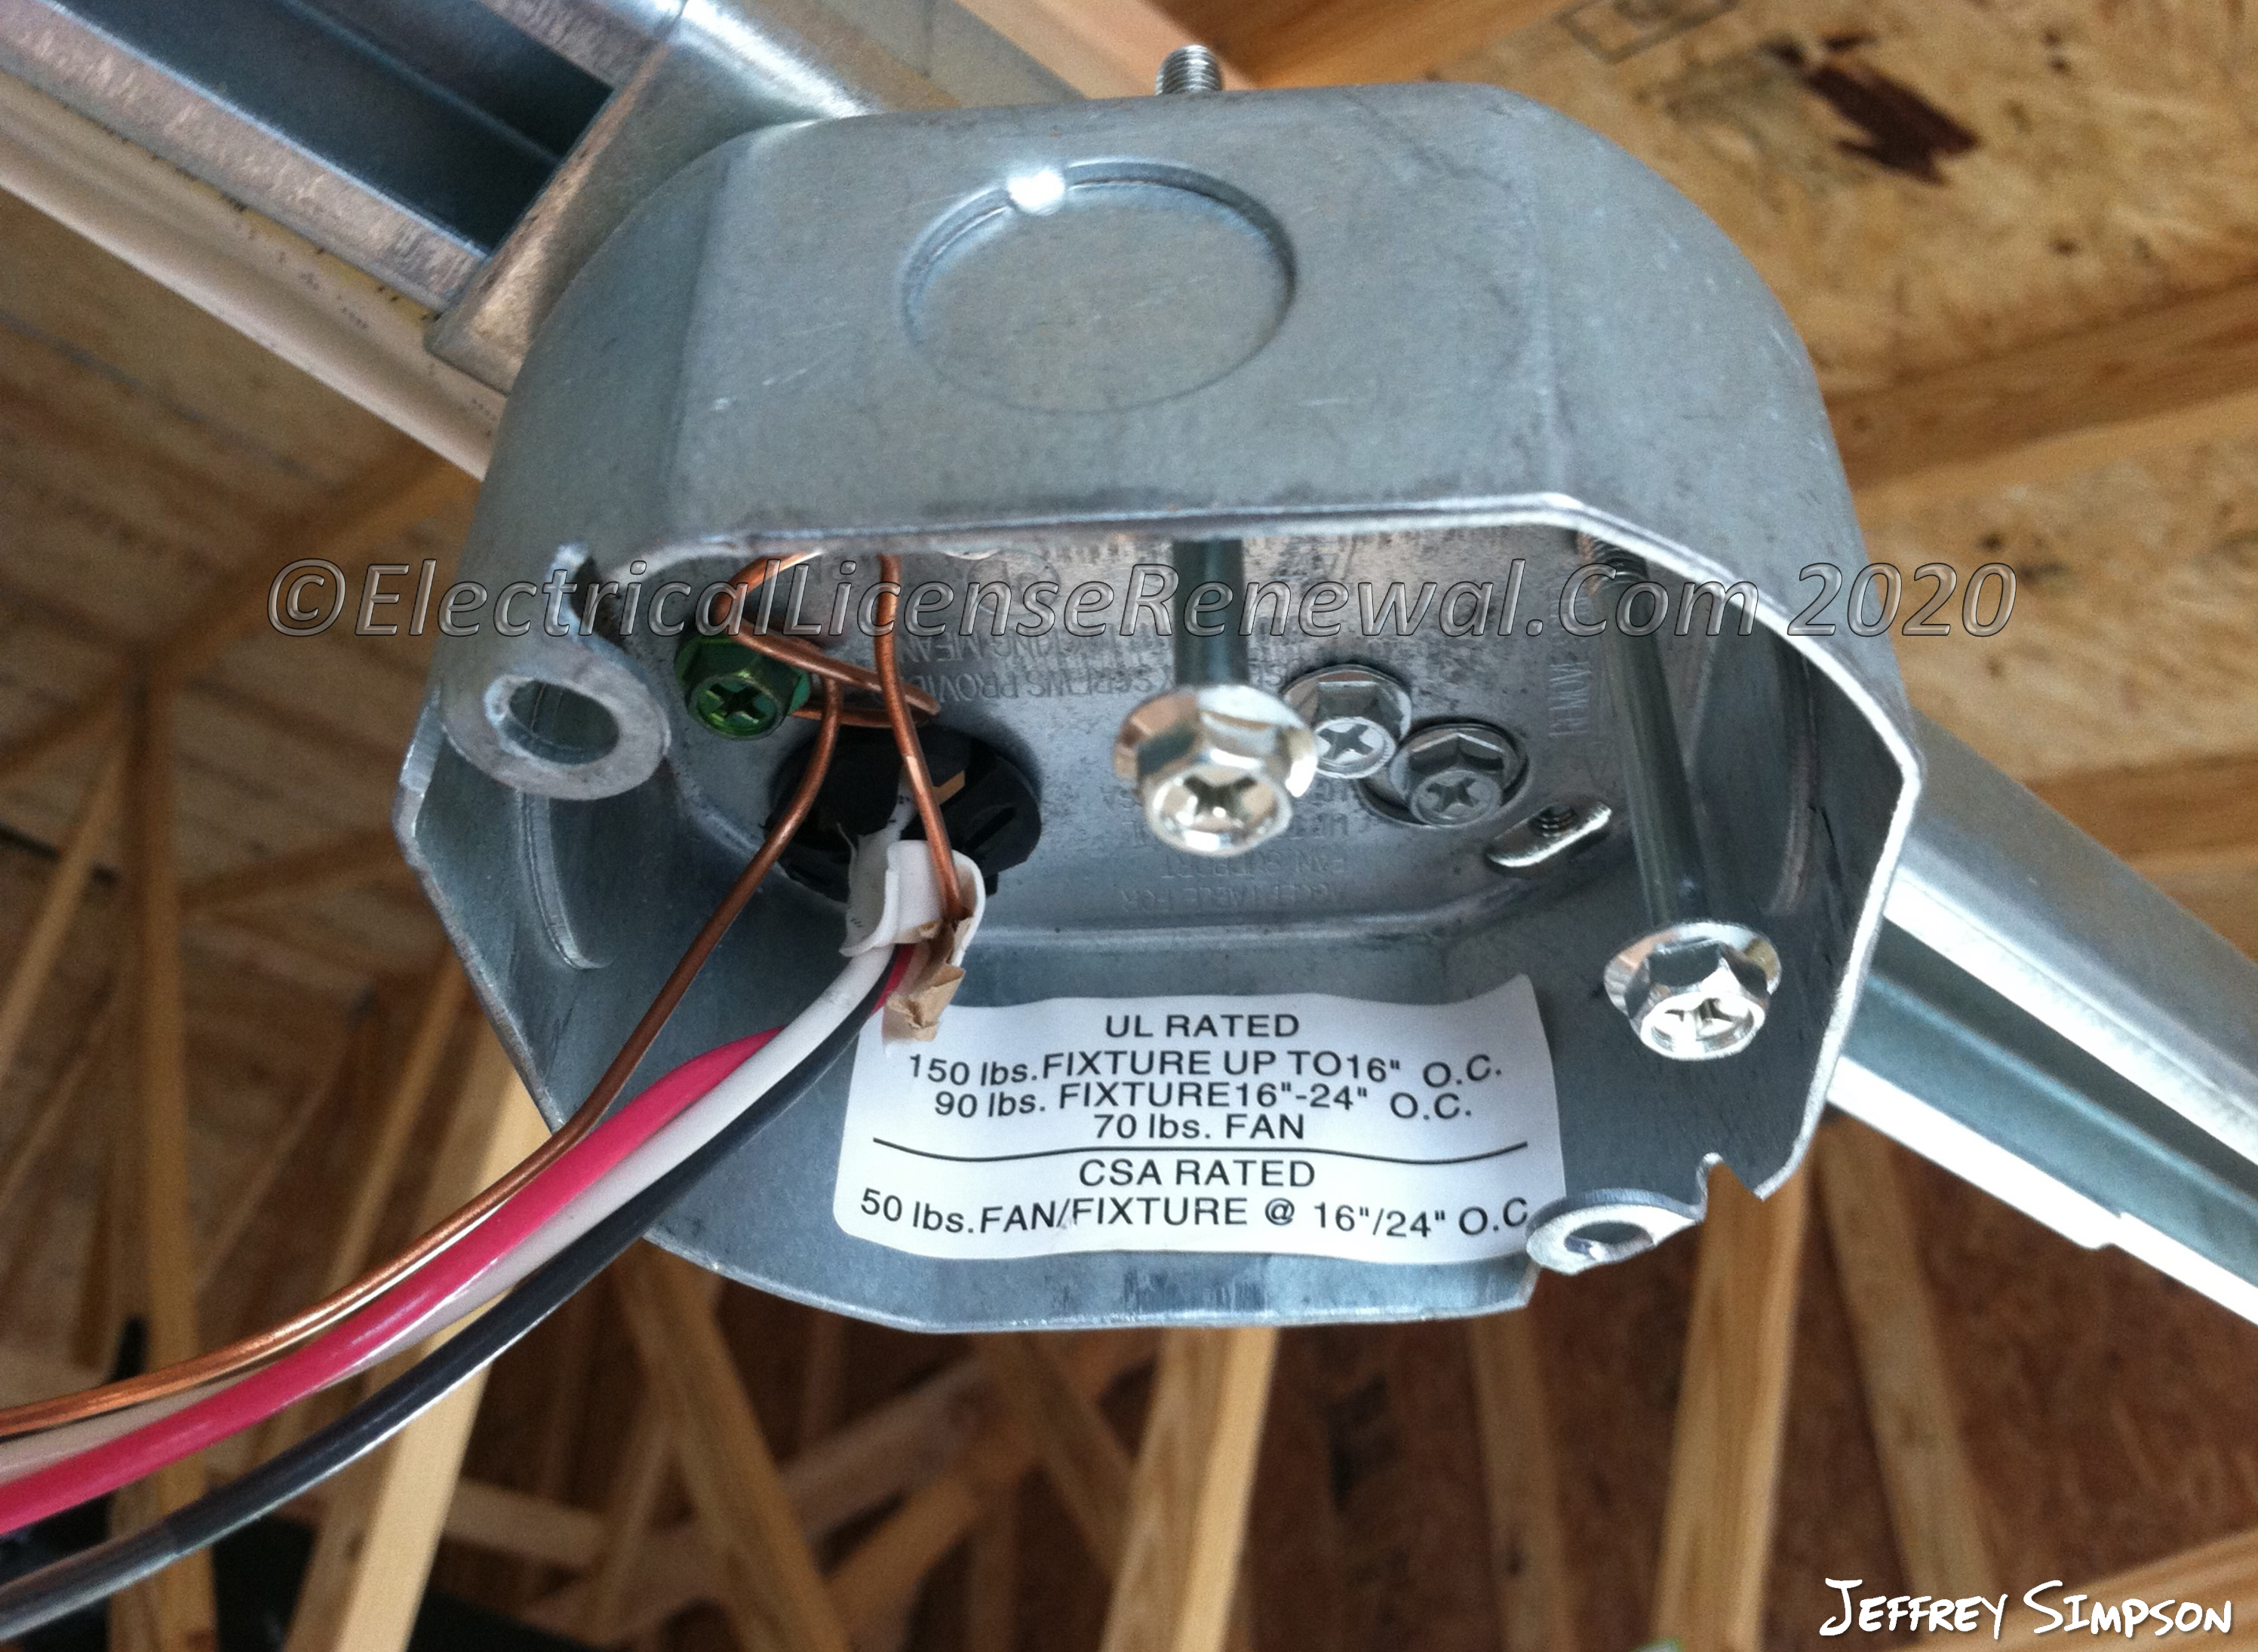
If your fan wobbles noticeably or produces noise seemingly from the ceiling itself, the mounting system likely needs attention. Standard electrical boxes aren’t rated for ceiling fan weight and vibration—only fan-rated boxes properly secure the fixture. Turn off power, then gently wiggle the fan housing where it meets the ceiling. Any movement indicates loose mounting.
Tighten mounting bracket screws connecting to the electrical box first. If the box itself moves, you’ll need to replace it with a fan-rated box—a project requiring attic access or drywall work that many homeowners delegate to professionals. Also check for bent or damaged mounting brackets that prevent proper alignment with the downrod. A misaligned bracket causes chronic wobble regardless of blade balance.
Proper mounting prevents noise recurrence and eliminates safety hazards. Fan-rated boxes cost $15-25 and support the dynamic loads created by fan operation, making them essential for quiet, safe performance.
Address Light Kit and Accessory Vibrations
Fans with light kits develop unique noise issues from glass shades, bulbs, or decorative elements vibrating against fixtures. These noises often intensify at specific speeds and become most noticeable when lights are on. Confirm light kit involvement by temporarily removing it and running the fan without lighting.
Tighten all glass shade retainers without overtightening, which can crack glass. Replace humming CFL bulbs with vibration-resistant LED alternatives—bulb type significantly affects noise levels. Ensure bulbs screw in firmly but avoid excessive tightening that damages sockets. Adjust pull-chain length so it hangs freely without contacting housing during operation.
For persistent light kit noise, apply small rubber washers between glass components and metal fixtures to dampen vibration transmission. This simple modification often eliminates buzzing without visible modification to your fixture.
Know When to Call Professionals or Replace
Some noise issues require professional expertise or indicate replacement is more practical than repair. Electrical problems beyond capacitor replacement, including sparks, burning smells, or circuit breaker trips, demand immediate professional attention due to fire hazards.
Fans over ten years old with multiple noise problems often cost more to repair than replace. Modern fans operate 30-40% more quietly due to improved motor technology and manufacturing tolerances. If repair costs exceed 50% of a new fan’s price, replacement becomes the smarter investment.
Strange internal motor noises, excessive heat during operation, or persistent problems after systematic troubleshooting suggest internal damage not worth repairing. In these cases, new energy-efficient models often pay for themselves through reduced electricity costs within a few years.
Regular maintenance prevents most ceiling fan noise problems before they start. Tighten hardware annually, clean blades quarterly to prevent dust buildup, and address minor issues immediately before they escalate. Listen carefully to your fan’s normal operation so you recognize changes early. Well-maintained ceiling fans typically operate quietly for 10-15 years, but when replacement becomes necessary, modern models offer significantly quieter performance and better energy efficiency. By applying these targeted fixes based on your specific noise type, you’ll restore peaceful operation to your living space without unnecessary expense.
Leave a Reply