Your Hunter ceiling fan suddenly stops spinning, leaving you sweating in summer heat or struggling with winter drafts. When a Hunter ceiling fan not working scenario strikes, most homeowners panic, assuming costly repairs or replacement are necessary. The truth is, 80% of Hunter ceiling fan problems stem from simple issues you can diagnose and fix in under an hour—no electrician required. Whether your fan won’t start at all, runs intermittently, wobbles violently, or fails to respond to controls, this guide reveals the exact steps to identify and resolve the problem. You’ll learn which components to check first, how to safely troubleshoot electrical issues, and when professional help is truly necessary—saving you hundreds in unnecessary service calls.
Find Your Hunter Fan Model Number Before Troubleshooting
Locating your specific Hunter fan model number before attempting repairs prevents wasted time and incompatible parts purchases. Hunter and Casablanca fans hide model numbers in several standard locations that many homeowners overlook.
Check the top surface of the motor housing where it connects to the ceiling mounting bracket—this metal label withstands decades of operation. Remove the canopy cover (the decorative dome hiding wiring) to inspect its interior surface, where many newer models print specifications. For fans with integrated lighting, examine the light kit housing itself, especially around the bulb sockets. Some models tuck the label inside the switch housing cover, requiring you to remove the decorative plate covering the pull chains. Always have this number documented before ordering replacement parts or contacting support.
Pro Tip: Take multiple photos of the label with your smartphone before reassembling the fan. This reference prevents confusion when ordering capacitors or remote systems that vary significantly between Hunter models.
5 Most Common Reasons Your Hunter Ceiling Fan Won’t Start
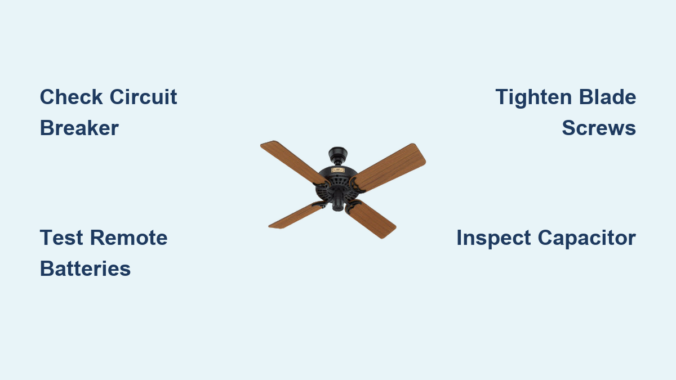
When your Hunter ceiling fan is not working properly, these five issues account for 90% of failures. Check each systematically before assuming motor failure.
Electrical supply interruptions cause most “dead fan” scenarios. A tripped circuit breaker often appears in the middle position rather than fully off, fooling homeowners. Wall switches develop internal failures that prevent contact even when toggled. Loose wire connections at the ceiling junction box create intermittent operation that seems mysterious but has a simple fix.
Failed capacitors silently disable motors while lights may still function. This hockey puck-shaped component provides the initial jolt needed to start rotation. When swollen or leaking electrolyte, it must be replaced with an exact model-specific match.
Remote control system failures mimic fan malfunctions. Dead batteries, signal interference from other devices, or desynchronized transmitter/receiver units create the illusion of a broken fan. Always test operation using the wall switch first.
Pull chain switch failures occur from years of use. The internal contacts burn out, preventing electricity from reaching the motor despite proper power supply.
Loose blade screws create dangerous wobble that triggers safety mechanisms in newer Hunter models, causing automatic shutdown to prevent damage.
How to Fix Hunter Ceiling Fan Power Supply Issues in 15 Minutes

Power supply problems represent the fastest Hunter ceiling fan not working fixes you’ll encounter. Follow this sequence before investigating complex components.
-
Verify wall switch position: Toggle the switch 5-6 times to clean internal contacts. Many “dead” fans revive from this simple action.
-
Check circuit breaker: Locate your electrical panel and inspect for tripped breakers. Reset by flipping fully off, then on. Wait 60 seconds before testing the fan.
-
Test outlet functionality (for plug-in models): Insert a known working device like a phone charger. If no power, check GFCI outlets in nearby rooms which may control the circuit.
-
Inspect pull chain switches: Remove the switch housing cover and examine connections. Burn marks or melted plastic indicate replacement is needed.
-
Confirm capacitor condition: Locate this cylindrical component (usually 1-2 inches in diameter) near the motor. Swelling, leakage, or bulging sides require immediate replacement with an exact model match.
Warning: Always turn off power at the breaker before accessing internal components. Use a non-contact voltage tester to confirm no electricity flows to the fan.
Troubleshoot Hunter Fan Remote Control Problems Without Replacement
Remote control issues cause more “Hunter ceiling fan not working” calls than actual fan failures. Fix these common problems before buying new remotes.
First, replace batteries with fresh ones—never mix old and new batteries as this causes inconsistent voltage. Test from multiple angles within 15 feet of the fan, as infrared remotes require direct line of sight. If the fan responds to wall switches but not the remote, resynchronize the system by:
- Turning off power at the breaker for 30 seconds
- Restoring power and waiting 15 seconds
- Holding both “Fan” and “Light” buttons on the remote for 10 seconds
- Listening for a click from the receiver unit inside the canopy
Check for signal interference from nearby electronics. Wi-Fi routers, baby monitors, and fluorescent lighting emit frequencies that disrupt remote signals. Temporarily turn off these devices to test if they’re causing the problem.
Pro Tip: Clean remote contacts with isopropyl alcohol and a cotton swab. Corrosion on button contacts creates intermittent function that mimics remote failure.
Diagnose and Fix Hunter Ceiling Fan Wobble in Under 30 Minutes
Wobbling isn’t just annoying—it accelerates wear on motor bearings and mounting hardware. Fix blade wobble with this systematic approach:
Start with the Blade Balance Test: Attach a clothespin to the leading edge of one blade and run the fan on low speed. If wobble decreases, that blade is lighter than others. Move the clothespin to different blades until wobble minimizes, then add a balancing clip (included with most Hunter fans) at that location.
Check Blade Screw Tightness: Use a ladder and tighten all eight blade screws (four per blade arm). Many homeowners only tighten visible screws, but both top and bottom screws require attention. Apply medium pressure—overtightening cracks plastic components.
Verify Blade Pitch Consistency: Measure each blade’s angle against the ceiling with a pitch gauge. Variations greater than 2 degrees create imbalance. Adjust blade irons equally across all blades to maintain proper pitch.
Warning: Never operate a severely wobbling fan for extended periods. This stresses the motor housing and may loosen the mounting bracket from the ceiling.
Hunter Fan Making Noise? Identify and Eliminate 7 Common Sounds
Different noises pinpoint specific Hunter ceiling fan not working issues. Match the sound to the solution:
Clicking sound: Usually debris caught in the blade path or loose light kit components. Turn off power and inspect the space between blades and housing.
Rattling noise: Indicates loose hardware. Tighten downrod connections at both ends and check blade arm screws. Plastic components require less torque than metal—snug but not tight.
Buzzing from motor: Points to failing capacitor or voltage irregularities. Replace the capacitor first before investigating electrical supply issues.
Grinding sound: Signals severe bearing wear requiring professional motor service. Do not continue operation as this damages the entire motor assembly.
Humming without rotation: Confirms capacitor failure. The motor receives power but lacks starting torque.
Squeaking noise: Indicates need for lubrication in older models. Apply light machine oil to moving parts—not recommended for modern sealed bearings.
Whooshing sound: Normal at high speeds; excessive noise suggests blade warping or dirt accumulation.
When to Call an Electrician for Your Hunter Ceiling Fan Not Working
Certain Hunter ceiling fan problems require professional intervention for safety and warranty preservation.
Call an electrician immediately if you discover frayed or corroded wiring in the ceiling junction box. These conditions create fire hazards that untrained homeowners shouldn’t address. Visible smoke, burning smells, or discoloration around wiring connections indicate serious electrical faults.
Motor replacement requires specialized tools and knowledge. Opening the motor housing voids most Hunter warranties and risks improper reassembly that creates safety hazards.
Professional service is mandatory when installing new electrical infrastructure or replacing non-fan-rated ceiling boxes. Many homeowners unknowingly mount fans to standard light fixture boxes not designed for rotational stress.
Warranty-covered repairs must be performed by authorized technicians to maintain coverage. Attempting DIY fixes on covered components voids your warranty immediately.
Prevent Future Hunter Fan Failures With This Simple Maintenance Routine
Regular care prevents most Hunter ceiling fan not working scenarios and doubles your fan’s lifespan.
Clean blades quarterly using a microfiber duster or damp cloth. Dust accumulation creates uneven weight distribution that strains the motor. For high ceilings, use an extendable duster rather than unstable ladder positions.
Tighten all hardware semi-annually—ceiling bracket, downrod connections, and blade screws. Vibration gradually loosens components, creating wobble that accelerates wear.
Inspect the capacitor annually for swelling or leakage. This component typically lasts 5-7 years before needing replacement. Keep a model-specific spare on hand for quick swaps.
Reverse fan direction seasonally using the switch on the motor housing. Summer (counter-clockwise) pushes air down for cooling; winter (clockwise) circulates warm air downward, reducing heating costs by up to 10%.
Pro Tip: Mark your calendar for maintenance tasks. Set reminders on your phone for April 1 (spring direction change), October 1 (fall direction change), and your birthday (annual inspection).
Save Money: Hunter Ceiling Fan Repair vs. Replacement Decision Guide
Most Hunter ceiling fan not working problems cost less to repair than replace. Follow this decision tree:
Spend under $50 on repairs when:
– Capacitor replacement ($15-25)
– Remote system reprogramming ($0)
– Blade balancing ($0)
– Light kit component replacement ($10-30)
Consider replacement when:
– Motor requires rebuilding ($150+)
– Multiple components fail simultaneously
– Fan is over 15 years old
– Repair costs exceed 50% of new fan price
Warning: Never attempt motor disassembly on modern Hunter fans. The permanent magnets create dangerous pinch hazards during reassembly.
Final Thoughts
A Hunter ceiling fan not working scenario rarely requires immediate replacement when you know how to diagnose the problem. By methodically checking power supply, remote systems, blade balance, and component condition, you’ll resolve most issues yourself. Always begin with the simplest solutions—like checking circuit breakers or replacing remote batteries—before investigating complex components. Implement the quarterly maintenance routine to prevent 80% of common failures, and keep your model number documented for quick parts identification. Remember that safety comes first—when in doubt about electrical components, call a licensed electrician. With proper care, your Hunter ceiling fan will deliver reliable airflow for 15+ years, making today’s troubleshooting effort a worthwhile investment in your home’s comfort.
Leave a Reply