Transforming your outdated ceiling fan with freshly painted blades is one of the most cost-effective home improvements you can tackle this weekend. Instead of spending $100-$300 on a replacement fixture, painting ceiling fan blades gives you complete design control while keeping your project budget under $150. Whether you’re matching a newly renovated room, refreshing weathered blades, or making a bold design statement, the right painting approach delivers professional-looking results that withstand constant air movement and daily use. This guide reveals the exact preparation and application techniques that prevent the peeling and chipping that doom most DIY fan painting attempts.
The difference between a paint job that lasts years versus one that flakes within weeks comes down to proper surface preparation and material selection. Rushing through sanding or using the wrong primer creates immediate adhesion problems that worsen with each fan rotation. By following the systematic process outlined here, you’ll create a finish that resists dust accumulation, cleans easily, and maintains its beauty through seasonal humidity changes and regular operation.
Why Painted Fan Blades Fail (And How to Prevent It)
Most DIYers make critical mistakes that doom their ceiling fan blade painting projects from the start. Painting over glossy surfaces without proper sanding creates instant adhesion problems that manifest as peeling within weeks of completion. Using standard interior paint on plastic blades leads to catastrophic failure because these smooth surfaces require specialized bonding primers. Skipping the crucial step of removing blades from the fan assembly results in missed spots and uneven coverage that becomes obvious once the fan starts spinning.
Your painted fan blades will last for years when you identify the exact blade material first and match your preparation accordingly. MDF blades need thorough priming to seal the engineered fibers, wood blades require grain filling for smooth results, and plastic blades demand aggressive sanding plus bonding primer. Investing two extra hours in proper preparation saves you from repainting within a year—and prevents the embarrassing scenario of paint chips scattering across your room when you first turn on the fan.
Identify Your Blade Material Before Buying Supplies

MDF blades show an extremely smooth, uniform surface without visible grain patterns and produce fine sawdust when lightly sanded. These common modern blades accept paint well but require proper priming to prevent uneven absorption.
Solid wood blades display natural grain patterns and feel denser than MDF. Pine, oak, and walnut each present unique challenges—deep-grained woods like oak need multiple grain-filling applications to achieve smooth painted finishes.
Plastic and polymer blades feel slightly flexible and produce curled shavings (not dust) when sanded. These budget-friendly blades require the most aggressive preparation since standard paints won’t bond to their smooth surfaces without specialized treatment.
Pro Tip: Test an inconspicuous spot with 120-grit sandpaper before purchasing supplies—the material response tells you exactly what you’re working with and prevents costly product mistakes.
Essential Tools Checklist for Flawless Results
Gather these specific supplies before starting your painting ceiling fan blades project to avoid mid-process frustrations:
- Sandpaper assortment: 120-grit (initial scuffing), 180-grit (intermediate smoothing), 220-grit (final prep)
- Foam sanding blocks: Conform to blade curves better than flat sandpaper
- TSP substitute: Removes grease buildup, especially critical for kitchen fans
- Bonding primer: Non-negotiable for plastic blades; use stain-blocking for wood
- Interior latex paint: Satin or semi-gloss finish in quart size (less than $25)
- Two-inch angled brush: For precise edge control on narrow blade surfaces
- Four-inch foam roller: Applies paint quickly on smooth blade tops
- Tack cloths: Removes sanding dust that causes surface imperfections
Warning: Skip the cheap dollar-store brushes—they shed bristles that embed in your wet paint and create a textured mess that screams “amateur job.”
Surface Prep: The Make-or-Break Step
Proper surface preparation accounts for 80% of your painting ceiling fan blades success. Follow these exact steps to create a paint-ready surface:
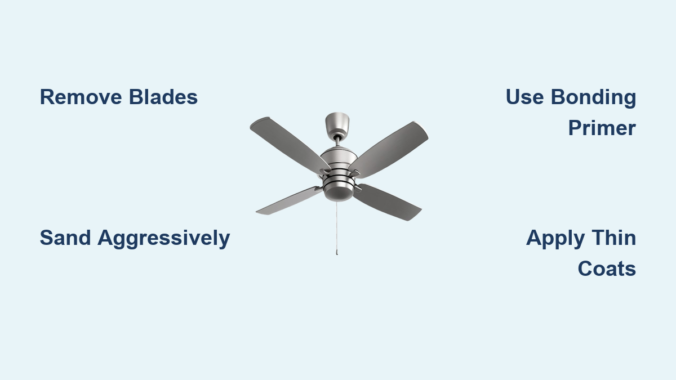
- Remove blades completely from the fan assembly—this gives you full access to all surfaces including often-neglected bottom edges
- Clean thoroughly with warm water, mild dish soap, and TSP substitute to remove dust, oils, and kitchen grease
- Sand systematically starting with 120-grit (following blade length direction), then 180-grit, finishing with 220-grit
- Remove all dust with vacuum followed by tack cloth—any remaining particles become visible in your finish
For plastic blades, sand aggressively until the glossy surface sheen disappears completely. For wood blades with prominent grain, apply wood filler to valleys, let dry, then sand smooth with 220-grit. Allow blades to dry completely (2-4 hours) before priming—any moisture trapped under paint causes immediate adhesion failure.
Primer Application Secrets Professionals Use
Primer creates the critical bonding layer between your blade material and topcoat. Apply it correctly with these techniques:
- Work in temperatures between 50°F-85°F with humidity below 65% for optimal adhesion
- Load your brush, then wipe excess against container edge to prevent drips
- Apply in long, smooth strokes following blade length direction
- Maintain wet edges to avoid lap marks that create visible lines in your finish
- Allow proper drying time (check manufacturer specs) before sanding or topcoating
Pro Tip: For plastic blades, use Zinsser Bulls Eye 1-2-3 or Kilz Adhesion bonding primer—standard primers fail on smooth plastic surfaces regardless of your preparation quality.
Paint Application Techniques That Prevent Brush Marks
Achieve smooth, professional-looking results with these application methods:
- Apply thin coats rather than attempting full coverage in one pass—two thin coats beat one thick coat every time
- Brush technique: Dip no more than one-third of bristle length, apply long strokes from edge toward center
- Roller technique: Use “W” pattern for even distribution, finish with unidirectional strokes
- Spray alternative: For flawless results, use Krylon Fusion for Plastic on plastic blades
Allow paint to dry to the touch (1-2 hours for latex) before applying second coat, but don’t rush—full cure takes 7-14 days. Apply a minimum of two coats for adequate coverage and durability, especially when painting over dark colors.
Creative Design Ideas Beyond Basic Solid Colors
Transform your fan into a design statement with these approaches:
- Two-tone blades: Paint tops one color and edges/undersides a contrasting color
- Ombre effect: Create gradual color transitions from blade to blade (best with spray application)
- Metallic accents: Use metallic paint on blade edges for subtle shine that catches light
- High-contrast ceilings: Paint blades same color as ceiling for dramatic disappearing effect
Expert Note: Satin finish provides the best balance of durability and light reflection for most rooms. Semi-gloss offers superior moisture resistance for kitchens and bathrooms but shows imperfections more readily.
Reinstallation and Curing Timeline
Allow proper curing time before reinstalling to prevent surface damage:
- Latex paint: Wait 24-48 hours before reinstallation, but full cure takes 7-14 days
- Oil-based paint: Requires 21-30 days for complete cure (not recommended for most DIYers)
- Tighten screws properly: 20-30 inch-pounds of torque—over-tightening cracks mounting tabs
After reinstallation, run the fan at medium speed for several hours to test paint adhesion before regular use. Check for wobbling and verify blades appear in the same plane when spinning.
Maintenance Tips for Long-Lasting Results
Extend your painted fan blades’ life with these care techniques:
- Dust weekly with microfiber cloth (never feather dusters that scatter debris)
- Clean monthly with mild soap solution for kitchen/bathroom fans
- Address chips immediately by lightly sanding, cleaning, and applying matching paint
- Avoid harsh cleaners or abrasive pads that damage the paint surface
Warning: High humidity, temperature extremes, and direct sunlight accelerate paint degradation—kitchen and bathroom fans need more frequent inspection.
Fixing Common Painting Problems
When issues arise, diagnose and solve them correctly:
Peeling paint: Usually from inadequate surface prep—remove failed paint completely, re-sand, and re-prime
Visible brush marks: Sand smooth with 320-grit paper, then apply additional thin coats
Uneven color: Apply additional coats while ensuring thorough paint stirring between applications
Drip marks: Sand smooth after complete drying, then apply thinner coats with proper technique
Painting ceiling fan blades successfully requires matching your preparation to the specific blade material and following precise application techniques. By investing time in proper surface preparation, selecting appropriate materials, and allowing adequate curing time, you create a finish that withstands years of use while transforming your room’s aesthetic. The modest investment of $70-$150 in materials delivers professional-quality results that make expensive fan replacements unnecessary—proving that thoughtful DIY projects provide exceptional value when executed correctly.
Leave a Reply