Nothing ruins the post-shower experience like stepping out of a steamy bathroom only to realize your ceiling fan has stopped working. The humid air hangs heavy, mirrors stay fogged for minutes, and that musty smell begins to creep in. If your bathroom ceiling fan suddenly quit on you, you’re not alone – this is one of the most common household electrical issues homeowners face. Understanding why bathroom ceiling fans fail and how to address the problem can save you time, money, and prevent potential moisture damage to your home.
Bathroom ceiling fans stop working for specific, identifiable reasons that typically fall into several common categories. The good news is that many issues can be resolved with basic troubleshooting before calling an electrician. In this guide, we’ll walk through the most frequent causes of bathroom ceiling fan failure, how to safely diagnose the problem, and which fixes you can handle yourself versus when to call a professional. You’ll learn not just how to restore airflow but how to prevent future breakdowns that lead to costly moisture damage.
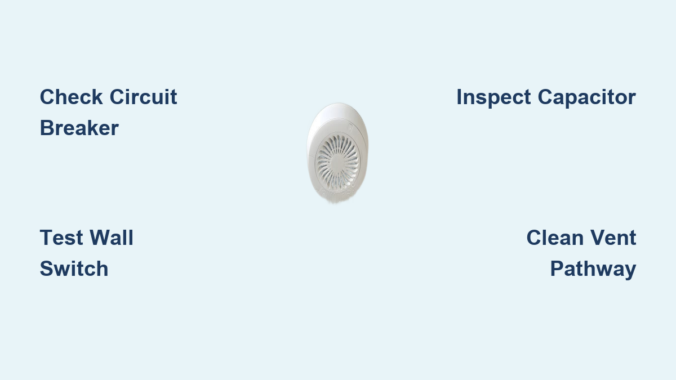
Immediate Checks Before Troubleshooting Your Bathroom Fan
Verify Power Source and Basic Functionality
Before diving into complex repairs, perform these quick checks that solve most “bathroom ceiling fan stopped working” issues:
- Check if the bathroom light still works (if on the same switch)
- Test other outlets in the bathroom to confirm general power
- Locate your home’s circuit breaker panel and verify the bathroom circuit hasn’t tripped
- Try resetting any GFCI outlets in the bathroom or adjacent rooms
If your circuit breaker keeps tripping when you attempt to run the fan, this indicates either an overloaded circuit or a serious electrical issue requiring professional attention. Never repeatedly reset a tripped breaker without identifying the cause.
Switch and Control Testing
Many homeowners overlook the simplest potential culprit – the wall switch itself:
- Toggle the switch multiple times to check for mechanical failure
- Listen for clicking sounds that indicate switch mechanism issues
- Try operating the fan with any remote controls or smart home systems connected
- If your fan has a pull chain, ensure it’s properly engaged (not stuck between settings)
A faulty wall switch is one of the most common reasons bathroom ceiling fans stop working unexpectedly. These switches endure constant humidity exposure which accelerates wear and tear compared to switches in other rooms.
Electrical Components Causing Fan Failure

Motor Burnout Signs and Solutions
When your bathroom ceiling fan stops working completely with no humming sound, the motor has likely failed:
- Listen for unusual grinding, screeching, or humming noises preceding failure
- Check for visible signs of overheating like melted plastic or burnt smells
- Feel for excessive vibration when attempting to operate the fan
Bathroom fan motors typically last 8-15 years depending on usage and humidity exposure. Continuous operation in high-moisture environments without proper ventilation protection accelerates motor wear. If your fan is over 10 years old and stops working, motor replacement is often more cost-effective than repairing individual components.
Capacitor Failure Diagnosis
The capacitor provides the initial electrical boost needed to start the fan motor spinning:
- A failed capacitor often causes the fan to hum but not turn
- Visually inspect for bulging, leaking, or burnt appearance
- Test with a multimeter (only if you’re experienced with electrical testing)
Capacitors are relatively inexpensive components that fail more frequently than motors, especially in humid bathroom environments. Replacing a faulty capacitor can revive a non-working fan for minimal cost compared to motor replacement.
Moisture-Related Damage to Bathroom Fans
Condensation Damage Inside the Housing
Bathroom ceiling fans endure constant moisture exposure that causes unique failure points:
- Check for visible rust or corrosion on metal components
- Inspect wiring connections for green oxidation (sign of moisture damage)
- Look for water droplets or dampness inside the fan housing
Unlike fans in other rooms, bathroom units must withstand daily steam exposure. Over time, even small amounts of moisture infiltration can corrode electrical connections and damage motor windings. Proper installation with adequate ventilation between the fan housing and attic space prevents many moisture-related failures.
Ventilation Pathway Blockages
A stopped fan might actually be a symptom of blocked airflow rather than electrical failure:
- Inspect the exterior vent cap for bird nests or debris accumulation
- Check for disconnected or crushed ducting between fan and roof
- Feel for airflow at the vent while running the fan (if possible)
When bathroom exhaust fans can’t vent properly, moisture backs up into the fan housing, accelerating component failure. A blocked vent pathway causes the fan motor to work harder, leading to premature burnout. Many homeowners don’t realize their fan stopped working because the vent was blocked months earlier.
Safety-First Troubleshooting Approach
Essential Safety Precautions Before Inspection
Never attempt bathroom fan repairs without these critical safety steps:
- Turn off power at the circuit breaker, not just the wall switch
- Use a voltage tester to confirm power is disconnected
- Allow the fan housing to cool completely before handling
- Wear safety glasses to protect from dust and debris
Working on bathroom electrical fixtures involves unique risks due to constant moisture exposure. Water and electricity create potentially lethal combinations, so never skip these safety steps even for “simple” inspections. If you’re uncomfortable with any part of the process, stop and call a licensed electrician.
When to Call a Professional Immediately
Certain warning signs require professional electrical assistance:
- Burning smells or visible smoke when operating the fan
- Water dripping from the fan housing
- Frequent circuit breaker trips that reset immediately
- Physical damage to wiring or electrical components
Attempting DIY repairs on compromised electrical systems risks electrocution, fire hazards, or further damage. Licensed electricians have specialized tools and training to safely diagnose and repair complex bathroom fan issues that go beyond simple component replacement.
Preventative Maintenance to Avoid Future Failures

Regular Cleaning Schedule for Longevity
Extend your bathroom fan’s lifespan with these simple maintenance tasks:
- Clean or replace filters monthly (if your model has them)
- Vacuum dust from the grille and housing every 3-6 months
- Wipe down exterior components with a dry cloth after showering
- Run the fan for 20-30 minutes after each shower to clear moisture
Bathroom fans accumulate more dust and moisture than other household fans. Regular cleaning prevents the buildup that forces motors to work harder, significantly extending operational life. Set phone reminders to clean your fan on a consistent schedule.
Upgrading to Moisture-Resistant Models
When replacement becomes necessary, choose models designed specifically for bathroom environments:
- Look for fans rated for “damp” or “wet” locations
- Select units with stainless steel or plastic housings instead of metal
- Consider models with humidity sensors that auto-adjust runtime
- Install fans with built-in LED lighting to reduce separate fixtures
Modern bathroom exhaust fans incorporate moisture-resistant components that dramatically outlast standard models. The slightly higher upfront cost pays off through longer service life and better moisture control. Properly sized units (measured in CFM) for your bathroom dimensions prevent the constant running that leads to premature failure.
Final Note: A non-working bathroom ceiling fan creates more than just inconvenience—it risks serious moisture damage to your home’s structure. By understanding the common reasons bathroom ceiling fans stop working and following safe troubleshooting procedures, you can address many issues yourself while knowing when professional help is essential. Implementing regular maintenance and selecting appropriate replacement models prevents recurring problems and protects your home from humidity-related damage. Remember that when electrical components meet constant moisture exposure, prevention is always more cost-effective than repair. Keep your bathroom properly ventilated to maintain a healthy, damage-free home environment.
Leave a Reply