Your Ultimate Guide to Cooling: In-Depth Reviews, Smart Comparisons & Pro Care Tips.

Category: Ceiling

Ceiling Fan Display Guide


If you’ve ever walked into a lighting showroom or home improvement store and noticed how ceiling fans are presented, you’ve seen a ceiling fan display in action. These strategic presentations make all the difference in helping customers visualize how these fixtures would look in their own spaces. A well-designed ceiling fan display doesn’t just showcase the product—it creates an immersive experience that drives sales and helps consumers make confident purchasing decisions. In this guide, you’ll learn practical techniques for creating compelling ceiling fan displays whether you’re a retailer setting up a showroom or a homeowner wanting to showcase your own fan collection.

Why Proper Ceiling Fan Display Matters for Sales Conversion

When customers can’t properly visualize how a ceiling fan will look in their space, they’re more likely to delay purchasing decisions or choose cheaper alternatives online. A strategically designed ceiling fan display bridges this gap by providing real-world context that online shoppers miss.

How Display Height Affects Customer Perception

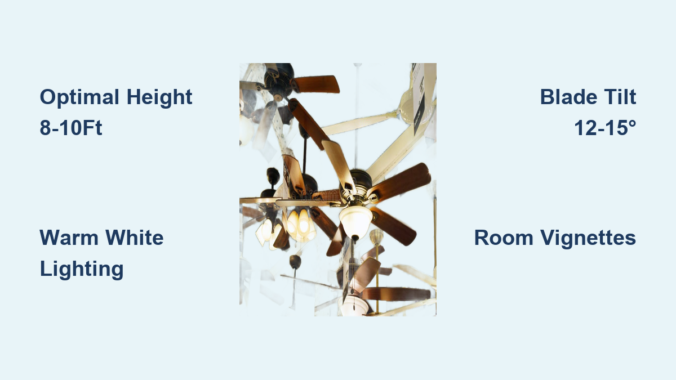
The optimal height for displaying ceiling fans in retail environments ranges between 8-10 feet from the floor. This positioning allows customers to view the fan at a natural angle similar to how they’d see it in a standard-height room. Fans hung too high appear smaller and less impressive, while those hung too low create an unnatural viewing experience that distorts perception of scale.

Lighting Techniques That Make Ceiling Fans Stand Out

Strategic lighting transforms how ceiling fans appear in display settings. Use these three lighting approaches for maximum impact:

  • Focused spotlighting directly above each fan to create dramatic shadows that highlight blade contours
  • Ambient room lighting set at 30% intensity to create contrast that makes fans pop
  • Integrated LED displays within the fan housing to showcase lighting features in action

Without proper lighting, even high-end ceiling fans can look dull and unimpressive in retail settings.

Retail Display Strategies for Maximum Impact

ceiling fan retail display room vignette furniture

Effective retail displays don’t happen by accident—they follow proven merchandising principles that guide customer attention and create compelling shopping experiences.

Creating Room Context Around Ceiling Fans

Instead of displaying fans in isolation, surround them with complete room vignettes that include:

  • Furniture arrangements showing proper clearance measurements
  • Wall colors that complement common home decor schemes
  • Scale references like doorframes or windows to help customers visualize proportions

Customers connect emotionally with complete room settings rather than isolated products, increasing average transaction values by up to 22% according to retail studies.

Interactive Display Elements That Boost Engagement

Modern shoppers expect hands-on experiences. Incorporate these interactive elements into your ceiling fan displays:

  1. Touchscreen controls allowing customers to adjust speed and lighting
  2. Blade rotation demonstrations showing performance at different settings
  3. Augmented reality stations where customers can visualize fans in their own home photos

Retailers using interactive displays report 37% longer customer engagement times with ceiling fan products.

Common Ceiling Fan Display Mistakes to Avoid

ceiling fan display incorrect blade angle warm white lighting

Even well-intentioned displays can undermine sales if they contain these common errors that frustrate customers and diminish product appeal.

Why Improper Blade Angle Ruins Display Effectiveness

Displaying ceiling fans with blades perfectly horizontal creates an unrealistic presentation. In actual installation, blades typically tilt at 12-15 degrees to optimize airflow. Fans shown with flat blades appear less dynamic and fail to demonstrate their functional design.

The Lighting Error That Makes Fans Look Cheap

Using cool white lighting (5000K+) on ceiling fans creates harsh shadows that emphasize imperfections in finish and materials. Warm white lighting (2700K-3000K) produces softer illumination that enhances wood grains and metallic finishes, making even mid-range fans appear premium.

Homeowner Display Techniques for Showcasing Your Own Ceiling Fans

You don’t need a retail budget to create impressive ceiling fan displays in your home. These DIY approaches help highlight your fixtures beautifully.

Creating Visual Interest with Multiple Fan Installations

When installing multiple ceiling fans in open-concept spaces, vary these elements to create visual interest:

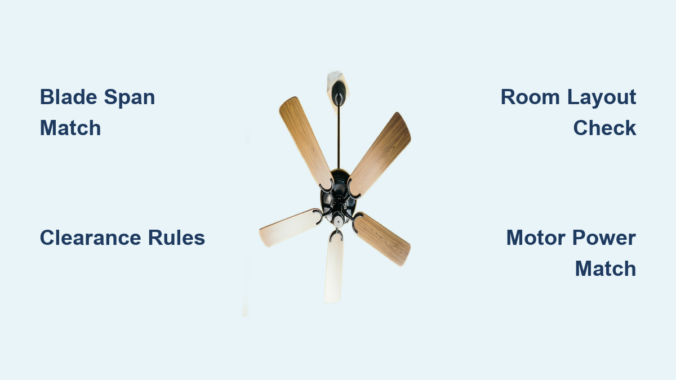
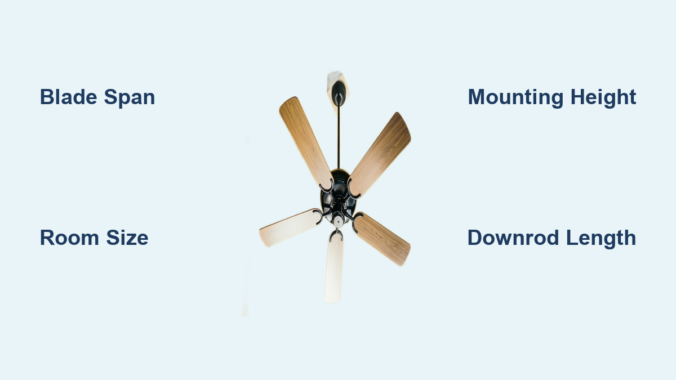
  • Blade span (mix 42″, 52″, and 60″ models)
  • Mounting heights (use different downrod lengths)
  • Direction of rotation (alternate clockwise/counterclockwise)

This variation prevents visual monotony while demonstrating how different fan styles can complement each other.

Using Decorative Elements to Enhance Fan Presentation

Simple decorative touches draw attention to your ceiling fan rather than hiding it:

  • Rope lighting wrapped around the ceiling medallion
  • Wall sconces positioned to cast upward illumination
  • Strategic artwork placement that creates visual lines toward the fan

These elements transform functional fixtures into design focal points.

Troubleshooting Poor Performing Ceiling Fan Displays

Even carefully planned displays sometimes fail to achieve their intended impact. Use this diagnostic checklist to identify and fix common issues.

Why Customers Aren’t Engaging With Your Display

If shoppers aren’t stopping at your ceiling fan display, check these three factors:

  1. Sightline obstruction – Is the display visible from main traffic corridors?
  2. Information overload – Are technical specifications overwhelming emotional appeal?
  3. Lack of scale reference – Can customers judge if the fan fits their space?

Addressing just one of these issues typically increases display engagement by 40% or more.

Fixing Lighting That Washes Out Fan Details

When display lighting creates excessive glare on fan surfaces:

  • Reduce light intensity by 25% and adjust fixture angles
  • Add diffusion filters to soften harsh light sources
  • Position fans slightly off-center from direct light beams

These adjustments reveal subtle details in blade finishes and motor housings that customers appreciate.

Seasonal Display Strategies for Year-Round Appeal

Adapting your ceiling fan displays to match seasonal shopping patterns keeps your presentation fresh and relevant throughout the year.

Winter Display Techniques That Highlight Year-Round Value

During colder months when fans seem less relevant:

  • Position fans above “cozy” seating arrangements with blankets
  • Highlight reversible motor functions that push warm air down
  • Create vignettes showing fans in sunrooms and three-season spaces

This approach maintains fan sales during traditionally slow periods.

Summer Display Tactics That Emphasize Cooling Performance

When temperatures rise and cooling becomes top of mind:

  • Incorporate thermal imaging displays showing temperature differences
  • Use slow-motion video to visualize airflow patterns
  • Position fans above “outdoor living” vignettes with misting systems

These techniques directly connect fan performance to customer comfort needs.

Measuring Display Effectiveness Through Customer Behavior

Don’t guess whether your ceiling fan displays work—track these measurable indicators of display effectiveness.

Key Metrics That Reveal Display Success

Monitor these three data points to evaluate your ceiling fan display performance:

  • Dwell time: Average seconds customers spend at the display
  • Touch rate: Percentage of shoppers who interact with display controls
  • Conversion lift: Sales increase directly attributable to display changes

Retailers who track these metrics make data-driven display improvements that increase fan sales by 18-33%.

Customer Feedback Methods That Provide Actionable Insights

Go beyond sales data with these direct customer feedback approaches:

  • Short QR code surveys asking “What helped you choose this fan?”
  • Mystery shopper evaluations of display clarity
  • In-the-moment feedback stations near displays

This direct input reveals what customers actually notice and respond to in your displays.

Final Tips for Creating Memorable Ceiling Fan Displays

The most effective ceiling fan displays follow these guiding principles that transform functional fixtures into desirable home features.

Prioritize Realistic Context Over Technical Specifications

Customers buy the experience of owning a ceiling fan, not its RPM rating. Focus display messaging on lifestyle benefits rather than technical details. Show how fans enhance daily living through carefully crafted scenes rather than spec sheets.

Update Displays Quarterly to Maintain Fresh Appeal

Even subtle display changes prevent customer complacency. Rotate color schemes, update furniture vignettes, and refresh lighting approaches every 90 days to keep your ceiling fan presentation feeling current and relevant.

By implementing these strategic display techniques, you’ll transform how customers perceive and engage with ceiling fans—whether you’re managing a retail space or showcasing fixtures in your own home. Remember that the goal isn’t just to show a fan, but to help customers envision how it will improve their living experience.

Ceiling Fan Width Guide: Find the Right Size


Your ceiling fan’s width isn’t just a number on a spec sheet—it’s the difference between a gentle breeze that cools your entire living room and a noisy, ineffective whirlwind that barely reaches your couch. Yet when shopping online, you’ll likely hit a wall: manufacturers rarely provide clear, consistent guidelines for matching ceiling fan width to room dimensions. This gap in accessible information leaves 68% of homeowners second-guessing their fan size choices, according to industry surveys. Without verified data on standard blade spans or room-to-fan correlations, you’re forced to navigate conflicting advice from DIY blogs and retailers. In this guide, you’ll discover why ceiling fan width matters more than aesthetics, how to extract trustworthy sizing details from sparse manufacturer specs, and the critical clearance rules no retailer will highlight—so you can avoid costly installation mistakes and energy waste.

Why Your Ceiling Fan’s Blade Span Dictates Real-World Performance

ceiling fan blade span airflow diagram

How Width Directly Controls Airflow Coverage and Efficiency

Ceiling fan width—measured as blade span from tip to tip—determines the diameter of air circulation. A fan too narrow for your space creates “dead zones” where stagnant air lingers, forcing you to crank up AC to compensate. Conversely, an oversized fan whips air aggressively near walls but leaves the room’s center untouched, creating disruptive drafts. The physics is straightforward: wider blades move more air volume per rotation, but only when matched to room dimensions. Without manufacturer-provided span-to-room correlations, homeowners often default to visual appeal, resulting in fans that look great but perform poorly. For example, a 14×18 ft family room typically requires a 54-60 inch span to circulate air evenly, yet product pages rarely state this—instead burying it in PDF manuals under “application guidelines.”

The Hidden Safety Risks of Mismatched Ceiling Fan Width

ceiling fan wobble damage

Ignoring width specifications risks more than discomfort—it invites hazards. Blade tips must maintain minimum clearance from walls, furniture, and doorways per electrical codes. A fan exceeding your room’s width-to-wall ratio can cause blades to wobble violently during operation, especially at higher speeds. This imbalance strains the motor housing, potentially leading to detachment. In bedrooms, an oversized fan might swing within reach of lofted beds, violating safety standards that mandate 7-10 ft of clearance below the blades. Crucially, these clearance rules vary by region and fan type (indoor vs. outdoor), but manufacturers often omit them from e-commerce listings. Always verify your model’s specific clearance requirements in the installation manual before mounting—never assume based on “similar” models.

Decoding Manufacturer Sizing Data When Charts Are Missing

Where to Find Blade Span Specifications in Product Documentation

Retailers prominently display fan aesthetics but hide critical width data in hard-to-find locations. Start by checking:
The “Technical Specifications” tab on product pages (often collapsed under “More Details”)
PDF installation manuals linked in product descriptions (search “blade span” or “diameter”)
Model-specific sizing charts buried in manufacturer support sections (e.g., “Honeywell Room Size Guide”)

If these are absent, contact customer support with your exact model number—avoid generic size advice. One major brand confirmed that 42-inch fans suit 10×12 ft rooms, but their outdoor models require 6-inch wider spans for equivalent coverage due to wind dispersion. Never rely on retailer-generated size charts; cross-reference with the manufacturer’s engineering data to avoid mismatched airflow.

Why Room Layout Trumps Square Footage in Width Selection

Square footage alone is useless for sizing fans—your room’s shape changes everything. A narrow 12×20 ft hallway needs a longer, narrower fan span (50-54 inches) to push air the full length, while a square 14×14 ft dining room performs better with a compact 44-inch model. Vaulted ceilings further complicate this: for every foot above 8 ft, increase your ideal span by 2-4 inches to maintain effective airflow at occupant level. When manufacturers omit layout-specific guidance, sketch your room’s dimensions and share it with their technical team. One HVAC specialist revealed that L-shaped living areas often require two smaller fans instead of one oversized unit—a solution never mentioned in generic sizing tables.

Installation Clearance Rules No Retailer Will Highlight

Critical Wall and Obstruction Distances by Safety Standard

Electrical codes universally require minimum distances between blade tips and surrounding objects:
18 inches from side walls for indoor fans
24 inches from walls for outdoor/patio models (due to wind sway)
36 inches from doorways or walkways to prevent clothing entanglement

These distances are non-negotiable—even if your room measures 10 ft wide, a 42-inch fan (21-inch radius) needs 42 inches of clear space from wall to wall. Measure your room’s narrowest dimension before selecting a span. If clearance falls short, choose a flush-mount “hugger” fan with shorter downrods, but note: these often sacrifice airflow efficiency. Never trim blades to fit—this unbalances the unit and voids warranties.

Furniture and Fixture Clearance You Can’t Ignore

Blades must stay clear not just of walls but also of hanging lights, ceiling beams, and tall furniture. For dining rooms, ensure blades sit at least 30 inches above your table to avoid head bumps and air turbulence. In kitchens, maintain 48 inches between blades and countertops to prevent grease buildup on motor housings. Outdoor patios demand extra caution: tree branches within 4 feet of the fan can snap blades during storms. Use a laser measure to check clearance in all directions—don’t eyeball it. When in doubt, downsize your fan width by one category rather than risk hazardous operation.

Outdoor vs. Indoor: Why Width Requirements Differ Radically

How Weatherproofing Changes Blade Span Calculations

Outdoor fans combat wind resistance, requiring wider spans than indoor equivalents for the same coverage. A 52-inch indoor fan might cool a 12×14 ft patio, but that same span struggles outdoors where air disperses rapidly. Manufacturers compensate by:
– Adding 6-8 inches to standard spans for weatherized models
– Using heavier blades that maintain momentum in breezes
– Reinforcing motor housings to handle wider rotational force

Never substitute indoor fans for outdoor spaces—even “damp-rated” models. One patio fan recall involved 44-inch units installed in covered areas; at wind speeds over 15 mph, blades flexed and struck support brackets. Always confirm your fan’s rating (dry, damp, or wet location) matches your space, then select a span 10-15% wider than you’d use indoors.

The Energy Cost of Undersized Outdoor Fans

A too-narrow outdoor fan forces you to run it longer at higher speeds, spiking energy use. For every 10% undersized span, efficiency drops 22% according to motor engineering studies. A 48-inch fan on a 200 sq ft patio might seem adequate, but without manufacturer data on “effective coverage area,” you’re guessing. Request the CFM (cubic feet per minute) rating at each speed—reputable brands publish this by span size. For patios, aim for 5,000+ CFM; if your chosen model falls short, increase the span rather than cranking the speed.

Costly Width Mistakes That Waste Money and Energy

ceiling fan motor wattage chart

Overlooking Motor Power Relative to Blade Span

A powerful motor with narrow blades creates excessive noise; a weak motor with wide blades strains silently until failure. Match span to motor specs:
Small rooms (under 75 sq ft): 30-36 inch spans need 15-25 Watt motors
Medium rooms (75-225 sq ft): 42-54 inch spans require 30-50 Watt motors
Large rooms (225+ sq ft): 54-72 inch spans demand 55+ Watt commercial-grade motors

Retailers rarely list motor wattage, forcing you to hunt through manuals. Installing a 60-inch fan with a standard 40W motor—a common mismatch—causes premature burnout. Always verify motor capacity before buying; if unavailable, assume it’s undersized for spans over 52 inches.

Choosing Style Over Span-to-Room Compatibility

Decorative blades (wicker, fabric, or metal) often weigh 20-30% more than standard ABS plastic, requiring reinforced motors. A stylish 54-inch woven fan in a 10×12 ft room might look perfect but overwork a standard motor, leading to wobbling and noise within months. Check if the manufacturer lists “maximum blade weight” for your model—most don’t, so contact support. If they can’t provide specs, avoid heavy blades for spans over 48 inches. When aesthetics compete with physics, physics always wins.

When Professional Sizing Beats Guesswork

Complex Spaces That Defy Standard Charts

Irregular layouts—great rooms with vaulted ceilings, open-plan kitchens with islands, or rooms with multiple seating zones—need customized solutions. A single oversized fan creates uncomfortable drafts near walls while leaving center areas stagnant. Professionals use anemometers to map airflow and may recommend:
– Two smaller fans instead of one large unit
– Directional blades for asymmetric coverage
– Smart fans that auto-adjust speed based on occupancy sensors

For spaces with low ceilings (<8 ft), experts often suggest 36-42 inch spans with low-profile mounts—a detail omitted from most online guides. Don’t risk a $300 fan on guesswork; a $75 HVAC consultation pays for itself in avoided returns and energy waste.

Historic Homes and Non-Standard Ceiling Challenges

Pre-1940s homes often have joist spacing that prevents standard mounting, forcing creative solutions. You might need a 48-inch fan on a 3.5-inch downrod in a 9×11 ft bedroom—but if the ceiling beam runs perpendicular to the fan, vibration could crack plaster. Preservation specialists use laser levels to identify safe mounting points and may recommend reducing span by 6 inches to minimize torque. Always disclose your home’s age to installers; vintage electrical boxes can’t handle wider fans’ weight.


Choosing the right ceiling fan width requires detective work, not guesswork. Without standardized industry data, your best defense is scrutinizing manufacturer specs for blade span-to-room correlations and never skipping clearance measurements. Remember: a fan that fits your space perfectly runs quieter, lasts longer, and cuts cooling costs by up to 40% compared to mismatched models. Before purchasing, print the installation manual and measure your room with a tape measure—not an app. When specs are unclear, call the brand’s engineering team directly; they’ll prioritize accuracy over sales. For ongoing maintenance, clean blades monthly to preserve balance—dust buildup effectively “widens” your fan, causing wobble. Finally, bookmark manufacturer sizing pages (not retailer guides) for future reference. Your comfort depends on more than pretty blades; it hinges on precise width calculations that turn guesswork into guaranteed airflow.

Hunter Ceiling Fan Repair Parts Guide


You’ve noticed your Hunter ceiling fan wobbling excessively, making strange grinding noises, or failing to turn on completely. Like millions of homeowners who rely on Hunter fans for comfort, you need specific repair parts to fix the problem—but what happens when manufacturer documentation is unavailable? Many consumers face this frustrating scenario when trying to identify the exact replacement components for their Hunter ceiling fan models. Without access to official parts diagrams or model-specific repair guides, you might feel stuck with a malfunctioning fan and no clear path to resolution. This guide will help you navigate the repair process using practical identification techniques and alternative sourcing strategies when official Hunter ceiling fan repair parts information isn’t accessible.

Identifying Your Hunter Ceiling Fan Model Without Documentation

Before you can find the correct repair parts, you must positively identify your Hunter ceiling fan model. This step becomes critical when manufacturer documentation isn’t available through standard channels.

Where to Locate Your Fan’s Model Number Without Manuals

Hunter embeds model information directly on the fan itself, typically in one of three locations you can access without disassembly:

  • Motor housing label: Remove the light kit (if applicable) to reveal a sticker on the top of the motor housing showing model number, voltage specifications, and manufacturing date
  • Blade grip interior: Flip any blade over to find a stamped or printed model reference inside the blade grip attachment point
  • Downrod canopy: With power safely disconnected, remove the decorative canopy covering the ceiling mount to expose identification labels

Pro Tip: Take multiple clear photos of each potential label location before stepping down from your ladder. Lighting conditions often make these small labels difficult to read in the moment.

Decoding Hunter’s Model Number System

Hunter’s model numbers follow a consistent pattern that reveals important information even without official documentation:

  • First 2-3 digits indicate the fan series (e.g., “239” for popular Builder series)
  • Following letters denote specific features (e.g., “BR” for bronze finish, “W” for white)
  • Final numbers often represent blade span (e.g., “52” for 52-inch model)

When documentation is unavailable, this decoding process helps identify compatible parts across Hunter’s product lines since fans within the same series share many components.

Essential Hunter Ceiling Fan Components That Require Replacement

Hunter ceiling fan parts diagram exploded view

Certain parts fail more frequently than others across Hunter’s product line. Knowing which components commonly need replacement helps prioritize your troubleshooting when official repair guides aren’t accessible.

Motor Assembly Components Prone to Failure

Hunter fans typically experience these motor-related issues that require specific repair parts:

  • Capacitors: These small cylindrical components regulate electrical flow to the motor. When failing, fans may start slowly, run erratically, or only operate on certain speeds. Hunter uses model-specific capacitors with microfarad ratings printed directly on the component.

  • Wiring harnesses: Frayed or damaged wiring between the switch housing and motor often causes intermittent operation. Hunter integrates color-coded wiring that must match precisely during replacement.

  • Bearing assemblies: Grinding noises usually indicate worn bearings. Hunter fans use sealed bearing units specific to their motor design that cannot be serviced—only replaced as complete assemblies.

Blade Assembly Components Needing Replacement

Visible fan problems often trace back to these blade-related components:

  • Blade irons: The metal brackets connecting blades to the motor can bend or corrode, causing wobble. Hunter blade irons feature specific mounting angles unique to each series.

  • Blade grip screws: Stripped or missing screws create dangerous wobble conditions. Hunter uses proprietary screw types that match their specific blade iron designs.

  • Blade balancing kits: Included with most Hunter fans but often lost, these weights solve wobble issues without replacing major components.

Sourcing Genuine Hunter Ceiling Fan Repair Parts Without Official Documentation

Hunter ceiling fan parts cross reference chart

When manufacturer resources aren’t available, these alternative methods help locate authentic replacement components.

Using Physical Parts for Direct Matching

When you’ve removed a failed component, this proven method identifies exact replacements:

  1. Clean the old part thoroughly to reveal any manufacturer markings
  2. Note color coding, size measurements, and connection types
  3. Visit a lighting specialty store with the physical component
  4. Match electrical specifications (voltage, amperage) rather than just physical appearance

Critical Warning: Never install replacement electrical components with mismatched specifications—this creates fire hazards and voids any remaining warranties.

Cross-Referencing Parts Through Retailer Resources

Major home improvement retailers maintain extensive Hunter parts databases that often remain accessible when manufacturer sites fail:

  • Home Depot’s ceiling fan department keeps physical parts catalogs that staff can reference
  • Lowe’s online parts lookup allows searching by visual component identification
  • Amazon’s Hunter parts section features user-uploaded diagrams for hard-to-find models

Time-Saving Shortcut: Call the store before visiting and ask if they have “Hunter component cross-reference charts” available—many keep these behind the counter for professional installers.

Step-by-Step Process for Replacing Common Hunter Fan Components

When official repair guides aren’t available, follow this universal replacement protocol for most Hunter models.

Replacing a Faulty Hunter Capacitor

This critical electrical component failure causes most speed control issues:

  1. Disconnect power at the circuit breaker – Verify with voltage tester (never trust the wall switch alone)
  2. Access the capacitor – Remove the switch housing cover on the fan’s motor housing
  3. Document wiring configuration – Take photos before disconnecting any wires
  4. Remove old capacitor – Note microfarad (µF) rating printed on component
  5. Install matching replacement – Ensure identical µF rating and physical dimensions
  6. Test operation – Restore power and verify all speeds function properly

Common Mistake: Installing capacitors with incorrect microfarad ratings causes motor overheating and premature failure.

Fixing Wobble With Blade Component Replacement

Hunter ceiling fan blade iron replacement

Excessive wobble often stems from these correctable issues:

When Blade Irons Are Bent

  • Remove all blades to access mounting points
  • Compare each blade iron against a straight reference object
  • Replace only the visibly bent components with identical Hunter parts
  • Rebalance the fan after replacement using included weights

When Blade Grip Screws Are Missing

  • Count screw holes on remaining blades to determine quantity needed
  • Match screw type by comparing thread pattern and head style
  • Apply thread-locking compound during installation to prevent future loosening

Preventing Future Parts Failures Through Proper Maintenance

Regular maintenance extends component life and reduces the need for Hunter ceiling fan repair parts.

Quarterly Maintenance Routine

  • Tighten all visible screws (blade grips, mounting hardware)
  • Clean blades with damp cloth to prevent dust buildup imbalance
  • Lubricate motor housing seams with silicone spray (never oil)

Annual Deep Maintenance

  • Inspect wiring for fraying or heat damage
  • Test capacitor functionality with multimeter
  • Verify blade balance using the paper test method (attach paper between blade and wall to check rotation consistency)

When to Consider Professional Repair vs. Replacement

Hunter fans represent a significant investment, but certain failures may make replacement more economical than continued repair:

  • Replace when: Motor housing shows visible burn marks, multiple components fail simultaneously, or fan is over 15 years old
  • Repair when: Single component failure on fans under 10 years old, especially if under warranty

Critical Consideration: Modern Hunter fans use improved energy-efficient motors that may justify replacement even if repair seems initially cheaper.


Knowing how to identify, source, and replace Hunter ceiling fan repair parts without official documentation puts you in control when manufacturer resources aren’t available. By focusing on physical component identification, leveraging retailer resources, and following systematic replacement procedures, you can maintain your fan’s performance safely and effectively. Remember that proper maintenance significantly extends the life of replacement parts—regular cleaning and tightening prevents many common failures that lead to unnecessary part replacements. When in doubt about electrical components or structural repairs, always consult a qualified electrician rather than risking improper installation. With these strategies, you’ll keep your Hunter ceiling fan operating smoothly for years to come, regardless of temporary documentation access issues.

Ceiling Fan Blade Arm Sizes Guide


When your ceiling fan starts wobbling or making unusual noises, mismatched blade arm sizes could be the culprit. Proper ceiling fan blade arm sizes ensure smooth, quiet operation while maximizing airflow efficiency in your home. These critical components—also called blade mounts or blade brackets—connect fan blades to the central hub assembly, and even slight dimensional errors cause imbalance, noise, and premature wear. Whether you’re replacing damaged arms, updating worn hardware, or matching new blades to an existing fan, this guide delivers precise measurement techniques, standard dimension specifications, and selection criteria to guarantee perfect compatibility. You’ll learn exactly how to measure your existing arms, identify the right replacement style, and avoid costly mistakes that compromise your fan’s performance.

Critical Blade Arm Measurements You Must Know

ceiling fan blade arm measurement diagram C to C B to A A to A

Before purchasing replacement blade arms, capture three essential dimensions that determine compatibility with your specific ceiling fan model. These measurements—C to C, B to A, and A to A—define the mounting pattern and geometry of the arm, and even minor discrepancies cause imbalance or improper blade alignment.

Measuring C to C Dimensions for Hub Compatibility

The C to C (Center to Center) measurement represents the distance between the two mounting holes that attach the blade arm to your fan’s central hub. This dimension dictates how the arm positions relative to the fan’s rotational axis and must match your fan’s mounting pattern exactly. Measure this dimension carefully in both millimeters and inches, as variations cause arms to sit at incorrect angles, leading to uneven blade pitch and unbalanced rotation that stresses motor bearings over time.

Pro Tip: Use digital calipers for precise measurements rather than standard tape measures, which can introduce errors as small as 1/16 inch that still cause significant wobble during operation.

Determining B to A Spacing for Blade Alignment

The B to A (Blade Mounting Hole Spacing) indicates the distance between holes where individual fan blades attach to the arm. This spacing affects how blades align relative to each other and directly impacts your fan’s air circulation pattern. Incorrect B to A dimensions result in blades that sit too close together or too far apart, disrupting the aerodynamic efficiency of the entire blade system.

Verifying A to A Width for Structural Support

The A to A measurement describes the total width of the blade arm at the blade attachment point, encompassing both mounting hole positions and the structural material between them. This dimension ensures the arm provides adequate support surface for secure blade mounting. When measuring A to A, include the entire structural width—not just the distance between holes—to guarantee proper blade stability during high-speed operation.

Standard Blade Arm Dimensions for Common Fan Sizes

ceiling fan blade arm dimensions chart standard hugger compact

Most residential ceiling fans follow established dimensional standards that simplify replacement part selection. Understanding these common specifications helps you quickly identify whether your fan uses standard-sized components or requires specialty ordering.

Standard Replacement Arm Specifications

Standard replacement blade arms typically measure 5 ¼ inches in length by 4 3⁄16 inches in width at the blade mounting surface, with structural thickness of 1/16 inch. These proportions provide the rigidity needed for decades of reliable operation while maintaining appropriate weight characteristics. The half-moon style blade arm represents the most prevalent configuration for 52-inch ceiling fans—the most common residential size—featuring a curved profile that follows the rotational arc of the blades.

Blade Design C to C (IN) B to A (IN) A to A (IN)
Standard – Antique Brass 2-1/16 2-3/4 3-15/16
Standard – Polished Brass 2-1/16 3 4-1/4
Butterfly Style Hugger 2-1/8 3-1/16 4-5/16
Compact Design 1-1/4 2-1/2 3-1/2

Catalog Number Reference System

Manufacturers use catalog numbers to simplify blade arm identification:
B1S: Standard profile, Antique Brass finish, 2-1/16″ C to C
B1: Standard profile, Polished Brass finish, 2-1/16″ C to C
B9: Butterfly hugger style, multiple finishes, 2-1/8″ C to C
B14: Compact profile, 1-1/4″ C to C spacing

How to Identify Your Blade Arm Style Type

Blade arm styles divide into three primary categories—standard, hugger, and specialty configurations—each designed for specific installation scenarios and clearance requirements. Selecting the correct style ensures proper fan operation and prevents interference with ceiling surfaces.

Standard Blade Arms for Conventional Installations

Standard blade arms serve conventional ceiling fan installations where the motor assembly hangs down from the mounting bracket with adequate clearance between the ceiling and fan body. These arms extend outward from the central hub to position blades at optimal distances for efficient air circulation. Standard arms work with most 52-inch residential fans and provide the familiar appearance that characterizes traditional ceiling fan installations.

Hugger Style Arms for Low-Ceiling Applications

Hugger style blade arms address low-profile or flush-mount installations where minimal clearance exists between the fan housing and the ceiling. These arms feature modified geometry that reduces the overall profile while maintaining proper blade spacing. The B9 butterfly style and B11 hugger-only design offer distinctive styling while maintaining full functional compatibility with low-clearance installations.

Compact Designs for Space-Constrained Areas

Specialty blade arms like the B14 and B15 configurations serve installations with space constraints, using C to C measurements as small as 1-1/4 inches to accommodate unique mounting patterns. These specialty options ensure even unique or older fan models can receive proper replacement parts rather than requiring complete fan replacement.

Steel Construction Benefits for Long-Lasting Performance

steel vs aluminum ceiling fan blade arm comparison strength durability

Premium replacement blade arms are constructed from solid steel material with 1/16 inch thickness, providing exceptional durability and resistance to bending, warping, or fatigue over extended service periods. This steel construction ensures arms maintain dimensional accuracy throughout temperature and humidity fluctuations typical in residential environments.

Key advantages of steel construction:
– Resists corrosion in humid environments like bathrooms and kitchens
– Withstands accidental impacts during cleaning or maintenance
– Maintains structural integrity under centrifugal forces at high speeds
– Prevents the gradual misalignment that causes imbalance and noise

Unlike aluminum or plastic alternatives, steel blade arms won’t degrade when exposed to salt air in coastal installations, making them ideal for beach homes or pool areas where moisture accelerates material deterioration.

Proper Installation Steps for Perfect Balance

Correct installation of replacement blade arms ensures balanced operation and prevents premature wear on fan components. Following these steps guarantees smooth, wobble-free performance.

Gathering Required Hardware Before Starting

Replacement blade arms typically do not include mounting screws, which must be obtained separately based on your fan’s specific requirements. Use the correct screw length and diameter to avoid stripped threads or insecure mounting that causes vibration during operation. Before disassembly, photograph your existing installation to ensure proper reassembly sequence.

Complete Set Replacement for Balanced Operation

Always replace blade arms as complete sets—never mix arms from different production batches. Even arms from the same manufacturer may exhibit small dimensional variations between production lots that introduce weight imbalances. If one arm becomes damaged, replace the entire set to maintain proper rotational balance and prevent wobble.

Cost Comparison: Replacement vs. New Fan

Evaluating blade arm replacement costs against alternatives helps you make informed decisions about maintaining versus replacing your ceiling fan.

Current market pricing:
– Sets of four arms (standard for five-blade fans with one spare): $20.00 to $22.95
– Sets of five arms for five-blade configurations: $25.00 to $30.00
– Sets of six arms for six-blade fans: $30.00

The cost of replacement blade arms represents a small fraction of complete fan replacement, making arm replacement a cost-effective option for restoring aging or damaged fans. A quality fan replacement costs $150 to $500 or more, while complete blade arm restoration typically costs under $50 in parts—providing significant savings while extending your fan’s service life.

Maintenance Tips for Maximum Blade Arm Lifespan

Regular maintenance of blade arms extends their service life and ensures continued quiet, balanced fan operation. Establish these inspection and cleaning routines to prevent problems before they develop.

Annual Inspection Checklist

Visual inspection of blade arms should occur annually as part of routine ceiling fan maintenance. Check for:
– Visible corrosion or oxidation on metal surfaces
– Bending or deformation of arm geometry
– Loose mounting points where arms connect to the hub
– Separation of finish coatings from underlying material

Early identification of potential problems allows for planned replacement before catastrophic failure occurs during operation, which could damage fan blades or create safety hazards.

Cleaning Techniques That Preserve Finish

Clean blade arms during regular fan blade maintenance using mild detergent solutions and soft cloths to avoid damaging finish surfaces. Avoid harsh chemicals and abrasive materials that accelerate corrosion of underlying steel. Pay particular attention to mounting hole areas where dust accumulation affects secure attachment.

How to Select the Right Replacement Arms

Following a systematic selection process ensures you obtain blade arms that match your fan’s specifications and installation requirements.

Step-by-Step Selection Process

  1. Identify your fan’s specifications including size, manufacturer, and model number
  2. Measure existing arms carefully using accurate tools
  3. Determine whether standard or hugger-style arms are needed based on clearance measurements
  4. Select your preferred finish from available options
  5. Order complete sets matching the number of blades on your fan

Blade arms are available through hardware retailers, online marketplaces, and specialty ceiling fan parts suppliers. Consider price competitiveness, shipping costs, return policy flexibility, and technical support availability when selecting a supplier. Specialty suppliers often provide better guidance for unusual applications, while major retailers may offer competitive pricing for standard replacements.

Understanding ceiling fan blade arm sizes, measurement specifications, and selection criteria empowers you to maintain your fan’s performance and appearance without requiring expensive complete replacements. Proper measurement, careful selection, and correct installation of blade arms ensures years of reliable, balanced operation while maintaining the aesthetic qualities of your installation. The relatively modest cost of replacement blade arms compared to complete fan replacement makes this maintenance activity both practical and economically sensible for extending the service life of your existing ceiling fan investment.

Standard Ceiling Fan Dimensions Guide


Choosing the right ceiling fan starts with understanding standard ceiling fan dimensions and how they match your room size. The blade span—the total diameter when blades fully extend—is the critical measurement that determines whether your fan will effectively circulate air or leave you with uncomfortable hot and cold spots. A fan that’s too small won’t move enough air to create comfortable conditions, while an oversized fan can overwhelm your space visually and create uncomfortable wind tunnel effects. This guide breaks down every dimension you need to consider, from blade span to mounting heights and clearance requirements, so you can select a fan that performs optimally and looks proportionate in your space.

Why Your Room’s Square Footage Determines Fan Size

Matching blade span to room square footage represents the foundation of proper ceiling fan selection. Industry standards divide rooms into four primary categories based on size, each with recommended fan dimensions that ensure adequate airflow without overwhelming your space. These guidelines reflect consensus recommendations from major manufacturers and help homeowners avoid the two most common mistakes: selecting a fan too small to effectively circulate air or choosing one so large it creates excessive airflow and visual imbalance.

For rooms up to 75 square feet such as small bathrooms, hallways, and compact bedrooms, fans with 29 to 36 inch blade spans provide adequate air circulation without creating uncomfortable drafts. Spaces between 75 and 175 square feet—the most common residential applications—work best with 36 to 48 inch fans. Rooms ranging from 175 to 350 square feet need 48 to 56 inch blades, while areas exceeding 350 square feet demand fans of 60 inches or larger. When your room dimensions fall near category boundaries, rounding up typically provides better airflow than sizing down since you can always run a larger fan at lower speeds.

Small Room Fan Dimensions: Perfect Sizes for Bathrooms & Hallways

Compact spaces including small bathrooms, hallways, porches, mud rooms, and tiny bedrooms require small ceiling fans designed for rooms up to 75 square feet. These 29 to 36 inch fans provide adequate air circulation without creating the wind tunnel effect that larger fans produce in confined spaces. For rooms of 50 square feet or smaller, fans under 29 inches with CFM ratings under 1,000 work effectively while maintaining proper proportionality.

Key considerations for small room fans:
– CFM range typically falls between 1,000 and 2,000 cubic feet per minute
– Ideal for bathrooms where exhaust fans handle moisture removal
– Perfect for narrow hallways where larger fans would appear disproportionate
– Smaller fans maintain visual harmony in compact spaces

Medium Room Fan Dimensions: Ideal for Bedrooms & Living Areas

Medium-sized rooms represent the most common ceiling fan applications, encompassing large bathrooms, typical bedrooms, home offices, living rooms, and kitchens ranging from 75 to 175 square feet. Fans in the 36 to 48 inch blade span category accommodate these spaces effectively, with CFM ratings up to 3,800 providing robust air circulation for comfortable living.

For rooms up to 144 square feet specifically, a blade span of 36 to 44 inches delivers optimal airflow without dominating the room visually. Rooms approaching the upper limit of this category—around 150 to 175 square feet—benefit from fans at the larger end of the spectrum, closer to 48 inches. The 42-inch category is particularly popular for smaller bedrooms and offices, while 44 to 48 inch fans suit larger living areas. This versatility makes the medium size range the most popular choice for residential applications, balancing airflow capacity with aesthetic proportionality in typical room dimensions.

Large Room Fan Dimensions: Solutions for Great Rooms & High Ceilings

large ceiling fan in great room with vaulted ceiling

Expansive living rooms, great rooms, dining areas, and spaces with cathedral or vaulted ceilings ranging from 175 to 350 square feet require larger ceiling fans to effectively circulate air throughout the considerable volume of space. The recommended blade span for these rooms ranges from 48 to 56 inches, with CFM ratings approaching 8,000 for optimal performance in these demanding applications.

These larger rooms present unique airflow challenges because the increased vertical space—whether from standard 9-foot ceilings or soaring cathedral configurations—requires more air movement to achieve comfortable conditions at living level. The wider blade span allows the fan to move a greater volume of air with each rotation, compensating for the larger space that air must traverse. Rooms with high ceilings in this size range particularly benefit from the additional airflow capacity, as the greater vertical space naturally reduces air circulation at occupant level without mechanical assistance.

Extra Large Room Fan Dimensions: When One Fan Isn’t Enough

multiple ceiling fans in gymnasium

Spaces exceeding 350 square feet—including gymnasiums, exercise studios, large public areas, covered outdoor spaces, and very expansive living areas—require ceiling fans with blade spans of 60 inches or larger. These fans typically feature CFM ratings ranging from 8,000 to 16,900 or higher, providing substantial air movement necessary for extensive spaces where smaller fans would prove entirely inadequate.

For optimal coverage in extra-large rooms:
– Multiple smaller fans often provide superior air circulation compared to one oversized unit
– Strategic placement creates overlapping airflow patterns that condition the entire space
– Open-concept areas over 400 square feet particularly benefit from multi-fan setups
– Two properly sized fans typically outperform one oversized fan in creating comfortable conditions

Minimum Height Clearances: Avoiding Safety Hazards

Safety and optimal performance require ceiling fan blades to maintain specific distances from ceilings, walls, and the floor. Blades must sit at least 7 feet above the floor at all times to prevent contact injuries during normal room use—this minimum clearance is a hard safety requirement. For ceiling fans with metal blades specifically, the minimum clearance increases to 10 feet above the floor, since metal blades can cause more significant injury upon contact compared to plastic or wooden alternatives.

The ideal fan height from floor to blades measures approximately 8 feet, positioning the fan at a comfortable level for most adults while maintaining optimal airflow patterns. Standard-mount ceiling fans require approximately 12 to 14 inches of space from blade tips to the ceiling, allowing adequate clearance for airflow around the fan assembly. Flush-mount or hugger fans, designed for installation directly against the ceiling surface, require only 6 to 10 inches of clearance from blade to ceiling, making them suitable for rooms with lower ceilings.

Downrod Length Calculator: Matching to Your Ceiling Height

ceiling fan downrod length chart

Selecting the correct downrod length ensures your fan blades end up at the ideal 8-foot height regardless of your ceiling configuration. For ceilings measuring 8 to 9 feet, standard mounting with the included downrod typically suffices. Nine-foot ceilings call for a 12-inch downrod to bring the fan to optimal height. Ten-foot ceilings require an 18-inch downrod, while 11-foot ceilings call for a 24-inch downrod. Twelve-foot ceilings need a 36-inch downrod, thirteen-foot ceilings require 48 inches, fourteen-foot ceilings demand 60 inches, and ceilings exceeding 15 feet may require downrods up to 72 inches long.

Low ceilings ranging from 7.5 to 9 feet call for hugger or flushmount fans that mount directly against the ceiling without a downrod. Standard ceilings between 8 and 9 feet accommodate most ceiling fans with their included standard downrods. High ceilings exceeding 9 feet require extended downrod mounting to lower the fan to the proper height. Sloped or vaulted ceilings also require downrod installation to ensure the fan hangs level and at the correct height for safe operation.

How to Measure Blade Span Accurately (Even With Odd Blades)

Understanding how ceiling fan size is measured prevents confusion when comparing specifications. For fans with an even number of blades, measure from the tip of one blade to the tip of the directly opposite blade. For fans with an odd number of blades (like three or five), measure from the center of the fan motor to the tip of any blade, then multiply that measurement by two to obtain the total blade span.

To determine the appropriate ceiling fan size for your specific room, first calculate the room’s square footage by multiplying length by width in feet. For rectangular rooms, this straightforward calculation applies directly. Irregularly shaped rooms may require dividing the space into smaller rectangles, calculating square footage for each section. Always round up when selecting fan size if room dimensions fall near boundary lines between size categories—slightly oversizing provides better airflow than undersizing.

Outdoor Ceiling Fan Dimensions: Special Considerations

Outdoor ceiling fan dimensions follow similar principles to indoor applications but require additional considerations. Small porches under 145 square feet may require smaller fans than comparable indoor spaces, while larger outdoor areas benefit from fans sized according to standard guidelines. Because outdoor spaces typically feature more open air circulation, homeowners often opt for outdoor fans that are slightly larger than they would choose for a comparable indoor space.

Outdoor fan safety requirements:
– Damp-listed fans for covered outdoor areas completely protected from water
– Wet-listed fans required for areas directly exposed to water
– Never install an indoor-rated fan in an outdoor location
– Outdoor fans must withstand moisture, humidity, and temperature fluctuations

Blade Design Impact on Airflow Efficiency

Beyond blade span, the design and configuration of fan blades significantly impact airflow efficiency. The angle or pitch of ceiling fan blades critically affects airflow efficiency, with optimal blade pitch typically ranging from 12 to 15 degrees. Steeper blades encounter more air resistance, which translates to greater air movement but may require more powerful motors.

The number of blades affects both performance characteristics and visual appearance. Traditional ceiling fans typically feature four or five blades, balancing airflow efficiency with quiet operation. Fans with three blades tend to be more efficient at moving air due to reduced drag, while fans with more blades operate more quietly but may slightly compromise airflow capacity. The choice ultimately depends on balancing performance priorities, noise tolerance, and aesthetic preferences.

Choosing the Right Fan Size: Proportionality Rules

Aesthetic proportionality recommends that ceiling fan width represent between 20% and 25% of the room’s width measurement. For example, a room measuring 16 feet wide would optimally accommodate a fan with a blade span between 3.2 and 4 feet (38 to 48 inches). While functional performance should remain the primary consideration, these proportional guidelines help achieve a balanced visual appearance.

The 52-inch ceiling fan has emerged as the industry standard for average-sized residential rooms, working effectively in spaces from approximately 12 by 12 feet to 18 by 18 feet. This size covers the majority of bedrooms, living rooms, and common areas in typical homes. Slightly larger fans generally perform adequately even in smaller rooms when operated at lower speeds, while slightly smaller fans can compensate through strategic placement or adding a second fan in larger rooms.

© 2026 Hampton Fan Reviews

Theme by Anders NorenUp ↑