Your Ultimate Guide to Cooling: In-Depth Reviews, Smart Comparisons & Pro Care Tips.

Category: Tips (Page 12 of 22)

How to Replace Ceiling Fan Chain – Easy Fix Guide


That familiar “snap” when your ceiling fan pull chain breaks leaves you stranded with no control over your fan’s speed or lights. Learning how to replace chain on ceiling fan is a simple DIY fix that takes less than an hour and costs under $20—no electrician required. Most homeowners can complete this repair using basic tools they already own, restoring full control over fan speed settings and lighting functions without professional help. This guide walks you through every critical step, from safely disconnecting power to testing your new chain, ensuring you avoid common mistakes that could leave your fan useless or create electrical hazards.

The pull chain mechanism connects your physical pull to the internal switch controlling electricity flow to your fan motor or light kit. When the chain breaks or stops clicking, the entire assembly typically needs replacement since individual components aren’t sold separately. Understanding your specific fan model’s switch type and following proper safety procedures makes this repair accessible even for beginners. By the end of this guide, you’ll know exactly how to replace chain on ceiling fan safely and correctly, with troubleshooting tips for common issues that arise during installation.

Why Ceiling Fan Chains Fail

Wear from Regular Use

Daily pulls gradually wear down the internal switch contacts that complete electrical circuits. Metal chain links stretch and weaken over time, while plastic components become brittle and crack. Most pull chains withstand thousands of cycles, but fans in high-traffic areas like bedrooms may need replacement every 2-3 years. You’ll notice reduced “click” sensation before complete failure occurs.

Damage and Accidental Stress

Yanking the chain too hard—especially when reaching from below—can disconnect internal linkages or break the chain entirely. Tangled chains caught on objects or pulled by children suffer similar damage. Dust accumulation inside the switch housing interferes with smooth operation, while bathroom humidity accelerates metal corrosion. These issues compound over time until the chain snaps or stops functioning.

Signs You Need Replacement

Watch for these warning signs: a chain that moves freely without clicking indicates internal switch failure. Intermittent operation where the fan responds inconsistently to pulls suggests worn contacts. Visible damage like broken links, frayed cord, or missing beads means immediate replacement is needed. Address these issues before complete failure leaves your fan uncontrollable.

Gather Essential Tools First

ceiling fan repair tool kit

Basic Tool Requirements

You’ll need a screwdriver set (both flathead and Phillips), needle-nose pliers for manipulating small components, and a flashlight to illuminate the dim switch housing interior. These basic tools cost under $15 if you don’t already own them. A magnetic tray prevents dropped screws from disappearing into carpet fibers.

Access and Safety Equipment

Use a sturdy step ladder positioned on level ground with three points of contact maintained at all times. Clear furniture from beneath the fan before starting. Power off at the breaker—not just the wall switch—is non-negotiable for safety. A non-contact voltage tester ($5-$10) verifies power disconnection before touching any components.

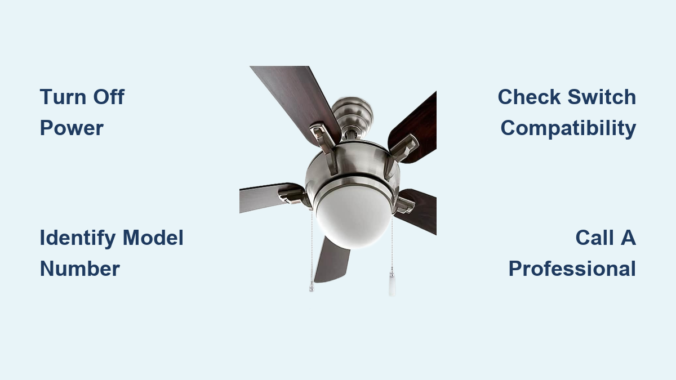
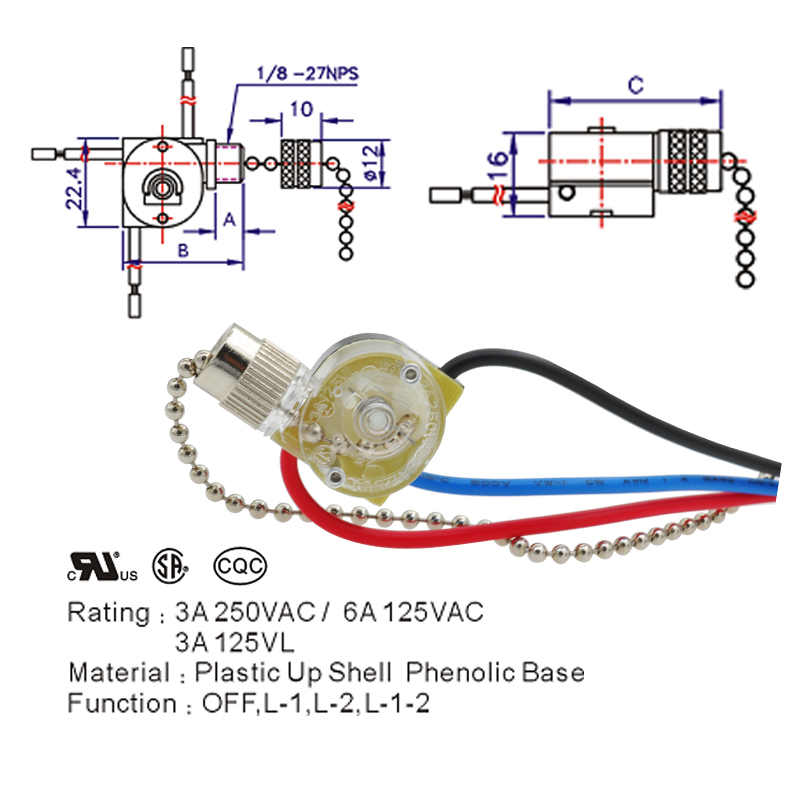
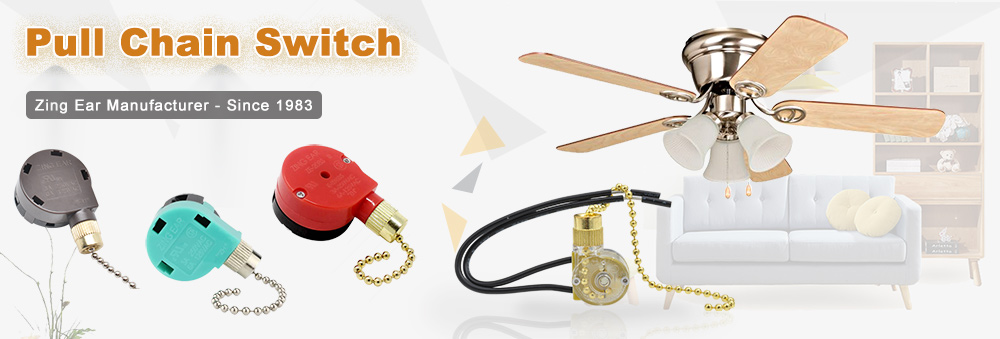
Selecting Replacement Parts

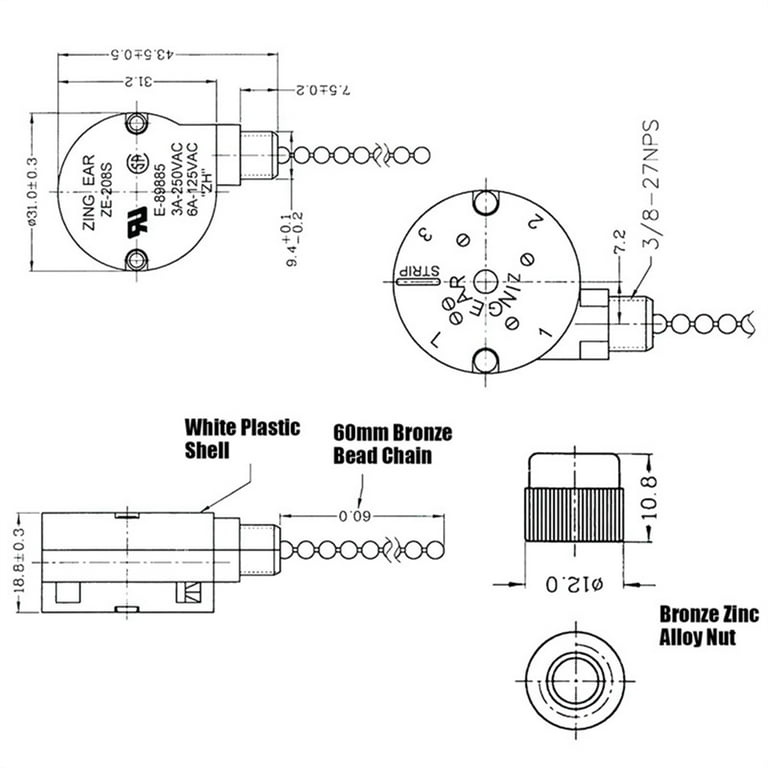
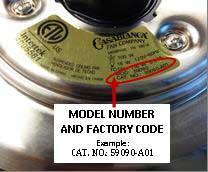
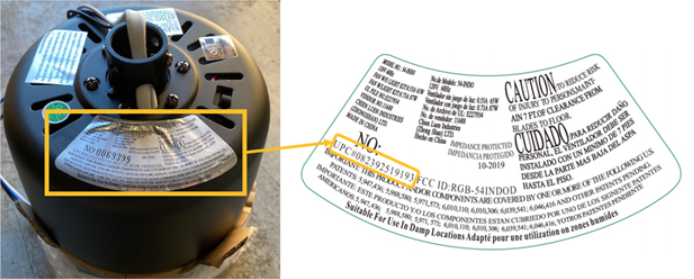
Purchase a replacement pull chain assembly matching your fan’s switch type (single-speed, three-speed, or light-only). These cost $5-$25 and come in 18-48 inch lengths. Verify compatibility by matching your fan’s model number or bringing the old switch to the store. Universal replacements work for most standard fans if exact matches aren’t available.

Critical Safety Precautions

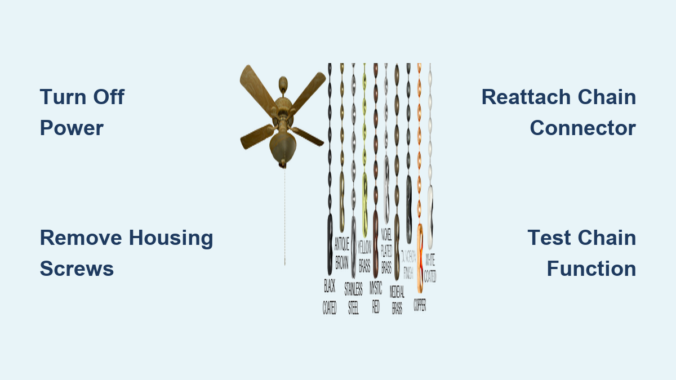
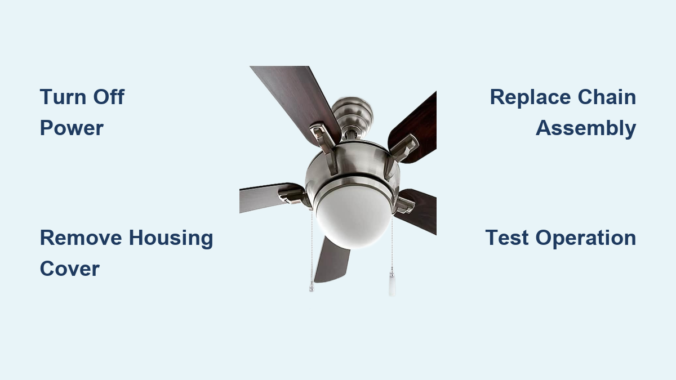
Turn Off Electrical Power

This is the most critical step when learning how to replace chain on ceiling fan. Locate your electrical panel and switch off the circuit breaker controlling the fan—typically a 15-20 amp breaker labeled “bedroom” or “ceiling fixture.” Never rely solely on the wall switch, as internal wiring remains live. Confirm power is off by testing fan operation before proceeding.

Verify Power Disconnection

After shutting off the breaker, attempt to turn on the fan using wall controls—it should remain completely unresponsive. For absolute certainty, use a non-contact voltage tester on the pull chain and exposed wiring. This simple verification prevents potentially fatal electrical shocks during the repair process.

Safe Ladder Practices

Position your ladder on firm, level ground with the top extending 3 feet above your work surface. Maintain three points of contact at all times and never overreach—move the ladder instead. Have someone spot you if possible, especially for high-ceiling installations. Falls cause more injuries than electrical issues with this repair.

Diagnose Your Pull Chain Type

ceiling fan pull chain switch types comparison

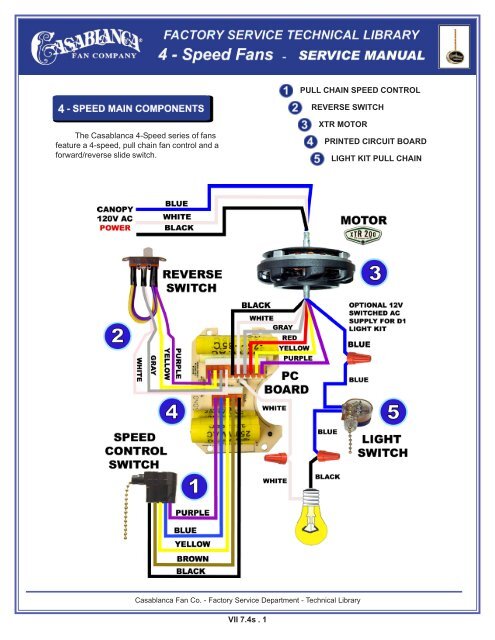
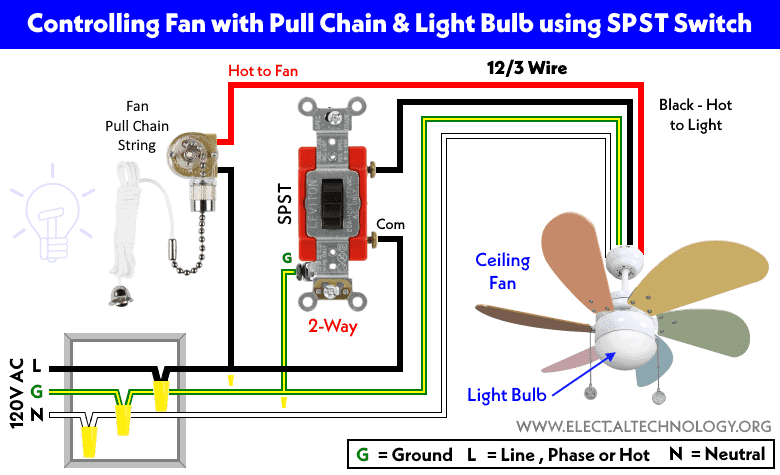
Single-Speed Fan Chains

These simple on/off switches feature two distinct positions with clear clicking sensations. Replacing them requires matching voltage and amperage ratings. If your fan has only one chain controlling both fan and light, you likely have a single-speed model with integrated lighting control.

Multi-Speed Fan Chains

Most modern fans use three-speed mechanisms where each pull advances through low, medium, and high settings before returning to off. These switches are more complex and must match your fan’s electrical specifications exactly. Some models separate fan and light control into two chains within the same housing.

Light Kit Pull Chains

Fans with integrated lighting typically have a separate pull chain just for lights. This switch operates on the same principle but controls the light circuit rather than the motor. Replacement must match your specific light kit’s wiring configuration and bulb type.

Access the Switch Housing

Locate the Switch Housing Cover

Identify the decorative cover beneath the fan motor—usually dome-shaped or cylindrical with 3-4 visible screws. This housing contains the pull chain mechanism and switch assembly. Stand comfortably on your ladder to access it without overreaching.

Remove the Housing Safely

Use the appropriate screwdriver to remove mounting screws counterclockwise, supporting the housing with your free hand as you loosen the final screw. Carefully lower the housing and set it aside, noting screw positions for reassembly. Some housings have wires connecting to the main wiring harness—handle these gently.

Document Internal Configuration

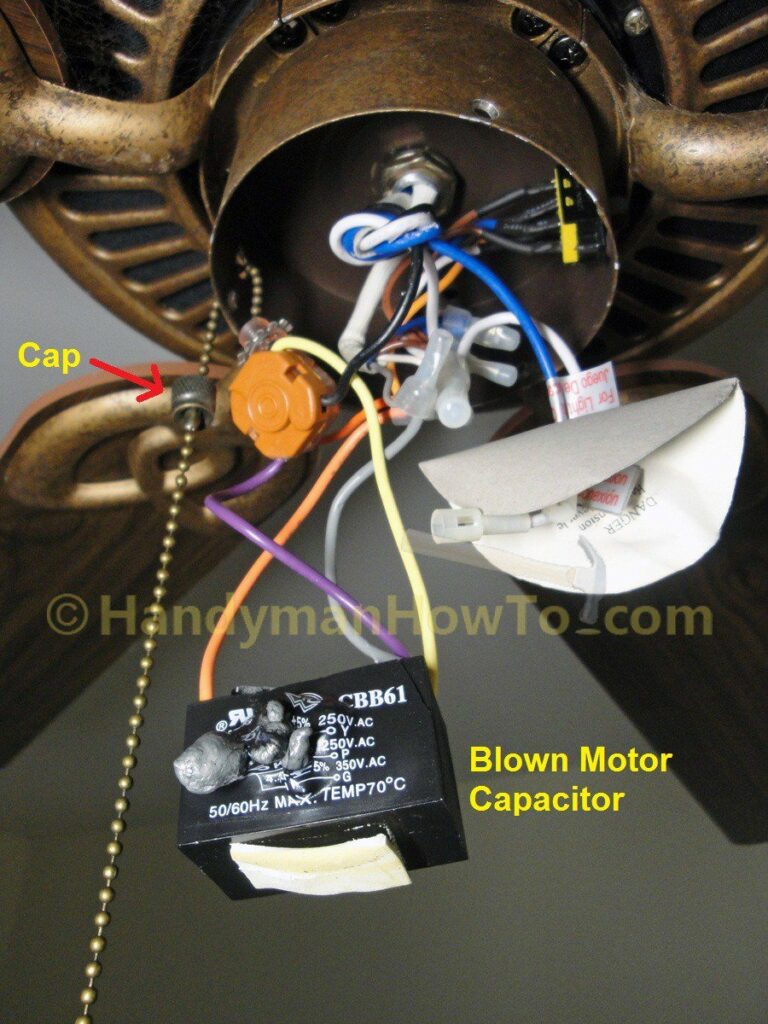
Before disconnecting anything, photograph the internal wiring setup with your smartphone. Note which wires connect to which terminals and how the chain attaches to the switch mechanism. This visual reference prevents connection errors during reassembly.

Replace the Pull Chain Assembly

Disconnect Old Switch Wires

Loosen screw terminals counterclockwise or press release tabs on push-in connectors to remove wires. Keep track of which wire connected to which terminal—matching colors isn’t always reliable. If unsure, label wires with tape before disconnecting.

Remove the Faulty Switch

Release the mounting bracket or retaining clip securing the switch mechanism. Some switches pull straight out while others require releasing a clip first. Handle carefully as old switches may have sharp edges. Extract the entire chain assembly through the housing opening.

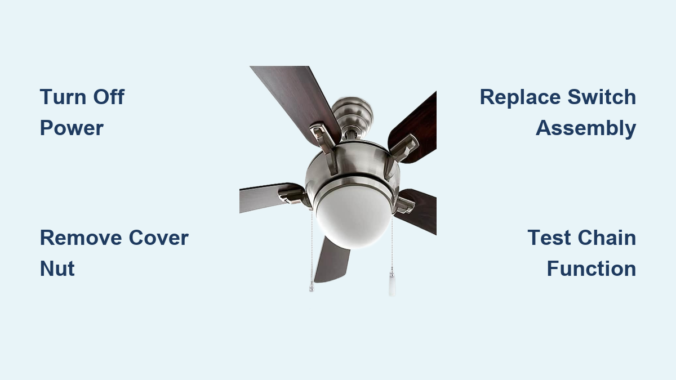
Install the New Replacement

Feed the new chain through the housing opening before mounting the switch. Position the new switch in the same orientation as the original and secure it with the mounting hardware. Connect wires to matching terminals as documented, tightening screw terminals firmly but not excessively.

Reassemble and Test Your Work

ceiling fan switch housing reassembly diagram

Secure the Housing Properly

Reposition the switch housing against the fan body and hand-tighten screws before fully tightening in a star pattern. This ensures even pressure distribution and prevents housing cracks. Don’t over-tighten—snug is sufficient for plastic housings.

Test Fan Operation Thoroughly

Restore power at the breaker and test the new chain with firm, steady pulls. The fan should cycle through all speed settings with distinct clicks. Test light functions separately if applicable. Listen for unusual noises that might indicate loose components.

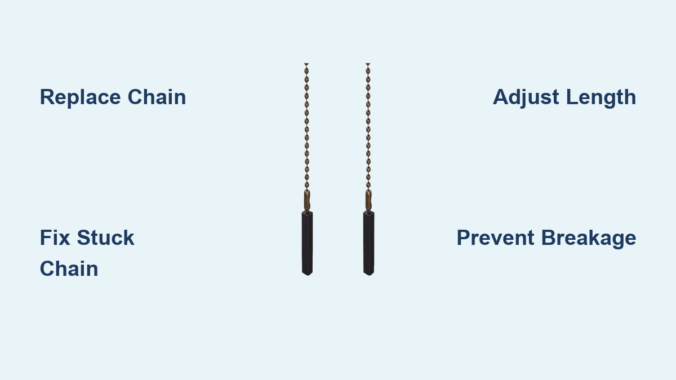
Verify Chain Length and Operation

Ensure the chain hangs at a comfortable length—typically 6-8 feet from the floor. Adjust by removing excess links if too long, or purchase an extension if too short. Operate the chain multiple times to confirm smooth, consistent clicking throughout its range.

Fix Common Problems After Replacement

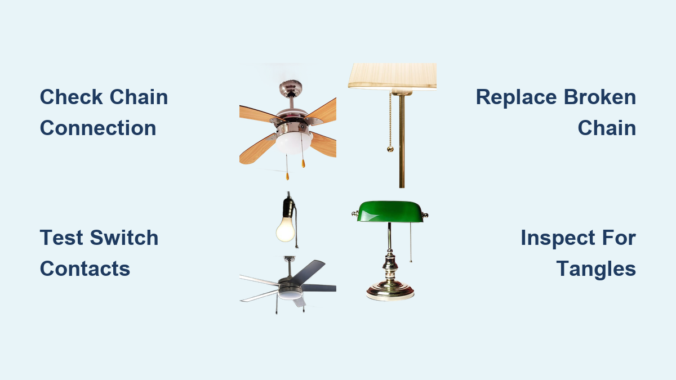
Chain Moves Freely with No Response

Check if the switch is properly seated and the retention clip engaged. Verify all wire connections are secure and correctly positioned. Confirm you purchased the correct replacement switch for your fan model—compatibility issues are common with universal replacements.

Fan Operates but Lights Don’t Work

Ensure the wall switch controlling the light circuit is in the “on” position. Inspect wire connections at the light switch for loose or corroded terminals. You may have accidentally purchased a fan switch instead of a light switch assembly.

Intermittent Operation After Installation

Recheck all wire connections for security and correct positioning. Verify switch compatibility with your fan’s electrical specifications. Clean dust from the switch housing with compressed air—debris often causes inconsistent operation.

Extend Your New Chain’s Lifespan

Regular Inspection and Cleaning

Every 3-4 months, examine the chain for wear signs and operate it to feel for changes in clicking sensation. Clean the housing interior with compressed air to prevent dust accumulation. Gentle, steady pulls—not yanks—extend component life significantly.

Proper Operation Techniques

Pull the chain with moderate, consistent force rather than jerking motions. Ensure it hangs freely without tangling in fan blades or nearby objects. Teach children proper operation techniques to prevent rough handling damage.

Environmental Considerations

Fans in humid areas like bathrooms require more frequent maintenance. Ensure adequate ventilation to minimize moisture exposure. Dusty environments also accelerate wear—increase inspection frequency in these locations to catch problems early.

Replacing a ceiling fan pull chain ranks among the most accessible DIY repairs, requiring minimal tools and basic skills. By following proper safety protocols—especially disconnecting power at the breaker—you’ll complete this repair in under an hour. Selecting the correct replacement parts and documenting your fan’s configuration ensures reliable results that restore full functionality for years. Regular maintenance extends your new chain’s lifespan, preventing future frustrations and keeping your ceiling fan operating smoothly through seasons of use.

How to Fix a Ceiling Fan Chain That Came Off


Nothing disrupts your home comfort like reaching for your ceiling fan’s pull chain only to find it’s completely detached. When your ceiling fan chain comes off, you lose control of fan speeds and lighting functions, leaving you sweltering in summer heat or struggling with inadequate room lighting. The good news is that reattaching a ceiling fan chain is typically a straightforward DIY repair that takes less than 30 minutes with basic household tools. This guide provides step-by-step instructions to fix your detached ceiling fan chain properly, avoid common mistakes, and prevent future detachment issues—no electrician required for most cases.

Why Your Ceiling Fan Pull Chain Keeps Coming Off: 3 Common Causes

Understanding why your ceiling fan chain detached is crucial for implementing the right fix. The most frequent culprit is a worn pull switch housing assembly where the internal mechanism connecting the chain to the switch has failed. Over months or years of use, the small metal ball connector at the chain’s end gradually wears down, eventually slipping through the housing slot that normally secures it in place. This wear happens naturally but accelerates if you frequently yank the chain forcefully instead of using a gentle pull.

Physical damage from excessive force represents another major cause of chain detachment. When users pull too hard on the chain—especially when trying to change speeds on a stiff switch—the sudden stress can dislodge the connector from its mounting point or even damage the internal switch mechanism itself. This problem is particularly common in households with children who might tug the chain playfully without understanding the proper technique.

Environmental factors also contribute significantly to chain failures. In bathrooms or kitchens where humidity levels run high, metal components of the chain and switch mechanism can corrode over time, weakening their structural integrity. Additionally, vibrations from an unbalanced fan motor can gradually loosen connections until the chain finally comes free. Recognizing these specific causes helps you address not just the immediate problem but also implement preventative measures for long-term reliability.

Critical Safety Steps Before Fixing Your Detached Ceiling Fan Chain

Before you even consider touching your ceiling fan’s internal components, you must disconnect electrical power at the source—this isn’t optional but an absolute safety requirement. Locate your home’s circuit breaker panel and switch off the circuit that powers your ceiling fan. To verify the power is truly off, attempt to operate both the wall switch and any remaining chain segments; if the fan doesn’t respond, you’ve successfully isolated the electrical supply.

Never skip this step—working on live electrical fixtures creates potentially fatal shock hazards, especially when your hands will be inside the fan housing near exposed wiring. Once power is confirmed off, gather these essential tools: a Phillips head screwdriver, needle-nose pliers for precise handling of small components, a bright flashlight to illuminate the housing interior, and a stable ladder or step stool that allows you to work comfortably without overreaching.

Position your ladder directly beneath the fan and have a phone or tablet nearby to take photos as you disassemble components. These reference images prove invaluable when reassembling the switch housing, helping you remember exactly how parts aligned before disassembly. If possible, work during daylight hours when natural light supplements your flashlight, making it easier to see small parts and connections within the housing.

How to Open Your Ceiling Fan Switch Housing in 3 Simple Steps

ceiling fan switch housing removal diagram

Accessing the pull switch mechanism requires carefully removing the switch housing without damaging surrounding components. Locate the small cup-shaped housing typically mounted on the bottom of your fan’s motor assembly, directly beneath any light fixtures your model may have. This housing usually features two or three visible screws securing it to the fan body—these are your entry point.

Using your Phillips head screwdriver, begin loosening these mounting screws while supporting the housing with your free hand. As each screw becomes loose, increase your grip on the housing to prevent it from falling when the final screw releases. Important: Don’t let the housing drop—ceiling fans often have limited space beneath them, and a falling component could damage the blades or create a safety hazard below.

Once all screws are removed, the housing will hang down suspended only by the wiring and chain. Gently lower it until you can clearly see the cylindrical pull switch assembly inside. Take a moment to examine how the chain connects to this switch before proceeding—you’ll notice most switches feature a small slot, hook, or metal tab where the chain’s end connector attaches to the internal mechanism. This visual reference ensures you’ll properly reconnect the chain during repair.

Fixing a Disconnected Ceiling Fan Chain: Reattach or Replace Options

With the switch housing accessible, determine whether your chain can be reattached or requires replacement. If the chain’s metal end piece—a small ball or loop connector—is intact but merely dislodged, you can often reattach it using needle-nose pliers. Carefully grasp the connector, gently open it if necessary, slide it onto the switch’s attachment point (usually a small metal tab or hook), then secure it firmly in place. Test the connection by lightly tugging the chain to ensure it won’t slip off again.

When the end connector is damaged, missing, or the chain shows signs of fraying, replacement becomes necessary. Purchase a replacement chain matching your fan’s specifications—most hardware stores carry universal pull chains in various lengths with pre-attached connectors. Before installing the new chain, thread it through the housing slot first to determine proper length, then attach the connector to the switch mechanism. Pro tip: Leave slightly more chain length than you think you need; you can always shorten it later, but extending it requires repeating the entire installation process.

Testing Your Repaired Ceiling Fan Chain Before Final Installation

Never reinstall the switch housing without first verifying your repair works correctly—this saves you from repeating the entire disassembly process if something’s wrong. With the housing still hanging down, gently pull the chain through all its positions while listening for distinct clicking sounds that indicate proper switch engagement. Each pull should produce a clear mechanical click as the internal switch changes positions, controlling either fan speed or light function depending on your model.

If the chain moves without resistance or fails to produce clicking sounds, the connector isn’t properly seated on the switch mechanism. Recheck that the chain’s end connector is fully secured to the attachment point and that nothing is obstructing its movement. Once you confirm smooth operation with proper clicks, carefully lift the housing back into position while managing the wiring to prevent pinching or strain.

Secure the housing with its mounting screws, tightening them firmly but avoiding excessive force that could crack the plastic housing. After restoring power at the circuit breaker, test all fan speeds and light functions (if applicable) to ensure complete functionality. If the fan operates erratically or not at all, immediately turn off power and recheck your connections before proceeding.

Signs Your Ceiling Fan Pull Switch Needs Full Replacement (Not Just the Chain)

ceiling fan pull switch replacement comparison old vs new

Sometimes the problem extends beyond a simple chain detachment to a faulty pull switch assembly itself. Key indicators requiring full switch replacement include inconsistent fan operation (where the fan works on some speeds but not others), a humming sound without blade movement, or a “mushy” feeling when pulling the chain with no distinct clicking sensation. These symptoms suggest internal switch contacts have worn out or become damaged.

Replacing the entire pull switch assembly costs only $10-$25 and follows a straightforward process if you document connections carefully. Before disconnecting anything, take clear photos of the wire connections—most switches connect via two or three wires that plug directly into the fan’s wiring harness. Remove the switch mounting screws, disconnect the wires following your photographic reference, then install the new switch by reversing the process. Warning: If you’re uncomfortable working with electrical connections or can’t identify wire functions, hire a licensed electrician—this isn’t a repair to attempt without proper electrical knowledge.

7 Proven Ways to Stop Your Ceiling Fan Chain from Coming Off Again

ceiling fan maintenance checklist infographic

Prevent future chain detachment issues with these practical maintenance strategies that extend the life of your pull switch mechanism. First and foremost, adopt a gentle pulling technique—yanking the chain creates excessive stress on the connector and internal mechanism. Instead, use a smooth, controlled motion and allow the chain to return to its resting position naturally without snapping it back.

If your chain is excessively long, shorten it properly by removing links or cutting and reattaching the end connector according to manufacturer specifications. Most chains allow length adjustment without compromising function. Schedule quarterly inspections of the chain and housing, especially in humid environments like bathrooms or kitchens where corrosion accelerates component wear.

Wipe down the chain periodically with a dry cloth to remove dust and grime that can contribute to premature wear. Consider installing a chain stopper—a small plastic or metal device that limits how far the chain can be pulled—available at most hardware stores for under $5. For fans in high-traffic areas, replace standard metal chains with sturdier braided nylon alternatives that resist stretching and corrosion.

Finally, address any fan vibration issues immediately, as excessive shaking gradually loosens connections throughout the fixture. Balance wobbling fans using manufacturer-provided balancing kits to reduce stress on all components, including your pull chain mechanism.


Final Note: This repair guide covers standard ceiling fan models with accessible pull chain mechanisms. If your fan features proprietary components, integrated remote control systems, or if problems persist after following these instructions, consult your manufacturer’s specific documentation or contact a qualified electrician. Remember that proper maintenance and gentle operation significantly extend the lifespan of your ceiling fan’s control mechanisms, keeping your home comfortable without unexpected interruptions.

How to Fix Ceiling Fan Chain Issue


That annoying moment when your ceiling fan chain snaps off in your hand or gets stuck mid-pull happens to nearly every homeowner. When your fan’s pull chain fails, you’re left either standing on an unstable chair trying to reach the switch or dealing with a fan that won’t respond to your commands. The good news is that most ceiling fan chain issues can be resolved in under an hour with basic tools you probably already own. Whether you have a Hunter, Hampton Bay, Casablanca, or Harbor Breeze fan, this guide provides the exact steps to diagnose and fix your pull chain problems without calling an electrician.

Ignoring a malfunctioning pull chain leads to bigger headaches—like accidentally turning your fan on high speed when you meant to turn it off, or worse, having to replace the entire fan unit unnecessarily. By following these proven techniques, you’ll restore full control to your ceiling fan while avoiding costly service calls. Let’s dive into the specific solutions for every common pull chain issue you might encounter.

Identify Your Ceiling Fan Chain Failure Type

Knowing exactly what’s wrong with your chain determines which repair method to use. Different symptoms require completely different approaches, so proper diagnosis saves you time and prevents unnecessary work.

Chain snapped off completely happens when the metal links break from years of use or when the connector pulls out of the switch mechanism. If you’re left holding a short piece of chain or see only a tiny stub remaining, this is your problem. The constant stress of daily use eventually weakens the connection point where the chain attaches inside the housing.

Chain pulls smoothly but fan doesn’t respond indicates an internal switch failure rather than a chain issue. You’ll feel the familiar clicks when pulling, but the fan ignores your commands. This means the electrical contacts inside the switch mechanism have worn out or become corroded, requiring switch replacement.

Chain sticks or jams when you pull it but it won’t return to position or requires excessive force. Dust buildup inside the housing, tangled chain links, or a damaged ball connector typically cause this frustrating problem. Sometimes the chain catches on a rough edge inside the housing, preventing smooth operation.

Chain length is impractical creates daily annoyance without actual damage. A chain that hangs too low becomes a hazard for children or gets caught on furniture, while an overly short chain forces you to stretch uncomfortably—especially problematic for fans installed on high ceilings.

Assemble Your Ceiling Fan Chain Repair Toolkit

Having these specific tools ready before you start ensures you won’t need to interrupt your repair to search for equipment. Most items are common household tools that work on virtually all fan models.

  • Sturdy step ladder rated for your ceiling height (never use unstable chairs)
  • Phillips and flathead screwdrivers (magnetic tip recommended)
  • Needle-nose pliers for handling small chain components
  • Non-contact voltage tester (critical for electrical safety)
  • Replacement ball chain matching your fan’s specifications
  • Optional: Flashlight or headlamp for better visibility inside housing

Take inventory of these tools before climbing up to your fan. Working without proper equipment leads to frustration and potential safety hazards, especially when balancing on a ladder with one hand while trying to hold tools with the other.

Critical Safety Steps Before Starting

Skipping these safety measures risks electrical shock or falls—two dangers that turn a simple repair into a serious emergency. Never assume your fan is safe to work on just because it’s turned off at the wall switch.

Turn off the circuit breaker controlling your fan at the main electrical panel. Test by attempting to operate the fan after flipping the breaker—confirm it won’t turn on. Leave the breaker off throughout the entire repair process. Many homeowners make the mistake of only turning off the wall switch, creating a dangerous situation if someone accidentally restores power while you’re working inside the housing.

Verify power is completely off using a non-contact voltage tester on the wires inside the switch housing. Test the tester on a known live outlet first to confirm it’s working properly. This simple step prevents potentially fatal electrical contact.

Ensure your ladder is on level ground and have someone spot you if possible. Never overreach while on the ladder—reposition instead. The few extra minutes spent setting up safely prevent falls that could result in serious injury.

Replace a Broken Ceiling Fan Pull Chain

ceiling fan pull chain replacement steps diagram

When your chain snaps off completely, replacement is the only effective solution. Splicing broken chains creates weak points that fail again quickly. Follow these precise steps for a permanent fix.

Remove the switch housing cover by unscrewing the 2-3 screws holding it in place. This circular or rectangular cover sits directly below the fan canopy. Some models have a small access hole rather than a full cover—check your fan’s design before forcing any components.

Locate the broken chain’s attachment point inside the housing. Most fans use a small metal or plastic connector piece with a loop or hook that the chain links attach to. Use needle-nose pliers to carefully remove any remaining chain fragments from this connector.

Measure your old chain length or determine your ideal new length. Standard replacement chains come in 24″, 36″, and 48″ lengths—choose one that positions the end at comfortable waist height when hanging naturally.

Thread the new chain through the housing opening, making sure it follows the same path as the original. Attach the last link to the connector inside using needle-nose pliers to open and close the link securely.

Test the connection by pulling the chain from below—you should feel distinct clicks for each speed setting. If the chain slips or doesn’t engage properly, recheck your attachment point before reassembling the housing cover.

Fix a Stuck or Jammed Pull Chain

A chain that resists movement usually suffers from internal debris or binding. This common issue often resolves with simple cleaning rather than part replacement.

Access the switch housing following the same safety procedures as chain replacement. Inspect the interior mechanism for visible dust buildup, dead insects, or other obstructions. Many stuck chains result from years of dust accumulation inside the housing.

Clean the mechanism using compressed air from a can or a soft-bristled brush. Avoid liquids near electrical components—dry cleaning methods prevent moisture damage. Vacuum out loosened debris with a narrow attachment.

Examine the chain’s entire path for sharp edges or damaged components that could cause binding. File down any rough metal edges with fine-grit sandpaper. Check the ball connector for cracks or deformation—replace if damaged.

Apply a tiny amount of silicone-based lubricant only if cleaning doesn’t resolve the issue. Oil-based lubricants attract more dust and cause faster deterioration. Work the chain through several pull cycles to distribute the lubricant evenly.

Adjust Your Pull Chain Length for Comfort

ceiling fan pull chain length adjustment guide

Chains that hang too long or too short create daily frustration but don’t require complex repairs. Proper length adjustment makes your fan significantly more user-friendly.

For overly long chains, determine your ideal length by having someone hold the chain at comfortable waist height while you simulate pulling it. Mark this position with tape, then remove the chain from the connector.

Open the chain at your marked point using needle-nose pliers to separate the links. Reattach the shortened chain to the connector, ensuring a secure connection before testing.

For short chains, purchase a matching ball chain extension or replace the entire chain with a longer version. Universal chain extensions connect seamlessly to existing chains using the same link-opening technique.

Prevent Future Pull Chain Failures

ceiling fan pull chain maintenance checklist

Simple maintenance habits dramatically extend your pull chain’s lifespan and prevent recurring issues.

Pull the chain straight down with gentle pressure—never yank at an angle. Angled pulls stress the connection point and accelerate wear. Teach household members proper technique to avoid unnecessary strain.

Inspect the chain quarterly for stretched links, corrosion, or damaged connectors. Early detection allows replacement before complete failure occurs.

Wipe the chain with a dry cloth during regular fan cleaning to prevent dust buildup. Periodically check the housing exterior for accumulated debris that could work its way inside.

Address minor stiffness immediately before it develops into complete failure. A chain that starts sticking requires prompt attention to prevent more serious problems.

Consider upgrading to a remote control system for fans with persistent chain issues. Many universal remote kits install easily and eliminate pull chain problems entirely.

Handle Common Pull Chain Emergencies

Certain scenarios require specific approaches beyond standard repairs:

  • Chain breaks repeatedly at same point: Inspect for sharp edges inside housing or misaligned switch mechanism causing abnormal stress
  • Fan only runs on one speed: Clean internal switch contacts or replace the entire switch mechanism
  • Chain spins freely with no tension: Reattach the chain to the internal connector or replace a damaged connector piece
  • New chain still doesn’t work: Diagnose switch mechanism failure rather than chain issues
  • Correct length but hard to reach: Install a chain extension or consider remote control conversion

Knowing how to fix ceiling fan chain problems saves money and frustration while extending your fan’s lifespan. Most repairs take less than thirty minutes with basic tools, putting you in control of your home environment. By following proper safety procedures and performing regular maintenance, you’ll keep your ceiling fan operating smoothly for years to come. When issues do arise, you’ll have the confidence to address them quickly without expensive service calls or unnecessary fan replacement. Take control of your comfort today by mastering these essential ceiling fan repair techniques.

How to Fix Ceiling Fan Pull Chain Not Working


That familiar tug on your ceiling fan’s pull chain meets resistance or produces no response—suddenly you’re stuck with a fan running at full speed or not working at all. This common household frustration affects millions of homeowners each year when the simple mechanism designed to control your comfort fails at the most inconvenient times. When your ceiling fan pull chain not working issue strikes, you don’t need to immediately call an electrician or replace the entire fixture. Most problems can be diagnosed and repaired in under an hour with basic tools you likely already own.

Before you resign yourself to sweltering nights or costly professional repairs, understand that pull chain failures typically stem from just a few identifiable causes. This guide reveals exactly how to pinpoint and fix your non-responsive pull chain, whether it won’t budge, moves freely without effect, or only partially functions. You’ll learn to safely access the mechanism, test components, and implement permanent solutions that restore control to your hands—saving you time, money, and unnecessary stress.

Why Your Pull Chain Suddenly Stopped Functioning

Most ceiling fan pull chain failures fall into four distinct categories, each with telltale symptoms that help you diagnose the problem quickly without specialized tools.

Chain mechanism detachment causes the most frequent issues, where the chain has physically separated from the internal switch. When this happens, you’ll feel the chain moving loosely without the characteristic “click” at each speed change. The chain might seem to slip or spin without engaging any mechanism—a clear sign the connector inside has come unhooked.

Worn-out switch contacts create problems where pulling the chain produces clicks but no fan response. Inside the pull switch, tiny metal contacts physically connect and disconnect to control speed settings. After years of use, these components wear thin or become coated with carbon buildup from electrical arcing, preventing proper electrical flow despite correct mechanical operation.

Internal chain tangles occur when the pull cord wraps around internal components, especially in older fans. You might feel unusual resistance when pulling or notice the chain only works after twisting it in a specific direction. These tangles develop gradually as the chain wears and frays from repeated use.

Complete chain breakage presents as a dangling chain segment with the remainder still inside the housing. This typically happens at stress points where the chain bends repeatedly—either at the switch connector or where it passes through the housing slot. The broken end often shows visible wear or separation at individual links.

Immediate Checks Before Taking Tools to Your Fan

Before removing any components, perform these three simple checks that resolve nearly one-third of pull chain issues without tools or electrical work.

First, pull the chain through its full range of motion while listening closely for clicking sounds. A functioning switch produces a distinct mechanical click with each speed change. If you hear clicks but the fan doesn’t respond, the problem lies with the switch contacts or wiring rather than the chain mechanism itself.

Next, examine the chain’s connection point inside the switch housing. Many fans feature a removable bottom cover secured by two small screws. Remove this cover and check whether the chain’s metal connector has simply popped off the switch lever. Reattaching this hook often restores function in minutes—no parts required.

Finally, test the fan’s operation from any wall control if available. Turn the wall switch off and on multiple times while observing fan behavior. If the wall control works but the pull chain doesn’t, you’ve confirmed the issue is isolated to the pull switch assembly rather than broader electrical problems.

Accessing the Pull Chain Mechanism Safely

ceiling fan disassembly steps diagram

Reaching the problematic components requires careful disassembly that takes less than five minutes with basic tools.

Turn off power at the circuit breaker controlling the fan circuit—never rely solely on the wall switch. Verify power is off using a voltage tester at the fan’s electrical box before proceeding. Locate the bottom housing cover (typically a dome-shaped piece directly below the fan blades) and remove its retaining screws, usually positioned around the perimeter.

Lower the housing carefully—it connects to the fan body via wires and a mounting bracket. You may need to loosen the central mounting nut slightly to create enough clearance. Once lowered, you’ll see the pull chain switch mounted on the side of the motor housing, identifiable as a small cylindrical or rectangular plastic unit with the chain emerging from one end.

Inspect this switch for visible damage like melted plastic, scorch marks, or loose wires. Most standard switches have three to five wires connecting to different speed terminals, with the chain attached to a small lever mechanism that physically moves between contact points with each pull.

Testing the Pull Switch Without Special Tools

ceiling fan pull chain switch internal parts diagram

You can often determine switch functionality without a multimeter by performing these simple tests.

With power still off, remove the switch housing cover if present (usually secured by small screws or clips). Manually move the switch lever through its positions while observing the internal contacts. They should move cleanly between contact points without sticking or excessive play. Any visible corrosion, pitting, or burned spots on the contacts indicates a failed switch requiring replacement.

If you have a multimeter, set it to continuity mode and test between terminals as you manually operate the switch lever. Each speed position should show continuity between specific terminal pairs. No continuity in any position confirms switch failure, while inconsistent continuity suggests intermittent contact problems.

Replacing a Faulty Pull Chain Switch in 5 Minutes

When testing confirms switch failure, replacement takes minutes and costs less than $15 for the part.

Purchase an exact replacement by noting your fan’s brand and model number, or take the old switch to a hardware store for matching. Universal switches fit most installations but must match your fan’s speed configuration—three-speed switches are standard for most residential fans.

Before disconnecting anything, photograph or sketch the wire connections to ensure proper reinstallation. Most switches use black wires for power input and colored wires (blue, red, yellow) for different speed outputs. Loosen terminal screws on the old switch, remove wires one at a time, and transfer them to identical positions on the new switch. Hand-tighten terminal screws—over-tightening can strip the plastic housing.

After reassembly, restore power and test all fan speeds. The pull chain should produce distinct clicks at each position with corresponding speed changes. If the fan runs continuously or fails to start, double-check your wiring against the original configuration—reversed wires are the most common installation error.

Fixing Broken or Stuck Pull Chains

ceiling fan pull chain repair kit

When the chain itself is damaged but the switch works, replacement costs under $5 and requires no electrical knowledge.

For completely broken chains, access the switch housing as described earlier and locate the chain connector inside—usually a small metal hook or crimp-on attachment. Remove the broken chain segment and feed a new chain through the housing slot, reconnecting it to the switch lever. Ensure the connection is secure by gently tugging before reassembling the housing.

For chains that won’t pull or feel stuck, untangle any internal loops while supporting the chain to prevent re-tangling. Clean accumulated dust and debris from the housing slot using compressed air or a small brush. Apply a tiny drop of silicone-based lubricant to the chain if binding persists, but avoid oil-based products that attract more dirt.

When to Call a Professional

While most pull chain issues are DIY-friendly, certain situations warrant professional assistance.

Stop immediately and call an electrician if you discover melted wires, scorched components, or burning smells during inspection—these indicate serious electrical problems that pose fire hazards. Older fans (over 15 years) with obsolete parts may be more cost-effective to replace than repair, especially when modern ENERGY STAR models offer significantly better efficiency.

Fans with complex control systems involving remote receivers or multiple wall switches often require manufacturer-specific knowledge that exceeds typical DIY capabilities. In these cases, professional diagnosis prevents costly mistakes from miswired components.

Preventing Future Pull Chain Failures

Extend your pull chain’s lifespan with these simple maintenance practices.

Operate the chain gently rather than yanking it forcefully—the mechanism is designed for smooth, deliberate engagement. Annual inspection during ceiling fan cleaning reveals early signs of wear before they cause complete failure. Look for fraying links, loose connections, or binding mechanisms that need attention.

Address minor problems immediately rather than continuing to use a malfunctioning chain. A slightly loose connection or early-stage tangle becomes a major failure if ignored, potentially causing additional damage to the switch mechanism.

Restoring Control Without Costly Repairs

A non-working pull chain rarely means replacing your entire ceiling fan. By methodically checking the chain connection, testing the switch mechanism, and replacing only the faulty components, you restore control to your comfort system with minimal expense. Most repairs require less than $25 in parts and under an hour of your time—far less than professional service calls.

Remember that electrical safety always comes first. Verify power is off at the circuit breaker before accessing any components, and never work on live wiring. When in doubt about your ability to complete a repair safely, consult a licensed electrician—your peace of mind is worth the investment.

With these straightforward solutions, you’ll transform that frustrating moment when your ceiling fan pull chain not working from a comfort crisis into a minor inconvenience you can solve yourself. The next time that tug on the chain doesn’t produce the expected response, you’ll know exactly how to diagnose and fix the problem—putting control back in your hands where it belongs.

How to Fix Ceiling Fan Pull Chain Broke Off


A broken ceiling fan pull chain is a common household issue that leaves many homeowners frustrated. One moment you’re adjusting your fan’s speed, and the next you’re left with a dangling piece of chain or nothing at all. While this seems like a simple problem, the reality is that proper repair information can be surprisingly difficult to find in reliable sources. Without verified repair instructions or manufacturer specifications, attempting a DIY fix can potentially create more problems than it solves.

This guide addresses what you need to know when reliable repair information is scarce. We’ll focus on safe assessment practices, understanding your limitations, and knowing when to seek professional help – all critical considerations when official repair documentation is unavailable for your specific fan model.

Why Proper Information Matters for Pull Chain Repairs

Ceiling fan repairs require specific knowledge that varies significantly between models and manufacturers. Unlike standardized electrical components, pull chain switches come in numerous configurations with different wiring setups, attachment mechanisms, and replacement part specifications.

When reliable repair information is unavailable, attempting a fix based on generic advice can lead to several problems. You might install an incompatible switch that doesn’t match your fan’s electrical requirements, connect wires incorrectly causing short circuits, or damage internal components while trying to access the switch housing. In some cases, improper repairs can void any remaining manufacturer warranties or create electrical hazards that compromise home safety.

The absence of model-specific documentation means you cannot verify critical details like amperage ratings, wire gauge requirements, or proper grounding procedures for your particular fan. These aren’t minor details – they’re essential safety considerations that determine whether your repair will function properly and safely long-term.

How to Assess Your Situation Safely Without Complete Information

ceiling fan pull chain switch inspection close up

When you discover your pull chain has broken off, your first steps should focus on assessment rather than immediate repair. Start by turning off power at the circuit breaker – never rely solely on wall switches when working with electrical components. This basic safety measure remains critical regardless of whether you have complete repair information.

Carefully examine what remains of the pull chain mechanism. Is the chain completely detached, or is a portion still connected to the internal switch? Can you see the switch assembly through the housing? Document what you see with clear photographs from multiple angles, as these will be valuable when consulting professionals or searching for compatible parts.

Without manufacturer documentation, determining whether you need just a new chain or an entire switch replacement becomes challenging. Most pull chain switches have specific electrical ratings that must match your fan’s requirements. Using an incompatible replacement could lead to premature failure or safety issues. The safest approach is to remove the broken switch (if accessible) and take it to a professional for identification rather than guessing based on appearance alone.

Essential Safety Considerations When Information Is Limited

Working with electrical components without proper documentation significantly increases risks. The most critical safety practice is verifying power is completely off before beginning any work. Use a non-contact voltage tester to confirm no current is flowing to the fan – this simple $10 tool provides essential protection.

When documentation is unavailable, avoid assumptions about wiring configurations. Ceiling fans typically connect to both a light circuit and fan motor circuit, and incorrect wiring can damage components or create shock hazards. If you cannot positively identify wire functions (hot, neutral, ground), do not proceed with any electrical connections.

Working at height adds another layer of risk. Many ceiling fans are installed in rooms with high ceilings, requiring ladders or platforms. Without clear repair instructions, you may spend more time working overhead, increasing fall risks. Always have someone spot you when working at height, and never overreach while on a ladder.

Remember that electricity demands respect – a momentary lapse in safety protocol can have serious consequences. When proper repair information is unavailable, erring on the side of caution isn’t just recommended, it’s essential for personal and household safety.

Finding Reliable Repair Information When Standard Sources Fail

ceiling fan model number location sticker

When initial searches yield no usable information about your specific fan model, several alternative approaches can help identify proper repair procedures. Start by locating your fan’s model number, typically found on a sticker attached to the motor housing, blade irons, or mounting bracket. This information is crucial for finding model-specific documentation.

Contact the manufacturer directly through their customer service department. Many companies will provide repair manuals or connect you with authorized service centers that have access to technical documentation. Be prepared to provide photos of your broken components and the fan’s model information.

Visit specialized lighting and ceiling fan retailers that carry replacement parts. Knowledgeable staff at these stores often have access to cross-reference catalogs showing compatible replacement switches for various fan models. They may also have repair guides not available to the general public.

Check if your fan is covered under an extended warranty or home warranty plan. These services often include repair coverage and will send qualified technicians with the proper knowledge and tools to address the issue correctly.

When Professional Help Is Necessary

Certain situations absolutely require professional assistance, especially when reliable repair information is unavailable. If you cannot identify the make and model of your fan, professional help becomes strongly advisable. Different manufacturers use proprietary switch designs that require specific replacement parts.

Issues that extend beyond the pull chain itself warrant professional attention. If your fan makes unusual noises, wobbles excessively, or shows signs of overheating, these indicate problems that likely require more than a simple switch replacement. Attempting repairs without proper knowledge could exacerbate these underlying issues.

If your initial assessment reveals damaged wiring, corrosion, or signs of electrical arcing, stop immediately and contact a licensed electrician. These conditions indicate potentially serious electrical problems that shouldn’t be addressed without proper training and equipment.

Fans installed in hard-to-reach locations or those requiring specialized mounting hardware also benefit from professional repair. The increased risk of falls or damage to the fan unit makes professional assistance cost-effective when considering potential injury or replacement costs.

Key Takeaways for Safe Decision-Making

ceiling fan repair cost comparison DIY vs professional

When facing a broken ceiling fan pull chain with limited repair information, prioritize safety over speed of repair. Never work on electrical components without verifying power is completely off at the circuit breaker. Take time to properly identify your fan model before attempting any repairs – this single step prevents many common mistakes.

Understand that not all repairs are appropriate for DIY when documentation is unavailable. The cost of professional service typically ranges from $75-$150, which may seem high but pales in comparison to potential costs from electrical damage, fire hazards, or injury from working at height.

If you decide to proceed with a repair despite limited information, document every step with photographs before disconnecting anything. This creates a visual reference for reassembly that can prevent wiring mistakes. Only purchase replacement parts after positively identifying your existing components – generic replacements often lead to compatibility issues.

Most importantly, recognize that sometimes the wisest repair decision is knowing when not to repair. When reliable information is unavailable and safety concerns exist, professional assistance provides peace of mind that your ceiling fan will operate safely and reliably for years to come.


Final Note: This article acknowledges the limitations of providing specific repair instructions without verified manufacturer documentation. Always prioritize electrical safety and consult qualified professionals when in doubt about any home repair involving electrical components. Your safety is worth far more than the cost of professional service.

How to Fix Ceiling Fan Pull Chain Light


That frustrating moment when you pull your ceiling fan light chain only to hear a snap or feel nothing happen is more common than you might think. When your pull chain breaks or stops functioning, you lose convenient control over both fan speeds and lighting—two features you probably relied on daily without a second thought. The good news is that fixing a pull chain on a ceiling fan light is a manageable DIY project that typically costs under $20 and takes less than an hour to complete. Whether your chain snapped completely, feels stuck, or simply won’t cycle through settings properly, this guide provides the exact steps to restore full functionality to your ceiling fan without calling an expensive electrician.

Most pull chain failures fall into two distinct categories: visible breaks in the accessible portion of the chain, or internal failures requiring switch replacement. Understanding which problem you’re facing determines your repair approach. If the chain broke where you can see it outside the fan housing, you may only need an extension chain. But when the chain breaks internally or the switch mechanism fails, you’ll need to replace the entire pull chain switch assembly. This guide covers both scenarios with detailed instructions for the more complex switch replacement that becomes necessary when internal components fail.

Diagnose Your Specific Pull Chain Failure

Pull chain malfunctions present in three distinct ways, each requiring a different solution. A completely broken chain that pulls apart in your hand indicates a visible break where the chain separated, often at a weak link. If you can see both broken ends hanging from the fan housing, you’re dealing with the simplest type of failure that may only require an extension chain to fix.

A chain that feels stuck or requires excessive force to pull signals internal switch mechanism wear. When the chain doesn’t move smoothly through its full range of motion or catches midway, the internal components are beginning to fail. Addressing this early prevents complete failure and avoids being left without fan control during hot weather.

A chain that appears intact but won’t change settings points to a failed internal switch mechanism. When pulling the chain produces no response, cycles through only some speed settings, or requires multiple pulls for a single setting change, the electrical contacts inside the switch have degraded. This requires complete switch replacement since the chain itself remains attached but the internal components no longer function properly.

Essential Tools for Pull Chain Repair

ceiling fan pull chain repair tools kit

The how to fix pull chain on ceiling fan light process requires only basic tools found in most home toolkits. A standard screwdriver set handles all the fasteners securing the fan housing and cover components. Depending on your fan model, you may need Phillips head, flathead, or both, so having a complete set ensures compatibility with your fixture’s hardware.

Wire cutters serve a critical role when disconnecting the old switch from the fan’s wiring. You’ll use these to carefully cut the colored wires from their terminals on the old switch, freeing the wiring for connection to your replacement. Some switch models feature a pull-away connector design that eliminates cutting—I’ll explain how to identify which type you have during the repair process.

The most crucial component is a replacement pull chain switch matching your fan’s configuration. These switches vary by voltage, amperage ratings, terminal configurations, and mounting styles. Bring your old switch to the hardware store or search online using your fan’s model number to ensure perfect compatibility. The wrong switch won’t function correctly with your fan’s electrical system.

Critical Safety Steps Before Starting

Working on an energized ceiling fan exposes you to potentially fatal voltage levels, so electrical safety must be your absolute priority. Begin by locating your home’s electrical panel and finding the circuit breaker controlling the ceiling fan circuit. Switch this breaker completely to the OFF position—don’t assume it’s off based on its position.

Turn off any wall switches that provide power to the ceiling fan. Some electrical configurations route power through multiple pathways, so flipping wall switches to OFF ensures no electricity reaches the fixture. Only after confirming the fixture is completely powerless should you proceed with disassembly.

Verify power is off by attempting to operate the fan both via the wall switch and by pulling the chain. If the fan responds in any way, return to the breaker panel and try again. This verification step is non-negotiable—never proceed until you’ve confirmed no electricity reaches the fan.

Remove the Fan Light Cover Safely

With power confirmed off, locate the white cover at the bottom of your ceiling fan assembly where the pull chain emerges. This cover conceals the switch mechanism and is secured by a central retaining nut. Support the cover from below with one hand while using your other hand to unscrew the retaining nut counterclockwise.

Remove any light bulbs before proceeding further. Allow bulbs to cool completely if recently lit, as hot glass is more susceptible to thermal shock. Setting bulbs aside prevents accidental damage during housing removal and eliminates broken glass hazards.

Carefully lower the cover away from the fan housing once the retaining nut is fully removed. Set both the cover and nut in a safe location where they won’t be damaged or lost. With the cover removed, you now have visual access to the pull chain switch assembly.

Access the Internal Switch Mechanism

The fan housing base containing the pull chain switch is typically secured by several screws around its perimeter. Remove these housing screws systematically, working in a pattern (opposite sides rather than all from one side) to prevent binding. Place each screw in a container where it won’t roll away or get lost.

Gently pull the fan housing away from the fan body once all screws are removed. Take care not to damage any wiring connections during this process. With the housing removed, you can now see how the pull chain switch connects to your fan’s electrical system.

Disconnect Wires from the Old Switch

ceiling fan pull chain switch wiring diagram

Examine your current switch to determine how its wires are connected. Many switches use terminals with small screws that clamp wire ends in place. If your switch has these screw terminals, cut the wires as close to the terminal connector as possible using wire cutters to preserve maximum wire length for the new switch.

Some switches feature pull-away connectors where wires detach by pulling firmly. If your existing switch has this design, simply pull each wire from its terminal block without cutting—this preserves all original wire length for easier reconnection.

Install Your New Pull Chain Switch

ceiling fan pull chain switch installation guide

Obtain your replacement switch and verify it matches your old switch’s terminal configuration. Connect the colored wires from your fan’s wiring harness to corresponding terminals on the new switch, matching each wire to the terminal that corresponds to its original connection.

Ensure each connection is secure with no exposed copper wire outside the connector—exposed copper creates a short circuit hazard. Tighten terminal screws firmly but avoid overtightening, which could strip threads or damage wires.

Reassemble and Test Your Repair

Position the new switch back into the mounting hole in the fan housing, ensuring it fits snugly. Secure it with mounting screws tightened firmly but not excessively. Reposition the white cover over the switch area, aligning the central shaft with the cover’s hole, then thread the retaining nut clockwise until snug.

Before reinstalling bulbs, restore power and test the new pull chain switch by pulling it through all settings. Each pull should produce immediate, consistent response with smooth chain movement. If issues persist, turn power off again and verify all wire connections.

Once confirmed working, reinstall light bulbs and restore full operation. Your ceiling fan should now respond to pull chain commands as it did when new.

Quick Fix: Extension Chain Solution

When the chain breaks in the accessible middle section outside the fan housing, a complete switch replacement may be unnecessary. Extension chain kits provide a simple solution with an additional chain length and connector link that joins to the remaining chain portion.

This approach works only when the break occurs where you can grip both ends. If the chain broke flush with the housing or inside where invisible, you’ll need the full switch replacement process. But when applicable, this solution restores functionality in minutes with minimal effort.

Prevent Future Pull Chain Failures

Periodically inspect your chain for signs of wear, fraying, or damage at stress points where it bends around corners. Avoid pulling at sharp angles or with excessive force—pull straight down in a smooth motion to minimize wear on both chain and internal mechanism.

Address early warning signs promptly—if the chain becomes difficult to pull or speeds don’t cycle properly, replace the switch before complete failure occurs. Keeping the chain clean and free from dust extends its operational life and maintains smooth function.

Troubleshoot Common Post-Repair Issues

If your new pull chain switch fails to resolve issues, verify power restoration by double-checking breaker and wall switch positions. Confirm switch compatibility with your specific fan model—different manufacturers use different wiring configurations.

If fan operates but light fails, test with a known-working bulb first. If the light still doesn’t work, the issue may be with the socket rather than the pull chain switch. Persistent inconsistent operation could indicate a faulty capacitor within the fan motor assembly, which typically requires professional service.

How to Fix Ceiling Fan Speeds Not Working


Your ceiling fan suddenly sticks on one speed or refuses to change settings altogether—nothing disrupts home comfort like a fan that won’t respond to your speed adjustments. When ceiling fan speeds not working properly, you’re left either sweltering in stagnant air or battling an unnecessary gale. This guide cuts through the confusion with actionable steps to diagnose and fix the exact problem causing your fan’s speed failure, whether it’s a simple pull chain issue or a failing capacitor. You’ll learn how to identify the specific culprit based on your fan’s symptoms and determine if this is a fix you can handle in under an hour or when to call a professional.

Most residential ceiling fans operate using multi-speed motors controlled by pull chains, wall switches, or remote systems. When one or more speed settings fail, the problem almost always traces back to four key components: the speed selector mechanism, the capacitor regulating motor performance, wiring connections that degrade over time, or the motor windings themselves. Identifying which component matches your specific symptoms saves you unnecessary part replacements and prevents wasted effort on irrelevant fixes. Understanding these failure points puts you in control of the repair process rather than leaving you guessing at what might solve your ceiling fan speeds not working dilemma.

Identify Which Speed Settings Are Affected

Before grabbing tools, determine exactly how your ceiling fan speeds not working issue presents itself. This initial diagnosis directs you toward the most likely cause and prevents wasted effort on irrelevant repairs. Fans that run on only one speed—typically the highest setting—almost always indicate capacitor failure, as this component regulates voltage distribution across different motor windings. When the capacitor fails, power can only reach the winding associated with that single speed.

Fans that cycle through some speeds but skip others point directly to problems with the speed selector switch. Pull chain switches develop worn contacts over time, while wall-mounted controls accumulate dust in their internal mechanisms. Remote-controlled fans often exhibit speed skipping due to pairing issues between the remote and receiver unit. Conversely, fans that don’t respond to any speed changes typically suffer from complete switch failure, wiring disconnects, or power supply problems.

Note whether your fan makes unusual sounds when attempting speed changes. A humming noise without blade movement suggests capacitor issues or motor winding problems, while clicking sounds often indicate a failing pull chain switch. These auditory clues help confirm your visual observations and narrow down the potential causes before you even open the fan housing.

Replace the Pull Chain Switch in 30 Minutes

ceiling fan pull chain switch replacement diagram

When ceiling fan speeds not working but the fan runs on at least one setting, the pull chain switch likely needs replacement. This small cylindrical component inside the fan housing contains contacts that engage as you pull the chain to route power to different motor windings. After years of use, these contacts wear out, corrode, or break completely.

Start by turning off the circuit breaker controlling the fan—never work on live ceiling fan wiring. Remove the canopy cover (usually secured by 2-3 screws) to access the switch housing. Locate the cylindrical switch with multiple wires connected to it. Before disconnecting anything, take a photo of the wiring configuration for reference during reinstallation.

Test the Switch with a Multimeter

Set your multimeter to continuity mode and disconnect the switch wires. Probe the contacts while operating the pull chain through all positions. A functioning switch shows continuity (beep sound) on at least some settings; a failed switch shows no continuity on any setting. If you confirm failure, purchase an exact replacement switch matching your fan’s specifications—most cost under $15.

Complete the Replacement

Remove the old switch by unscrewing its mounting and disconnecting wires according to your reference photo. Install the new switch in the same position, reconnect wires exactly as they were configured, and secure the housing. Reassemble the fan canopy, restore power, and test all speed settings. This straightforward repair resolves ceiling fan speeds not working issues in most older fans with pull chain controls.

Fix Capacitor Failure Causing Single-Speed Operation

If your ceiling fan runs only on high speed or requires manual spinning to start, the capacitor has likely failed. This component (typically rated at 4-6 microfarads for residential fans) regulates voltage distribution between motor windings to enable different speeds. When it fails, the motor can only access the winding associated with the highest speed setting.

Diagnose Capacitor Problems Visually

Locate the capacitor—usually mounted near the switch housing or on top of the motor—and inspect for physical damage. A healthy capacitor appears flat on top; failed units often show bulging, leaking electrolyte, or visible burn marks. Even without visible damage, a capacitor can lose capacity over time, causing speed control issues.

Replace the Faulty Capacitor

Purchase an exact replacement matching both microfarad rating and voltage specifications (typically 250VAC or higher). Before handling the capacitor, discharge it by touching its terminals together with an insulated screwdriver—capacitors store electrical charge even when power is off. Disconnect the old unit, connect the new one using the same wiring configuration, and secure it in place. This $8-$15 part usually solves ceiling fan speeds not working issues when only one speed functions.

Resolve Remote Control Speed Failures

ceiling fan remote receiver pairing instructions

Remote-controlled fans introduce unique troubleshooting challenges when ceiling fan speeds not working. Start with the simplest solution: replace the remote batteries with fresh ones, ensuring correct orientation. Test immediately after replacement—even if the remote worked partially before, weak batteries cause intermittent speed control failure.

Re-Pair Remote and Receiver

If new batteries don’t restore function, re-pair the remote with the receiver unit. Access the receiver in the fan canopy (with power off), locate the small pairing button (often recessed), and press it with a paperclip while simultaneously pressing buttons on the remote. Follow your specific fan model’s pairing sequence—usually involving holding specific buttons for 5-10 seconds until the fan responds.

Replace Faulty Receiver Units

When re-pairing fails, the receiver unit itself may have failed. Symptoms include complete non-response to remote commands or operation on only one speed despite correct pairing. Purchase a compatible replacement receiver for your fan model, disconnect the old unit while noting wire positions, and install the new receiver following the included wiring diagram. This repair typically resolves remote-specific ceiling fan speeds not working issues.

Check Wiring Connections Causing Intermittent Speed Failure

Loose wiring connections account for many ceiling fan speeds not working complaints, especially in older installations. Turn off power at the breaker and remove the fan canopy to inspect all wire connections. Look for:

  • Wires pulled loose from wire nuts
  • Wire nuts that are loose or missing
  • Signs of burning or melting at connection points
  • Corrosion or greenish buildup on copper wires

Tighten any loose connections using proper technique: strip 3/8 inch of insulation, hold wires parallel, and twist on a new wire nut until snug with no exposed copper. Also check connections at the wall control switch if your fan uses one—loose speed control wires often cause specific speeds to fail while others work normally.

Recognize When Motor Windings Have Failed

ceiling fan motor winding test multimeter

When ceiling fan speeds not working despite functional capacitors, switches, and wiring, motor winding failure becomes likely. Symptoms include:

  • Burning smells from the motor housing
  • Excessive heat during operation
  • Speeds that cause the fan to stall or run roughly
  • Complete failure to start despite humming sounds

Testing windings requires a multimeter set to resistance mode. With power off and motor wires disconnected, measure resistance between each pair of motor leads. Healthy windings show low, consistent resistance; failed windings show infinite resistance or significantly higher readings than other windings. Motor replacement becomes necessary when windings fail, though this repair often costs nearly as much as a new fan.

Prevent Future Speed Control Problems

Avoid recurring ceiling fan speeds not working issues with these maintenance practices:

  • Clean dust from blades and motor housing monthly
  • Tighten blade mounting hardware quarterly
  • Inspect electrical connections annually
  • Replace capacitors preventively every 5-7 years

These simple steps extend your fan’s operational life and prevent sudden speed control failures during hot weather when you need your fan most.

Know When to Call an Electrician

Seek professional help immediately if you encounter:
– Damaged or modified wiring
– Tripping circuit breakers during operation
– Burning smells or visible smoke
– Severe motor overheating signs

Capacitor and switch replacements are generally safe for homeowners, but motor repairs and complex wiring issues require professional expertise to ensure safety and proper function.

When ceiling fan speeds not working, systematic diagnosis based on your specific symptoms leads directly to the solution. Most speed control problems stem from accessible components you can fix yourself with basic tools and under $20 in parts. By following this guide’s targeted approach, you’ll restore proper speed control to your fan and avoid unnecessary professional service calls—getting back to comfortable, adjustable airflow in your space.

How to Make Ceiling Fan Faster: Quick Tips


Your ceiling fan whirs weakly overhead while summer heat builds in the room. You’ve cranked the pull chain to high speed, but the breeze feels more like a gentle sigh than the cooling blast you need. This frustrating scenario affects millions of homeowners—especially with older models where dust buildup and worn components silently rob airflow. The good news? You don’t need an electrician or expensive upgrades to regain that powerful, room-churning breeze. By targeting the four key factors that choke fan performance—mechanical resistance, blade pitch, motor efficiency, and directional flow—most homeowners can safely boost speed by 25-40% in under 30 minutes. Let’s fix that sluggish spin.

Why Your Ceiling Fan Loses Speed Over Time

Dust accumulation creates the most common speed killer most people overlook. As microscopic particles coat motor windings and bearings, they act like sandpaper—increasing friction by up to 60% according to HVAC industry tests. This forces the motor to work harder while spinning slower. Simultaneously, warped blades wobble off-axis, creating aerodynamic drag that feels like riding a bike with a stuck brake. You’ll notice this when the fan vibrates noticeably at high speeds or produces a rhythmic “thump” sound. These issues compound silently until your once-powerful fan barely moves air.

Immediate Speed Boost: Clean Motor Housing and Blades

ceiling fan motor dust buildup

How Dust Chokes Your Fan Motor

Open the motor housing cover (usually 2-4 screws beneath the canopy) and inspect for gray, felt-like dust buildup on copper windings. This insulating layer traps heat, triggering thermal overload protection that automatically throttles speed. A single gram of dust can reduce airflow by 15%—equivalent to riding a bike with flat tires.

Step-by-Step Deep Cleaning Process

  1. Turn OFF power at circuit breaker (critical safety step—test wires with voltage tester)
  2. Remove canopy cover and gently vacuum motor housing with soft brush attachment
  3. Dip microfiber cloth in isopropyl alcohol (70%+), wring completely dry, and wipe windings
  4. Clean blade tops/bottoms with damp cloth + mild soap (avoid harsh chemicals that damage finishes)
  5. Reassemble and test—most users report 20-30% immediate speed improvement

Pro Tip: Place painter’s tape on blades before cleaning to catch falling dust. Skip this step and you’ll repaint your ceiling.

Optimize Blade Pitch for Maximum Airflow

ceiling fan blade pitch angle adjustment tool

Why Standard 12-15° Pitch Isn’t Enough

Factory blade angles prioritize quiet operation over power. Increasing pitch to 18-22° forces more air downward per rotation—but only if done correctly. Incorrect adjustments cause dangerous wobble. Measure current pitch by placing a level against the blade’s leading edge; the gap between level and ceiling indicates angle.

Safe Pitch Adjustment Method

  • For adjustable-pitch fans: Loosen blade bracket bolts, tilt to 18° (use angle finder app), retighten
  • For fixed-pitch fans: Install high-velocity blade kits (e.g., Hunter Quick-Install blades)
  • Critical check: After adjustment, spin fan manually—if blades wobble more than 1/8 inch, readjust

Warning: Never exceed 22° pitch. Over-angulation strains the motor mount, risking catastrophic detachment.

Replace the Run Capacitor (The Speed Secret Most Ignore)

How Capacitors Control Fan RPM

This hockey-puck-sized component (usually inside the motor housing) regulates electrical current to the motor. As capacitors age, they lose capacitance—like a battery that won’t hold full charge. A failing 4μF capacitor might drop to 2.8μF, directly reducing rotational force. Your symptom: fan starts slowly or won’t reach top speed.

Capacitor Replacement Checklist

Tools needed: Needle-nose pliers, screwdriver, multimeter, replacement capacitor (match μF rating exactly)
1. Power OFF at breaker—double-check with voltage tester
2. Discharge capacitor by touching terminals with insulated screwdriver
3. Note wire positions (take photo!), disconnect old capacitor
4. Install new capacitor matching original microfarad (μF) rating
5. Test before reassembly—most users gain 15-25% speed instantly

Expert Note: Buy capacitors with “440V” rating (not 370V) for longer lifespan. Cost: $8-$12 at hardware stores.

Reverse Fan Direction for Seasonal Speed Gains

Summer vs. Winter Rotation Physics

Ceiling fans move air downward in summer (counterclockwise rotation) but should push air upward in winter (clockwise). Many homeowners forget to switch modes, forcing the fan to work against physics. In summer mode, improper rotation creates upward drafts that cancel cooling effects—making the fan feel slower even at full speed.

How to Verify and Correct Rotation

  1. Stand directly under fan at full speed
  2. If you feel strong upward breeze, rotation is wrong
  3. Flip direction switch on motor housing (usually labeled “SUMMER/WINTER”)
  4. Correct summer rotation: blades move left-to-right at top of spin

Time Saver: Mark correct summer rotation on canopy with tape—no more guessing each season.

Troubleshoot Speed Control Issues

ceiling fan speed switch wiring diagram

Why Pull Chains Fail to Deliver “High” Speed

Worn speed switches often max out at “medium” without warning. Test by:
– Listening for distinct “clicks” through all settings
– Feeling for resistance when pulling chain
– Checking if fan starts reliably on first pull

Quick Switch Diagnosis

Symptom Likely Cause Fix
Only 1 speed works Broken switch contacts Replace switch module ($12)
Fan starts on 2nd pull Weak spring tension Lubricate mechanism
Speeds jump erratically Carbon buildup on contacts Clean with contact cleaner

Critical: Never force a stiff pull chain. This strips internal gears requiring full motor replacement.

When to Call a Professional

Some speed issues indicate serious hazards requiring expert help:
Burning smell from motor: Overheating windings (immediate shutdown required)
Blue sparks at switch: Arcing wiring (fire risk—cut power now)
Grinding noises: Bearing failure (continuing causes motor seizure)

If your fan is under warranty or over 15 years old, professional service often costs less than DIY mistakes. Replacing a $3 capacitor is smart—but miswiring a speed control could cost $300+ in damage.

Prevent Future Speed Loss With 2-Minute Maintenance

Keep your fan spinning at peak velocity with this quarterly routine:
1. Dust blades weekly with microfiber duster (prevents buildup)
2. Lubricate motor shaft annually with 1 drop of 10W-30 oil (only if manual specifies)
3. Tighten blade screws every 6 months (warped blades cause drag)
4. Check capacitor with multimeter yearly (replace if capacitance drops 15% below rating)

Pro Tip: Set phone reminder for “Fan Tune-Up Day” each season change—takes less time than brewing coffee.


Final Speed Checklist: After implementing these fixes, your fan should:
✅ Reach full speed within 3 seconds of startup
✅ Produce measurable breeze 8+ feet below blades
✅ Operate quietly without vibration
✅ Cool rooms 3-5°F faster than before

Don’t tolerate a lazy-spinning fan when simple, safe adjustments can restore powerhouse performance. Start with the 10-minute cleaning ritual—most users regain significant speed immediately. When dust and wear steal your comfort, remember: a well-maintained ceiling fan moves 5,000+ cubic feet of air per minute. That’s not just breeze—it’s free, efficient cooling that slashes AC costs all summer. Grab your ladder and reclaim that cooling rush today.

Fix Harbor Breeze Ceiling Fan Speed Issues


Nothing disrupts home comfort like a Harbor Breeze ceiling fan that won’t maintain proper speed settings. When your fan suddenly runs only on low, skips speed levels, or cycles unpredictably between settings, the frustration is immediate. These common Harbor Breeze ceiling fan speed problems transform what should be a cooling solution into a source of annoyance and diminished airflow. The good news is that most speed issues stem from just a few components that you can often diagnose and fix yourself without professional help.

Understanding why your Harbor Breeze fan struggles with speed control requires knowing how its electrical system works. Unlike simple on/off appliances, ceiling fans use a carefully balanced system of capacitors, switches, and motor windings to deliver multiple speed settings. When one component fails, the entire speed regulation system can malfunction. This guide cuts through the confusion with step-by-step diagnostics that help you identify whether your problem lies with the capacitor, pull chain switch, remote receiver, or other critical components—saving you time, money, and unnecessary service calls.

Diagnose Speed Control Issues

Your Harbor Breeze ceiling fan speed problems become easier to solve when you first characterize the exact symptoms. Does your fan run only at the lowest speed regardless of switch position? Does it jump erratically between settings? Or does it fail to reach higher speeds entirely? These distinctions matter because they point directly to the failing component. A fan stuck on low speed typically indicates capacitor failure, while inconsistent speed selection often points to switch problems.

Begin your diagnosis by mapping which speed settings work and which don’t. With the fan running, operate the pull chain through all positions while noting which speeds activate. If your fan has a remote, test both control methods separately. This simple exercise reveals patterns that guide your troubleshooting—like a fan that works perfectly with the pull chain but ignores remote commands, which immediately isolates the problem to the remote system rather than the fan’s internal components.

Before touching any electrical components, always turn off power at the circuit breaker and verify it’s off by attempting to operate the fan. This non-negotiable safety step prevents electrical shock and protects sensitive electronics from accidental short circuits during your inspection. Use a non-contact voltage tester on the fan’s wiring to confirm power is completely disconnected before proceeding with physical checks.

Test Capacitor Functionality

Harbor Breeze ceiling fan capacitor test multimeter

The capacitor represents the most frequent culprit behind Harbor Breeze ceiling fan speed problems, especially when higher speeds become unavailable. This small, cylindrical component stores electrical energy to provide the initial boost needed for motor startup and regulates speed transitions between settings. When capacitors fail—which happens frequently due to heat exposure and age—they typically cause symptoms like the fan running only on low speed or failing to reach maximum RPM.

Start with a visual inspection of the capacitor, usually mounted in the fan’s switch housing or canopy assembly. Look for telltale signs of failure: bulging or swelling at the top or sides, leaking electrolyte (appearing as brown, crusty residue), or discoloration from overheating. Even capacitors that appear normal externally can fail internally, so electrical testing provides the definitive diagnosis.

To properly test the capacitor, you’ll need a multimeter with capacitance measurement capability. With power completely off, discharge the capacitor by safely touching its terminals together with an insulated screwdriver, then disconnect the wires. Set your multimeter to measure microfarads (μF) and connect the probes to the capacitor terminals. Compare the reading to the rating printed on the capacitor body—any reading below 80% of the specified value means replacement is necessary. Always match the replacement capacitor’s voltage rating (typically 250V or 370V) and microfarad specifications exactly, as mismatches cause immediate speed problems or motor damage.

Inspect Pull Chain and Speed Switch

Harbor Breeze ceiling fan pull chain switch disassembly

When your Harbor Breeze ceiling fan speed problems include inconsistent speed selection or complete failure to respond to chain pulls, the mechanical switch deserves close attention. This component physically routes power through different capacitor values to achieve each speed setting, and its internal contacts wear out over time from repeated use and dust accumulation.

Access the switch housing by removing the decorative cover (with power off) and examine the pull chain mechanism for smooth operation. Stiffness or resistance when pulling indicates internal binding that prevents proper contact engagement. Remove the switch assembly and inspect all wire connections for looseness, corrosion, or signs of arcing like melted insulation or discolored terminals.

Testing requires a multimeter set to continuity mode. With the switch removed from the circuit, touch probes to the appropriate terminals while cycling through each speed position. Each setting should produce an audible continuity beep when properly engaged. Dead positions indicate worn contacts that need replacement. Many homeowners successfully restore function by carefully cleaning the switch housing with electrical contact cleaner and compressed air to remove accumulated dust and oxidation, though severely worn switches require complete replacement.

Check Remote Control and Receiver

For Harbor Breeze fans with remote operation, speed problems often trace back to the wireless control system rather than the fan itself. When your fan responds correctly to the pull chain but ignores remote commands, or when speeds change unexpectedly during operation, focus your troubleshooting on the remote transmitter and receiver module.

Start with the simplest fix: replace the remote’s battery with a fresh one. Weak batteries cause more remote-related speed problems than any other single issue. While changing the battery, inspect the contacts for corrosion and ensure proper polarity. Next, verify the remote’s infrared signal by pointing your smartphone camera at the LED while pressing buttons—the camera should show visible flashes confirming transmission.

The receiver module, typically mounted inside the fan canopy, can fail due to power surges or moisture exposure. If battery replacement doesn’t resolve the issue, access the receiver (with power off) and check for visible damage like burned components or melted plastic. Test connections between the receiver and fan motor for proper seating, as vibration can gradually loosen these critical links. When in doubt, replacing the entire receiver module—available as model-specific kits from Harbor Breeze—is often faster and more reliable than component-level repair.

Verify Power Supply and Voltage

Harbor Breeze ceiling fan voltage test multimeter

Electrical supply issues frequently masquerade as Harbor Breeze ceiling fan speed problems, especially when the fan runs slowly across all settings. Before concluding the fan itself is faulty, verify that adequate power reaches the unit and that your home’s electrical system delivers stable voltage.

Use a multimeter to measure voltage at the fan’s junction box with power on and other household appliances operating normally. A reading below 110 volts AC suggests circuit problems that affect fan performance. Check for loose connections at the circuit breaker panel, as well as at wall switches controlling the fan. Many speed problems disappear after tightening a loose wire nut in the ceiling electrical box that was causing intermittent voltage drops.

Examine all wiring connections within the fan assembly for signs of overheating—discolored wire nuts, brittle insulation, or melted plastic components. These indicate connections that have been arcing over time, creating resistance that reduces voltage to the motor. Tighten all connections securely and replace any damaged wire connectors. If you discover problems beyond the fan itself (like at the wall switch or breaker panel), consult a qualified electrician to address potential fire hazards.

Maintain Optimal Fan Performance

Preventing future Harbor Breeze ceiling fan speed problems requires simple but consistent maintenance. Clean fan blades and motor housing every three months using a soft cloth or duster—never spray liquids directly onto the motor. Dust accumulation creates imbalance that strains the motor and accelerates component wear.

Inspect blade brackets and mounting hardware twice yearly, tightening any loose screws that cause wobble and vibration. Check pull chain operation monthly to catch developing switch problems early. If your fan model has oil ports (consult your manual), apply 2-3 drops of lightweight machine oil to motor bearings annually—never lubricate sealed bearings as this causes damage.

Address speed problems immediately rather than operating a struggling fan. Motors running at reduced speeds due to capacitor or winding issues draw excessive current, generating dangerous heat that accelerates failure. Early intervention through proper diagnosis and component replacement keeps your Harbor Breeze fan running safely and efficiently for decades.

When speed issues persist despite basic troubleshooting, consult your fan’s specific model manual or contact Harbor Breeze customer support with your model number. For electrical testing or component replacement beyond your comfort level, always enlist a qualified electrician—safety should never be compromised when working with household electricity.

Fix Hampton Bay Ceiling Fan Speed Issues


You’ve just installed your Hampton Bay ceiling fan, but something’s wrong—the fan only runs at one speed or doesn’t respond to your remote control settings. This frustrating problem affects thousands of homeowners each year, leaving them searching for solutions to their Hampton Bay ceiling fan speed problem. When your fan won’t adjust properly, it’s more than just an inconvenience; it impacts your comfort, energy efficiency, and potentially your home’s electrical system. This guide addresses the most common speed control failures in Hampton Bay models and provides actionable steps to diagnose and fix these issues without unnecessary guesswork.

Unfortunately, comprehensive technical documentation for specific Hampton Bay fan models can be difficult to access. Many online resources contain incomplete information or generic advice that doesn’t address model-specific quirks. In this guide, we’ll focus on practical approaches to identify and resolve speed control problems while acknowledging the limitations of available information. You’ll learn what specific details to look for in your model’s documentation and how to safely troubleshoot without risking further damage to your fan.

Identifying Your Specific Hampton Bay Fan Model

Hampton Bay ceiling fan model number location sticker

Before attempting any repairs, you must determine your exact fan model to access accurate troubleshooting information. Hampton Bay fans come in numerous variations with different electrical components that require specific solutions.

Where to Find Your Model Number

Locate your fan’s model number by checking these critical positions:
– The metal bracket connecting the fan to the ceiling
– A sticker on the top of the motor housing (requires fan removal)
– The original packaging or purchase receipt
– The pull chain housing or remote control documentation

Critical warning: Never assume your fan’s components match another model—even fans with identical appearances can have different internal wiring configurations. Attempting repairs without your specific model information risks electrical damage or safety hazards.

Why Model-Specific Information Matters for Speed Problems

Hampton Bay ceiling fan speed problems often stem from component variations between models. The capacitor size, wiring configuration, and control mechanism differ significantly across product lines. A capacitor that works for one model could cause permanent damage to another. Without knowing your exact model, you’re essentially troubleshooting blindfolded—potentially wasting time and money on incorrect parts.

Common Causes of Hampton Bay Fan Speed Control Failures

Hampton Bay ceiling fan capacitor failure diagram

Understanding the root causes of speed control issues helps prioritize your troubleshooting efforts. These problems typically fall into specific categories based on symptom patterns.

Why Your Fan Only Runs at One Speed

When your Hampton Bay ceiling fan operates at a single speed regardless of settings, these components are most likely at fault:
Failed speed control capacitor: The most common culprit, especially in older models
Malfunctioning pull chain mechanism: Worn contacts prevent proper speed selection
Defective wall control unit: Modern installations with hardwired controls
Remote control receiver issues: Signal processing failures in the fan’s receiver

Pro tip: If your fan suddenly stopped changing speeds after a power surge, check the capacitor first—it’s often the first component to fail during electrical fluctuations.

Why Your Fan Won’t Respond to Remote Control Settings

Remote control issues create unique speed problems that require different troubleshooting:

Is Your Remote Battery the Real Problem?

  • Replace batteries with high-quality alkaline types (not rechargeable)
  • Clean battery contacts with isopropyl alcohol
  • Test remote functionality by standing directly under the fan

When Remote Programming Fails

  • Reset the remote control following manufacturer instructions
  • Reprogram the remote to match your fan’s receiver
  • Check for interference from nearby electronic devices

Critical mistake to avoid: Never attempt to disassemble the remote control receiver inside the fan housing unless you’ve disconnected power at the circuit breaker—this component contains capacitors that can deliver dangerous shocks even when the fan is off.

Step-by-Step Hampton Bay Fan Speed Diagnosis

Effective troubleshooting requires a systematic approach that eliminates potential causes in order of complexity and safety.

Safety First: Essential Pre-Diagnosis Steps

Before touching any components, complete these critical safety procedures:
1. Turn off power at the circuit breaker (not just the wall switch)
2. Use a non-contact voltage tester to confirm power is off
3. Allow the fan to cool completely if recently operated
4. Secure your work area with a drop cloth to catch falling parts

Time estimate: 15-20 minutes for proper safety preparation

Basic Speed Control Testing Without Disassembly

Perform these checks before removing any components:
– Test with alternative control methods (pull chain vs remote vs wall control)
– Listen for clicking sounds when changing speeds (indicates mechanical operation)
– Check for unusual burning smells near the motor housing
– Observe if the light kit functions properly (shared circuit issues)

Visual cue: If the fan works on some speeds but not others, the problem is likely in the speed selector mechanism rather than complete component failure.

When to Call a Professional for Hampton Bay Speed Problems

damaged Hampton Bay ceiling fan wiring electrical hazard

Not all speed control issues can be safely fixed by homeowners. Recognizing these red flags prevents dangerous mistakes.

Dangerous Situations Requiring Professional Help

  • Burning smells or visible scorch marks on wiring
  • Tripped circuit breakers when operating the fan
  • Exposed or damaged wiring visible in the housing
  • Water damage near electrical components
  • Persistent humming without fan movement

Cost consideration: Professional diagnosis typically costs $75-$150, but could save you from costly mistakes. If your fan is under warranty, unauthorized repairs may void coverage—always check warranty terms first.

Finding Reliable Hampton Bay Fan Repair Information

The biggest challenge in fixing speed problems is accessing accurate, model-specific information. Generic advice often leads to wasted time and money on incorrect parts.

Where to Find Authentic Technical Documentation

  • Hampton Bay’s official website (search by model number)
  • Home Depot’s Hampton Bay support section (primary retailer)
  • Original installation manuals (often available online)
  • Reputable appliance parts websites with model-specific schematics

Critical warning: Avoid YouTube tutorials or forum posts that don’t specify your exact model number—what works for one fan could damage another. Always verify information against official documentation when possible.

What Proper Repair Documentation Should Include

Authentic technical resources for Hampton Bay ceiling fan speed problems will contain:
– Wiring diagrams specific to your model
– Component specifications (capacitor microfarad ratings)
– Step-by-step disassembly instructions
– Safety warnings for your specific model
– Approved replacement part numbers

If documentation lacks these elements, it’s not reliable for your repair project.

Preventing Future Hampton Bay Fan Speed Issues

Once you’ve resolved your current speed problem, implement these maintenance practices to avoid repeat issues.

Monthly Maintenance for Reliable Speed Control

  • Clean dust from speed control components (when power is off)
  • Tighten loose wire connections in the housing
  • Lubricate moving parts of pull chain mechanisms
  • Test all speed settings to ensure smooth operation

Pro tip: Keep a record of your fan’s model number, purchase date, and any repairs performed—this documentation helps with future troubleshooting and warranty claims.

When to Consider Replacement Over Repair

For older Hampton Bay fans with recurring speed problems, replacement may be more cost-effective than repeated repairs. Consider upgrading if:
– Your fan is over 10 years old
– Replacement parts are discontinued
– Repair costs exceed 50% of a new fan’s price
– You experience frequent electrical issues

Modern fans offer better energy efficiency and more reliable speed controls that reduce long-term maintenance headaches.


Final Note: Hampton Bay ceiling fan speed problems require model-specific solutions that aren’t always readily available. Always prioritize safety by confirming power is off before inspection, and never force components during disassembly. If you cannot locate accurate documentation for your specific model, consult a qualified electrician rather than risking improper repairs. For ongoing maintenance, keep your fan clean and periodically check connections to prevent many common speed control issues. When in doubt about any repair step, stop and seek professional assistance—your safety is more important than saving a few dollars on a DIY fix.

« Older posts Newer posts »

© 2026 Hampton Fan Reviews

Theme by Anders NorenUp ↑