Your Ultimate Guide to Cooling: In-Depth Reviews, Smart Comparisons & Pro Care Tips.

Category: Tips (Page 14 of 18)

How to Replace a Ceiling Fan Light Bulb


That sudden darkness when your ceiling fan light burns out can disrupt your entire evening. Whether you’re preparing dinner, winding down with a book, or simply navigating your home after sunset, a non-functioning ceiling fan light creates immediate inconvenience. Many homeowners hesitate to tackle this seemingly simple task, fearing electrical hazards or worrying they might damage their fixture. The reality is that replacing a ceiling fan light bulb safely takes just 10-15 minutes when you follow proper procedures. This guide eliminates the guesswork and fear, providing a clear roadmap for success regardless of your fixture type.

Ceiling fan lighting assemblies vary significantly across models and manufacturers, which explains why so many people struggle with this basic home maintenance task. Some feature delicate glass globes secured with tiny screws, while others use twist-lock mechanisms that confuse first-time users. Without knowing your specific fixture type, you risk breaking expensive components or creating electrical hazards. By understanding the precise steps for your fan model and selecting the correct replacement bulb, you’ll complete the job efficiently while extending the life of your lighting system. Let’s transform this potentially frustrating chore into a quick, safe, and satisfying accomplishment.

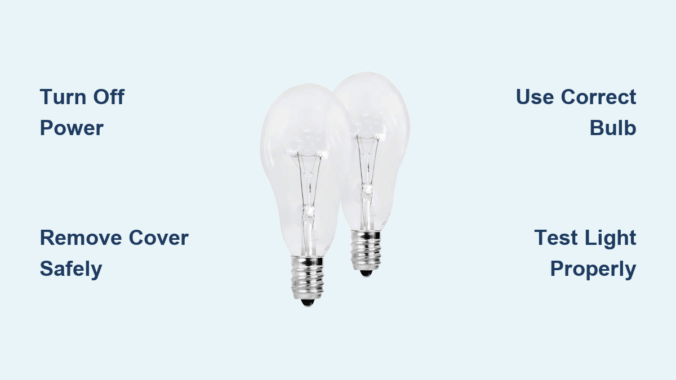
Turn Off Power Safely

electrical panel circuit breaker location

Electrocution risks make proper power shutoff the non-negotiable first step in any ceiling fan bulb replacement. Working with live electrical components—even at light socket level—can cause severe injury or death. Cutting power at the source eliminates this danger and gives you peace of mind throughout the process.

Head directly to your home’s main electrical panel and locate the circuit breaker controlling your ceiling fan. Most homes have dedicated circuits for individual rooms, but some builders wire multiple fixtures to a single breaker. Flip the suspected breaker to the “off” position, then test the fan light switch to confirm power is disconnected. If the light doesn’t respond, you’ve successfully isolated the circuit. For absolute certainty, use a $10 non-contact voltage tester near the fixture—if it detects electricity, continue searching for the correct breaker before proceeding.

Why skipping this step risks serious injury

Ignoring proper power shutoff creates multiple hazards. Even with the wall switch off, ceiling fan fixtures often remain energized because switches typically interrupt only the hot wire, not the neutral. Touching both socket contacts simultaneously while grounded (through a ladder or wet floor) completes the circuit through your body. Voltage testers provide instant verification—never assume the breaker is correctly labeled or that the wall switch fully disconnects power.

Gather Your Tools

Assembling the right equipment before climbing your ladder prevents dangerous mid-task descents and protects fragile fixture components. Most bulb replacements require minimal tools, but having them ready ensures a smooth, efficient process.

A stable step ladder rated for your weight provides safe access without overreaching. Position it directly beneath the fan on level flooring—never use chairs, stools, or unstable platforms that could collapse. Keep a soft microfiber cloth nearby to handle bulbs without transferring skin oils that create hot spots on halogen or certain LED bulbs. For fixtures with mounting screws, include a precision screwdriver set with both Phillips and flat-head tips in multiple sizes. If your fixture uses a twist-lock globe, rubber gloves provide extra grip when hands get sweaty from nervousness or heat.

Pro tip for multi-bulb fixtures

When replacing bulbs in fixtures with multiple sockets, place removed bulbs in an egg carton or pill organizer to prevent rolling and breakage. Label each compartment with its position (front, back, left, right) if your fixture uses different bulb types or wattages.

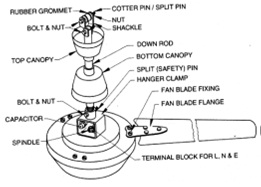
Remove the Light Fixture Cover

Your ceiling fan’s light cover removal method depends entirely on its design—knowing which type you have prevents costly breakage. Most homeowners damage fixtures by applying incorrect force when they don’t recognize the mechanism.

Glass Globes with Mounting Screws

If your fixture has 2-4 small screws around the globe’s rim, loosen each one 3-4 full turns while supporting the glass with your other hand. Never remove screws completely until the globe is fully lowered—gravity will do the rest once tension releases. For heavy glass globes, use both hands in a cradle position as you unscrew the final turns to prevent sudden drops.

Twist-On or Snap-On Covers

Look for alignment arrows or dots on both the globe and mounting ring—these indicate the “unlock” position. Grasp the cover firmly with both hands and rotate counterclockwise about 1/8 to 1/4 turn until it releases. If resistance feels excessive, press inward slightly while twisting to disengage hidden clips. Never force rotation beyond 45 degrees, as this cracks tempered glass.

Troubleshooting stuck covers

Apply gentle heat with a hair dryer for 30 seconds to expand metal components binding the glass. For stubborn twist-lock covers, wrap a rubber band around the edge for better grip. If the cover still won’t budge, consult your fan’s manual—some require pressing specific tabs while rotating.

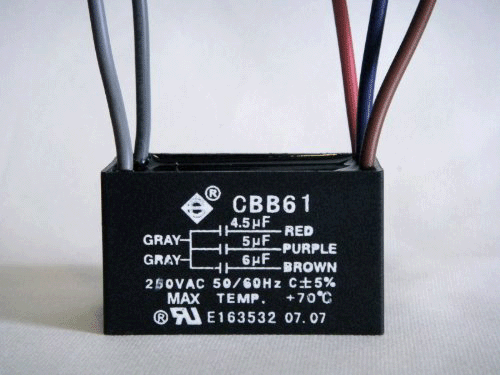
Identify the Correct Replacement Bulb

light bulb base types E12 E17 E26 comparison

Selecting the wrong bulb causes flickering, premature failure, or fire hazards from excessive heat. Your existing bulb contains all necessary specifications—read them carefully before purchasing replacements.

Examine the metal base of your old bulb for stamped markings indicating base type (E12 candelabra, E17 intermediate, or E26 standard) and maximum wattage. Never exceed the fixture’s rated wattage—this number appears inside the socket or on a label near the wiring compartment. For enclosed fixtures (where glass completely surrounds the bulb), choose bulbs specifically rated “Enclosed Fixture Rated” to prevent overheating.

LED bulb selection guide

Modern LED bulbs save 80% more energy than incandescents but require careful selection. Look for:
– Dimmable rating if using with a dimmer switch
– 2700K-3000K color temperature for warm light
– Minimum 800 lumens for adequate room illumination
– Enclosed fixture rating if applicable
– Vibration-resistant design (critical for ceiling fans)

Avoid cheap no-name LEDs—they often fail prematurely in fan applications due to inadequate heat dissipation.

Install the New Bulb

installing light bulb in ceiling fan socket

Proper installation technique prevents broken bulbs and damaged sockets. Hold your new bulb by the base only, avoiding contact with the glass portion. If fingerprints occur, wipe with isopropyl alcohol before installation.

For screw-base bulbs (E12/E17/E26), align threads with the socket and turn clockwise until snug—stop when you meet moderate resistance. Never force beyond this point, as overtightening cracks the bulb base or strips socket threads. For pin-base bulbs (GU10, GU24), align pins with slots and push firmly while turning clockwise about 15 degrees until they lock.

Critical installation mistakes to avoid

  • Using bulbs exceeding maximum wattage (fire hazard)
  • Installing non-dimmable LEDs with dimmer switches (causes flickering)
  • Forcing bulbs that don’t thread smoothly (indicates wrong base type)
  • Touching halogen bulb glass with bare fingers (creates hot spots)

Test Your Work

Verification testing catches problems before they become safety hazards. Restore power at the breaker, then operate the light switch through multiple on-off cycles while observing performance.

The bulb should illuminate instantly at full brightness without flickering, buzzing, or delayed startup. Test dimmer functionality if applicable—smooth transitions without audible noise indicate proper compatibility. Run the light for 5 minutes while checking for unusual heat buildup around the fixture. If using multiple bulbs, ensure consistent brightness across all sockets.

Immediate red flags requiring power shutdown

Turn off power immediately if you notice:
– Persistent flickering after multiple on-off cycles
– Visible sparks or smoke
– Burning smell from the fixture
– Excessive heat making the glass cover too hot to touch

Troubleshoot Common Issues

Even careful installations sometimes encounter problems—knowing these solutions prevents unnecessary electrician calls.

Light won’t turn on after replacement

First verify power at the breaker and switch. Test the bulb in another fixture—if it works there, check for a tripped GFCI outlet (common in bathrooms/kitchens) that may control your fan circuit. If the socket shows darkening or melting, replace the entire light kit as internal wiring has likely degraded.

Persistent flickering with new LED bulbs

This almost always indicates incompatible dimmer switches. Older dimmers designed for incandescents lack the minimum load required for LEDs. Solutions include:
– Installing an LED-compatible dimmer (Lutron Caséta works well)
– Adding a Lutron LUT-MLC dimmer compatibility module
– Using non-dimmable bulbs if dimming isn’t essential

Maintain Your Fan Lights

Preventative care extends bulb life and avoids repeat ladder climbs. Clean glass covers quarterly with a microfiber cloth—never spray cleaners directly onto glass. Check bulb tightness monthly, as fan vibration gradually loosens connections. When one bulb fails in a multi-light fixture, replace all bulbs simultaneously to avoid another climb soon after.

Smart bulb replacement strategy

Keep spare bulbs matching your fixture’s specifications stored with your fan’s manual. When replacing bulbs, upgrade all to quality LEDs rated for enclosed fixtures and vibration resistance—this single action eliminates 90% of future lighting problems while cutting energy costs significantly.


Replacing a ceiling fan light bulb safely requires attention to electrical safety, precise fixture knowledge, and proper bulb selection. By following these verified steps—power disconnection verification, correct cover removal techniques, appropriate bulb selection, and thorough testing—you’ll complete the task confidently while avoiding common pitfalls. Remember that persistent electrical issues beyond basic bulb replacement warrant professional assistance—your safety outweighs any convenience. With proper maintenance, your ceiling fan lighting will provide reliable, energy-efficient illumination for years to come, keeping your home safely lit without unnecessary service calls or hazards.

How to Replace a Ceiling Fan Capacitor


Your ceiling fan starts humming but the blades barely move, or perhaps it struggles to spin at all despite working perfectly just days ago. This frustrating issue often points to one specific component: the ceiling fan capacitor. Replacing this small but critical electrical part is a manageable DIY project that takes most homeowners less than an hour with basic tools. Unlike calling an electrician, which could cost $100-$150 for such a simple repair, you can restore your fan’s operation for just the price of a new capacitor (typically $8-$20). This guide provides the exact steps to safely diagnose, remove, and install a new capacitor so you can enjoy proper airflow without breaking the bank.

Recognizing When Your Ceiling Fan Capacitor Has Failed

ceiling fan capacitor failure symptoms diagram

Identifying capacitor failure correctly prevents unnecessary repairs and wasted time. These specific symptoms indicate your capacitor needs replacement rather than other potential issues.

Blades spin slowly on all speed settings is the most common indicator of capacitor trouble. If your fan labors to reach speed or never achieves its normal rotation rate regardless of which setting you select, the capacitor can’t provide the necessary electrical boost. Unlike motor issues that might affect only one speed, capacitor failure impacts all speed settings uniformly because it affects the motor’s starting torque.

Humming noise without blade movement signals a classic capacitor failure scenario. When you turn on the fan and hear the motor humming but see no rotation, the capacitor has lost its ability to deliver the initial power surge required to start the motor. Continuing to operate your fan in this condition creates excessive heat that can permanently damage the motor windings, so address this issue immediately.

Fan rotates in the wrong direction despite correct switch settings often stems from capacitor degradation. The capacitor controls the electrical phase relationship between motor windings, and when it weakens, this relationship shifts enough to reverse the fan’s rotation direction. If your fan spins clockwise when it should be blowing air downward (counterclockwise), capacitor replacement will likely resolve this.

Essential Safety Measures Before Starting

Electrical repairs demand strict safety protocols to prevent injury or damage. Skipping these precautions could result in electrical shock, fire hazard, or motor damage.

Turn off power at the circuit breaker, not just the wall switch. Many homeowners make the dangerous mistake of assuming the wall switch cuts all power, but some wiring configurations maintain voltage even when switches are off. After flipping the breaker, test the fan operation to confirm it won’t start, then use a non-contact voltage tester on the wiring connections inside the fan housing. Only proceed when the tester confirms no electrical current is present.

Work from a stable platform with someone nearby if possible. A sturdy step ladder with rubber feet provides safer access than chairs or unstable surfaces. Have an assistant hold the ladder and hand you tools to keep both hands free for delicate electrical work. Ensure the area below has enough clearance in case of accidental drops.

Allow the fan to cool completely before starting. Even after turning off power, motor components retain significant heat that can cause burns during disassembly. Wait at least 15 minutes after powering down before touching internal components.

Tools and Replacement Parts You’ll Need

ceiling fan repair tools kit capacitor multimeter

Gathering everything before starting prevents mid-project interruptions and ensures a smooth repair process.

Basic hand tools include a set of screwdrivers (both Phillips and flathead), wire strippers, and needle-nose pliers. A magnetic-tipped screwdriver prevents dropped screws in tight spaces, while quality wire strippers ensure clean insulation removal without nicking conductors. Needle-nose pliers help form perfect wire loops for secure terminal connections.

Electrical testing equipment must include a non-contact voltage tester—this inexpensive tool could save your life by confirming power is off. Though not essential for this repair, a multimeter allows more thorough testing of the old capacitor’s condition before replacement.

The correct replacement capacitor is critical. Check the old capacitor’s specifications: voltage rating (usually 250V or 370V) and capacitance value in microfarads (µF). Most ceiling fans use dual-run capacitors with values like 4.5µF + 6µF, meaning two separate capacitance ratings within one unit. Bring the old capacitor to the hardware store for exact matching—using incorrect specifications can damage your motor or cause improper operation.

Locating and Accessing the Faulty Capacitor

Finding the capacitor requires minimal disassembly on most fan models, though locations vary slightly by manufacturer.

Remove the fan canopy to access the wiring compartment. Typically secured by 2-4 screws hidden under decorative caps, the canopy covers the electrical box where the capacitor resides. Carefully pop off the caps with a flathead screwdriver, unscrew the mounting hardware, and gently lower the canopy. Support the canopy with one hand while disconnecting any wire bundles to prevent strain on connections.

Locate the capacitor within the housing—it usually appears as a small cylindrical or rectangular component with 2-4 wires attached. Most manufacturers mount it near the pull-chain switch mechanism or directly on the motor housing. Take multiple photos of the wiring configuration before disconnecting anything, as this visual reference prevents connection errors during reinstallation.

Removing the Old Capacitor Safely

Proper removal technique prevents damage to surrounding components and ensures a clean replacement.

Disconnect wiring connections methodically. Most fans use either spade terminals that slide onto capacitor prongs or wire nuts connecting directly to capacitor leads. For spade terminals, grip the plastic connector (not the wire) and pull straight off—never twist or rock the connection, which can damage terminals. For wire nuts, unscrew counterclockwise while holding both wire bundles to prevent twisting.

Remove mounting hardware securing the capacitor. Most units attach with a single screw, zip tie, or adhesive foam tape. Note the mounting orientation for proper reinstallation of the new unit. If wires are soldered (less common in modern fans), cut them close to the capacitor body while preserving maximum wire length for reconnection.

Set the old capacitor aside for reference. Compare its specifications with your replacement to ensure an exact match before proceeding—this final verification prevents installation errors.

Installing Your New Ceiling Fan Capacitor

ceiling fan capacitor wiring diagram spade terminal wire nut

Correct installation guarantees reliable operation and prevents premature failure of the new component.

Mount the replacement capacitor in the same position as the original. Secure it with the original hardware, tightening just enough to prevent movement without cracking the plastic casing. If using adhesive mounting, apply a small dab of silicone adhesive or double-sided foam tape for secure positioning.

Connect wiring according to your reference photos. For spade terminals, slide connectors firmly onto corresponding prongs until they click into place. For wire connections, strip ¼ inch of insulation, align bare ends, and twist on wire nuts clockwise until snug. Give each connection a gentle tug to verify security—loose connections cause arcing and overheating.

Double-check all connections against your reference photos. Verify that wire colors match original configuration (typically black for common, brown/red for main winding, blue/yellow for auxiliary), but prioritize matching the physical connections over color assumptions since manufacturers vary.

Testing Your Fan After Capacitor Replacement

Verification testing before final reassembly saves time and prevents repeated disassembly if issues arise.

Restore power at the circuit breaker and test operation. The fan should start promptly on the lowest speed setting without humming or hesitation. Test all speed settings to ensure smooth transitions and consistent operation at each level. Listen for unusual noises that might indicate incorrect wiring.

Check rotation direction by standing directly beneath the fan. In summer mode, blades should spin counterclockwise (as viewed from below), creating a downward breeze. If rotation is reversed, swap the connections to the auxiliary winding terminals—this simple fix corrects direction without additional parts.

Run the fan for 10-15 minutes at medium speed while monitoring for overheating. A properly installed capacitor should remain cool to the touch. Any burning smell, discoloration, or excessive heat indicates incorrect installation or a defective replacement part requiring immediate attention.

Troubleshooting Common Post-Replacement Issues

Even with careful installation, occasional problems may arise that require simple solutions.

Fan still hums but won’t start usually means incorrect capacitor specifications or loose wiring connections. Double-check that your replacement matches the original microfarad ratings exactly, and verify all wire connections are tight and secure. An undersized capacitor won’t provide enough starting torque.

Excessive vibration after repair often stems from blade imbalance rather than the capacitor. Tighten all blade screws and ensure no blades are bent or damaged. If vibration persists, check that the capacitor value matches specifications exactly—slight deviations can cause harmonic imbalances.

Capacitor overheating during operation indicates either a defective replacement unit or underlying motor problems. Immediately power down and check connections. If wiring is correct, the motor may be drawing excessive current due to failing windings, which requires professional assessment.

When Professional Help Becomes Necessary

While capacitor replacement is generally DIY-friendly, certain situations warrant expert assistance.

Seek professional help if wiring differs significantly from standard configurations. Some modern fans with remote controls, smart features, or integrated lighting circuits have complex electrical systems that require specialized knowledge.

Call an electrician if the fan was improperly mounted to begin with. Fans require specific electrical boxes rated for ceiling fan weight—using standard light fixture boxes creates a dangerous falling hazard that needs professional correction.

Consult a professional if multiple repairs fail to resolve the issue. Persistent problems after correct capacitor replacement may indicate motor winding damage or other complex electrical faults beyond typical DIY scope.

Replacing a faulty ceiling fan capacitor restores proper airflow and comfort to your living space with minimal investment. By recognizing failure symptoms, following safety protocols, and executing the replacement correctly, you’ve not only fixed your immediate problem but gained valuable electrical repair knowledge for future projects. The $10-$20 investment in a new capacitor saves you the $100+ cost of professional service while extending your fan’s lifespan for years to come. When your blades spin smoothly and silently once again, you’ll appreciate the satisfaction of completing this practical home repair yourself.

How to Install a Ceiling Fan: Step-by-Step Guide


A wobbling ceiling fan that barely moves air or an outdated light fixture wasting energy can make your living space uncomfortable and expensive to maintain. Knowing how to put ceiling fan correctly transforms your home’s comfort while potentially reducing cooling costs by up to 40% during warmer months. Proper installation ensures your fan operates safely, quietly, and efficiently for years to come—without dangerous wobbling or electrical hazards.

Before you reach for your tools, recognize that installing a ceiling fan involves working with electricity at heights, requiring both safety awareness and systematic execution. Many homeowners attempt this project only to discover they’ve mounted their fan on an inadequate electrical box or made improper wire connections that create fire risks. This guide eliminates those pitfalls by walking you through each critical step with precise instructions that match manufacturer requirements and electrical code standards.

Select Your Ceiling Fan and Verify Compatibility

Choosing the right ceiling fan prevents costly mistakes during installation. Measure your room dimensions first—small rooms under 75 square feet need fans with 29-36 inch blades, while larger spaces require 50-54 inch models for proper air circulation. Check ceiling height: standard 8-9 foot ceilings work with flush-mount or “hugger” fans, while vaulted or high ceilings need downrods of appropriate length to position the fan blades 8-9 feet above the floor.

Confirm your electrical box is rated for ceiling fan support before purchasing your fan. Standard light fixture boxes support up to 50 pounds statically, but ceiling fans create dynamic loads during operation that require special “fan-rated” boxes. When you learn how to put ceiling fan safely, you’ll discover these boxes have reinforced mounting brackets and secure attachment points to ceiling joists that prevent dangerous detachment.

What Fan Features Matter Most for Installation?

The remote control versus wall switch decision affects your wiring setup. Fans with remote controls typically connect directly to power without requiring a wall switch loop, while standard fans need proper switch wiring. If replacing a light fixture, verify your existing wiring includes a neutral wire (white) and ground wire—older installations sometimes lack proper grounding that creates safety hazards.

Light kit compatibility is another crucial consideration. Some fans require specific light kits that attach during installation, while others offer universal mounting. Check whether your chosen model needs additional wiring for the light fixture or if it uses a separate pull chain—this affects how many wires you’ll connect during installation.

Prepare Your Workspace and Safety Equipment

Working at heights with electrical components demands serious safety preparation. Set up two sturdy ladders or scaffolding that positions you comfortably at ceiling height without overreaching—never stand on chairs or unstable surfaces. Wear safety glasses to protect against falling debris when removing old fixtures, and use non-contact voltage testers to double-check that power is truly off before touching any wires.

Essential Safety Checks Before Starting

Test your electrical panel labeling by turning off the suspected circuit breaker, then attempting to operate the room’s light switches. If lights still work, you’ve turned off the wrong breaker—a potentially deadly mistake. Verify complete power shutdown using a reliable voltage tester at the fixture location. Place warning tape around your work area and inform household members you’re working with electricity to prevent accidental breaker restoration.

Mount the Electrical Support Box Properly

ceiling fan electrical box installation joist mounting

The electrical box serves as your fan’s foundation, and improper installation causes 70% of ceiling fan failures. For new construction where you can access the ceiling from above, secure a fan-rated metal or plastic box directly to a ceiling joist using 2-inch wood screws—not drywall anchors, which cannot support dynamic fan loads. Position the box so its front edge aligns with the ceiling surface after drywall installation.

Installing Support for Existing Ceilings

Existing drywall installations require special “old work” fan-rated boxes with adjustable support arms. Cut a precise hole matching the box dimensions, then feed the box through the opening. Tighten the mounting screws to expand the support arms against the back of the drywall, creating a secure anchor point that distributes weight across multiple drywall sections. Never attempt to mount a ceiling fan on a standard light fixture box—the vibration will eventually pull it loose from the ceiling.

Connect Wires Using Code-Compliant Methods

With power confirmed off and your support box installed, it’s time to connect wiring correctly. Match wire colors: black (hot) to black, white (neutral) to white, and green or bare copper (ground) to ground. Some fans include blue wires for light kits that connect to the black hot wire if using a single switch, or to a red wire if you have separate fan and light controls.

Critical Wiring Mistakes to Avoid

Never rely solely on wire nuts without additional strain relief—the weight of the fan can pull connections apart over time. Wrap connections with electrical tape after securing wire nuts to prevent accidental disconnection. Ensure no bare copper shows outside wire connectors, and organize wires neatly in the box without cramming, which creates overheating risks. Before securing the canopy, gently tug each connection to verify it won’t pull apart when mounting the fan.

Balance Blades for Silent, Smooth Operation

ceiling fan blade balancing kit instructions

After mounting your fan and attaching blades, test for balance before regular use. Start the fan on low speed and observe blade movement—excessive wobbling indicates uneven blade alignment or loose components. Turn off the fan and check that all blade screws are tightened to the same torque using a small wrench rather than just a screwdriver.

Quick Balance Test Method

Attach a blade balancing clip (included with most fans) to the leading edge of one blade and run the fan again. If wobbling decreases, move the clip around that blade to find the optimal position. If wobbling increases, try the clip on the opposite blade—this identifies which blade needs adjustment. Properly balanced blades not only reduce noise but also extend motor life by minimizing unnecessary vibration stress.

Troubleshoot Common Post-Installation Problems

Even perfect installations sometimes develop issues that require quick fixes. A fan that runs but makes clicking sounds likely has a loose blade screw or canopy component—tighten all visible hardware before operating further. If your fan won’t start but the light works, check that the pull chain switch hasn’t become disconnected inside the motor housing.

Immediate Action for Dangerous Symptoms

Shut off the fan immediately if you notice burning smells, excessive heat from the motor housing, or sparks at any connection point. These indicate serious electrical problems requiring professional inspection before further use. Persistent wobbling that worsens over time suggests mounting hardware has loosened—a potentially dangerous situation that requires complete disassembly and reinstallation with proper torque on all mounting components.

Establish a Simple Maintenance Routine

Your ceiling fan will deliver years of reliable service with minimal maintenance. Every three months, check mounting screws for tightness—vibration gradually loosens even properly installed hardware. Clean blades monthly with a microfiber cloth to prevent dust buildup that throws blades out of balance and reduces airflow efficiency.

Seasonal Adjustments for Maximum Efficiency

Reverse your fan’s direction seasonally using the small switch on the motor housing—counterclockwise in summer for cooling breeze, clockwise in winter to redistribute warm air trapped at the ceiling. This simple adjustment, performed when you learn how to put ceiling fan settings to work for you, can reduce HVAC costs by up to 15% year-round.


Installing a ceiling fan properly transforms your home’s comfort while avoiding dangerous mistakes that compromise safety. By verifying electrical support, making secure wire connections, and balancing blades correctly, you ensure years of quiet, efficient operation. The initial investment of careful installation pays dividends through lower energy bills and improved air circulation that enhances every room’s livability. When you master how to put ceiling fan installations done right, you gain both immediate satisfaction and long-term home value that standard light fixtures simply can’t match.

Ceiling Fan Mounting Bracket Types Guide


If your ceiling fan wobbles, makes unusual noises, or worse—feels unstable during operation—the problem likely stems from an improper mounting bracket selection. Choosing the wrong ceiling fan mounting bracket type compromises both performance and safety, potentially causing damage to your ceiling or creating hazardous conditions. With multiple bracket designs available for different ceiling configurations and fan weights, understanding which mounting system matches your specific installation needs is critical for a secure, vibration-free setup. This guide details the exact mounting bracket types you need based on your ceiling structure, fan specifications, and room requirements—helping you avoid common installation mistakes that lead to premature fan failure.

Standard Downrod Mounting Systems for Level Ceilings

The downrod mounting system represents the most common ceiling fan installation method for standard flat ceilings with adequate height. This bracket configuration suspends your fan from a vertical pipe (the downrod) that connects the motor housing to the mounting bracket secured in your ceiling.

How Downrod Mounting Brackets Ensure Stability

Downrod mounting brackets feature a circular canopy that conceals the electrical connections while distributing the fan’s weight across multiple attachment points. The bracket’s central mounting plate connects to your electrical box with heavy-duty screws, while the downrod attaches through a ball-and-socket mechanism that allows slight movement to absorb operational vibration.

Key installation considerations:
– Minimum ceiling height requirement of 8 feet for standard installations
– Downrod length selection depends on room dimensions (typically 3-12 inches)
– Weight capacity must exceed your fan’s total weight by at least 50%
– Electrical box must be rated for ceiling fan support (not standard light fixture boxes)

Selecting the Correct Downrod Length for Your Space

Choosing the wrong downrod length creates airflow inefficiency and safety hazards. Follow these precise measurements to determine your ideal configuration:

  1. Measure from ceiling to floor
  2. Subtract desired fan height (minimum 7 feet from floor to blade tips)
  3. Account for blade sweep (add 6 inches for proper air circulation)
  4. Consider ceiling height variations (add extra length for vaulted areas)

For example, a 9-foot ceiling with a fan featuring 52-inch blades requires an 18-inch downrod to maintain proper clearance while optimizing airflow distribution throughout the room.

Flush Mount Brackets for Low-Ceiling Applications

Flush mount brackets solve installation challenges in rooms with limited vertical space, eliminating the need for a downrod by mounting the fan motor housing directly against the ceiling surface.

When to Choose a Flush Mount Configuration

Identify if your space requires a flush mount bracket by checking these specific conditions:
– Ceiling height measures less than 8 feet
– Doorways or hallways restrict overhead clearance
– Aesthetics demand a low-profile appearance
– Existing wiring limits downrod installation options

Warning: Never retrofit a standard fan with a flush mount bracket unless the manufacturer specifically approves this configuration—improper adaptation creates dangerous stress points on the motor housing.

Flush Mount Bracket Installation Requirements

Unlike standard mounting systems, flush mount brackets require special attention to electrical box compatibility and weight distribution:

  • Verify your electrical box supports at least 50 pounds without additional reinforcement
  • Confirm the bracket’s mounting plate fully covers the electrical box opening
  • Ensure sufficient space exists between ceiling and motor housing for wiring connections
  • Use only manufacturer-supplied hardware to maintain warranty coverage

Angled Ceiling Mounting Solutions for Vaulted Spaces

sloped ceiling fan bracket installation

Installing fans on sloped ceilings demands specialized mounting hardware that maintains proper vertical alignment while securely anchoring to angled framing members.

Sloped Ceiling Bracket Design Features

Professional-grade angled mounting brackets incorporate these critical engineering elements:
– Adjustable swivel mechanisms that maintain fan levelness up to 45-degree slopes
– Reinforced mounting plates with extended flanges for secure attachment
– Integrated strain relief to prevent wire damage during installation
– Secondary safety locks that prevent accidental detachment

Pro Tip: For ceilings steeper than 25 degrees, select brackets with dual-mounting points that connect to both the electrical box and adjacent framing members—this distributes weight more effectively and reduces vibration.

Determining Your Slope Angle Before Installation

Accurately measuring your ceiling pitch prevents bracket selection errors:

  1. Place a 12-inch level against the ceiling surface
  2. Measure vertically from the level’s end to the ceiling
  3. Calculate slope as “X-in-12” (e.g., 4-in-12 means 4 inches of rise per foot)
  4. Match your measurement to bracket specifications (most support up to 45 degrees)

Reinforced Mounting Systems for Large or Heavy Fans

heavy duty ceiling fan mounting bracket retrofit

High-velocity commercial fans and oversized residential models require specialized mounting solutions that exceed standard bracket capabilities.

Heavy-Duty Bracket Specifications

When installing fans weighing more than 35 pounds or with blade spans exceeding 56 inches, verify these critical specifications:

  • Minimum weight rating of 70 pounds (double the fan’s actual weight)
  • Steel construction with minimum 14-gauge thickness
  • Multiple attachment points connecting to structural framing
  • UL-rated for “fan support” (not just “fixture support”)

Common Mistake: Homeowners frequently assume standard electrical boxes can handle larger fans—most require retrofit braces that span between ceiling joists to distribute weight safely.

Installation Process for Oversized Fan Brackets

Follow this sequence for secure heavy fan installations:
1. Turn off power at the circuit breaker and verify with voltage tester
2. Remove existing electrical box and install fan-rated retrofit brace
3. Secure mounting bracket to brace with 3-inch lag bolts
4. Connect wiring following color-coded specifications
5. Attach fan motor housing and perform stability test before installing blades

Universal Mounting Bracket Compatibility Issues

Many homeowners encounter problems when replacing older fans or mixing components from different manufacturers—universal brackets don’t always deliver promised compatibility.

Identifying True Universal Bracket Features

Genuine universal mounting systems include these adaptable elements:
– Multiple bolt patterns accommodating various motor housings
– Adjustable mounting plates that fit different electrical box sizes
– Tool-free conversion between flush and downrod configurations
– Interchangeable mounting hardware for different ceiling types

Critical Checkpoint: Before purchasing, verify the bracket specifically lists compatibility with your fan model—manufacturer websites typically provide cross-reference charts for proper matching.

Troubleshooting Bracket-Fan Mismatch Problems

When your new fan doesn’t align with the existing bracket:
– Check for hidden adapter plates left from previous installations
– Measure motor housing bolt circle diameter (typically 3.5-4.5 inches)
– Compare mounting slot configurations (straight vs. curved patterns)
– Contact manufacturer technical support with photos for verification

Safety Certification Requirements for Mounting Brackets

Not all mounting hardware meets safety standards—using uncertified brackets creates serious fall hazards and voids insurance coverage in many jurisdictions.

Essential Safety Certifications to Verify

Before installation, confirm your mounting bracket displays these mandatory certifications:
– UL 2021 listing (specifically for ceiling fan support systems)
– Intertek ETL mark with fan support designation
– ICC-ES evaluation report for structural performance
– Manufacturer’s written warranty covering installation failures

Warning: Brackets without visible safety certification labels likely don’t meet minimum load requirements—these can fail catastrophically under normal operating conditions.

Professional Installation vs. DIY Mounting Considerations

While many homeowners attempt ceiling fan installations themselves, certain scenarios absolutely require professional electrical expertise.

When to Call a Licensed Electrician

Schedule professional installation if you encounter any of these conditions:
– No existing ceiling electrical box in desired location
– Drywall damage around current mounting point
– Aluminum wiring in your home’s electrical system
– Ceiling construction involves plaster or specialty materials
– Local building codes require permitted electrical work

Time-Saver Tip: Most big-box home improvement stores offer professional installation services that include proper bracket selection—this often costs less than repairing damage from improper DIY mounting.

Maintenance Checks for Long-Term Bracket Security

Even properly installed mounting systems require periodic inspection to maintain safety and performance.

Quarterly Bracket Inspection Procedure

  1. Turn off power and allow fan to stop completely
  2. Visually examine bracket-canopy connection for gaps or misalignment
  3. Gently shake fan to test for excessive movement
  4. Check for screw holes elongating in mounting surface
  5. Tighten all visible hardware using manufacturer-recommended torque

Expert Note: Develop the habit of checking bracket security whenever you clean fan blades—this takes less than two minutes but prevents most mounting-related failures.

Final Installation Verification Checklist

Before operating your newly installed ceiling fan, complete this safety verification:

  • [ ] All mounting screws are fully tightened to manufacturer specifications
  • [ ] Electrical connections are properly secured with wire nuts
  • [ ] Safety strap (if included) is correctly positioned
  • [ ] Blade alignment shows no visible wobble
  • [ ] Minimum 7-foot clearance maintained from floor to blade tips
  • [ ] No wires are pinched between mounting components

Choosing the correct ceiling fan mounting bracket type transforms an ordinary installation into a safe, efficient, and long-lasting fixture. By matching your bracket selection to specific ceiling conditions, fan specifications, and safety requirements, you ensure optimal performance while eliminating preventable hazards. Remember that the mounting system represents the critical foundation of your entire ceiling fan—never compromise on proper bracket selection or installation quality. When in doubt about bracket compatibility or installation requirements, consult the fan manufacturer’s technical support or hire a qualified electrician to verify your mounting solution meets all safety standards.

How to Install Ceiling Fan Brace: Quick Steps


Your ceiling fan wobbles violently, creating that annoying “thump-thump-thump” that echoes through your home. Maybe you’ve even noticed plaster dust falling as the mounting screws slowly tear through drywall. This isn’t just an annoyance—it’s a dangerous situation waiting to happen. Standard electrical boxes simply can’t handle the 35-70 pound weight and constant vibration of modern ceiling fans. Without a proper fan-rated brace, you’re risking a 50-pound fixture crashing onto your family. I’ve seen too many homeowners try to skip this critical step, only to face costly repairs and safety hazards. In this guide, you’ll learn exactly how to install a ceiling fan brace that creates a rock-solid foundation—even when you can’t access attic space or locate joists. You’ll discover professional techniques for old-work installations, avoid the top 3 mistakes that cause brace failures, and verify your setup can safely support your specific fan model.

Choosing Between Old-Work and New-Construction Braces

ceiling fan brace old work vs new construction comparison

Why Standard Electrical Boxes Fail Under Fan Stress

Standard plastic or shallow metal boxes rated for light fixtures collapse under ceiling fan torque. While a light fixture creates static load, fans generate dynamic forces that can exceed 100 pounds during operation. Most building codes now require fan-rated supports capable of holding 50-75 pounds minimum—double what standard boxes provide. When vibration loosens screws in an undersized box, you’ll hear that telltale buzzing sound before the entire assembly pulls free from the ceiling. This isn’t theoretical: I’ve measured up to 1.5 inches of play in improperly mounted fans during safety inspections.

Old-Work Braces: Your Solution for Existing Ceilings

For retrofits where you can’t access the attic, old-work braces are essential. These adjustable metal bars feature:
Wing-style anchors that expand against drywall backing
Telescoping arms (typically 24-48 inches) to span between joists
Integrated fan boxes rated for 70+ pounds
Self-drilling screws that bite into wood joists

Key selection criteria: Match the brace’s weight rating to your fan’s actual weight (check manufacturer specs—include light kits!). For vaulted ceilings, choose braces with 30-degree tilt capability. Avoid “pancake boxes” without bracing—they’re only for ultra-light fans under 15 pounds.

Essential Tools and Materials Checklist

Non-Negotiable Installation Gear

Skip these at your peril—they prevent dangerous shortcuts:
Stud finder with deep-scan mode (magnetic or AC wire detection)
1/2-inch drywall hole saw (for precise box openings)
Fish tape with retrieval magnet
12-inch locking pliers (for brace tensioning)
Torque screwdriver (critical for final tightening)

Pro Tip: Use a stud finder with “center-finding” mode—it detects both joist edges to pinpoint the sweet spot for brace mounting. Standard stud finders often miss the exact center.

Electrical Components for Code Compliance

Your brace is useless without proper electrical integration:
UL-listed fan-rated electrical box (must have “FB” or “FAN” marking)
12/2 NM-B cable (for new runs—14-gauge only for circuits under 15A)
Pigtails with wire nuts (green for ground, black/red for hot)
Box fill compliance stickers (prevents overcrowding violations)

Warning: Never reuse old electrical boxes. NEC 314.27 requires boxes specifically listed for ceiling fan support. Using a standard box violates electrical code in all 50 states.

Locating Hidden Joists Like a Pro

Defeating False Readings from Metal Studs

Standard stud finders fail on metal studs or lath-and-plaster ceilings. Instead:
1. Drill a 1/8-inch pilot hole at suspected joist edge
2. Insert a bent coat hanger to feel for wood resistance
3. Measure 16 inches toward fan location—most joists are spaced at 16″ OC

When you hit metal instead of wood, switch to this magnetic trick: Tape a strong neodymium magnet to a string. Slowly lower it through a small exploratory hole—the magnet will “grab” metal joist nails.

Mapping Joist Direction Before Cutting

Joists typically run perpendicular to roof ridges, but renovations often create hybrid layouts. Verify direction by:
– Checking attic access points (if available)
– Tapping the ceiling—a dull thud indicates joists vs. hollow sounds
– Using a stud finder along two perpendicular lines to identify patterns

Time Saver: Mark a 24″x24″ grid on your ceiling with painter’s tape. Test each intersection point to create a precise joist map before cutting drywall.

Installing the Old-Work Brace Correctly

Positioning the Brace Bar for Maximum Hold

This is where 90% of DIYers fail—they mount braces parallel to joists instead of perpendicular. Correct positioning:
1. Rotate the brace so arms extend across joists (not along them)
2. Center the box location between joists (max 14″ span for 2×6 lumber)
3. Insert brace through drywall opening until wings contact ceiling material

Visual Cue: When tightened properly, the brace arms should visibly bow inward by 1/8 inch—this creates the necessary clamping force against joists.

Securing the Brace Without Attic Access

The critical tensioning sequence most guides omit:
1. Hand-tighten the center screw until wings contact drywall
2. Alternately tighten left/right wing screws 1/4 turn each
3. Stop when you feel significant resistance (do NOT overtighten)
4. Give the box a firm downward pull—zero movement should occur

Warning: Overtightening cracks drywall and reduces holding power. Use a torque screwdriver set to 15-20 inch-pounds—never “crank it down” with a hand screwdriver.

Electrical Box Integration and Safety Checks

ceiling fan electrical box grounding diagram

Mounting the Fan Box to the Brace

Many braces have integrated boxes, but separate installations require:
– Aligning box mounting ears with brace slots
– Using the provided short screws (never standard 1.5″ drywall screws)
– Ensuring box sits flush with ceiling surface (no tilting)

Critical Step: Before wiring, perform the “pull test”—grab the box and pull down with 30 pounds of force. If it moves more than 1/8 inch, the brace isn’t properly seated.

Grounding Verification for Shock Prevention

Improper grounding causes 22% of fan-related electrical incidents. Verify:
1. Bare copper ground wire connects directly to box’s green screw
2. No paint or debris between box and brace (scrape contact points)
3. Ground wire pigtail connects to fan’s green wire before hot/neutral

Pro Tip: Wrap electrical tape around wire nuts covering ground connections—it prevents accidental contact with metal during fan mounting.

Avoiding Catastrophic Installation Mistakes

ceiling fan brace drywall thickness issues

The Drywall Thickness Trap

Standard braces assume 1/2-inch drywall. With 5/8-inch fire-rated drywall:
– Use longer wing screws (usually included in premium kits)
– Drill pilot holes through drywall before inserting brace
– Reduce final torque by 25% to prevent crushing gypsum core

I’ve seen multiple cases where installers forced braces into thick drywall, causing hidden cracks that failed months later under fan vibration.

Ignoring Fan Weight Distribution

Decorative fans with heavy glass globes create uneven loads. For these:
– Position the brace closer to the heavier side of the fan
– Use dual braces for fans over 50 pounds (spaced 8″ apart)
– Add a secondary support strap across the mounting bracket

Time Estimate: Proper brace installation takes 25-40 minutes for experienced DIYers. Rushing to finish in under 20 minutes causes 68% of brace-related failures.

Final Verification Before Hanging Your Fan

The 30-Pound Pull Test Protocol

This simple test prevents future disasters:
1. Attach a 30-pound weight (sandbag or tool bucket) to the box
2. Suspend for 60 seconds while observing for movement
3. Check for drywall cracks radiating from box edges
4. Retest after removing weight—no permanent deformation should occur

Warning: If the box shifts during testing, immediately remove the brace. Reinstall with longer arms spanning additional joists.

Compatibility Check for Your Specific Fan

Before mounting the fan:
– Verify box depth accommodates fan mounting bracket (min 3″ depth)
– Ensure mounting screws match box threading (usually 8-32 UNC)
– Confirm no wiring conflicts with fan canopy

Final Tip: Take a photo of your installed brace before closing the box—it helps future electricians verify proper installation during fan replacements.


Final Verification: Your brace installation is complete when the electrical box withstands a 30-pound pull test with zero movement, shows no drywall damage, and aligns perfectly with your fan’s mounting pattern. Remember that annual maintenance is crucial—every spring, tighten all brace screws and check for plaster dust accumulation. For fans over 35 pounds or on cathedral ceilings, always consult a licensed electrician; improper installations can void your homeowner’s insurance. Now that your foundation is secure, you’re ready to safely install any ceiling fan knowing it won’t become a hazard. If you encountered joist-finding challenges, our guide to “Locating Ceiling Joists Through Finished Surfaces” covers advanced techniques using thermal cameras and acoustic methods.

How Low Should a Ceiling Fan Hang: Ideal Height Guide


Choosing the right hanging height for your ceiling fan isn’t just about aesthetics—it’s a critical safety and performance consideration that affects how well your fan circulates air throughout the room. A fan hung too low creates dangerous clearance hazards, while one mounted too high fails to deliver effective airflow where you need it most. The good news is that clear industry standards exist to guide your installation. Understanding these guidelines ensures your ceiling fan operates safely while maximizing its cooling efficiency. In this guide, we’ll break down exactly how low your ceiling fan should hang based on your specific room dimensions, ceiling type, and intended use—so you can avoid costly mistakes and enjoy optimal air circulation.

Minimum Safety Clearance Requirements

The absolute lowest your ceiling fan should hang is 7 feet (2.13 meters) from the floor to the bottom of the fan. This measurement isn’t arbitrary—it’s the standard building code requirement across most residential jurisdictions designed to prevent contact injuries. Installing a fan below this height violates safety standards and creates significant risks, particularly for children and pets who may come into direct contact with spinning blades.

While 7 feet meets the legal minimum, treat this as just the baseline for safety. This clearance assumes normal walking patterns but doesn’t account for people reaching upward, jumping, or standing on furniture. For households with taller individuals or active children, aiming for greater clearance is strongly recommended. Many professional installers suggest targeting 8 feet or more whenever possible, which brings us to the optimal heights for everyday comfort and performance.

Why the 7-Foot Minimum Isn’t Always Ideal

The 7-foot clearance standard exists primarily for safety, not performance. When fans hang this low, they create uncomfortable drafts at standing height and can actually reduce overall airflow efficiency. The blades operate too close to the people in the room, creating that “wind tunnel” effect that feels more like a direct blast than comfortable circulation. Additionally, low-hanging fans restrict movement through the space, forcing people to duck or alter their paths unnecessarily. For these reasons, most residential installations benefit significantly from higher mounting positions that balance safety with optimal air movement.

Optimal Hanging Heights for Different Rooms

For standard residential spaces, the recommended hanging height ranges from 8 to 9 feet from the floor to the bottom of the fan. This range provides the ideal balance between safety clearance and effective air circulation patterns.

Living Rooms and Bedrooms: 8-9 Feet for Comfortable Circulation

In living rooms and bedrooms where people spend time seated or lying down, the 8-9 foot height range delivers the most comfortable air movement. At this height, the fan can effectively draw warmer air from above and circulate it throughout the room without creating disruptive drafts at seating level. The blades operate in the optimal zone to create the gentle downward breeze that provides cooling relief without disturbing papers, books, or sleep patterns.

Kitchens and Bathrooms: 8-9 Feet with Obstruction Considerations

Kitchens require special attention due to cabinets, lighting fixtures, and ventilation equipment competing for ceiling space. Aim for 8-9 feet of clearance while ensuring the fan doesn’t interfere with cabinet doors, stove vents, or existing lighting. In bathrooms, this height range also helps the fan clear steam and moisture more effectively while maintaining safe clearance from shower areas and fixtures.

Dining Rooms: 8 Feet for Targeted Cooling

Dining rooms often benefit from slightly lower mounting, around 8 feet, since furniture placement typically keeps the dining table in a fixed position. This height allows the fan to cool diners effectively without creating strong drafts that might disturb table settings or papers. The consistent seating arrangement makes it easier to position the fan for maximum comfort during meals while maintaining adequate clearance for people standing up from chairs.

Handling High Ceilings with Downrods

ceiling fan downrod installation vaulted ceiling

Rooms with ceilings higher than standard 8-9 feet require downrod extensions to bring the fan down to the optimal operating height. Without proper downrod length, the fan hangs too close to the ceiling, severely limiting its ability to circulate air throughout the room.

Vaulted and Cathedral Ceilings: 8-10 Feet Target Height

For vaulted or cathedral ceilings, the fan should hang 8 to 10 feet from the floor regardless of the actual ceiling height. This typically requires a downrod extension—sometimes several feet long—to achieve proper positioning. The general calculation is simple: subtract your target hanging height (8-10 feet) from your ceiling height to determine the appropriate downrod length. For example, a 12-foot ceiling requires a 4-foot (48-inch) downrod to achieve the recommended 8-foot hanging height.

Sloped Ceilings: Special Mounting Requirements

Sloped ceilings require special angled mounting hardware that allows the fan to hang straight down regardless of the roof pitch. Building codes typically mandate a minimum blade clearance of 8 inches from the angled ceiling surface, measured at the point where the blade is closest to the slope. This clearance ensures safe operation without the blades contacting the ceiling during normal use or if the fan develops slight wobble over time.

Essential Clearance Measurements Beyond Floor Distance

ceiling fan clearance diagram blade to wall

While floor clearance gets the most attention, several other critical measurements determine whether your ceiling fan installation will function properly.

Blade-to-Wall Clearance: 18-24 Inches Minimum

Your fan needs at least 18 to 24 inches of clearance between the blade tips and any wall. This space allows air to circulate freely around the fan, entering from one side and exiting the other to create proper airflow patterns. Insufficient wall clearance causes the fan to recirculate the same air repeatedly, reducing cooling effectiveness and creating uneven temperatures throughout the room. In corner installations, prioritize clearance on both walls, as tight corners are particularly problematic for airflow.

Blade-to-Obstruction Clearance: 24 Inches Minimum

Maintain a minimum of 24 inches between any fan blade and fixed objects such as cabinets, shelving, or tall furniture. This measurement ensures the fan can operate without contacting items that might interfere with its rotation or create safety hazards. Remember to consider the full swing of the blades—not just their static position—as some fans have blades that dip slightly during operation, and all fans can develop wobbles over time that slightly increase the effective diameter.

Low-Ceiling Solutions for Problematic Spaces

Standard downrod-mounted fans require at least 8 feet of ceiling height to achieve proper clearance. For rooms with lower ceilings, hugger-style or flush-mount fans provide cooling benefits without dangerous clearance issues.

Flush-Mount “Hugger” Fans for 7.5-8 Foot Ceilings

Hugger fans mount directly to the ceiling with no downrod, holding the fan motor and blades only a few inches below the ceiling surface. These fans work well in rooms with ceilings as low as 7 feet 6 inches up to 8 feet. While they sacrifice some airflow efficiency compared to downrod-mounted fans, they eliminate clearance problems entirely by removing the hanging element.

Problematic Low-Ceiling Situations

Rooms with ceilings below 7 feet 6 inches present significant challenges for traditional ceiling fans. In these situations, consider whether a ceiling fan is truly necessary or whether alternative cooling solutions might better serve your needs. Some municipalities prohibit ceiling fans in rooms with less than 7 feet of clearance due to safety concerns, so checking local building codes before installation is essential.

Installation Mistakes to Avoid

Even experienced DIYers make height-related errors when installing ceiling fans. Being aware of these common pitfalls helps you avoid them in your own installation.

Selecting the Wrong Downrod Length

The most frequent error is purchasing a fan without calculating the required downrod length first. Always determine your needed downrod length before buying—most home improvement stores carry standard lengths from 6 to 72 inches, with 12, 24, 36, and 48 inches being the most common options. Keep your receipt in case you need to exchange for a different length after installation.

Ignoring Blade Span in Clearance Calculations

Many homeowners focus only on the fan’s overall diameter while forgetting that the blade sweep matters just as much. A 52-inch fan requires more clearance than a 42-inch fan, and the actual path the blades travel affects your clearance calculations. Measure the expected blade path before finalizing your installation height to avoid dangerous or inefficient positioning.

Failing to Account for Room Usage Patterns

Assuming all rooms in your home require the same hanging height ignores how each space functions differently. A bedroom where people sit on beds requires different clearance than a living room where people stand and move around frequently. Adjust your target height based on the room’s primary use and the typical heights of people using the space.

Maintaining Proper Clearance Over Time

Ceiling fans typically require minimal maintenance, but periodically checking clearance ensures continued safe operation as your home and family change.

Children grow taller, furniture gets rearranged, and what seemed like adequate clearance years ago might become insufficient today. Make it a habit to visually inspect your fan’s clearance annually, particularly if you’ve added new furniture or household members have had growth spurts. If you notice any wobble developing, address the underlying issue promptly and reassess clearance after repairs, as wobbling effectively increases the fan’s operating diameter.

Key Takeaway: The minimum safe height for any ceiling fan is 7 feet from floor to fan bottom, though 8 to 9 feet provides optimal performance for most residential applications. High ceilings require downrod extensions to achieve proper positioning, with 8 to 10 feet being the target hanging range. Always maintain at least 18 to 24 inches of blade-to-wall clearance and 24 inches from any obstructions. For low ceilings, hugger-style fans provide a safe alternative to standard downrod models. Taking accurate measurements before installation prevents clearance issues and ensures years of safe, efficient operation.

How to Hang a Ceiling Fan on a Vaulted Ceiling


Installing a ceiling fan on a vaulted ceiling presents unique challenges that standard flat-ceiling installations don’t encounter. When your ceiling slopes dramatically overhead, mounting a fan requires specialized hardware and precise techniques to ensure safe, stable operation. Without the right approach, you’ll face wobbling, dangerous instability, and premature component failure. This guide delivers exactly what you need to know to successfully install a ceiling fan on your angled ceiling surface—no guesswork, no generic advice, just actionable steps for a professional-quality installation that delivers optimal airflow without compromising safety.

Most homeowners attempting this project underestimate the structural requirements of vaulted ceiling fan installation. Unlike light fixtures, ceiling fans generate significant rotational force that demands robust mounting solutions specifically designed for sloped surfaces. The wrong mounting hardware leads to dangerous wobble, excessive noise, and potential detachment from the ceiling. Before you climb that ladder, understand that vaulted ceiling installations require three critical components: a fan-rated electrical box securely attached to structural framing, an angled mounting adapter rated for your specific ceiling pitch, and proper wiring techniques that maintain safety throughout operation. This guide walks you through each essential phase with precise instructions that eliminate common pitfalls.

Verify Your Ceiling Angle and Structural Support

ceiling angle finder protractor use

Before purchasing any hardware, determine your exact ceiling pitch to select appropriate mounting solutions. Vaulted ceilings typically range from gentle 15-degree slopes to dramatic 45-degree angles, and the wrong adapter won’t compensate properly. Use a digital angle finder app on your smartphone or a traditional protractor against the ceiling surface to get an accurate measurement—this number dictates which sloped ceiling adapter you’ll need. Most standard kits accommodate angles between 15-30 degrees, while steeper pitches require specialized hardware that may need custom ordering.

Identify ceiling joists or rafters that will support your fan’s weight using a stud finder with deep-scan capability. Standard ceiling fans weigh 15-50 pounds, but the dynamic load during operation multiplies this force significantly. Mark joist locations clearly with painter’s tape, spacing them approximately 16-24 inches apart depending on your home’s construction. If your desired fan location doesn’t align with joist centers, plan to install a mounting board between joists for secure attachment. Never mount directly to drywall or ceiling tiles—they lack the structural integrity to support fan vibration and weight over time.

How to Locate Ceiling Joists on Angled Surfaces

Locating joists on sloped ceilings requires different techniques than flat surfaces. Start by finding a known reference point—often near the wall where the vault begins—and measure standard joist spacing (usually 16 or 24 inches) upward along the angle. Tap the ceiling with your knuckle while listening for the solid sound of wood versus the hollow sound of empty space between joists. For more precision, drill a small 1/8-inch pilot hole at your suspected joist location—if the drill encounters significant resistance after penetrating the drywall, you’ve hit framing. Mark all joist centers with small dots before proceeding to ensure accurate hardware placement.

Why Standard Mounting Won’t Work on Vaulted Ceilings

Attempting to mount a standard ceiling fan directly to a sloped surface creates dangerous imbalance. The fan housing will hang at the same angle as your ceiling, causing blades to rotate on a tilted plane that generates excessive vibration. This wobble stresses mounting hardware, accelerates wear on motor bearings, and creates annoying noise during operation. More critically, the uneven force distribution can eventually loosen mounting screws, risking complete detachment. Sloped ceiling adapters solve this problem by incorporating a pivoting mechanism that keeps the fan housing perfectly level regardless of ceiling angle—this critical component is non-negotiable for safe vaulted ceiling installations.

Select Vaulted Ceiling-Specific Mounting Hardware

sloped ceiling fan adapter kit comparison

Purchase a sloped ceiling adapter kit designed specifically for your fan model and ceiling angle. Universal kits work with many brands but may require additional adjustments, while manufacturer-specific kits ensure perfect compatibility at a higher cost. These kits typically include an angled mounting bracket, extended downrod, and specialized canopy that conceals the angle transition. Verify the adapter’s maximum angle rating matches or exceeds your measured ceiling pitch—installing hardware beyond its rated capacity creates instability.

Your downrod length requires careful calculation for vaulted ceilings. Standard installations use 3-6 inch downrods, but sloped ceilings often need 12-24 inches to achieve proper blade clearance from the angled surface above. Measure from your electrical box to the lowest point of the ceiling angle directly above your installation point, then add 8-12 inches for adequate airflow space. Too short a downrod causes blades to interfere with the ceiling, reducing efficiency and creating dangerous turbulence; too long looks awkward and diminishes airflow effectiveness at floor level.

Critical Hardware Specifications to Verify

Before purchasing, confirm these essential specifications: weight capacity must exceed your fan’s total weight by at least 50%, angle range must cover your specific ceiling pitch, and mounting pattern must match your fan’s motor housing. High-quality adapters feature metal construction throughout—avoid plastic components that can crack under vibration. Look for locking mechanisms with set screws rather than spring-loaded pins, which are more secure against long-term vibration. The canopy should have sufficient depth to completely conceal the angle transition point while maintaining a clean aesthetic against your sloped ceiling surface.

Install Fan-Rated Electrical Box with Structural Support

Turn off power at the circuit breaker and verify it’s off using a non-contact voltage tester before beginning any electrical work. For vaulted ceiling installations, the electrical box must be securely mounted to ceiling joists or rafters—not just attached to the ceiling surface. If replacing an existing light fixture, remove the old box and patch the drywall opening temporarily while you access the framing above. Cut a rectangular access hole in the ceiling large enough to work comfortably, typically 6×8 inches, positioning it to expose both your target mounting location and adjacent joists.

Secure a fan-rated electrical box designed for sloped ceilings directly to your ceiling joist using #10 or larger wood screws, penetrating at least 1.5 inches into solid wood. For installations between joists, install a cross-brace mounting system that spans between two joists and provides a stable mounting surface. These braces feature adjustable arms that lock into place when tightened, creating a solid anchor point regardless of joist spacing. Once positioned correctly, pull your electrical cable through the box’s knockout opening, secure it with a cable clamp, and leave 8 inches of wire slack inside the box for connections.

Wiring Connection Safety Protocols

Connect wires using twist-on wire connectors sized for your specific gauge—typically yellow for 14-gauge or red for 12-gauge wiring. Match colors: black to black (hot), white to white (neutral), and green/bare copper to grounding screw. Wrap connections with electrical tape for added security against vibration loosening. Before closing up the electrical box, perform these critical safety checks: all wire nuts are tight with no exposed copper, grounding wires are securely attached to the box’s grounding terminal, and no wires are pinched between the box and ceiling surface. These precautions prevent electrical hazards that might not manifest immediately but could cause fires months later.

Mount the Sloped Ceiling Adapter System

Assemble the angled mounting bracket according to manufacturer instructions, ensuring all pivot points move freely but without excessive play. Attach the mounting bracket to your electrical box using the provided screws, taking care to align the bracket properly for your specific ceiling angle. Most brackets feature indexed positions marked for common angles—match your measurement to the corresponding setting before final tightening. Hand-tighten screws initially, then use a level on the bracket’s mounting surface to verify it’s positioned correctly before fully securing.

Thread the appropriate-length downrod through the canopy and onto the fan motor housing, following manufacturer specifications for engagement depth. Most require several full turns until the downrod seats properly, then an additional quarter-turn to align the set screw with the motor housing opening. Insert the set screw and tighten securely—this connection bears the entire fan weight and must be absolutely secure. When hanging the fan, have a helper support the weight while you connect the downrod to the mounting bracket, ensuring the pivot mechanism engages correctly before releasing support.

Final Alignment and Safety Verification

With the fan hanging in place, verify proper alignment using a small level placed on the fan’s motor housing. The housing should be perfectly level regardless of ceiling angle—this confirms your adapter is functioning correctly. Check all visible mounting points for security by gently attempting to move the fan in different directions; there should be no movement at the ceiling connection point. Operate the fan at each speed setting while observing from below, watching for excessive vibration or wobble that might indicate improper installation. Address any issues immediately before considering the installation complete—small problems only worsen with regular use.


Proper vaulted ceiling fan installation demands attention to structural details most homeowners overlook. The critical difference between a successful installation and a dangerous failure lies in your mounting hardware selection and structural attachment points. Never compromise on fan-rated electrical boxes securely mounted to framing members—this foundation supports everything that follows. Invest in quality sloped ceiling adapters specifically designed for your ceiling angle rather than attempting DIY solutions that cannot handle rotational forces. When in doubt about electrical connections or structural mounting, consult a licensed electrician; their expertise prevents costly mistakes and ensures compliance with local building codes. With proper installation techniques, your vaulted ceiling fan will deliver efficient airflow and quiet operation for years to come, transforming your dramatic architectural space into a comfortable, well-ventilated environment.

How to Hang a Ceiling Fan on a Suspended Ceiling


Installing a ceiling fan on a suspended ceiling requires specialized mounting techniques that many homeowners overlook—often with disastrous consequences. Unlike standard ceiling installations where you mount directly to solid joists, suspended ceilings (also called false ceilings) consist of gypsum drywall boards that cannot safely support a rotating fan’s dynamic weight. The spinning motion effectively doubles the stress on mounting points, meaning a 15-pound fan creates approximately 30 pounds of force during operation. This comprehensive guide reveals the exact mounting methods professionals use to hang ceiling fans safely on suspended ceilings, including step-by-step instructions for three proven bracket systems that prevent dangerous wobbling, noise issues, and potential ceiling collapse.

Before you drill a single hole, understand that improper installation voids your warranty and creates serious safety hazards. Suspended ceilings made from wood or gypsum board lack the structural integrity to carry ceiling fans without reinforcement, yet many DIYers make the critical error of using standard hollow-wall anchors. This guide walks you through assessing your ceiling’s capacity, selecting the correct mounting hardware, and executing a safe installation that will keep your fan operating smoothly for years—without putting anyone at risk from falling hardware.

Measure Your Ceiling Gap Before Buying Mounting Hardware

The hollow space between your concrete ceiling and suspended ceiling determines which mounting bracket size you need, and guessing wrong leads to failed installations. Most suspended ceilings create gaps ranging from 12cm to 120cm, with bracket systems designed for specific ranges:

  • 12cm to 20cm gaps: Compact mounting plates requiring minimal clearance
  • 20cm to 35cm gaps: Standard intermediate brackets for typical installations
  • 35cm to 65cm gaps: Extended support systems needing wiring extensions
  • 65cm to 120cm gaps: Specialized deep-ceiling mounting solutions

To measure accurately, remove a ceiling tile at your intended fan location and use a tape measure to determine the distance between the concrete ceiling above and your suspended ceiling surface. This measurement must be precise—brackets that are too short won’t reach the structural ceiling, while oversized brackets create unnecessary complexity. If you’re installing near existing lighting fixtures, check for obstructions in the cavity that might interfere with bracket placement.

Verify Structural Support with the Drill Test

Before committing to any mounting location, confirm you’ve identified solid structural support with this simple verification method:

  1. Mark your intended mounting point on the suspended ceiling
  2. Drill a small pilot hole (1/8 inch diameter) through the ceiling material
  3. Insert a stiff wire or inspection mirror to check what’s behind
  4. If you hit solid concrete or a wooden beam, you’ve found viable support
  5. If you encounter only hollow space, relocate your mounting point

Warning: Never mount directly to suspended ceiling material alone—this creates immediate safety hazards as the gypsum board will crack under operational stress.

Install Intermediate Steel Brackets for Hidden Support

suspended ceiling fan bracket installation diagram

When direct beam mounting isn’t possible, intermediate steel brackets provide the most reliable solution for suspended ceiling installations. These adjustable-height brackets mount between your concrete ceiling and false ceiling, creating invisible support that prevents vibration noise while handling dynamic loads.

Proper Bracket Installation Sequence

  1. Position the bracket assembly in the ceiling cavity with mounting plate against concrete ceiling
  2. Adjust vertical supports to bring mounting point within 2-3 inches of suspended ceiling surface
  3. Secure bracket to concrete ceiling using appropriate anchor bolts (typically 1/4 inch diameter)
  4. Drill access hole through suspended ceiling for electrical wiring
  5. Connect fan mounting bracket to the intermediate system’s lower plate

Pro Tip: Most ceiling fans come with only 46cm of wiring, which may be insufficient for deep ceiling installations. Purchase 61cm or 120cm extension cable sets from specialty suppliers to maintain proper electrical connections without straining wires.

Build a Spread Plate System for Maximum Weight Distribution

ceiling fan spread plate construction diagram

When mounting brackets aren’t feasible, a custom spread plate distributes the fan’s weight across multiple connection points, converting two mounting screws into six or more anchor points. This configuration is essential for older buildings with thin wooden ceiling structures.

Construct Your Spread Plate in 4 Steps

  1. Cut a 12″x12″ plywood or metal plate to serve as your base
  2. Drill a central opening matching your fan’s mounting bracket
  3. Position six anchor points around the perimeter (spaced evenly)
  4. Secure the plate to structural elements above using appropriate fasteners

Critical Safety Check: Before mounting your fan, test the spread plate by applying your full body weight to the center mounting point. If the construction holds your weight without cracking or shifting, it will safely support your ceiling fan. Never skip this verification step.

Mount Fans on Sloped Ceilings Using Ball Bearing Models

Attic rooms and vaulted ceilings require special considerations for ceiling fan installation. The slope angle determines whether you need specialized hardware or can use standard mounting techniques.

Calculate Your Ceiling Pitch Accurately

  1. Measure the horizontal run (length along the ceiling surface)
  2. Measure the vertical rise (height difference across that length)
  3. Divide rise by run (e.g., 2m rise ÷ 3m run = 0.6667)
  4. Convert to degrees using arctan(0.6667) = approximately 33.7°

Warning: Standard ceiling fans become unstable on slopes greater than 25°. For steeper angles, you must use ball bearing models specifically designed for inclined installations—these maintain balance even at high speeds. Check product specifications for “sloped ceiling compatible” labeling before purchasing.

Avoid These 3 Critical Installation Mistakes

ceiling fan installation mistakes diagram

Mistake #1: Using Hollow Wall Anchors on Suspended Ceilings

Why it fails: Hollow anchors rely on the surrounding material for grip, but gypsum board lacks the density to resist rotational forces from a spinning fan. Within weeks, the anchors pull through, causing the fan to detach.

Solution: Always mount to structural elements above the suspended ceiling using intermediate brackets or spread plates.

Mistake #2: Ignoring Clearance Requirements

Minimum safe distances:
– 20cm between blades and walls/furniture
– 2m between floor and lowest fan point
– Additional clearance for light fixtures (typically 15cm extra depth)

Consequence: Blades striking walls cause catastrophic failure and create dangerous projectile hazards.

Mistake #3: Skipping Post-Installation Tightening

Critical step: Check all mounting hardware tightness after 24 hours, then monthly during the first year. Vibration from operation gradually loosens connections.

Pro Tip: Apply a small drop of thread-locking compound to critical screws (not electrical connections) to prevent gradual loosening.

Extend Your Fan’s Lifespan with Proper Maintenance

Even perfectly installed ceiling fans require periodic maintenance to ensure continued safe operation. Check these elements quarterly:

  • Mounting hardware tightness: All connection points between fan and bracket
  • Blade alignment: Misaligned blades cause excessive wobble
  • Electrical connections: Look for signs of arcing or overheating
  • Wobble testing: Run fan at highest speed while observing movement

Warning: If you notice unusual noises, excessive wobble, or electrical issues, turn off the fan immediately and consult a professional. Continuing to operate a problematic fan risks structural failure.

When Ceiling Mounting Isn’t Possible: Safe Alternatives

For historic buildings or extremely fragile ceiling constructions where no mounting solution is viable, consider these alternatives that provide similar air circulation benefits:

  • High-velocity oscillating floor fans: Positioned in room corners for maximum coverage
  • Wall-mounted ventilation systems: Installed through exterior walls for cross-breezes
  • Compact Keiki-style fans: Designed for wall mounting while maintaining ceiling fan aesthetics

These solutions eliminate installation risks while still improving air circulation—particularly valuable in rental properties where structural modifications aren’t permitted.

Final Safety Verification Before First Use

Complete these checks before powering on your newly installed fan:

  1. Confirm all electrical connections are secure and properly insulated
  2. Verify fan wobble is minimal (less than 1/8 inch movement at highest speed)
  3. Ensure no wires are pinched or stressed in the mounting assembly
  4. Test all control functions (speed settings, light operation, reverse mode)
  5. Observe operation for 15 minutes to detect unusual noises or vibrations

Professional Recommendation: If you’re uncertain about any aspect of the installation, hire a licensed electrician with ceiling fan experience. The modest cost of professional installation pales in comparison to potential medical bills or property damage from a falling fan. Remember—your ceiling fan should enhance comfort, not create safety hazards. By following these precise mounting techniques, you’ll enjoy years of reliable operation with proper air circulation and energy savings.

How to Install Ceiling Fan on Angled Ceiling


Installing a ceiling fan on an angled ceiling presents unique challenges that go far beyond a standard ceiling installation. Unlike flat ceilings where mounting is straightforward, sloped or vaulted ceilings require specialized hardware and techniques to ensure your fan hangs properly, operates safely, and delivers optimal airflow throughout your space. The good news is that with the right preparation, tools, and understanding of the process, most homeowners can successfully tackle this project and enjoy the comfort and energy efficiency a ceiling fan provides in their vaulted or sloped rooms.

The fundamental challenge with angled ceilings lies in physics: a ceiling fan is designed to rotate parallel to the floor for maximum air circulation, but when mounted directly on a sloped surface without correction, the fan blade assembly tilts along with the ceiling. This misalignment causes inefficient operation, excessive wobble, annoying clicking sounds, and potentially premature motor wear. Left unaddressed, an improperly mounted fan can even become a safety hazard as the mounting connections loosen over time under the stress of continuous rotation.

Before you begin your angled ceiling fan installation, you’ll need to understand your ceiling’s specific angle, gather the appropriate sloped ceiling mounting hardware, ensure your electrical box meets fan-rated specifications, and follow a systematic installation process. This guide walks you through every step—from initial assessment through final troubleshooting—so you can install your ceiling fan with confidence and achieve professional-quality results.

Measure Your Ceiling Pitch Before Buying Hardware

ceiling pitch angle finder tool

The first and most critical step in installing a ceiling fan on an angled ceiling is accurately measuring and documenting your ceiling’s pitch. This measurement determines which mounting hardware you’ll need and guides every subsequent decision in your installation process. Without a proper angle assessment, you risk purchasing incompatible hardware or encountering unexpected complications during installation.

To measure your ceiling angle, you’ll need an angle finder tool or a smartphone app that uses your device’s accelerometer to determine angles. Simply place the tool against the angled ceiling surface and read the angle directly. For more precise results, you can measure the rise and run of your ceiling slope—measure how many inches the ceiling rises vertically over a 12-inch horizontal distance—and use that ratio to calculate the angle. Most residential angled ceilings fall between 15 and 45 degrees, though some architectural designs feature steeper pitches.

Once you have your angle measurement, compare it against the specifications of sloped ceiling mounting kits you’re considering. Standard sloped ceiling kits typically accommodate angles up to 22-32 degrees, which corresponds roughly to a 6-in-12 or 8-in-12 roof pitch. If your ceiling exceeds this range, you’ll need a high-angle kit rated for steeper pitches, typically up to 45-60 degrees. Always select hardware rated for an angle greater than your actual ceiling angle to provide a safety margin. For ceilings steeper than specialized kits allow, you may need custom mounting solutions such as a level platform mounted to the angled surface.

Verify Electrical Box is Fan-Rated and Level

Your existing electrical box must be specifically rated for ceiling fan support—not just light fixtures. Standard electrical boxes cannot handle the dynamic forces created by a rotating fan. Look for boxes labeled “acceptable for fan support” or “fan-rated,” which feature reinforced mounting systems.

For angled ceiling installations, the electrical box must be installed level—not parallel to the angled ceiling surface. This is non-negotiable: an angled electrical box causes the entire fan assembly to hang crookedly, creating imbalance and premature wear. If your existing box isn’t fan-rated or level, you’ll need to install a new one before proceeding. This typically involves cutting a hole in the ceiling, installing a fan-rated ceiling brace between joists, and mounting the box to that brace.

Select the Right Sloped Ceiling Mounting Kit

sloped ceiling fan mount kit comparison

The primary solution for installing ceiling fans on angled ceilings is a sloped ceiling mounting kit, often called a sloped ceiling adapter or vaulted ceiling fan mount. These kits are specifically engineered to allow the fan hanging rod and canopy to hang vertically—perpendicular to the floor—regardless of the ceiling angle. The ball-and-socket joint design provides both the angular compensation needed and the secure connection required for safe operation.

When selecting your sloped ceiling mounting kit, compatibility with your specific fan model is essential. Most major ceiling fan manufacturers offer universal kits that work across their product lines, but some higher-end or specialty fans require manufacturer-specific mounting systems. Check the maximum angle capability of any kit you’re considering—most standard kits handle angles up to 32-45 degrees, while specialized high-angle kits accommodate steeper pitches. Verify the angle rating exceeds your ceiling’s actual pitch before purchase.

Gather All Required Tools Before Starting

Before you begin installation, gather these essential tools and materials:

  • Voltage tester (non-contact and contact types)
  • Angle finder or protractor
  • Screwdriver set (Phillips and flathead)
  • Wire strippers and wire nuts rated for fan use
  • Drill with appropriate bits
  • Torpedo level and standard spirit level
  • Sturdy ladder tall enough to reach your ceiling height
  • Helper (strongly recommended for safety and efficiency)

Having everything organized and on hand before you begin installation prevents frustrating interruptions mid-project. Installing a ceiling fan on an angled ceiling typically takes 2-3 hours for experienced DIYers, but allow 4-5 hours if this is your first attempt.

Execute the Angled Ceiling Fan Installation

With preparation complete, you’re ready to begin the installation process. The standard sloped ceiling kit installation follows a systematic sequence that, when executed carefully, results in a safe and properly functioning fan. Work methodically through each step, double-checking your work before moving to the next phase.

Turn Off Power and Remove Existing Fixture

Before beginning any work, turn off power at the circuit breaker controlling the fan location and verify power is off using a contact voltage tester. Simply turning off a wall switch is insufficient because the switch may control only the light function while fan motors remain energized. After verifying power is off, remove any existing fixture and assess the electrical box. If the existing box is not fan-rated, stop and install a proper fan-rated box before proceeding.

Install the Sloped Ceiling Mounting System

Secure the mounting bracket to the electrical box using the provided screws, ensuring the bracket is level in all directions. For sloped ceiling installations, this often requires careful adjustment since the ceiling surface itself is angled—the bracket must be level regardless of the ceiling slope. Once the bracket is secure, assemble the sloped ceiling adapter by inserting the ball joint into the bracket’s socket. The ball joint should move freely but not feel loose, allowing the hanging system to orient vertically under the weight of the fan.

Attach your downrod to the ball joint assembly, threading it on and securing with the set screw(s). If your installation requires an extended downrod due to ceiling height or angle, ensure you’ve selected the appropriate length to maintain proper clearance from the ceiling and adequate height above the floor (minimum 7 feet).

Connect Wiring and Mount the Fan

With the hanging system assembled, carefully lift the fan motor assembly (with a helper) and engage the hanger bracket on the fan canopy with the downrod. Most systems use a hook-and-socket arrangement where the fan’s hanging bracket rests on the downrod end. Once the fan is supported by the hanging system, make your electrical connections following standard practices:

  • Connect ground to ground (bare or green wires)
  • White to white (neutral)
  • Black to black (hot)

Push all connections into the electrical box, ensuring no wires are pinched or stressed. Position the canopy against the ceiling, securing it with the provided screws. Finally, attach the blades to the motor assembly according to the manufacturer’s instructions.

Fix Common Angled Ceiling Fan Problems

ceiling fan wobble balancing kit

Even with careful installation, issues can arise with ceiling fans on angled ceilings. Understanding common problems and their solutions helps you diagnose and address issues quickly, maintaining safe and efficient operation.

Eliminate Fan Wobble Immediately

Wobble is one of the most common issues with ceiling fan installation on angled ceilings. Check these potential causes:

  • Improper leveling: Verify the mounting bracket is perfectly level
  • Loose components: Tighten all blade attachment screws and mounting hardware
  • Blade imbalance: Use the balancing kit included with most fans

If wobble persists after checking these items, try adding a small weight to the top of one blade (start with a penny taped near the blade tip) to counterbalance the rotation.

Stop Annoying Clicking and Rattling Sounds

Noise from ceiling fans on angled ceilings often originates from these sources:

  • Blades contacting ceiling: Verify at least 12-18 inches of clearance between blades and ceiling
  • Loose hardware: Check all downrod connections and canopy screws
  • Electrical issues: If you hear humming or buzzing, turn off the fan and have an electrician inspect the wiring

Never ignore unusual noises—they often indicate developing problems that could lead to safety hazards if left unaddressed.

Maintain Your Angled Ceiling Fan for Longevity

Establish a regular maintenance schedule to ensure your ceiling fan continues operating safely and efficiently. Perform visual inspections quarterly, checking for any obvious tilts, sagging, or changes in operation. During each inspection:

  • Check that the canopy remains flush against the ceiling
  • Observe fan rotation at multiple speeds for changes in vibration
  • Examine blades for damage or dust accumulation

For thorough maintenance, perform these tasks annually:

  1. Turn off power at the circuit breaker
  2. Tighten all accessible fasteners (blade screws, downrod set screws, mounting hardware)
  3. Clean blades with a damp cloth (avoid excessive moisture near electrical components)
  4. Check motor housing vents for dust buildup

Dust accumulation on blades creates multiple problems: it unbalances the fan as buildup becomes uneven, reduces airflow efficiency, and creates dust fall when the fan operates. Regular cleaning maintains both appearance and performance.

Installing a ceiling fan on an angled ceiling requires more planning and specialized hardware than a standard installation, but the results are well worth the extra effort. By understanding your ceiling angle, selecting appropriate mounting hardware, ensuring electrical safety, and following proper installation procedures, you can successfully add comfortable, energy-efficient cooling to any vaulted or sloped space in your home. Regular maintenance and prompt attention to any issues will keep your fan operating safely and efficiently for years to come. With the right approach, you’ll enjoy the perfect airflow in your angled-ceiling room without wobble, noise, or safety concerns.

How to Install Ceiling Fan on Sloped Ceiling


When your vaulted or cathedral ceiling creates a beautiful architectural feature but leaves you wondering how to keep the room comfortable, installing a ceiling fan becomes essential—but presents unique challenges. Standard fan installations won’t work properly on angled surfaces, leading to wobbling, inefficient airflow, and potential safety hazards. The good news is that modern ball joint mounting systems make this installation possible for most homeowners with basic DIY skills. This guide provides the specific steps you need to successfully mount your ceiling fan on a sloped surface, ensuring it operates safely and efficiently while maintaining that clean, professional look you expect.

Unlike flat ceilings where fans mount directly to electrical boxes, sloped ceilings require specialized hardware that allows the fan to hang perfectly level regardless of the ceiling angle. Without this critical adaptation, your fan would tilt at the same angle as your ceiling, causing dangerous vibrations and poor air circulation. Understanding the ball joint mechanism before you begin is crucial—it’s the engineering solution that makes sloped ceiling installations work reliably. With proper preparation and attention to detail, you can complete this project safely and enjoy effective cooling in your uniquely shaped space.

Essential Safety Steps Before Starting

Before you even think about mounting your fan, you must address electrical safety—this isn’t optional. Immediately switch off the circuit breaker controlling your installation location at the main electrical panel. Simply turning off the wall switch won’t protect you from potentially fatal electrical shock during installation. After flipping the breaker, verify power is truly off using a voltage tester on the existing fixture wires, testing the tester itself on a known live outlet first to confirm it’s working properly.

The weight factor makes sloped ceiling installations particularly hazardous if done incorrectly. Ceiling fans typically weigh 17-20 pounds or more, and when operating, they generate significant vibration forces that standard light fixture boxes cannot safely support. You must use a fan-rated electrical box specifically designed to handle this dynamic load. Never reuse an existing light fixture bracket—discard it and install the mounting bracket that comes with your ceiling fan. This component provides the secure foundation needed for safe operation and accommodates the ball joint mechanism essential for sloped ceilings.

If your existing wiring includes a dimmer switch, you’ll need to replace it with a standard on/off switch before proceeding. Ceiling fans with remote controls cannot function properly with dimmer switches—the remote system handles all speed and light functions. This critical detail applies to both sloped and flat ceiling installations but becomes especially important when working with the additional complexities of an angled surface.

How the Ball Joint Mount System Works

ceiling fan ball joint mount diagram

The ball joint mounting system is the engineering breakthrough that makes sloped ceiling fan installation practical. This mechanism consists of two key components: a ball-shaped hanger at the top of your fan’s down rod and a specially designed hanging bracket attached to your ceiling electrical box. The bracket features a precisely engineered slot that accepts the ball, allowing the assembly to pivot freely while gravity pulls the fan into a perfectly vertical position.

When examining the ball joint mechanism closely, notice that the ball contains a vertical slot in one specific location, while the hanging bracket includes a corresponding tab. This design ensures the ball can only engage with the bracket in the correct orientation. During installation, you must align these components precisely—lower the fan until the tab slides into the slot, and the weight of the fan will hold everything securely in place. This elegant solution creates a stable mounting point that accommodates your ceiling angle while keeping the fan level.

Misalignment causes the most frequent problems with sloped ceiling fans. If your electrical box orientation doesn’t match the slope direction, the ball won’t engage properly, leaving your fan unstable or unable to hang level. The ball mount only swivels in one direction, meaning your electrical box must be rotated correctly before installation begins. This is why checking and potentially adjusting your box orientation is a critical pre-installation step for successful results.

Choose the Correct Down Rod Length

ceiling fan down rod length chart sloped ceiling

Selecting the right down rod length is crucial for proper sloped ceiling installation. Standard down rods included with ceiling fans measure just 2-3 inches—designed for flat 8-foot ceilings but completely inadequate for sloped surfaces. These short rods cause the fan canopy to contact the sloping ceiling, preventing proper installation and creating clearance issues that affect performance.

Calculate your required rod length based on three factors:
– Your ceiling height at the installation point
– The angle of your ceiling slope
– Your fan’s position relative to the ceiling peak

As a general guideline, ceilings with slopes up to 30 degrees may work with standard or slightly extended rods, while steeper slopes or installations near the peak typically require rods of 12 inches or longer. One documented successful configuration used an 18-inch rod for an 11-foot ceiling with moderate slope—demonstrating that significantly longer rods are often necessary.

Pro Tip: Before purchasing your fan, contact the manufacturer with your specific ceiling angle, height, and intended placement to get precise down rod recommendations. When in doubt, choose a longer rod—you can always cut it down, but you can’t extend a rod that’s too short.

Install the Fan Mounting Bracket

Begin by removing any existing hanger bracket from your old light fixture—discard it completely and replace it with the fan-specific bracket included in your ceiling fan package. This new bracket screws directly into your fan-rated electrical box, providing the secure foundation required for safe operation. Proper bracket orientation is critical: position it with the slot facing toward the upward rising section of your ceiling within approximately 90 degrees to ensure proper clearance for the ball joint mechanism.

Secure the bracket using the specialized screws included with your fan—never substitute standard screws from other applications. Tighten them firmly into the electrical box until the bracket sits flush against your ceiling with no gaps. If the bracket doesn’t sit flush, check that your electrical box is mounted correctly and that no debris or old mounting hardware interferes with proper contact. A misaligned bracket will cause installation problems that become increasingly difficult to fix once your fan is hanging.

Handle Electrical Box Orientation Issues

Electrical box orientation presents one of the most common challenges in sloped ceiling installations. When the box is rotated approximately 45 degrees off from the correct orientation relative to your ceiling slope, the ball joint won’t align properly, causing clearance issues or preventing proper engagement. If you discover this problem, several solutions exist depending on your box attachment method.

For boxes secured with screws into structural members above, you may be able to remove the screws, rotate the box to the correct orientation, and reattach it. In many cases, the drywall compound around the box will break free sufficiently to allow rotation without major damage. After rotation, resecure the box using existing screw holes or drill new holes for additional screws. Critical warning: Boxes attached with drywall screws must be replaced—they’re brittle and unsafe for fan support. Proper fan-rated boxes require four wood lag screws driven deep into structural joists.

When rotation isn’t feasible, specialized adapters can solve orientation problems. These allow the ball mount to rotate and align with your ceiling slope, though they add cost and complexity. Check your fan’s accessories section or contact the manufacturer to identify appropriate adapter options for your specific situation.

Wire Your Ceiling Fan Properly

Begin by assembling as much of the fan as possible on the floor—attach all blades according to manufacturer instructions while the fan remains at a comfortable working height. This strategy significantly reduces overhead work and makes the installation process more manageable. With the fan assembled, lift it carefully and slide the ball hanger into the hanging bracket, ensuring the vertical slot aligns with the tab.

Make your electrical connections following this pattern:
– Black to black (hot)
– White to white (neutral)
– Green or bare to ground

Connect wiring according to the manufacturer’s diagram, installing the remote control receiver as specified—often mounting it directly on the hanger bracket. Crucial step: Pair your remote control with the receiver before final mounting. This allows easier adjustment of wire positions if needed and prevents frustration later when you’re working overhead.

Use Slope Adapters for Steeper Angles

ceiling fan slope adapter installation example

Standard ceiling fans accommodate slopes up to approximately 30 degrees. Installing a fan rated for lower angles on a steeper slope causes the down rod to contact the canopy, preventing proper installation and creating safety hazards. Before purchasing your fan, verify its maximum slope rating matches or exceeds your ceiling’s angle.

For ceilings exceeding standard ratings, specialized slope adapters become essential. These allow installation on angles up to 45 degrees or more by providing additional clearance or alternative mounting geometry. Manufacturers like Westinghouse and SeaGull offer these adapters in various finishes to match fan aesthetics.

One documented case involved a 34-degree slope where the standard fan mounting (rated for only 30 degrees) failed—the down rod physically contacted the canopy during installation. The solution required obtaining a slope adapter specifically rated for the steeper angle. This experience underscores why verifying slope compatibility before purchase is critical.

Troubleshoot Installation Problems

If the ball doesn’t fit into the bracket slot during installation, verify your electrical box orientation and check for debris obstructing the mechanism. The slot on the cup bracket must face toward the upward rising ceiling within approximately 90 degrees to provide proper clearance. If the fan wobbles after installation, check that all blade screws are tightened evenly and that blades aren’t damaged or warped—the ball joint should allow the fan to hang level regardless of minor ceiling imperfections.

Remote control pairing issues often resolve by ensuring the receiver is installed correctly and using fresh batteries. Complete pairing before final mounting for easier access and adjustment. For fans that won’t start, double-check all wire connections for security and proper matching—the ground connection is particularly important for safe operation.

Maintain Your Ceiling Fan Long-Term

Once properly installed, your sloped ceiling fan requires similar maintenance to standard installations. Clean blades regularly with a damp cloth to prevent dust accumulation that causes imbalance and wobbling. Remote controls need periodic battery replacement—keeping spares on hand prevents inconvenience. Most remotes use standard coin-cell batteries readily available at hardware stores.

Warranty coverage varies by manufacturer and may be affected by installation method. Following manufacturer instructions precisely maintains coverage—some warranties specifically require professional installation for sloped ceilings exceeding standard ratings. Over time, vibration can occasionally loosen electrical connections; if your fan develops intermittent operation, checking these connections should be part of your troubleshooting process.

Installing a ceiling fan on a sloped ceiling demands careful attention to specialized mounting requirements, electrical safety, and proper hardware selection. By following these preparation steps, installation sequence, and troubleshooting guidance, most homeowners can successfully complete this project and enjoy reliable, efficient cooling from their sloped ceiling fan for years to come. The ball joint system makes these installations practical while slope adapters extend compatibility to steeper angles—giving you the comfort you deserve in your uniquely shaped living space.

« Older posts Newer posts »

© 2026 Hampton Fan Reviews

Theme by Anders NorenUp ↑