Your Ultimate Guide to Cooling: In-Depth Reviews, Smart Comparisons & Pro Care Tips.

Category: Tips (Page 16 of 18)

How to Install Artika Ceiling Fan – Step-by-Step Guide


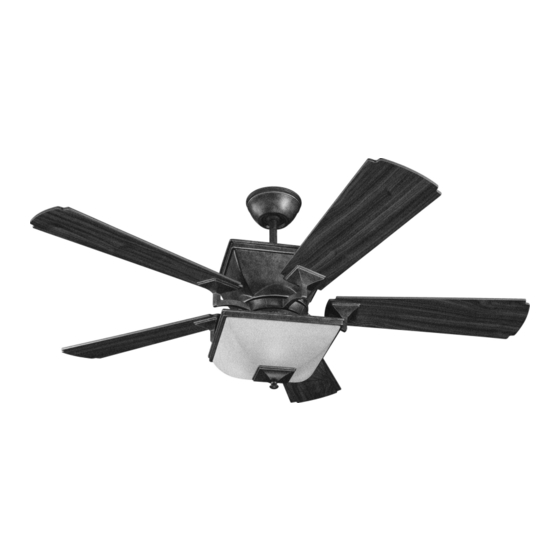
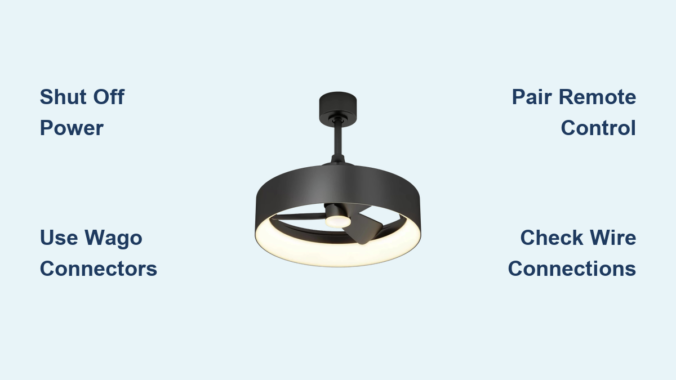
The thought of installing a ceiling fan often intimidates homeowners, but the Artika Austin Fandelier changes the game with its integrated receiver design that eliminates the need for a separate remote control box. Unlike traditional ceiling fans that require complex wiring for multiple components, this streamlined approach makes how to install Artika ceiling fan a project most DIYers can complete in under two hours. With proper preparation and attention to safety, you’ll transform your room’s comfort and style without calling an electrician.

This comprehensive guide walks you through every critical step of installing your Artika ceiling fan, from safely disconnecting power to pairing the remote control. You’ll learn why this model’s integrated receiver system simplifies installation compared to conventional fans and discover professional tips that ensure a secure, wobble-free result. Whether you’re replacing an old fan or installing in a new location, these instructions will help you achieve a professional-quality installation.

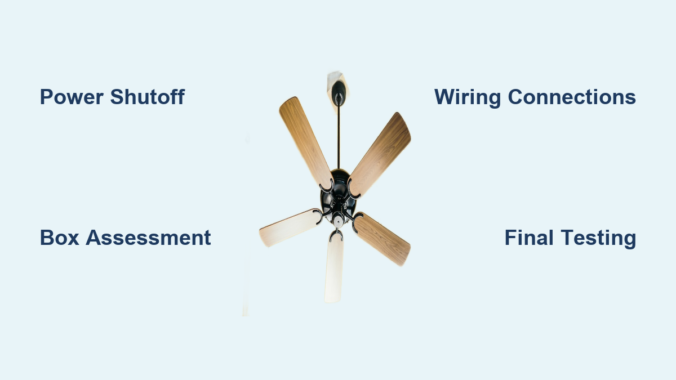
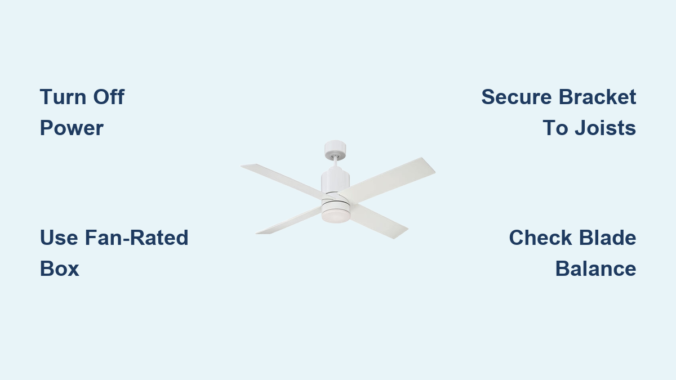
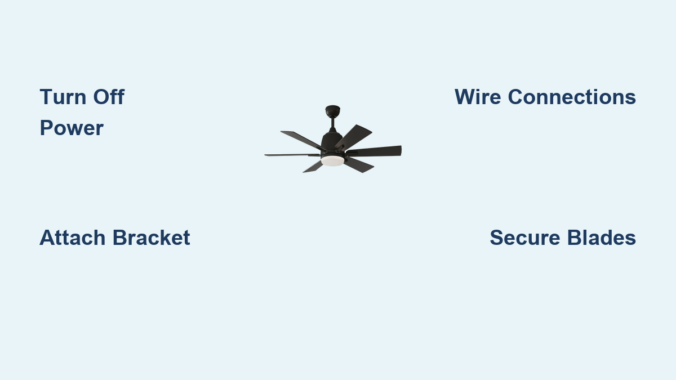
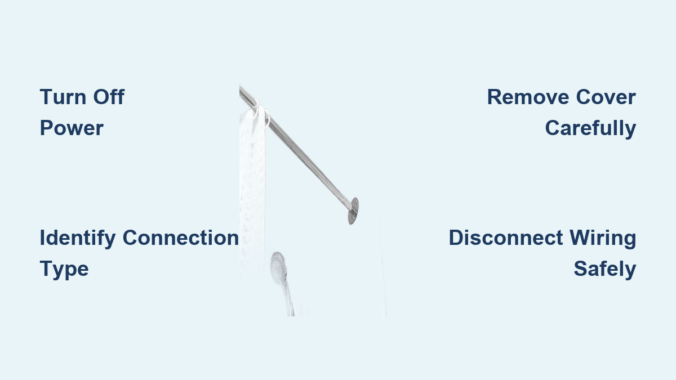
Shut Off Power at the Breaker Before Starting

Never skip this critical safety step—electrical shock can cause serious injury or death. Locate your home’s electrical panel and identify the circuit breaker controlling your ceiling fixture. Switch it to the OFF position, then verify power is disconnected by testing the existing light switch with a voltage tester. Place tape over the breaker to prevent accidental reactivation while you work.

Many DIYers make the mistake of assuming they’ve identified the correct breaker when they haven’t. Double-check by testing wires in the ceiling box with your voltage tester before touching any conductors. Keep your tester within reach throughout installation to confirm power remains off at critical moments. This single precaution transforms how to install Artika ceiling fan from a risky endeavor to a safe DIY project.

Verify No Power Is Present in Ceiling Wires

Use your non-contact voltage tester to check all wires in the electrical box before handling them. Test both the black (hot) and white (neutral) wires individually. If your tester indicates power is still present, return to the breaker panel and try a different circuit. Some homes have multi-wire circuits where two breakers control different components of the same fixture.

Gather Essential Tools Before Starting Artika Installation

ceiling fan installation tool kit

Having everything ready prevents frustrating interruptions mid-installation. The Artika Austin package includes most mounting hardware and standard twist-on wire connectors, but these additional items make the job smoother and connections more reliable.

Your must-have toolkit includes:
– Screwdriver set for mounting bracket attachment
– Wire strippers for preparing wire ends
– Voltage tester to confirm power is off
– Sturdy ladder rated for your weight
– WAGO lever-nuts (3-port for ground wires, 2-port for hot/neutral)
– Needle-nose pliers for wire manipulation

While not mandatory, WAGO connectors significantly improve connection reliability compared to traditional wire nuts. These push-in connectors provide visual confirmation of proper insertion and allow easy disconnection if corrections are needed. For how to install Artika ceiling fan successfully, invest in quality connectors—they prevent loose connections that cause future problems.

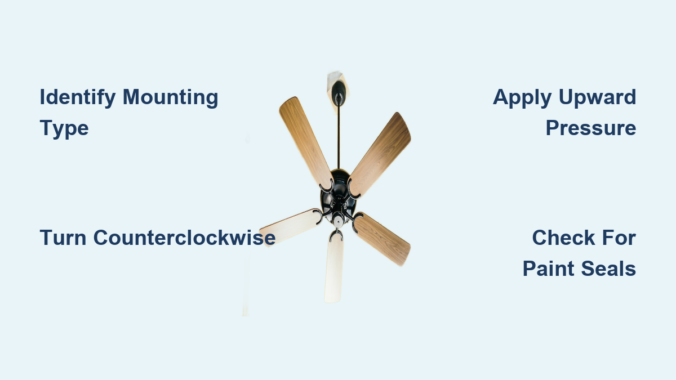
Remove Existing Fixture Without Damage

If replacing an old fan, work methodically through disassembly to avoid breaking components. Begin by removing glass shades, light bulbs, and decorative elements. For conventional Hunter-style fans, expect to remove multiple components before the main fixture comes down—this process often takes longer than installing the new Artika fan.

Always have two people handle fixture removal as fans can be heavy and awkward. The removal phase is your opportunity to inspect the electrical box condition. Check that it’s securely anchored to ceiling joists and rated for fan support. If your existing box shows damage or isn’t fan-rated, replace it before proceeding—this prevents future wobble or detachment.

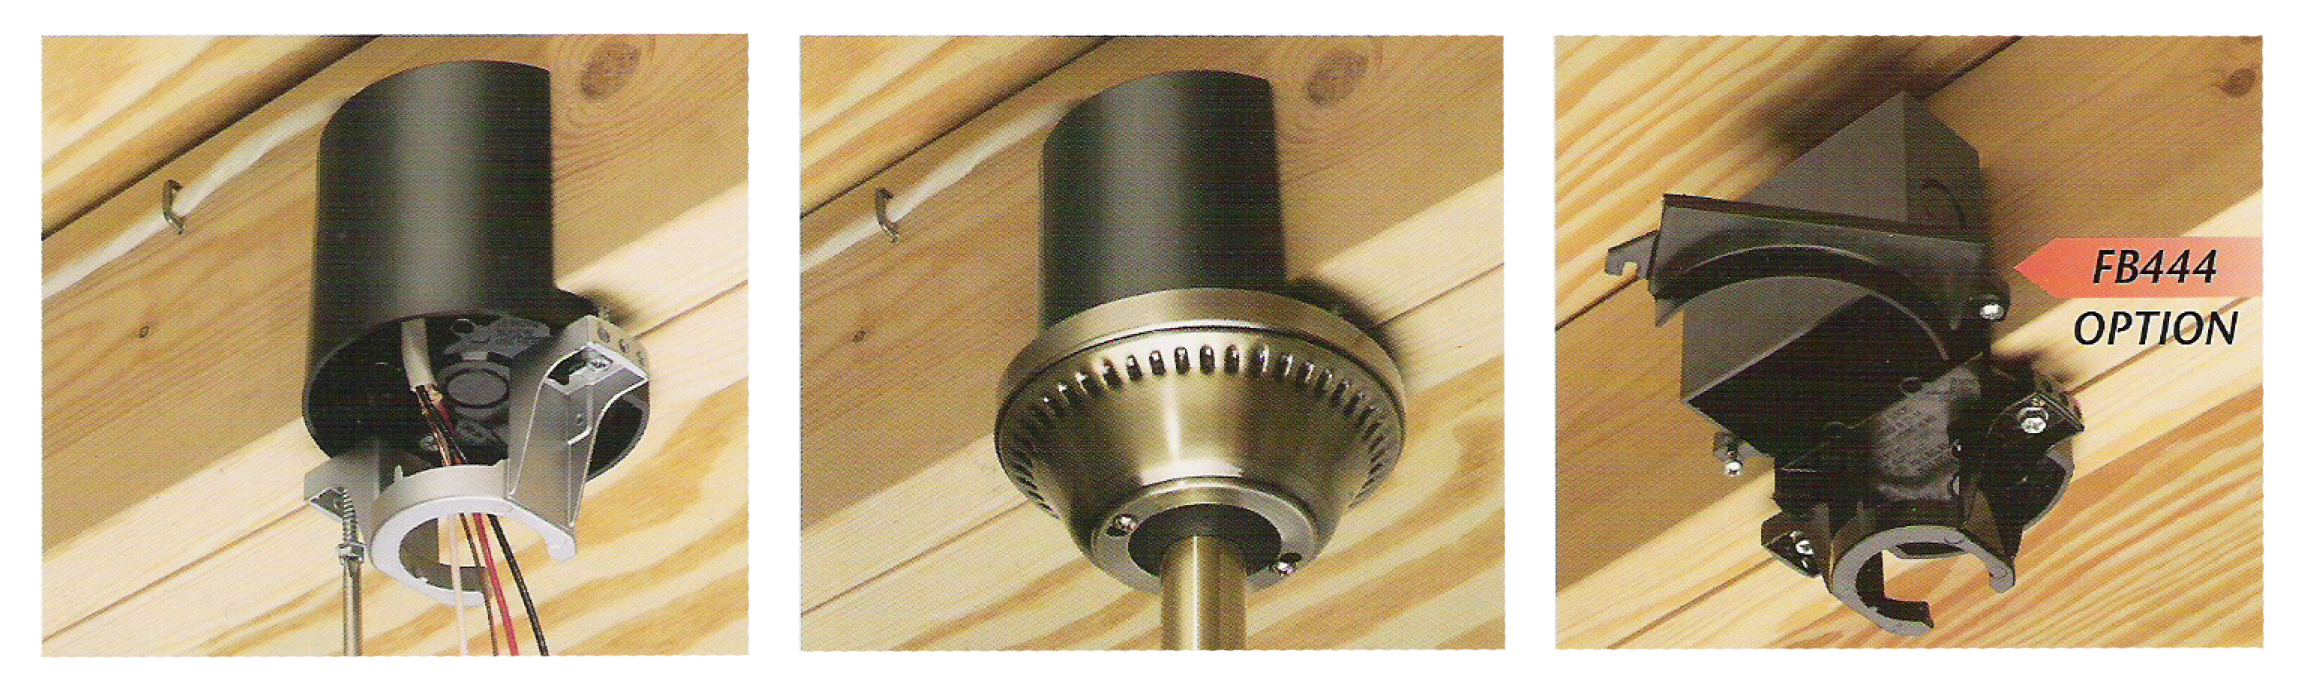
Identify Your Electrical Box Type

Artika Austin accommodates both 3-inch and 4-inch ceiling pancake boxes. While previous Artika models often required 4-inch boxes, this model’s adjustable mounting bracket works with existing 3-inch boxes in many installations. Verify your box size before starting—measure the diameter of the circular opening in your ceiling.

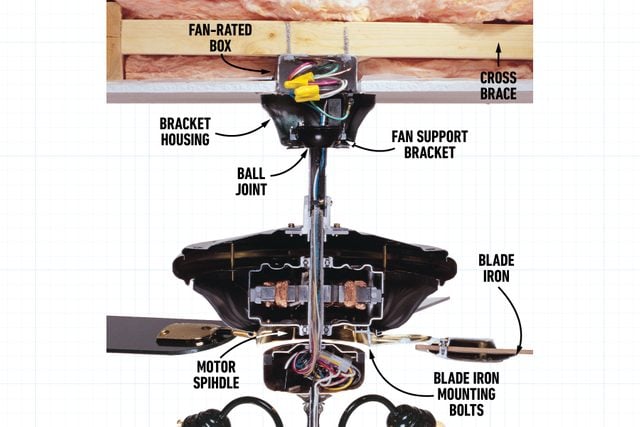
Install Mounting Bracket for Secure Foundation

The mounting bracket forms your fan’s foundation and must be secured properly. Attach the Artika support bracket to your electrical ceiling box using the provided screws. The fan’s half-ball mounting element fits into a groove in this bracket, creating a ball-and-socket connection that allows adjustment for perfect leveling.

Don’t overlook the small L-bracket included in your kit—it provides crucial additional security. Install it near the support bracket with the mounting clip positioned through it to anchor the fan assembly more securely. This prevents movement or wobble that might develop over time.

Position Bracket for Proper Fan Alignment

Before tightening all screws, verify the bracket is positioned correctly for your fan’s orientation. The groove must align with the fan’s mounting ball for proper seating. Hold the bracket in place and have an assistant confirm it’s level before fully securing it to the electrical box.

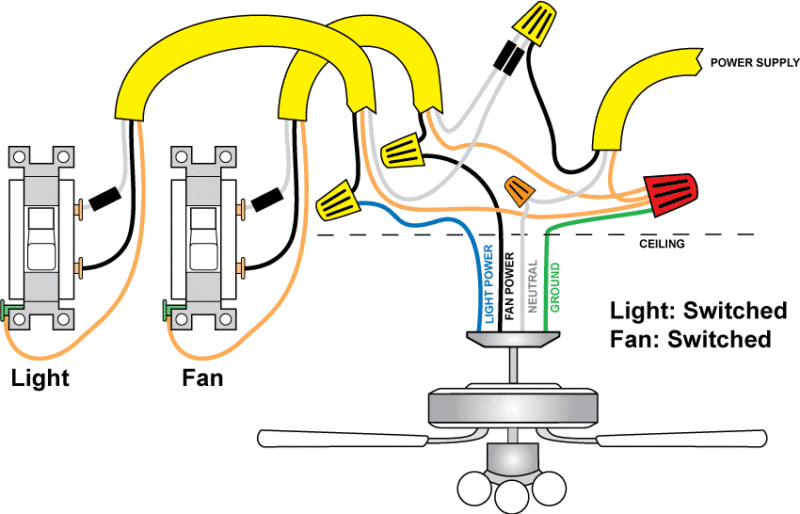
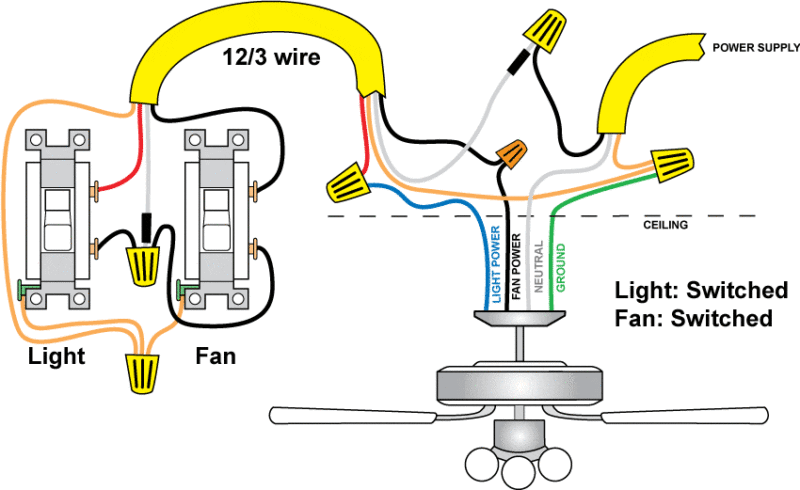
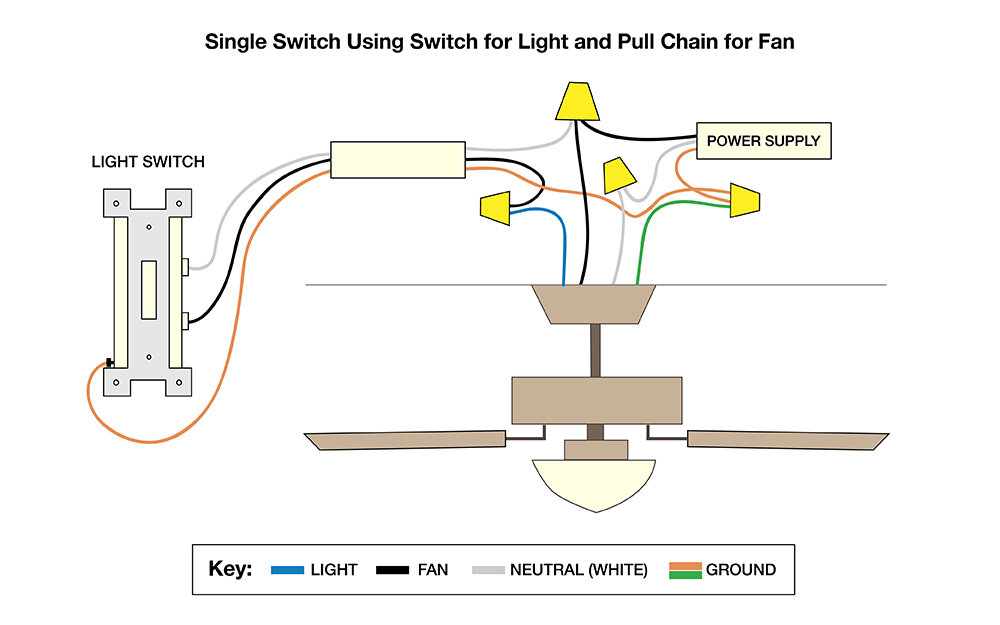
Connect Wires Using WAGO Connectors for Reliability

WAGO 221 connector wiring diagram ceiling fan

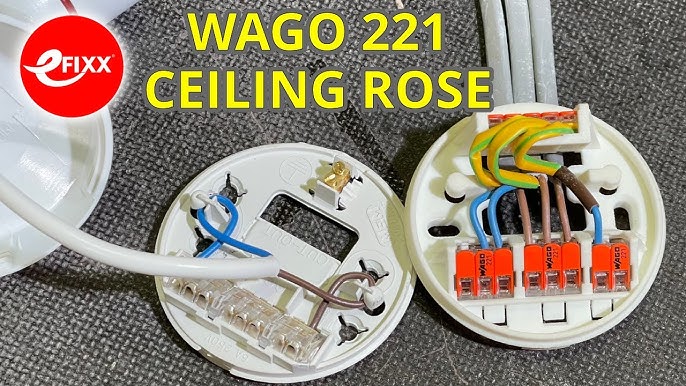
Prepare all wire connections before hanging the fan—working overhead with dangling wires creates unnecessary frustration. Strip 1/2 inch of insulation from each wire end and lightly twist strands for solid contact. The Artika Austin’s integrated receiver means only three wires exit the fan: black (hot), white (neutral), and ground.

Connect wires using this foolproof method:
– Join ceiling black wire to fan black wire with 2-port WAGO connector
– Connect ceiling white wire to fan white wire with another 2-port connector
– Use 3-port connector for ground wires (fan, ceiling, and bracket)

Cap any unused red wire with a wire nut and tuck it into the electrical box. This wire was likely used for separate light/fan control in previous installations but becomes unnecessary with Artika’s remote system.

Handle Ground Wires Correctly

Ground connections are critical for safety. The three-port WAGO connector joins the fan’s ground wire, ceiling ground wire, and mounting bracket ground tab in one secure connection. Ensure all ground wires are fully inserted until you see copper at the inspection window—this visual confirmation prevents loose connections that could cause electrical issues later.

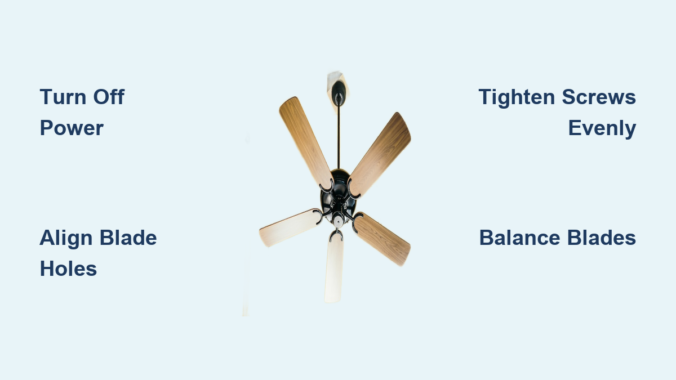
Hang and Secure Your Artika Ceiling Fan

Lift the fan assembly into position with an assistant supporting the weight. Align the half-ball mounting element with the bracket groove until it seats fully. The fan should hang freely without binding or misalignment. Have your assistant hold it steady while you make the electrical connections.

Tighten the mounting hardware securely but avoid overtightening plastic components. Proper torque prevents wobble while avoiding damage to the fan housing. Once secured, gently rotate the fan to confirm it moves freely without scraping against the mounting bracket.

Check for Proper Seating Before Final Tightening

Before fully tightening all screws, verify the fan ball is completely seated in the bracket groove. A partially seated connection causes wobble and noise during operation. Rotate the fan slightly to ensure it moves smoothly in the mounting system before finalizing the installation.

Pair Remote Control with Integrated Receiver

With power restored at the breaker, verify wall switches are in the ON position—this is essential for remote pairing. Follow the specific sequence in your manual, typically involving pressing and holding certain buttons until the fan responds. The integrated receiver means no separate pairing module exists, simplifying how to install Artika ceiling fan significantly.

The remote’s top right button controls light on/off, while the large center button manages fan speeds. Two rows below adjust color temperature and brightness, allowing transitions from cool white morning light to warm amber evening ambiance.

Test All Remote Functions Before Finalizing

Press each button to verify functionality before considering installation complete. Check:
– All six fan speed settings
– Light on/off operation
– Color temperature adjustments
– Brightness control
– Timer functions

If any function doesn’t work, repeat the pairing process with fresh batteries in the remote. Depleted batteries are the most common cause of remote control issues after installation.

Troubleshoot Common Installation Problems

ceiling fan troubleshooting guide wiring issues

When the fan doesn’t respond after installation, the most frequent culprit is a wall switch left in the OFF position. Verify all switches controlling the circuit are ON before checking connections. If switches are confirmed ON but the fan remains unresponsive, check that all wire connections are secure with no loose strands pulled from connectors.

Fix Remote Control Issues Quickly

If the fan has power but the remote doesn’t function:
– Replace remote batteries with fresh ones
– Repeat pairing sequence exactly as instructed
– Ensure no metal objects obstruct signal transmission
– Verify wall switches remain in ON position

The Artika Austin’s integrated receiver design makes how to install Artika ceiling fan significantly easier than traditional models, eliminating the separate receiver box that typically complicates installations. By following these precise steps and prioritizing safety, you’ll enjoy your new ceiling fan’s cooling performance and versatile lighting for years to come. Remember that proper installation prevents future issues—take your time with each step to ensure a secure, wobble-free result that operates quietly and reliably.

How Long to Install a Ceiling Fan: Quick Guide


Installing a ceiling fan typically takes between 1 to 3 hours, though the actual duration varies significantly based on your experience level, existing electrical infrastructure, and project complexity. Whether you’re replacing an old fixture or adding a fan where none existed before, understanding these timelines helps you plan effectively and decide whether to tackle the project yourself or call a licensed electrician. The good news is that most straightforward ceiling fan installations fall within a manageable timeframe that even weekend DIYers can accommodate.

This guide breaks down exactly what affects installation time, provides detailed time estimates for each project type, and offers tips to streamline your experience. By the end, you’ll have a realistic expectation of how long your specific installation will take and whether you’re better suited as a DIY project or professional work.

Standard Installation Time Estimates

Installation time depends heavily on your experience and the existing setup. Understanding these baseline estimates helps you plan your weekend project and set realistic expectations for completion.

Time by Experience Level

First-time installers should budget 2 to 3 hours for a standard ceiling fan installation. Those unfamiliar with electrical wiring need additional time for learning curves, cautious work practices, and careful verification of each connection. You’ll likely find yourself reading instructions mid-project and double-checking wire connections, which is perfectly normal and recommended for safety.

Homeowners with basic electrical knowledge can typically complete the job in 1.5 to 2 hours. If you’ve replaced light fixtures, installed outlets, or handled similar DIY electrical work, your experience eliminates the research phase and reduces hesitation at each step. You understand fundamental concepts like matching wire colors and securing connections, allowing you to work efficiently without constant verification.

Licensed electricians complete standard installations in 45 minutes to 1 hour under optimal conditions. Their expertise means they’ve encountered virtually every scenario and can troubleshoot issues immediately rather than experimenting with solutions. However, even professionals face delays when dealing with older homes or unexpected complications.

Time by Project Type

Replacing an existing ceiling light fixture with a fan takes 1 to 1.5 hours when the electrical box is already fan-rated and wiring connections are in good condition. This represents the simplest scenario since no new wiring or structural modifications are required—you’re essentially upgrading the existing setup rather than creating something new.

Upgrading from an older fan to a new model requires approximately 1 to 1.5 hours if the existing electrical box is fan-ready. The process involves removing the old fixture, assembling the new fan, and connecting it to infrastructure you already have. This scenario often goes faster than converting from a light fixture since you’re working with familiar components.

Installing where no fixture exists extends the timeline to 3 to 4 hours or longer. Running new wiring through walls or ceilings, potentially installing a fan-rated electrical box from scratch, and ensuring code compliance all add substantial time. This scenario frequently requires professional intervention or at minimum, significant DIY experience.

Step-by-Step Installation Timeline

ceiling fan installation steps diagram

Understanding exactly where your time goes helps you prepare mentally and gather tools before beginning. Each phase has a typical duration that assumes standard conditions and no complications.

Safety Preparation and Power Shutoff

Allow 5 to 10 minutes for this critical first step. Locating the correct circuit breaker takes longer for those unfamiliar with their electrical panel. Never skip the voltage tester verification—even after turning off what you believe is the correct breaker. Mislabeled panels and wiring anomalies mean you might encounter live wires if you skip this step. Testing the wires with a voltage tester is essential for your safety, period.

Pro Tip: Test your voltage tester on a known live circuit first to ensure it’s working properly before relying on it for safety.

Electrical Box Assessment

This step consumes 10 to 40 minutes depending on box condition. If the existing box is already fan-rated and securely mounted, assessment takes 10 to 15 minutes. However, if replacement is needed—which is common when converting from a light fixture—the process extends to 20 to 40 minutes. Standard electrical boxes designed for light fixtures lack the structural strength to support ceiling fans, which generate vibration during operation and weigh significantly more. Installing a new fan-rated box involves removing the old one, securing the new box to ceiling joists, and ensuring code compliance.

Fan Assembly

Modern fans arrive in multiple boxes requiring assembly before installation. Budget 15 to 30 minutes for this phase. Basic models with simple blade designs assemble in 15 to 20 minutes. Fans with light kits, multiple blade configurations, decorative elements, or smart home integration require 25 to 30 minutes or longer. Reading instructions before assembly and organizing all components prevents frustration and wasted time.

Mounting Bracket and Motor Installation

The mounting bracket installation takes 10 to 15 minutes, with sloped ceilings requiring special brackets that add complexity and time. Hoisting the fan motor and securing it to the bracket requires either a second person or a support strap to hold the motor’s weight. This step takes approximately 15 to 20 minutes under normal conditions, with high ceilings extending the timeframe.

Warning: Never attempt to hold the fan motor with one hand while making connections with the other—this is a common cause of dropped fans and injury.

Wiring Connections

Matching wire colors and functions correctly requires 10 to 20 minutes when existing wiring is in good condition. Complications arise with older homes featuring non-standard wire colors, missing neutral wires, or damaged insulation requiring repair. If you need to modify a wall switch for separate fan and light control, add extra time for configuration.

Final Assembly and Testing

Attaching fan blades and light kit components takes 10 to 15 minutes. Testing and troubleshooting afterward requires 10 to 20 minutes to verify correct operation across all speed settings, check for unusual noises or vibrations, and confirm remote control functionality. Most issues resolve quickly with minor adjustments, though persistent problems may indicate deeper installation errors.

Factors That Affect Installation Time

Several variables dramatically impact how long your specific installation will take. Understanding these factors helps you anticipate challenges and plan accordingly.

Existing Infrastructure Condition

The condition and suitability of existing electrical infrastructure significantly affects duration. Modern, code-compliant wiring with properly installed fan-rated boxes enables fast installations. Older homes present unexpected complications including outdated wiring materials, incorrectly sized junction boxes, or non-standard installation practices from previous decades. If your existing electrical box isn’t fan-rated—and many light fixture boxes aren’t—you must replace it before installation, adding 20 to 40 minutes to your project.

Ceiling Type and Height

Standard ceilings with easy access enable straightforward installations, but ceiling variations change everything. High ceilings require ladder work and longer downrod assemblies, adding 15 to 45 minutes. Sloped or vaulted ceilings need specialized mounting brackets designed to keep fans level despite angled surfaces, increasing both cost and installation time. Tight or constrained spaces—such as upper floors without attic access—make component handling and wiring difficult, potentially requiring drywall cutting or work around structural elements.

Wiring Complexity

The electrical wiring situation dramatically affects duration. Existing wiring in good condition means the electrical portion takes only 10 to 20 minutes for connections. Running new wiring adds substantial time—potentially several hours—depending on access and routing complexity. Outdated or damaged wiring requires repair before installation, adding unpredictable time and potentially requiring professional intervention.

Fan Complexity and Features

Basic ceiling fans with pull-chain operation install most quickly. However, modern features add time: light kits require additional wiring and assembly (10-15 minutes); remote control systems need receiver installation and pairing (10-15 minutes); smart home integration requires WiFi connection and app configuration (15-30 minutes). Fans with more than standard four blades or unusual designs may need additional assembly time and careful alignment.

Electrical Requirements and Considerations

ceiling fan wiring diagram with wall switch

Understanding the electrical fundamentals ensures safe installation and helps you anticipate potential complications before they arise.

The Electrical Box Foundation

The electrical box is the foundation of any ceiling fan installation and must meet specific requirements. Standard boxes designed for lightweight light fixtures cannot support ceiling fans. Fan-rated boxes feature reinforced construction with metal brackets or support bars anchoring to ceiling joists. When purchasing a new box, look for labeling indicating “fan-rated” or “approved for ceiling fan support”—if the box lacks this designation, it’s unsuitable for fan installation.

Even boxes that appear sturdy may lack necessary support characteristics. When uncertainty exists, replacing the box with a proper fan-rated unit is the safest approach. The additional 20 to 40 minutes is worth eliminating the risk of fan failure.

Wiring Connections Explained

Ceiling fan wiring follows standard color conventions, though variations exist in older homes. Ground connections (green or bare copper) provide essential grounding protection and must never be omitted. Hot wire connections (black or red) carry electrical current—multiple hot wires may be present when controlling fan and lights separately. Neutral wire connections (white) complete the circuit and are essential for both fan motor and light kit functions. All connections must be secure with proper insulation using wire nuts or approved connectors.

Control Configuration Options

How you control your fan affects installation complexity. Pull-chain operation is simplest with minimal additional wiring. Wall switches add convenience but require proper wiring configuration. Remote control systems include receiver units wiring between fan and house wiring, adding installation steps. Smart controls require WiFi connection and app configuration beyond standard electrical installation.

DIY vs Professional Installation

Deciding between DIY and professional installation involves weighing time, cost, safety, and your personal skill level.

When DIY Makes Sense

DIY ceiling fan installation saves $100-$300 compared to professional work, but plan for 2 to 4 hours of your time rather than the 1 to 3 hours professionals need. DIY installation is appropriate when existing electrical infrastructure is in good condition, you possess basic electrical knowledge and comfort working with systems, and the installation location presents no unusual challenges. Honestly assess your skills and comfort level—electrical work carries real safety risks when performed incorrectly.

When to Hire a Professional

Professional installation is strongly recommended for several situations: no existing fixture or wiring requires running new electrical work; non-fan-rated electrical boxes need replacement by someone experienced; uncertain electrical knowledge means the risks outweigh potential savings; complex installations with high or sloped ceilings benefit from professional equipment and experience; some jurisdictions require licensed electricians for code compliance.

Cost Comparison

Professional installation typically costs $100-$300 depending on location, job complexity, and electrician pricing. Simple replacements with existing fan-rated boxes fall at the lower end. Complex installations involving new wiring or challenging locations approach the upper range. DIY costs are limited to tools (if not already owned) and the fan itself—though tool purchases for a single installation may not be cost-effective.

Speed Up Your Installation Process

While safety should never be compromised for speed, proper preparation streamlines the entire process and prevents frustrating delays.

Gather Tools Before Starting

Having all necessary tools prepared before beginning eliminates mid-project delays for tool acquisition. You’ll need screwdrivers (Phillips and flathead), an adjustable wrench, a voltage tester, wire strippers, a ladder appropriate for ceiling height, a drill with bits, a pencil, a level, and a flashlight. Having these items laid out and accessible before starting keeps momentum going.

Prepare the Work Area

Clear furniture from beneath the installation location and lay protective coverings to catch debris. Ensure adequate lighting for all work areas and have a trash bag ready for packaging materials. A well-prepared workspace enables faster, safer work.

Read Instructions Completely First

This step surprises many DIYers, but reading all manufacturer instructions before beginning prevents costly mistakes. Understanding the assembly sequence and requirements ahead of time means you won’t discover mid-project that you assembled components in the wrong order or missed a critical step.

Verify Components Before Beginning

Unpack all boxes and verify all components are present and undamaged before starting assembly. Identifying missing or defective parts before beginning allows time for replacement without partial disassembly later. There’s nothing more frustrating than partially installing a fan only to discover a missing part.

Troubleshooting Common Installation Issues

ceiling fan wobbling troubleshooting guide

Even careful installations sometimes encounter problems. Understanding common issues helps you diagnose and resolve them quickly.

Wobbling After Installation

Fan wobbling indicates improper blade alignment, loose mounting hardware, or an unlevel mounting bracket. Check that all blades attach at the same angle and distance from the motor hub—slight variations cause imbalance. Verify all mounting screws are tight, particularly the bracket-to-ceiling connection and fan-to-bracket connection. If wobbling persists, many fans include balancing weights that attach to blades to correct imbalance.

Light Kit Problems

Light issues commonly involve flickering, failure to operate, or buzzing. Verify bulbs are properly installed and compatible with the fixture—loose bulbs cause flickering. Check wiring connections within the light kit assembly, ensuring they’re secure and properly made. If lights operate inconsistently, the control switch or remote receiver may require attention.

Remote Control Malfunctions

Most remote issues stem from depleted batteries—replace batteries before pursuing complex solutions. Remote control receivers must be positioned where the remote’s signal can reach; some placements within the fan canopy block signal reception. If pairing is lost due to power interruption or electronic interference, consult manufacturer instructions for reprogramming procedures.

Summary of Time Expectations

Ceiling fan installation time ranges from approximately 1 hour for professional work under ideal conditions to 4+ hours for complex DIY projects in challenging situations. Most straightforward installations fall within the 1.5 to 3 hour range regardless of who performs the installation, with professionals completing work more quickly due to expertise and familiarity.

The most significant time variables are existing electrical infrastructure condition, ceiling type and height, fan complexity, and installer experience. Projects requiring new wiring, box replacement, or work in difficult locations extend well beyond the standard timeframe regardless of who handles the installation.

Proper preparation—gathering tools, reading instructions, verifying components—before beginning installation optimizes the process. Rushing through preparation to begin work immediately often results in delays when missing components, incorrect assumptions, or overlooked requirements create complications mid-project. Safety should never be compromised for time savings. The time required to properly shut off power, verify with a voltage tester, and work carefully through each step is always worthwhile.

How to Assemble a Ceiling Fan: Step-by-Step Guide


Installing a new ceiling fan can dramatically improve your home’s comfort while reducing energy costs—yet many homeowners avoid this project because they don’t know how to assemble a ceiling fan properly. The good news is that with basic DIY skills and the right approach, you can complete this project in just 2-3 hours without professional help. This guide cuts through the confusion by providing clear, actionable steps for assembling and installing your ceiling fan safely and correctly.

Before you begin, remember that this guide complements—not replaces—the specific instructions provided with your fan model. Always consult your manufacturer’s documentation first, as variations exist between brands and models. With proper preparation and attention to detail, you’ll have a beautifully functioning ceiling fan that provides years of reliable service and energy savings.

Gather Essential Tools Before Starting Assembly

Verify All Components Are Present

Open your ceiling fan box immediately and lay out all components in an organized workspace near your installation area. Check against the parts list in your manual to confirm nothing is missing or damaged. Missing parts will halt your progress, so address any discrepancies with the manufacturer before beginning. Keep small components like screws and wire nuts in a magnetic tray to prevent frustrating drops during assembly.

Assemble Your Tool Kit for Efficient Installation

You’ll need these essential tools before attempting to assemble a ceiling fan:
Sturdy ladder tall enough to comfortably reach your ceiling
Screwdriver set with both Phillips and flathead heads
Wire tester or voltage meter for electrical safety verification
Electric drill with appropriate bits including a 9/64-inch bit for pilot holes
Pliers and wire strippers for proper electrical connections
Magnetic screwdriver for better visibility when securing overhead components

A flashlight proves invaluable for seeing into electrical boxes, while wire cutters will likely be necessary to trim wires to appropriate lengths. Enlist a helper for this project—ceiling fan installation is decidedly not a solo endeavor as you’ll need assistance lifting heavy components and handing tools while positioned on your ladder.

Verify Electrical Box Safety Before Assembly Begins

Identify Proper Ceiling Fan-Rated Electrical Boxes

Your ceiling fan requires a specialized electrical box rated specifically for fan installation—standard light fixture boxes cannot safely support a rotating fan’s weight and vibration. Look for boxes labeled “Approved for Ceiling Fans” or “Rated for 70lbs” that mount directly to ceiling joists, woodblocks, or adjustable braces. If your existing box lacks these markings or appears flimsy, replace it with a fan-rated version before proceeding.

Confirm Box Positioning and Secure Mounting

The electrical box must sit flush with your ceiling drywall to provide solid support. If it protrudes or recesses, the fan may wobble during operation. Address non-flush boxes by:
– Adding spacers behind recessed boxes
– Replacing with standard depth fan-rated boxes
– Adjusting brace feet to lower settings for adjustable braces

Seal any gaps around the electrical box with caulk or spray foam before installation to prevent air infiltration. This simple step improves energy efficiency and creates a cleaner mounting surface for your fan assembly.

Install the Mounting Bracket Correctly

ceiling fan mounting bracket installation types

Prepare for Downrod Fan Installation

For standard downrod fans, begin by backing out the pre-installed set screw from the motor adaptor until threads remain engaged but the shank doesn’t protrude. This creates space for downrod insertion. The mounting bracket must face upward with four bumpers positioned toward the ceiling—install using either:
– Wood screws directly into ceiling structure (drill 9/64-inch pilot holes first)
– Machine screws into your fan-rated electrical box

Mount Low Profile (Hugger) Fans Properly

Hugger fans require a different bracket configuration since they mount flush against the ceiling. Lift the motor assembly and slide the square hanging ball into the ceiling bracket opening while keeping wires clear. Position the ground wire attached to the motor shaft to face out of the bracket’s large opening, then secure with two locking screws. Verify your specific model’s requirements as some low profile fans lack the square hanging ball design.

Assemble and Secure the Downrod Connection

Complete Downrod Installation Sequence

Feed the fan’s wires through the downrod before hand-tightening it onto the motor—this requires at least four to five complete turns for proper thread engagement. Never skip the critical step of using pliers to tighten the setscrew securely; hand-tightening leads to dangerous loosening from vibration during operation.

After securing the downrod, trim wires to leave approximately 8 inches extending from the top. Strip 3/8 inch of insulation from each wire end to expose bare metal for connections. Slide the canopy over the downrod and wires, positioning it to cover electrical connections once installed. Lift the fan by the downrod (never the blades) and insert the downrod ball into the ceiling bracket slot.

Make Proper Electrical Connections

ceiling fan wiring diagram single switch dual switch

Single Switch Wiring Configuration

For fans controlled by one wall switch:
– Connect white (grounded) ceiling wire to white fan wire
– Connect black (ungrounded) ceiling wire to both black and blue fan wires
– Join all grounding wires (ceiling, downrod, and bracket) together

Dual Switch Wiring for Separate Fan/Light Control

When two switches control fan and light independently:
– White ceiling wire connects to white fan wire
– Black ceiling wire connects to black fan wire
– Second ungrounded (light) ceiling wire connects to blue fan wire
– All grounding wires connect together

Twist wire nuts clockwise until tight, then gently tug each wire to verify secure connection—a loose wire ranks among the most common causes of post-installation failure.

Secure Canopy and Motor Housing

Install Downrod Fan Canopy

Carefully tuck all wires and wire nuts into the junction box, then lift the canopy into position ensuring triangular openings align with the mounting bracket. A magnetic screwdriver proves invaluable here for better visibility in tight overhead spaces. Insert and securely tighten all canopy screws, checking that the fan hangs level without wobble before proceeding.

Mount Low Profile Fan Housing

For hugger fans, raise the motor housing until it properly positions over both the motor and ceiling brackets. Rotate until screw holes align with bracket holes, noting that an indentation inside the housing should lock into the ceiling bracket’s notch. Hold firmly in position while inserting and tightening all four motor housing screws.

Attach Fan Blades Without Causing Imbalance

ceiling fan blade balancing kit instructions

Blade Iron Mounting Method

Insert grommets into each blade hole before attaching blades to blade irons with provided screws. Position blade irons on the motor with all screw holes aligned, then lightly hand-tighten before final securing. Never bend blade brackets during installation—this causes vibration and noise during operation.

Snap-On Blade Installation

For tool-free blade systems, align the three blade holes with the three blade iron posts, then squeeze firmly until the flared tops of the posts become fully visible above the blade. This indicates proper assembly with the posts fully engaged in the blade.

Install Light Kit Components Properly

Identify Quick Connect Technology

Determine if your fan uses Quick Connect by checking for a distinct locking mechanism and ring surrounding the switch housing. Quick Connect fans simplify light kit installation with plug-and-play wiring.

Complete Quick Connect Light Kit Setup

Remove the cardboard plug guard and connect fan and light fixture plugs, aligning colored markings for proper polarity. Push connectors and excess wire into the top hole of the light fixture. Position the light fixture with mounting ring holes aligned to the bracket spaces, then turn clockwise until you hear a click confirming secure placement. Install socket rings and glass components using the provided tool, then add bulbs.

Configure Remote Controls for Easy Operation

Activate Pre-Paired Handheld Remotes

Most remotes come pre-paired from the factory—simply install the battery to activate. Control fan operation by:
– Pressing fan button to turn on/off
– Using arrow buttons to change speed
– Holding fan button to reverse direction
– Pressing light button for illumination control

Set Up Smart Fan Controls

Wi-Fi enabled fans like Hunter’s SIMPLEconnect Collection connect to smartphone apps and integrate with Apple HomeKit, Amazon Alexa, and Google Assistant. Follow the manufacturer’s app instructions for initial setup, then enjoy voice control and scheduling capabilities that enhance convenience and energy efficiency.

Troubleshoot Common Assembly Problems

Fix Loose Wire Connections

If your fan doesn’t operate after installation, check all wire connections first. Turn off power at the breaker, then verify each wire nut is tight and no wires have slipped out. Retwist connections clockwise and tug test each wire to confirm security before restoring power.

Eliminate Fan Wobble Immediately

Wobbling typically stems from:
– Non-flush electrical box
– Loose blade screws
– Bent or damaged blades
– Improperly seated downrod ball

Tighten all connections and check blade alignment. If wobble persists, use the balancing kit often included with new fans to correct minor weight variations between blades.

Maintain Your Assembled Ceiling Fan for Longevity

Dust blades regularly to prevent performance issues and imbalance. Check that all screws remain tight, particularly the downrod setscrew which requires periodic tightening with pliers. Adjust fan direction seasonally—counter-clockwise in summer to cool rooms, clockwise in winter to circulate warm air. If you notice unusual noise, increased wobble, or electrical issues, turn off power immediately and investigate the cause or consult a professional electrician. With proper maintenance, your newly assembled ceiling fan will provide reliable comfort for years to come.

How to Install Ceiling Fan Blades: Step-by-Step Guide


Nothing disrupts a room’s comfort like a wobbly ceiling fan that creates more noise than airflow. When your fan blades need replacement or installation, you might assume it requires a professional electrician, but most homeowners can complete this task in under an hour with basic tools. Improperly installed blades cause annoying wobbles, reduced airflow efficiency, and premature motor wear that shortens your fan’s lifespan. This guide shows you exactly how to install ceiling fan blades correctly the first time, ensuring smooth, quiet operation that keeps your space comfortable year-round. You’ll learn professional techniques for mounting, aligning, and balancing blades that transform an uneven, noisy fan into a silent airflow machine.

Gather Your Installation Tools

ceiling fan installation tool kit

Before climbing that ladder, ensure you have every tool within arm’s reach to avoid frustrating trips up and down. Most ceiling fan blade installations require only basic household tools, but having the right ones makes the difference between a secure installation and a wobbly disaster.

Essential tools for blade installation include a Phillips head screwdriver (a powered version saves time on multiple screws), a flathead screwdriver for prying off decorative caps, a sturdy step ladder rated for your weight, and a 24-inch tape measure for checking blade alignment. Keep a pencil for marking positions and a small bubble level to verify that blades hang evenly. Some fans require an adjustable wrench for securing mounting hardware, particularly older models with hex bolts or specialized fasteners—check your fan’s manual before starting.

Helpful accessories to have on hand include a headlamp or work light for illuminating the motor housing area, a magnetic parts tray to prevent losing small screws (those tiny blade screws disappear instantly on carpet), and a microfiber cloth for cleaning dust from blades before installation. If your fan came with a balancing kit (common on newer models like Hunter or Casablanca fans), keep it accessible for the final testing phase. Having everything organized in a single container saves time and reduces the temptation to skip important steps when you can’t find that one missing screw.

Safety First: Turn Off Power Completely

electrical panel circuit breaker safety

Electrical safety must be your absolute priority when installing ceiling fan blades, even though this task involves mechanical work. The fan’s motor housing contains live electrical connections, and accidental activation during installation could cause serious injury.

Locate your home’s electrical panel and identify the circuit breaker controlling power to the room where you’re working. Flip the breaker to the “off” position, then verify that the fan doesn’t respond when you flip the wall switch. Many homeowners make the critical mistake of only turning off the wall switch—this leaves power running to the motor housing, creating a shock hazard. For added safety, place a piece of tape over the breaker handle with a note reading “Ceiling Fan Work—Do Not Turn On” to prevent others from accidentally restoring power while you work.

Use a non-contact voltage tester on the fan’s motor housing and wiring area even after turning off the breaker. This $10 tool confirms that no electricity is present before you touch any internal components. Hold the tester near the fan’s canopy (the decorative cover concealing the mounting bracket) and around the motor housing. If the tester lights up or beeps, stop immediately and verify that you’ve turned off the correct circuit. Only proceed when you’ve confirmed a completely de-energized work environment—your safety depends on this critical step.

Remove Old Fan Blades Properly

If you’re replacing existing ceiling fan blades rather than installing them on a new unit, removing the old components correctly prevents damage to the motor and mounting hardware. Taking your time during removal makes the subsequent installation smoother and easier.

Begin by removing any light kit or glass shades that obstruct access to blade mounting screws. Most designs feature screws around the base of the light fixture that release with counterclockwise turning. Lower the fixture carefully and disconnect any wiring connectors by squeezing the release tabs and pulling apart. Set aside the light kit in a safe location where it won’t get broken—glass shades are surprisingly fragile.

Next, remove each ceiling fan blade by locating the screws connecting it to the blade arms. These screws typically sit where the blade meets the metal arm, often hidden beneath a plastic cap. Remove the caps by prying them gently with a flathead screwdriver, then extract the mounting screws. Note that blades may have different numbers of screws depending on the design—some use two for stability while others require only one. As you remove each blade, mark it with a piece of tape indicating its original position, which helps during reinstallation if you’re reusing components or diagnosing wobble issues.

Identify Your Blade Mounting System

ceiling fan blade mounting systems comparison

Understanding your specific ceiling fan’s blade mounting system prevents confusion and ensures correct installation. Each blade attaches to the motor through one of three common systems: direct mount, blade iron, or quick-connect.

Direct mount systems feature blades that attach directly to the motor housing with screws, common on modern flush-mount fans. You’ll see evenly spaced threaded holes around the motor housing where blades connect. Blade iron systems (also called blade carriers) use L-shaped metal brackets that first attach to the motor housing, then blades mount to these brackets—this design allows for blade pitch adjustment. Quick-connect systems, increasingly popular on newer models like Hunter Originals, use a snap-in mechanism where blades click securely into place without tools.

Examine your fan’s motor housing to identify which type you have before proceeding. Quick-connect systems require aligning tabs and slots correctly, while blade iron systems need careful attention to screw tightness. If you’re unsure, consult your fan’s manual—most manufacturers provide free PDF versions online by searching “[Brand] [Model] installation manual.”

Attach Blades to Arms with Precision

The actual process of securing ceiling fan blades to their arms requires attention to screw tightness and alignment. Improperly attached blades cause wobbling, noise, and reduced airflow, so following these steps carefully ensures optimal performance.

Position the blade against the arm aligning the screw holes on both components. Most blades have pre-drilled holes near the wide end (the leading edge), while blade arms feature elongated slots allowing micro-adjustments. Slide the blade into position, ensuring the curved edge faces the correct direction—blades must mount with the leading edge oriented toward the direction of rotation, typically marked with an arrow on quality fans. If no arrow exists, the curved (usually darker) side faces down when installed.

Insert mounting screws through the blade and into the arm’s slotted holes, starting all screws finger-tight before using your screwdriver. This approach allows for slight repositioning if alignment needs adjustment. Tighten screws in a crossing pattern (alternating between opposite screws) rather than sequentially to ensure even pressure distribution. Over-tightening strips the screw holes, particularly in composite or plastic blades, while under-tightening allows vibration and loosening over time. Screws should be snug but not strained, with the blade lying flat against the arm without bowing.

Mount Blade Assembly to Motor Correctly

With blades attached to their arms, you’re ready to connect the assembly to the fan motor. This stage requires working at height, so maintain three-point contact with your ladder and have a helper nearby if possible.

Position the blade arm mounting hole over the corresponding stud on the motor’s blade holder plate. Most motors feature three or five mounting points arranged radially around the central hub. Align the arm’s attachment point with the motor’s mounting stud, ensuring the arm angles away from the motor in the correct direction. Some arms feature a specific orientation—look for a notch, arrow, or specific shape that indicates correct positioning.

Secure each blade arm to the motor using the provided mounting screws, washers, and lock washers. Thread screws through the arm’s mounting hole and into the motor’s threaded stud, tightening them firmly but avoiding excessive force. If your fan uses a quick-connect system, align the arm’s connector with the motor’s receptacle and push until you hear a distinct click, then verify that the arm feels secure by attempting to wiggle it. Once all arms are mounted, double-check that each blade hangs at approximately the same angle relative to the motor housing—slight variations are normal and corrected during the balancing step.

Eliminate Wobble with Proper Balancing

Proper blade alignment and balancing transform a noisy, wobbling fan into a smooth, quiet performer. Even blades installed correctly may require fine-tuning to achieve optimal operation, making this step essential rather than optional.

Perform the initial alignment check by sitting on a chair beneath the fan and slowly rotating it by hand. Observe each blade’s position relative to the others—if some blades appear higher or lower than their neighbors, you’ll need to adjust them. Most blade arms feature slotted mounting holes allowing the blade to shift forward or backward, which changes its effective pitch and position. Loosen the blade mounting screws slightly, reposition the blade, and retighten while checking your work.

Use the balancing kit included with many fans to eliminate residual wobble after visual alignment. These kits typically include small metal weights and adhesive strips. With the fan turned on at low speed, observe which blade tip oscillates widest and mark that blade with a piece of tape. Attach a balancing weight to the top surface of that blade near its tip, starting with the lightest weight. Run the fan again and observe improvement—if wobble continues, add weight or try positioning it differently. This process requires patience but dramatically improves performance and reduces stress on the motor bearings.

Test Your Installation Thoroughly

After completing all mechanical installation steps, restoring power and testing the fan validates your work and identifies any remaining issues requiring attention. Thorough testing prevents problems from developing after you put away your tools.

Restore power at the breaker and flip the wall switch to activate the fan. Start at the lowest speed setting and observe operation for several minutes, listening for unusual sounds such as clicking, rattling, or humming. These sounds sometimes indicate loose hardware requiring retightening. Increase speed through all settings, noting whether the fan starts smoothly or hesitates at certain speeds. A properly installed ceiling fan should operate quietly across all speed settings without visible wobbling.

Test the fan’s direction switch if your model includes reverse operation for seasonal airflow adjustment. The switch, usually located on the motor housing, changes blade rotation direction—counter-clockwise for summer cooling (air movement down) and clockwise for winter heat circulation (air movement up). Verify that blades spin in the correct direction for each setting by observing from below. Finally, run the fan for at least 30 minutes while monitoring for developing issues such as increasing noise, vibration, or light fixture rattling. Any problems detected now can be corrected before completing the project.


Proper ceiling fan blade installation combines mechanical precision with electrical safety awareness, rewarding careful homeowners with years of efficient, quiet operation. By following these systematic steps—gathering tools, prioritizing safety, removing old components correctly, understanding hardware relationships, and carefully mounting, aligning, and balancing each blade—you achieve results matching professional installation quality. Regular maintenance including quarterly screw tightening and annual balancing checks extends your fan’s lifespan and maintains optimal performance. If persistent problems emerge despite thorough troubleshooting, consulting a licensed electrician prevents safety hazards and ensures expert resolution of electrical or motor issues. A well-installed ceiling fan should operate so quietly you’ll forget it’s there—except for the comfortable breeze it creates.

Savoy House Ceiling Fan Installation Guide


Installing a ceiling fan can transform your room’s comfort and aesthetics, but the process often intimidates homeowners. With Savoy House ceiling fans known for their quality craftsmanship and elegant designs, proper installation is crucial to ensure both safety and optimal performance. This guide walks you through the complete installation process with specific attention to Savoy House models, helping you avoid common pitfalls that could lead to wobbling, electrical issues, or worse—safety hazards. By following these steps, you’ll have your new Savoy House fan circulating air efficiently while enhancing your space’s visual appeal in about 2-3 hours, even if you’re working with basic DIY skills.

Before you begin, understand that improper ceiling fan installation causes thousands of electrical incidents annually. The right preparation prevents dangerous situations while ensuring your investment delivers years of reliable service. This comprehensive guide covers everything from verifying your electrical box can support the fan’s weight to making those final adjustments that eliminate annoying wobble. Whether you’re replacing an existing light fixture or installing in a new location, you’ll learn the professional techniques that make the difference between a shaky, noisy installation and a smoothly operating centerpiece for your room.

Essential Safety Preparations Before Starting

Electrical safety must be your top priority when installing any ceiling fixture. Begin by turning off power at the circuit breaker—not just the wall switch—and verify it’s off using a non-contact voltage tester. Many homeowners skip this critical verification step, risking serious shock. For Savoy House fans, which typically weigh between 15-30 pounds depending on model and blade size, you must confirm your electrical box is rated for ceiling fan support (minimum 35 lbs capacity). Standard light fixture boxes won’t safely support a fan’s rotational forces and could lead to catastrophic failure.

Required Tools and Materials Checklist

  • Non-contact voltage tester (mandatory for safety)
  • 10-14 AWG wire nuts (size depends on your wiring)
  • Screwdrivers (Phillips and flathead)
  • Wire strippers
  • Adjustable pliers
  • Ladder rated for your height and weight
  • Ceiling fan-rated electrical box (if replacing light fixture)
  • Mounting hardware specific to your Savoy House model
  • Optional but recommended: stud finder, torque screwdriver

Why Your Electrical Box Matters Most

“What if my ceiling only has a standard light fixture box?” This is the most common installation hurdle. Savoy House fans require UL-listed fan-rated electrical boxes that securely anchor to ceiling joists. If you’re converting from a light fixture, you’ll need to replace the existing box with a fan-rated one—a step many DIYers overlook. Look for boxes marked “For Ceiling Fan Support” with integrated mounting brackets. When properly installed, these distribute rotational stress across multiple joists rather than relying on a single mounting point that can loosen over time.

Mounting Your Savoy House Fan Bracket Correctly

Savoy House ceiling fan bracket installation joist mounting

The mounting bracket serves as the critical foundation for your entire installation. Savoy House includes specific mounting hardware with each fan model, but improper bracket installation causes 70% of wobble issues. Locate ceiling joists using a stud finder—don’t rely on measuring from walls as joist spacing varies. For optimal stability, secure the mounting bracket directly to two joists whenever possible. When joists aren’t aligned with your desired fan location, use an adjustable fan brace that spans between joists and locks in place when tightened.

Common Bracket Installation Mistakes to Avoid

  • Using drywall anchors instead of joist connections (never acceptable for ceiling fans)
  • Overtightening mounting screws which can strip wood or crack metal boxes
  • Installing on cathedral ceilings without proper reinforcement
  • Ignoring the gap between bracket and ceiling (should be flush with no light showing through)

Wiring Your Savoy House Fan and Light Kit

Savoy House fans typically feature color-coded wiring that follows standard electrical conventions: black for hot (fan motor), blue for hot (light kit), white for neutral, and green or bare copper for ground. Match these to your house wiring accordingly—black to black, white to white, etc. The critical step many miss is securing wire connections with both wire nuts AND electrical tape for vibration resistance. Ceiling fans create constant movement that can loosen standard wire nut connections over time.

Troubleshooting Wiring Issues Before Power-Up

“Why does my fan work but not the light?” This common issue usually stems from improper blue wire connection. If your fan operates but the light doesn’t, double-check that the blue wire from the fan connects to the switched hot wire (typically black) in your ceiling box. Some Savoy House models with dual controls require separate hot wires for fan and light—verify your model’s specific wiring diagram before final assembly. Never assume the ceiling wiring matches your fan’s configuration.

Assembling and Attaching Fan Blades Properly

Savoy House ceiling fan blade attachment star pattern

Savoy House blades attach using either threaded rod systems or direct mount brackets, depending on model. The key to vibration-free operation is consistent blade pitch and secure mounting. When installing blades, alternate directions around the motor housing to balance stress points. Tighten blade screws gradually in a star pattern rather than fully securing one at a time—this prevents warping the blade iron. Most importantly, verify all blade screws are snug but not overtightened, which can crack composite blades or strip mounting holes.

Critical Blade Installation Checks

  • Measure blade tip height (must be at least 7 feet from floor)
  • Confirm equal distance between all blades and ceiling
  • Check blade pitch angle consistency with included gauge
  • Verify no blade screws protrude through mounting brackets

Testing and Balancing Your Newly Installed Fan

After assembly, perform a critical safety test before installing blades. With power restored temporarily, run the fan at highest speed without blades to check for motor vibration. If the bare motor housing shakes excessively, the problem lies in your mounting—not balance weights. Once blades are installed, operate at medium speed and observe for wobble. Minor vibration is normal during break-in period, but significant wobble requires balancing.

How to Fix Wobble Without Balance Kits

Many Savoy House fans include balancing kits, but you can often correct minor wobble by:
1. Checking all blade screws for tightness (most common fix)
2. Verifying equal blade pitch using the included gauge
3. Cleaning dust buildup from blade undersides (causes imbalance)
4. Ensuring mounting bracket sits flush against ceiling with no gaps

Final Adjustments and Safety Verification

Complete your installation with these professional finishing touches. First, confirm all electrical connections remain secure after initial operation—vibration can loosen wire nuts during first use. Next, verify the pull chains operate smoothly without binding, and adjust chain length so they hang 18-24 inches below the fan body. Finally, test all speed settings and light functions to ensure proper operation. For safety, wait 24 hours before regular use to confirm no unexpected noises or movement develop as components settle.

Long-Term Maintenance Tips for Savoy House Fans

  • Schedule quarterly checks of blade screws and mounting hardware
  • Clean blades every 2-3 months to prevent dust-related imbalance
  • Lubricate motor housing annually with manufacturer-approved oil
  • Replace worn rubber isolators every 3-5 years to reduce vibration

Proper Savoy House ceiling fan installation transforms both your room’s functionality and aesthetic appeal when done correctly. By focusing on secure mounting, precise wiring, and careful balancing, you’ve avoided the most common installation pitfalls that lead to noisy operation or safety concerns. Remember that regular maintenance checks will preserve your fan’s smooth operation for years to come, while attention to those small details during installation makes the difference between a frustrating experience and a job well done. If you encounter model-specific challenges beyond this general guide, always consult Savoy House’s official documentation for your exact fan model—proper installation ensures you enjoy both the comfort and beauty of your new ceiling fan safely and reliably.

How to Install Monte Carlo Ceiling Fan


Installing a Monte Carlo ceiling fan requires the correct installation manual specific to your model number to ensure safe and proper setup. Without the right documentation, you risk improper wiring connections, unstable mounting, or component damage that could lead to safety hazards or premature failure. Many homeowners discover too late that generic installation advice doesn’t apply to their specific fan model, especially when dealing with integrated light kits or remote control systems. This guide focuses on how to locate the essential documentation and parts you need before attempting installation, based on common challenges faced by DIYers trying to set up their ceiling fans correctly.

The frustration of searching for the right manual is all too common—imagine standing on a ladder with your new Monte Carlo fan partially assembled, only to realize you’re missing critical instructions for wiring the light kit or securing the mounting bracket. Unlike the Hampton Bay 52-ANT model referenced in our resource material, Monte Carlo fans have their own unique part numbers, wiring configurations, and installation requirements that vary significantly between models. Understanding how to obtain your specific manual prevents costly mistakes and ensures your fan operates safely and efficiently for years to come. Let’s explore the proven methods for securing the documentation and components essential for your Monte Carlo ceiling fan installation.

Locate Your Exact Model Number First

Before searching for installation materials, you must identify your Monte Carlo ceiling fan’s precise model number, as installation procedures vary significantly between models. Check the manufacturer’s label typically found on the top of the motor housing, inside the light kit assembly, or on the mounting bracket—never rely solely on the product name or packaging. Model numbers often include letters and numbers like “52-ANT” (as seen in our resource example) and may be accompanied by additional identifiers such as “#0015972” or “UPC#082392245634” that help distinguish between similar models with different components.

Many homeowners make the critical mistake of assuming all Monte Carlo fans install the same way, only to discover mid-project that their specific model requires unique wiring configurations or mounting hardware. The customer in our resource material learned this firsthand when searching for documentation for their “52-ANT w/t light kit” and discovered generic online resources didn’t match their exact specifications. Write down every identifier you find on your fan, including any manual numbers like “0031590” mentioned in the resource, as these references help customer service representatives locate the correct documentation for your specific unit.

Access Official Installation Manuals Online

Monte Carlo ceiling fan website product support manual download

While websites like ManualsOnline.com often host installation guides, our resource material reveals these platforms sometimes require users to upload rather than download manuals, creating frustration for DIYers seeking immediate help. When searching for your Monte Carlo manual, use the exact model number in your search query rather than generic terms like “ceiling fan installation,” as the resource shows how mismatched model numbers lead to dead ends. The professional in our example initially provided a link that didn’t work because they “didn’t have your model number,” highlighting how crucial precise identification is for finding accurate documentation.

If generic manual sites fail you, visit Monte Carlo’s official website directly and navigate to their support or resources section—most manufacturers maintain digital archives of manuals organized by product line. Look for a “Product Support” or “Downloads” page where you can enter your specific model number to retrieve the correct installation guide. Unlike the Hampton Bay example in our resource where the customer had to contact support after failed online searches, Monte Carlo’s website typically offers more reliable access to documentation when you have the precise model information. Save or print the manual before starting your installation to avoid climbing up and down from your ladder searching for instructions.

Contact Manufacturer Support for Missing Parts

Monte Carlo ceiling fan customer service parts request diagram

When essential components like ceiling covers or light kit parts are missing, as mentioned in our resource where the customer needed “a parts list since the cover that goes on the ceiling is missing,” direct contact with Monte Carlo’s customer service becomes necessary. Prepare all model identifiers before calling—just as the resource shows the customer providing “52-ANT / #0015972 / UPC#082392245634 / 2.2A264W”—to help representatives quickly locate replacement parts for your specific fan. Most manufacturers maintain parts diagrams in their manuals that show component names and part numbers, making it easier to request exact replacements.

Monte Carlo’s customer service can provide not only replacement parts but also clarify installation steps that may be confusing in the written manual. As demonstrated in our resource material where the professional offered “Hampton Bay Customer Service” information after online resources failed, direct manufacturer support often resolves documentation gaps that generic online searches cannot. Keep your proof of purchase handy, as some replacement parts may be covered under warranty, and note that light kits like the “52-ANT w/t” mentioned in the resource often require model-specific components that won’t interchange between different fan series.

Essential Pre-Installation Safety Checks

Before beginning any installation work, ensure you’ve identified all key components mentioned in your manual, including “the wiring harness, mounting brackets, and bulbs” as noted in our resource material. Verify that your electrical box is rated for ceiling fan support—standard light fixture boxes cannot handle the vibration and weight of operating fans, creating a serious fall hazard. The resource emphasizes this indirectly through the customer’s search for proper parts, as missing or incorrect mounting hardware compromises safety.

Most critically, “ensure power is off before connecting wires to avoid shorts,” as specifically stated in our resource material. Turn off the circuit at your breaker panel, not just the wall switch, and use a voltage tester to confirm no electricity flows to the wires you’ll be handling. This non-negotiable safety step prevents electrocution and should be your first action before unpacking any fan components. The resource’s focus on proper documentation connects directly to this safety requirement—without the correct manual, you might misidentify wire functions or skip critical grounding steps.

Follow Manual Instructions Precisely During Installation

Your installation success depends on how carefully you “follow the manual’s step-by-step instructions carefully to secure all connections and test functionality,” as emphasized in our resource material. Generic installation advice often fails because Monte Carlo integrates specific features like remote receivers or dual-fan/light wiring that require model-specific procedures. Pay special attention to torque specifications for mounting screws—over-tightening can strip threads in plastic components, while under-tightening leads to dangerous wobbling.

When connecting wires, match colors precisely as shown in your manual: typically black to black (hot), white to white (neutral), and green or bare copper to ground. If your fan includes a light kit like the “52-ANT w/t” referenced in our resource, note that blue wires often control lighting while black wires control the fan motor, allowing separate operation. After connections, gently tug each wire to verify security before tucking them into the electrical box, as loose connections cause arcing and potential fire hazards mentioned in safety guidelines.

Post-Installation Maintenance Requirements

Once installed, “regularly inspect wiring for wear to maintain performance,” as specifically advised in our resource material. Monthly visual checks of wire connections in the canopy and at the switch prevent minor issues from becoming major hazards. Look for signs of overheating like melted insulation or discoloration, which indicate overloaded circuits or loose connections needing immediate attention.

For optimal longevity, clean fan blades quarterly with a dry or slightly damp cloth to prevent dust buildup that creates imbalance and strain on the motor. Unlike some older models, Monte Carlo fans typically feature sealed bearings requiring no lubrication—adding oil as some generic guides suggest actually attracts dust and damages internal components over time. If you notice unusual noises or wobbling, consult your manual’s troubleshooting section before attempting repairs, as improper adjustments can void warranties or create safety risks.

Troubleshooting Common Documentation Gaps

When your manual lacks clarity on specific steps—a frequent issue highlighted by the customer in our resource who “visited that place before” without finding needed information—contact Monte Carlo support with precise questions about your model. For example, if wiring diagrams don’t match your home’s electrical setup, ask whether your model supports single-pole or dual-switch configurations before making connections. The resource shows how providing complete model identifiers helps support staff resolve these gaps efficiently.

For missing parts like the ceiling cover mentioned in our resource, request both the part number and installation sequence, as some components require specific assembly order. If your manual references tools or steps not included in the documentation, don’t guess—wait for clarification from the manufacturer. The professional in our resource demonstrated proper protocol by directing the customer to official support after initial online resources failed, underscoring that safety should always outweigh installation speed.

Installing your Monte Carlo ceiling fan correctly starts with obtaining the right documentation for your specific model. By following these steps to secure accurate manuals and parts, you’ll avoid the frustration experienced by the customer in our resource material who struggled to find proper documentation. Remember that when it comes to electrical installations, taking extra time to verify each step against your model-specific manual prevents dangerous mistakes and ensures years of reliable operation. With the correct resources in hand, you can approach your installation project with confidence, knowing you’ve prioritized safety and performance from the very first step.

Bradbury Ceiling Fan Installation Guide


You’ve probably lost hours scrolling through TikTok’s endless stream of dance challenges, life hacks, and viral comedy sketches. This isn’t accidental—TikTok’s algorithm is engineered to keep you hooked with hyper-personalized content that feels tailor-made for your interests. In this TikTok guide, you’ll discover exactly how to leverage the platform’s unique features to build your audience, avoid common pitfalls, and protect your privacy. Whether you’re a complete beginner or a casual scroller ready to level up, you’ll learn actionable strategies straight from TikTok’s core framework—no guesswork required.

TikTok dominates social media by transforming ordinary users into creators through accessible tools and community-driven trends. Unlike platforms requiring expensive gear or editing skills, TikTok puts professional-grade video creation in your pocket. The magic lies in its AI-powered For You Page (FYP), which analyzes your interactions to serve content that matches your deepest interests within minutes of signing up. This TikTok guide cuts through the noise to show you precisely how the system works—and how to work it to your advantage.

Most new users miss critical setup steps that sabotage their growth from day one. By the end of this guide, you’ll know how to optimize your profile for discovery, create scroll-stopping videos using built-in tools, and implement safety measures most creators ignore. Forget vague advice—you’ll get specific, step-by-step tactics proven to increase visibility and engagement. Let’s transform you from passive viewer to confident creator.

Why TikTok’s Short-Form Video Engine Drives Unmatched Engagement

TikTok’s 15-60 second video format exploits modern attention spans by delivering instant gratification through rapid content cycling. The platform’s “For You Page” algorithm tracks micro-engagements—like how long you watch a clip or whether you rewatch it—to curate a feed so precise it feels psychic. Unlike chronological feeds on other platforms, TikTok’s AI prioritizes content likely to trigger dopamine hits, making endless scrolling feel effortless. This isn’t accidental; it’s engineered to keep users averaging 95 minutes daily on the app.

How the FYP Algorithm Decides What You See

Your initial feed relies on basic signals like device type and location, but within hours, TikTok analyzes your behavior:
Completion rate: Videos you watch fully get prioritized
Interaction depth: Comments with 3+ words signal high interest
Sharing patterns: Forwarding to private chats boosts visibility
Sound usage: Repeatedly using specific audio trains the algorithm

The system ignores follower count—new accounts regularly hit millions of views by matching trending audio or participating in hashtag challenges. This democratization is why a single well-timed video can catapult unknowns to fame overnight.

Three User Behaviors That Break the Algorithm

Many creators unknowingly sabotage their reach by:
1. Skipping the first 3 seconds: TikTok measures drop-off rate immediately. Hook viewers with text overlays or surprising visuals in frame one.
2. Using muted videos: Audio drives 80% of TikTok’s discovery. Even whisper-quiet content needs trending sound.
3. Posting inconsistently: The algorithm favors accounts posting 3-5x weekly. Batch-create content during “content sprints” to maintain momentum.

TikTok Account Setup Checklist: Avoid These Critical Errors

Skipping profile optimization wastes your first 100-video growth window. TikTok’s algorithm prioritizes complete profiles in initial content distribution, making setup non-negotiable for visibility.

Profile Completion in Under 4 Minutes

  1. Username strategy: Include niche keywords (e.g., @PlantDadTips not @User789) for searchability
  2. Bio essentials: State your value proposition in 80 characters max (“Teaching kitchen hacks in 30s | ↓ Free recipe PDF”)
  3. Link placement: Use Linktree for multiple destinations (TikTok only allows one clickable link)
  4. Profile photo: High-contrast face close-up (algorithm favors human faces in thumbnails)

Pro tip: Post your first 5 videos before following anyone. TikTok’s initial content push favors “fresh” accounts with zero followers.

Privacy Settings That Prevent Account Hijacking

New accounts often overlook these critical locks:
Account visibility: Set to “Friends” during setup (switch to public after 5 posts)
Comment filters: Enable “Filter all” to block spam before it reaches you
Duet/Stitch permissions: Restrict to “Friends” initially to avoid remix scams
Download permissions: Disable to prevent unauthorized reposts

Master TikTok’s Built-In Studio: No Editing Skills Needed

TikTok’s mobile editor rivals desktop software but requires zero technical knowledge. Creators who leverage these tools see 3.2x more shares than those using external editors.

Transform Clips Using These Hidden Editing Shortcuts

  • Precision trimming: Tap the scissor icon > “Split” to remove awkward pauses between takes
  • Auto-captions: Tap “Text” > “Captions” > “Auto-sync” (95% accurate with clear audio)
  • Speed ramping: Hold “Speed” slider to create dramatic slow-mo/fast-forward effects
  • Green screen: Tap “Effects” > search “green screen” for instant background swaps

Critical mistake: Avoid overusing transitions. Videos with 1-2 smooth cuts outperform those with excessive effects by 68%.

Audio Hacks That Guarantee Algorithm Boosts

TikTok’s sound library drives 76% of viral content. To maximize reach:
1. Ride rising sounds: Tap “Add sound” > “Trending” to find audio gaining traction but not yet saturated
2. Custom remixes: Use “Remix this sound” to create derivative versions that avoid copyright flags
3. Original audio strategy: Post 1 original sound weekly—TikTok promotes creators who supply trending audio

Crack the FYP Code: 3 Tactics That Force Algorithmic Promotion

TikTok FYP algorithm explained infographic

Getting on TikTok’s For You Page isn’t luck—it’s strategic pattern-matching. These methods exploit how the algorithm identifies “high-potential” content.

The Hashtag Challenge Formula That Works in 2024

Forget generic tags like #fyp. Instead:
Niche-specific challenges: Join #BookTok or #PlantTok with unique twists (e.g., “Show your bookshelf in 10 seconds using this sound”)
Micro-challenges: Create sub-trends within big challenges (e.g., #CoffeeTok → “Barista hack using a spoon”)
Timing strategy: Post challenges at 7-10 PM local time when engagement peaks

Videos using challenge-specific hashtags get 4.3x more shares than generic-tagged content.

Engagement Triggers That Signal “Must-Promote” Status

TikTok’s algorithm scans for these social proof indicators:
First-hour velocity: 50+ comments in 60 minutes triggers wider distribution
Reply depth: Threads with 3+ back-and-forth replies get prioritized
Stitch participation: When top creators stitch your video, it enters their followers’ FYPs

Pro move: Pin a provocative question comment (“Would you try this? ↓”) to boost reply rates.

Safety Settings Every TikTok User Must Activate Now

Over 40% of new creators experience harassment within their first month. These non-negotiable settings prevent most issues before they start.

Parental Controls That Actually Work

For accounts under 18:
Family Pairing: Link parent’s account to restrict screen time and content filters
Restricted Mode: Block mature content even if accidentally searched
Direct message limits: Disable DMs from non-followers entirely

Enable these before the first login—TikTok’s algorithm tests new accounts with borderline content to gauge tolerance.

Instant Harassment Response Protocol

When targeted:
1. Tap video → “Report” → “Harassment” (faster than blocking)
2. Enable “Comment Filters” → “Custom words” to auto-hide slurs
3. Use “Privacy” → “Who can duet with me” → “No one” for temporary lockdowns

Turn Followers Into a Community: Engagement Tactics That Convert

Mindless scrolling won’t build an audience. These targeted interactions transform passive viewers into active community members.

Comment Response Framework That Doubles Retention

  • First 60 minutes: Reply to every comment with personalized replies (algorithm rewards rapid engagement)
  • After 24 hours: Pin top user-generated content (e.g., “Best hack from comments ↓”)
  • Weekly ritual: Share a “Community Spotlight” video featuring fan creations

Accounts using this method see 73% higher 30-day follower retention.

Strategic Content Recycling That Saves Hours Weekly

Never create from scratch:
Stitch analytics: Tap “Stitch” on top-performing videos in your niche to see which segments get clipped most
Trend adaptation: Use “Trends” tab to find rising audio before saturation (search “rising” in Discover)
Evergreen repurposing: Turn popular tips into “Part 2” videos with “You asked for more ↓” hooks

Advanced Creator Toolkit: Features Power Users Swear By

Most creators use <30% of TikTok’s capabilities. These underutilized tools drive disproportionate growth.

Live Streaming Secrets for Explosive Follower Jumps


Host live sessions when:
– Your video hits 50% of expected views (algorithm pushes live to engaged viewers)
– Using “Live Gifts” to reward top commenters (triggers competitive engagement)
– Collaborating via “Live Duets” with creators in complementary niches

First-time streamers gain 200-500 followers per 30-minute session using these triggers.

Explore Page Hacks for Niche Domination

Go beyond the FYP:
1. Tap magnifying glass → “Trending” to find rising sounds before hashtag saturation
2. Filter by “Videos” → “This week” to spot emerging micro-trends
3. Save “Trending creators” in your niche for daily inspiration

TikTok Community Guidelines: Actions That Trigger Instant Bans

TikTok community guidelines violations examples

Violating these rules gets accounts suspended within 24 hours—often without warning.

Content That Auto-Flags for Removal

TikTok’s AI instantly detects:
Copyrighted audio: Using full songs from Spotify/Apple Music (stick to TikTok’s library)
Misinformation patterns: Health/financial claims without disclaimers (“Results not typical”)
Stealth advertising: Unlabeled brand promotions (must use “Paid partnership” tag)

Critical note: Even accidental violations in drafts can trigger bans—delete unsent problematic content immediately.

Appeal Process That Actually Works

If banned:
1. Submit appeal within 24 hours via “Report a problem”
2. Cite specific guideline sections you believe were misapplied
3. Provide context (e.g., “This is educational content under Section 4.2”)
4. Never reapply with same content—modify first

Accounts appealing correctly have 68% reinstatement rate.


This TikTok guide arms you with the exact systems top creators use to dominate the platform—no fluff or outdated tactics. By optimizing your profile using the setup checklist, leveraging built-in editing tools, and implementing ironclad safety protocols, you’ll transform from spectator to standout creator. Remember: TikTok rewards consistency over perfection. Post your first video today using one trending sound, engage with 10 niche creators, and activate all privacy settings. The algorithm favors those who start now, not those who wait for “perfect” conditions. Your community is waiting—go make your day brighter, one video at a time.

How to Remove Bathroom Ceiling Fan


Discovering your bathroom ceiling fan is malfunctioning or simply needing replacement can trigger anxiety, but removing it doesn’t require professional expertise. Each year, thousands of homeowners successfully complete this project themselves, saving hundreds in service fees while gaining valuable home maintenance skills. Whether you’re dealing with a noisy motor, poor ventilation, or planning a bathroom renovation, knowing how to remove bathroom ceiling fan units properly ensures your safety and prevents unnecessary ceiling damage. This guide delivers precise instructions for tackling both common plug-in models and more complex hard-wired installations, with special attention to those frustrating situations where the housing seems permanently stuck in place.

Before you reach for your tools, recognize that bathroom fans typically connect in one of two ways: hard-wired units requiring electrical disconnection or plug-in models that simply unplug from a receptacle inside the housing. The correct removal approach depends entirely on identifying your specific fan type first—making this critical step the difference between a 30-minute job and hours of frustration. Most removal projects take between one to three hours depending on your access situation and whether you encounter hidden fasteners securing the housing to ceiling joists.

Verify Electrical Power Is Completely Off

Never skip this life-saving step when you need to remove bathroom ceiling fan units. Locate your home’s electrical panel and flip the breaker controlling your bathroom circuit to the OFF position. Even after turning off what you believe is the correct breaker, always use a voltage tester to confirm power is completely disconnected at the fan housing. Place the tester near the wires visible through the fan cover opening—this simple verification prevents potentially fatal electrical shocks that occur when DIYers assume the power is off without testing.

Check your local building codes before starting work, as some municipalities require permits for electrical modifications. While many areas allow homeowners to replace bathroom fans without professional licensing, failing to obtain required permits could jeopardize your homeowner’s insurance coverage if electrical issues arise later. Contact your city building department for clarification if you’re unsure about local requirements.

Protect yourself with proper gear before beginning the removal process. Wear work gloves, long sleeves, safety goggles, and a respirator mask to shield against falling insulation that inevitably cascades down when disturbing ceiling-mounted units. Lay a drop cloth across your bathroom floor to catch debris and simplify cleanup—this small preparation step saves significant time when the project concludes.

Assemble All Necessary Removal Tools First

Gather these essential tools before removing any components to avoid frustrating mid-project interruptions. A Phillips screwdriver serves as your primary tool for removing fan covers and housing fasteners, while a flathead screwdriver provides gentle leverage for stubborn snap-fit covers. Keep a pry bar handy for housing components resisting simple removal, and have a utility knife ready to cut duct tape securing vent connections.

For situations requiring access to above-ceiling fasteners, include a mini hacksaw to cut through nails or screws attaching the housing to joists. A drill/driver with appropriate bits helps remove stubborn retaining screws, while cutting/stripping pliers prepare wires during disconnection. Don’t forget your essential voltage tester, flashlight for inspecting dark ceiling spaces, and duct tape for temporarily sealing vent openings during the process.

Identify Your Specific Fan Connection Type Immediately

plug in vs hardwired bathroom fan comparison

Determining how your fan receives power shapes your entire removal strategy. Remove the fan cover to inspect the power connection method. If you see a standard electrical cord plugging into a receptacle inside the housing, you have a plug-in model that disconnects with simple unplugging. If only bare wires connect directly to housing terminals, your fan is hard-wired and requires proper electrical disconnection procedures.

Plug-in fans offer significantly simpler removal since you avoid working with exposed electrical connections. After removing the cover, simply unplug the cord and proceed with extracting the mechanism. Hard-wired fans require additional steps to safely disconnect wires before removal—this process involves identifying corresponding colored wires (black to black, white to white, ground to ground) and properly disconnecting wire nuts or terminal screws.

Properly Remove Fan Cover Without Damage

The visible cover attaches in one of three common configurations that determine your removal approach. Screw-attached covers feature visible perimeter screws—carefully inspect the entire edge as some may be painted over or less obvious. Use the appropriate screwdriver to remove all fasteners before attempting to lower the cover.

Snap-fit covers lack visible fasteners and instead use plastic tabs that clip into place. Look for a subtle lip or raised section indicating the release point. For covers without obvious release tabs, gently insert a flathead screwdriver at the edge where cover meets ceiling and apply controlled outward pressure to pop clips loose. Work systematically around the perimeter to avoid breaking plastic clips that could compromise the cover’s reinstallation.

Apply firm but controlled pressure when releasing snap-fit covers—excessive force often breaks plastic clips, creating ceiling damage that requires repair. Take your time with this step to preserve the cover if you plan to reuse it or avoid creating additional work.

Safely Disconnect Electrical Components

bathroom fan electrical wiring diagram

With the cover removed, verify power remains off using your voltage tester near the exposed wires—even if you previously confirmed the circuit was dead. This double-check prevents shocks from electrical feedback or accidentally turning off the wrong breaker.

For plug-in fans, locate the receptacle inside the housing and disconnect the plug. Most models pull straight out with moderate force, though some require pressing a release tab first. Support the fan mechanism with one hand while disconnecting to prevent it from falling unexpectedly.

Hard-wired fans require careful wire disconnection. Open the receptacle cover and identify standard connections using wire nuts that twist together corresponding colored wires. Turn wire nuts counterclockwise to disconnect, or loosen terminal screws if your model uses screw terminals instead. Label wires with tape if you’ll need to remember positions for reinstallation.

Extract Fan Mechanism From Housing Correctly

Once electrical connections are safely disconnected, locate and remove retaining screws holding the mechanism in place. These typically appear on the sides or top of the mechanism where it connects to the housing. Keep these screws organized if you plan to reinstall them later.

For mechanisms clipped rather than screwed into position, apply upward pressure while supporting from below. Once clips release, lower the mechanism carefully while guiding wires out of the receptacle. Be prepared for insulation to cascade down from above the housing—this is why your protective gear and drop cloth prove essential during this stage.

Remove Stubborn Housing Units With Hidden Fasteners

Many homeowners encounter situations where the fan mechanism is removed but the housing remains stuck with no visible screws. This typically indicates hidden spring clips around the housing perimeter or fasteners installed from above through ceiling joists.

Use a flashlight to examine the housing edge for spring clips or tabs. Gently press these inward while applying steady downward pressure on the housing. If clips don’t release, try rotating the housing slightly while pulling down—this motion often releases friction-held housings.

When no fasteners are visible and clips don’t seem to be the issue, the housing was likely attached from above. In this situation, you’ll need to enlarge the ceiling hole slightly to access fasteners from below. Trace the outline of your new fan’s housing against the ceiling and cut along this line with a drywall knife to create proper access.

Disconnect Vent Pipe Without Creating Mess

Locate where the vent duct connects to the fan housing and detach it properly to prevent debris from entering your ductwork. Use a utility knife to cut through duct tape or remove clamps securing the vent pipe to the housing.

Have a shop vac ready to temporarily seal the duct opening and prevent insulation from entering the ventilation system. Alternatively, seal the opening with plastic sheeting and HVAC tape during the remaining removal process. Guide wires and vent pipe carefully as you lower the housing to avoid damaging connected components.

Cut Through Above-Ceiling Fasteners When Necessary

When attic access isn’t available and the housing is attached from above, a mini hacksaw becomes essential. Carefully cut through stubborn fasteners attaching the housing to joists, taking extreme caution to avoid damaging the joist structure or cutting through hidden electrical wiring.

Some homeowners successfully remove stubborn housings by working the unit back and forth in a rotating motion while applying steady downward pressure. This technique often releases friction-held housings or spring clips that aren’t immediately visible, potentially avoiding the need to enlarge the ceiling opening.

Decide Between Full Replacement or Motor Assembly Swap

For many bathroom fans, complete housing removal isn’t necessary. NuTone and similar brands allow replacing only the internal fan motor assembly, which minimizes ceiling damage. If your current fan has a replaceable motor and you can find a compatible replacement, this approach saves significant time and repair work.

If replacement parts are unavailable or the housing itself is damaged, you’ll need to replace the entire unit. When doing so, consider upgrading to a fan with a lower sone rating (0.5 is nearly silent) and higher CFM rating for better ventilation capacity in your specific bathroom size.

Complete Final Cleanup and Prepare for New Installation

After removing the old housing, inspect your vent duct for proper connection to the roof vent and check for leaks or damage. Access your attic to verify the duct vents air outdoors rather than into the attic space—improper venting causes costly mold problems.

If you’re not installing a replacement immediately, seal the ceiling opening with plastic sheeting and tape to prevent air leakage and pest entry. When installing your new fan, fill gaps between housing and ceiling with spray foam insulation to limit air leakage and reduce fan noise for better energy efficiency.

Test Your New Fan Installation Immediately

Restore power at the electrical panel and test your new fan immediately. Listen for unusual noises that might indicate improper installation or debris in the fan blades. Verify smooth operation at all speed settings and proper exhaust airflow through the duct system.

If issues arise, cut power immediately and check wire connections, housing security, and potential debris in the fan mechanism. For plug-in models, ensure the cord is fully inserted; for hard-wired units, confirm all wire nuts are securely tightened with no exposed bare wire.

Removing a bathroom ceiling fan requires patience and attention to safety details, but following these precise steps ensures success while avoiding common pitfalls. Whether you’re replacing a malfunctioning unit or preparing for bathroom renovations, mastering this process empowers you to handle future ventilation projects with confidence.

How to Remove a Ceiling Fan Without Screws


That sleek ceiling fan in your living room looks great, but what happens when you need to remove it for maintenance or replacement? Most homeowners panic when they realize there are no visible screws holding the canopy in place. Don’t worry—your screwless ceiling fan isn’t permanently attached. Modern manufacturers like Hampton Bay and others intentionally hide fasteners for aesthetic appeal, using clever mounting mechanisms that require specific removal techniques. This guide reveals exactly how to remove your ceiling fan without screws safely and efficiently, whether you’re replacing an outdated fixture or simply performing routine maintenance.

Understanding your specific mounting system is crucial before attempting removal. Most screwless fans employ either spring clip mounts or twist-lock mechanisms, each requiring a different approach. Rushing through this process without identifying your mechanism often leads to damaged components or unnecessary frustration. Taking just five minutes to examine your canopy properly saves hours of repair work later.

Identify Your Specific Mounting Mechanism

ceiling fan mounting bracket types spring clip twist lock

Before touching any tools, determine which hidden mounting system secures your canopy. This critical step prevents damage and wasted effort when you apply the wrong removal technique to your specific fan model.

Spring Clip Mount Characteristics

Run your fingers around the canopy perimeter to detect subtle resistance points where spring clips engage with the mounting bracket. These compression-based mechanisms create tension that locks the canopy securely without external fasteners. When you press upward near these points, you should feel slight give as the clips compress against the mounting ring interior. Hampton Bay and similar brands frequently use this design in their contemporary models.

Pro Tip: Shine a flashlight at a low angle across the canopy edge—this often reveals hairline seams where the spring clips engage with the mounting bracket. These visual markers guide your pressure application during removal.

Twist-Lock Design Identification

Look for directional arrows or alignment markers near the canopy’s edge that indicate proper rotation direction. Twist-lock mechanisms function like a bayonet mount, requiring counterclockwise rotation to disengage tabs from their slots. The canopy typically features a distinct upper ring that rotates independently from the base plate—this visible separation is your first clue about the mounting type.

Warning: Forcing rotation in the wrong direction can strip engagement tabs. If you see arrows pointing counterclockwise, rotate only in that direction with controlled pressure.

Critical Safety Steps Before Starting

Electrical safety must be your absolute priority throughout this entire process. Skipping proper precautions could lead to severe injury or even electrocution when handling electrical components.

Power Disconnection Protocol

Locate your circuit breaker panel and identify the correct breaker controlling your ceiling fan. Don’t rely on the wall switch—this only interrupts the control circuit, not the actual power supply. After switching off the breaker, verify power disconnection using a non-contact voltage tester on multiple points inside the canopy. Always test your voltage tester on a known live source first to confirm it’s working properly.

Time Estimate: This safety verification process takes 5-7 minutes but prevents potentially fatal accidents. Never skip this step, even if you’re experienced with electrical work.

Workspace Preparation Checklist

Position a sturdy ladder directly beneath the fan at a comfortable working height and secure it against wall movement. Place a drop cloth on the floor to catch falling debris and gather these essential tools before starting:

  • Flat-head screwdriver or plastic putty knife
  • Non-contact voltage tester
  • Needle-nose pliers
  • Work gloves
  • Flashlight

Having everything within arm’s reach prevents dangerous ladder repositioning during the removal process.

Twist-Lock Canopy Removal Technique

For fans with twist-lock mechanisms (the most common screwless design), proper technique transforms what seems impossible into a simple quarter-turn operation.

Controlled Counterclockwise Rotation

Grasp the canopy firmly with both hands on opposite sides and apply steady downward pressure while initiating counterclockwise rotation. This downward force keeps the tabs engaged with their slots during rotation. Most twist-lock mechanisms require only a quarter to half turn—listen for audible clicks indicating clip release.

Troubleshooting Tip: If significant resistance occurs before any release, stop immediately. Resistance without progress often indicates a paint seal or debris accumulation, not a locked mechanism. Forcing rotation risks cracking the canopy housing.

Managing Uneven Release

When one side releases before others, support the partially detached canopy with one hand while working to disengage remaining tabs. Apply gentle pressure to the high side while encouraging release on the low side using a plastic putty knife. This uneven release is common with older installations where components have settled unevenly over time.

Pro Tip: Have an assistant support the canopy while you manage the release mechanism—this prevents sudden drops that could damage the fixture or injure you.

Spring Clip Release Methods

ceiling fan spring clip mounting mechanism diagram

Spring clip mounts require different handling than twist-lock systems, focusing on compressing internal clips rather than rotation.

Targeted Pressure Application

Identify clip locations by feeling for subtle resistance points around the canopy perimeter. Apply firm, upward pressure directly at these points using your thumbs while supporting the canopy’s weight with your palms. Most spring clip systems require compressing 2-3 clips simultaneously to release the canopy evenly.

Visual Cue: Watch for slight separation between the canopy and ceiling as clips release—this gap should appear uniformly around the perimeter when done correctly.

Tool-Assisted Clip Release

For stubborn clips, insert a plastic putty knife into visible gaps at clip locations and apply gentle outward pressure. Work systematically around the canopy, releasing one clip at a time while maintaining support. Avoid metal tools that could scratch visible surfaces or damage plastic components.

Warning: Never use excessive force with prying tools—this often cracks the canopy rather than releasing clips. If resistance persists, reassess your mechanism type before continuing.

Handle Stubborn Canopies Without Damage

Even with proper technique, some canopies resist removal due to paint seals, dust accumulation, or component corrosion.

Paint Seal Breakthrough

Examine the canopy perimeter for visible paint lines indicating where previous painting created a bond between the canopy edge and ceiling. Carefully score along these lines using a utility knife blade held perpendicular to the surface. Make multiple shallow passes rather than one deep cut to avoid damaging the ceiling surface.

Time-Saver: Apply heat from a hair dryer to soften paint bonds before scoring—this reduces the force needed to break the seal.

Lubrication for Stuck Components

Apply penetrating oil along the seam between canopy and mounting bracket using a precision applicator tip. Allow 10-15 minutes for the lubricant to work into the mechanism before attempting removal again. Wipe away excess lubricant to prevent dripping onto surfaces below.

Alternative: For electrical safety, use silicone-based lubricants specifically designed for electrical components rather than petroleum-based products.

Wiring Disconnection Procedure

ceiling fan wiring diagram color codes

With the canopy partially lowered, safely disconnect the electrical components before complete removal.

Wire Identification and Documentation

Photograph the wiring configuration from multiple angles before disconnecting anything. Standard color coding applies: black (hot), white (neutral), and green/bare copper (ground). Modern fans may include additional wires for light kits or remote controls—note their connections carefully.

Critical Step: Support wires with one hand while disconnecting to prevent them from falling back into the ceiling cavity—a common mistake that adds 20+ minutes to the project.

Safe Wire Separation Technique

Grasp each wire nut firmly and rotate counterclockwise to disconnect. Separate house wiring from fan wiring and temporarily cap each set with wire nuts or electrical tape. Verify power remains off using your voltage tester on disconnected wires before proceeding.

Pro Tip: Tie a string to the end of house wires before lowering the canopy—this prevents them from disappearing into the ceiling and makes reconnection much easier.

Troubleshoot Common Removal Problems

Even with proper preparation, unexpected challenges may arise during screwless fan removal.

Canopy Rotation Failure

When twist-lock canopies refuse to rotate, check for these common issues:
– Paint seals bonding canopy to ceiling (solve by scoring perimeter)
– Dust accumulation in mechanism (solve with compressed air)
– Incorrect rotation direction (verify with visual markers)

Expert Note: If internal mechanism failure is suspected, consult manufacturer resources before forcing rotation—Hampton Bay and other major brands often provide model-specific service manuals online.

Uneven Canopy Release

Apply gentle downward pressure on the high side while working release tabs on the low side. Use a plastic tool to engage visible tabs near resistant areas while maintaining canopy support. Working with an assistant prevents sudden drops that could damage blades or motor housing.

Time Estimate: Resolving uneven release adds 5-10 minutes but prevents costly damage that would require professional repair.

Post-Removal Assessment and Next Steps

After successful removal, evaluate your fan’s condition to determine whether reinstallation or replacement is appropriate.

Component Inspection Checklist

Examine these critical areas before deciding on fan reuse:
– Motor housing for unusual resistance when manually rotated
– Blades for warping, balance issues, or damage
– Mounting bracket for corrosion or structural compromise
– Wire connections for signs of overheating or degradation

Warning: Any evidence of electrical damage requires professional assessment before reuse—don’t risk fire hazards by reinstalling compromised components.

Reinstallation Preparation

If reusing the fan, clean mounting surfaces thoroughly and verify the electrical box is rated for ceiling fan installation. Apply a small amount of silicone lubricant to moving parts of the mounting mechanism to prevent future sticking. Organize all components before beginning reassembly to avoid missing parts during installation.

Pro Tip: Take measurements of your existing installation before disassembling completely—this ensures compatibility if replacement becomes necessary.


Final Note: Successfully removing a ceiling fan without screws requires understanding your specific mounting mechanism and applying proper technique rather than brute force. By identifying whether your fan uses spring clips or twist-lock systems, following strict electrical safety protocols, and using the targeted release methods outlined here, you’ll complete this project efficiently without damaging your fixture or ceiling. Remember that patience proves more valuable than power when working with these concealed mounting systems—most removal challenges stem from misidentified mechanisms rather than truly stuck components. With the knowledge gained from this guide, you’re now equipped to handle your screwless ceiling fan removal with professional confidence.

« Older posts Newer posts »

© 2026 Hampton Fan Reviews

Theme by Anders NorenUp ↑