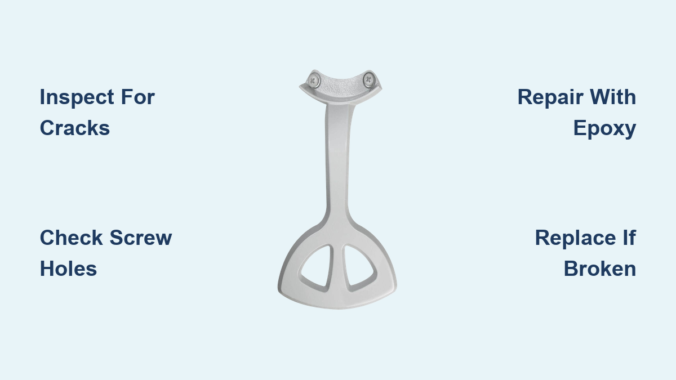
A snapped or cracked ceiling fan blade arm creates immediate safety concerns and disrupts your home’s comfort. When one blade arm fails, the fan becomes dangerously unbalanced, causing excessive wobbling that can damage the motor housing, loosen mounting hardware, and potentially lead to the entire fixture falling from the ceiling. This common household problem affects thousands of homeowners each year, but the good news is that repairing or replacing a broken blade arm is typically a manageable DIY project that takes less than an hour with the right approach. Understanding how to properly diagnose the damage, choose between repair and replacement options, and implement a lasting solution will restore your fan’s smooth operation while preventing future failures.
Diagnose Your Specific Blade Arm Damage
Before attempting any repair, you must accurately identify the type and severity of damage to determine the appropriate solution. Many homeowners mistakenly assume all broken blade arms require full replacement when some can be effectively repaired with the right technique.
Conduct a Thorough Visual Assessment
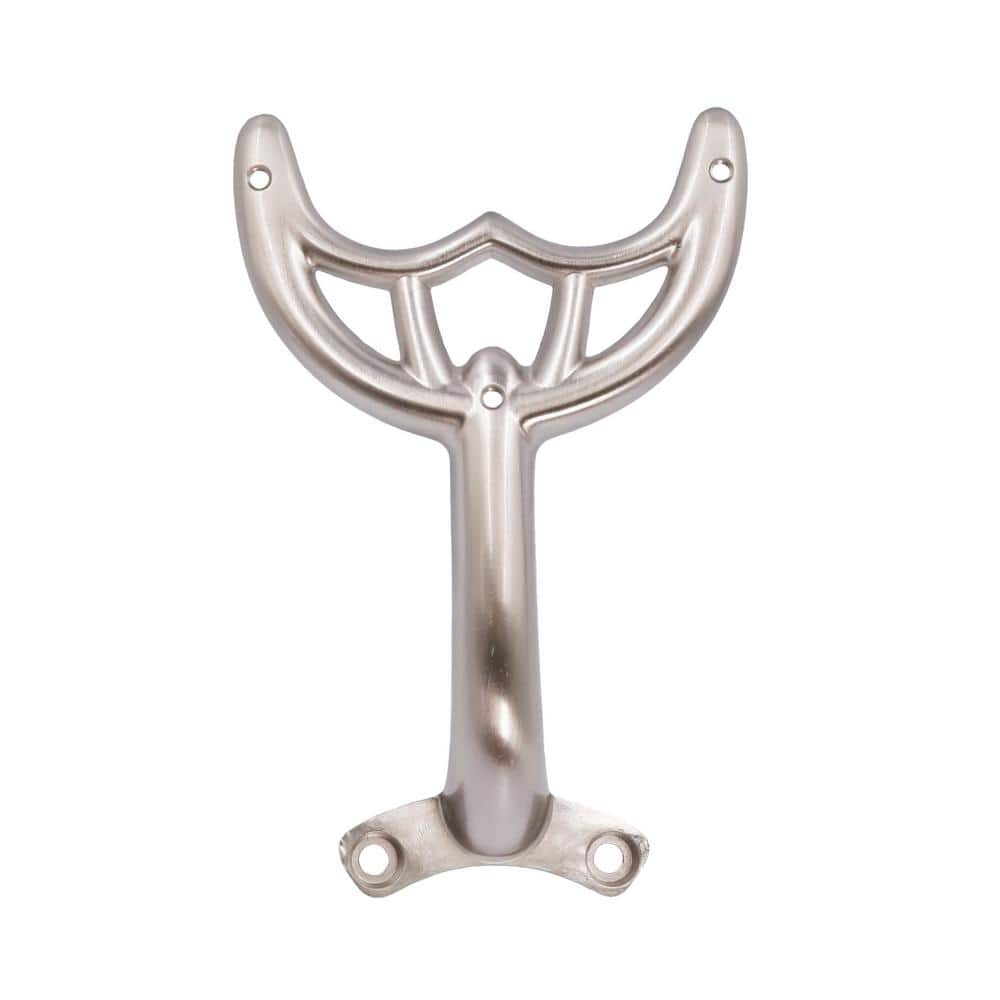
Turn off power to the fan at the circuit breaker and allow blades to stop completely before beginning your inspection. Position a sturdy ladder directly beneath the fan to examine each blade arm connection point where it meets both the fan hub and the blade itself. For metal arms, look for visible cracks at the curved section where maximum stress occurs during operation—this is the most common failure point. Plastic arms often show hairline fractures that may not be immediately visible from floor level. Gently wiggle each blade near the tip; movement exceeding one-quarter inch indicates internal damage even if no visible crack exists. Check for elongated screw holes that have lost their grip due to previous loosening and retightening cycles.
Recognize Critical Damage Patterns
Understanding common failure patterns helps you determine whether repair is viable. The most frequent issue occurs at the stress point where the arm curves outward from the hub—this area experiences maximum torsional force during operation. Metal arms typically develop hairline cracks that progressively widen, while plastic arms often splinter along their length due to material fatigue. Another common pattern involves screw hole damage where repeated loosening has enlarged the mounting holes, causing the blade to shift during operation. Plastic arms exposed to heat from light fixtures become brittle over time and may crack with minimal pressure. If multiple arms show similar damage patterns, this indicates an underlying balance issue rather than isolated component failure.
Choose Between Repair and Full Replacement

Your decision to repair or replace depends on several critical factors that affect both safety and long-term performance. Understanding these considerations prevents wasted effort on ineffective repairs or unnecessary replacement costs.
Situations Where Repair Is Practical
Minor hairline cracks in metal blade arms (less than two inches in length) that haven’t fully separated are excellent candidates for epoxy repair. This approach works particularly well when the manufacturer has discontinued replacement parts or when working with antique or specialty fans where matching components would be difficult to source. A properly executed metal repair using high-strength epoxy can restore 80-90% of the original structural integrity, making it suitable for fans that operate primarily at lower speeds. Temporary repairs also make sense when you need immediate functionality while waiting for replacement parts to arrive.
When Replacement Is Mandatory
Complete breaks, severely bent arms, or multiple cracks require full replacement for safety reasons. Plastic arms showing widespread brittleness or heat damage should always be replaced rather than repaired, as the material’s structural integrity has compromised throughout. Replacement is also necessary when damage occurs at critical stress points, when multiple arms show similar damage patterns, or when the fan is older and replacement parts would better ensure compatibility and performance. Never attempt to repair a blade arm that has completely separated while the fan was operating—this indicates catastrophic failure that compromises the entire assembly’s safety.
Prepare the Correct Tools and Materials
Gathering everything you need before starting prevents dangerous mid-repair ladder climbs and ensures proper execution. The required items differ slightly between repair and replacement scenarios.
Essential Tools for Any Blade Arm Work
You’ll need a sturdy extension ladder tall enough to reach the fan comfortably without overreaching, a complete screwdriver set with both Phillips and flathead options (ceiling fan screws vary by manufacturer), needle-nose pliers for manipulating small components, and a bright work light to illuminate the mounting area. Safety glasses protect your eyes from debris during disassembly, while a small container keeps screws organized and prevents loss.
Repair-Specific Materials
For metal arm repairs, gather two-part epoxy specifically formulated for metal bonding, fine-grit sandpaper (120-220 grit) for surface preparation, metal file for smoothing rough edges, and small clamps or heavy-duty zip ties to hold the repair in position during curing. Plastic arm repairs require plastic-specific epoxy and a rotary tool with sanding attachments to properly prepare the slick surface for adhesion.
Replacement-Specific Requirements
When replacing an arm, you’ll need the correct replacement part (either OEM or verified universal fit), a pencil for marking alignment points, and possibly a torque screwdriver to ensure proper tightening without over-stressing new components. Having an extra set of hands available makes the replacement process significantly easier when aligning the new arm with existing blades.
Execute a Professional-Quality Metal Arm Repair
Metal blade arm repairs can be highly effective when performed correctly, restoring reliable operation without the expense of full replacement.
Step-by-Step Metal Repair Process
Begin by completely removing the damaged blade assembly from the fan. Support the blade with one hand while carefully removing mounting screws with the other to prevent accidental drops. Clean both sides of the crack thoroughly with isopropyr alcohol to remove contaminants that would compromise adhesion. Lightly sand the bonding surfaces to create texture for the epoxy to grip, then mix the two-part epoxy according to manufacturer instructions. Apply a generous bead along both sides of the crack, then carefully align the pieces and press firmly together. Secure the repair with small clamps or zip ties positioned perpendicular to the crack, wiping away excess epoxy with a toothpick. Allow the epoxy to cure for the full recommended time (typically 24 hours for maximum strength) before reinstalling.
Critical Success Factors
The key to a lasting metal repair lies in proper surface preparation and alignment. Ensure the broken pieces fit together perfectly before applying epoxy—any misalignment creates weak points that will fail under operational stress. Apply firm, even pressure during curing to maximize molecular bonding between the metal and epoxy. After reinstallation, run the fan at low speed for the first 24 hours to allow the repair to fully stabilize before normal operation.
Complete a Proper Blade Arm Replacement
When replacement is necessary, the process requires careful attention to alignment and secure mounting to prevent future issues.
Precise Installation Technique
Before removing the damaged arm, take multiple photos from different angles to document its exact position relative to other blades. Remove the old arm and clean the mounting area thoroughly. Position the new arm loosely at the hub first, then attach the blade to the arm end—this sequence makes alignment easier. Use a straight edge or string stretched between blade tips to verify consistent alignment across all blades. Gradually tighten mounting screws in a star pattern (alternating between opposite screws) to distribute pressure evenly. Final torque should be firm but not excessive—overtightening can strip screw holes or create stress points in the new arm.
Post-Installation Balancing
Any blade arm replacement requires rebalancing to eliminate vibration. Start with the simple coin test: run the fan at medium speed and observe wobble direction. Attach small adhesive weights (included in balancing kits) to the top of affected blades, beginning with minimal weight and increasing incrementally until vibration stops. For precise balancing, use a clip-on balancing kit to test different weight positions before permanent attachment. Proper balancing reduces stress on the new arm by up to 70%, significantly extending its service life.
Implement Preventative Measures for Long-Term Reliability
After fixing your broken blade arm, take these steps to prevent recurrence and extend your fan’s overall lifespan.
Regular Maintenance Protocol
Check all blade arm connections quarterly by gently wiggling each blade near the tip—any movement beyond one-eighth inch indicates loosening that needs attention. Tighten mounting screws to manufacturer specifications (typically 30-40 inch-pounds), using a torque screwdriver for accuracy. Replace incandescent light bulbs with LED equivalents to reduce heat exposure that degrades plastic components. Clean blades monthly to prevent dust buildup that creates imbalance over time.
Upgrade Opportunities
Consider replacing plastic arms with metal equivalents if your fan operates in a hot environment or has experienced repeated failures. Install a fan speed controller to minimize starting torque that stresses blade arms during startup. For older fans showing multiple stress points, replace all blade arms simultaneously rather than waiting for additional failures—this ensures consistent material strength across the assembly.
Addressing a broken ceiling fan blade arm promptly with the right approach restores safe, quiet operation while preventing more serious damage. By accurately diagnosing the problem, choosing the appropriate solution, and implementing proper preventative measures, you can extend your fan’s service life significantly. Remember that when in doubt about structural integrity or safety concerns, consulting a professional electrician ensures the job is completed to code and eliminates risk. With these techniques, what might seem like a reason to replace your entire fan becomes a simple, cost-effective repair that keeps your home comfortable for years to come.
Leave a Reply