Is your ceiling fan dimmer switch suddenly failing to control your lights or fan speed? When your dimmer switch stops working properly, you might experience flickering lights, inconsistent fan speeds, or complete loss of control. This frustrating issue affects thousands of homeowners who rely on their ceiling fan lighting systems daily. Before you grab your screwdriver or search for quick fixes online, it’s critical to understand that electrical work involving dimmer switches requires proper knowledge and safety precautions. This guide will help you identify whether your problem is something you can safely address yourself or when you should call a licensed electrician.
Electrical issues with ceiling fan dimmer switches aren’t just inconvenient—they can indicate potentially dangerous wiring problems. Many homeowners don’t realize that using the wrong type of dimmer switch with ceiling fans can create fire hazards or damage your fan motor. The first step in resolving your dimmer switch problem is understanding why proper diagnosis matters for both functionality and safety in your home.
Why Standard Dimmer Switches Fail with Ceiling Fans

Incompatible Switch Types Cause Most Problems
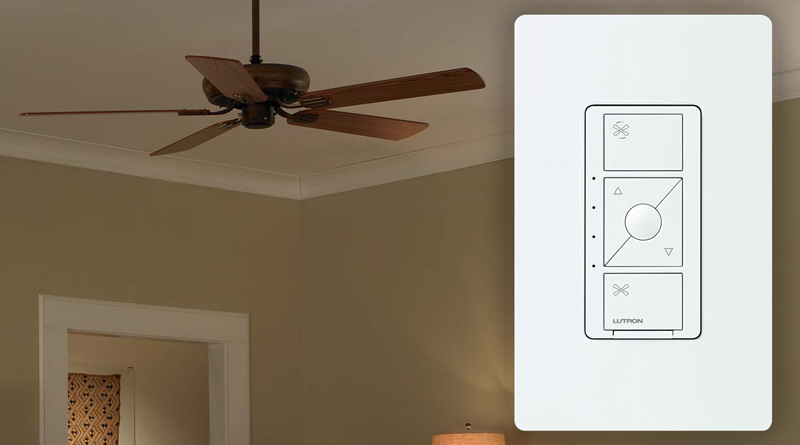
Ceiling fans require specialized dimmer switches designed specifically for motor loads, not standard light dimmers. When homeowners install regular incandescent dimmers with ceiling fans, they often experience:
- Flickering or inconsistent lighting as the dimmer struggles with the electrical load
- Buzzing or humming noises from incompatible voltage regulation
- Premature switch failure due to motor load stress
- Fan speed control issues where the fan won’t respond properly to adjustments
The critical difference lies in how these switches handle electrical loads. Standard dimmers chop the AC waveform to reduce power to lights, but ceiling fan motors require smooth voltage changes. Using the wrong dimmer creates electrical interference that damages both the switch and potentially your fan motor over time.
How to Identify Your Dimmer Switch Type
Before attempting any troubleshooting, determine what type of dimmer you have installed:
- Check for labeling on the switch plate or toggle button (look for “Fan Motor Compatible” or similar wording)
- Examine packaging if you still have it (ceiling fan dimmers typically specify maximum fan wattage)
- Note control features (true fan dimmers usually have separate controls for light and fan speed)
If your dimmer switch doesn’t explicitly state it’s designed for ceiling fans, this incompatibility is likely causing your problems. True ceiling fan dimmers maintain consistent voltage for the motor while separately controlling the lighting circuit.
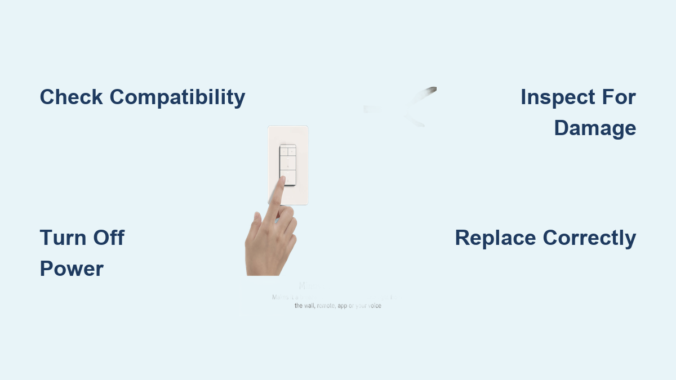
Immediate Safety Steps Before Troubleshooting

Essential Power Shutdown Procedure
Always turn off power at the circuit breaker before examining any electrical components. Simply flipping the wall switch off doesn’t eliminate dangerous current in the wiring box. Follow these steps:
- Locate the correct circuit breaker controlling your ceiling fan
- Flip the breaker to OFF position
- Use a non-contact voltage tester at the switch to confirm power is off
- Place tape over the breaker to prevent accidental reactivation
Skipping this step risks severe electrical shock. Even experienced DIYers have been injured by assuming power was off when it wasn’t—always verify with a tester.
Visual Inspection Without Disassembly
With power confirmed OFF, perform these external checks:
- Examine the switch plate for signs of scorching, melting, or discoloration
- Check for unusual warmth when the switch has been operating
- Listen for buzzing sounds when adjusting the dimmer
- Note if problems occur only at certain settings
These observations help determine whether you’re dealing with a simple compatibility issue or a potentially dangerous electrical fault requiring professional attention.
When to Call a Licensed Electrician Immediately
Critical Warning Signs Requiring Professional Help
Certain symptoms indicate problems beyond DIY repair capabilities:
- Burning smell coming from the switch or wall
- Visible scorch marks on the switch plate or wall
- Sparks or arcing when operating the switch
- Frequent breaker trips when using the dimmer
- Buzzing that intensifies over time
These signs often indicate loose connections, overloaded circuits, or failing components that create serious fire hazards. Attempting to fix these issues without proper training risks electrocution or starting an electrical fire in your walls.
Complex Wiring Configurations Need Expert Handling
Many homes have multi-way switching setups where multiple switches control the same fan. These installations involve:
- Traveler wires that carry current between switches
- Special three-way or four-way dimmers required for proper function
- Complex wiring patterns that are easy to misconfigure
Unless you’ve successfully worked with multi-switch circuits before, these installations require professional expertise to troubleshoot safely. Mistaking traveler wires for hot wires can create dangerous short circuits.
Choosing the Correct Replacement Dimmer Switch
Matching Specifications to Your Ceiling Fan
If you determine your dimmer is simply incompatible, selecting the right replacement requires checking:
- Maximum wattage rating (must exceed your fan’s total lighting load)
- Motor load compatibility (must specify “ceiling fan” or “motor load”)
- Switch type (single-pole for standard installations, three-way for multi-switch setups)
- Dimming technology (trailing edge vs. leading edge for different bulb types)
For example, if your fan uses LED bulbs, you’ll need a dimmer specifically rated for both motor loads and LED compatibility. Many modern fans combine these requirements, so verify all specifications match your exact setup.
Top Recommended Dimmer Switch Features
When shopping for a replacement, prioritize these safety-focused features:
- Overload protection that automatically shuts down if wattage exceeds capacity
- Cool-touch housing that prevents burns from internal heat
- Clear labeling of compatible loads and wiring configurations
- Tamper-resistant design that meets current electrical codes
- Long warranty period (5+ years indicates manufacturer confidence)
Reputable brands like Lutron, Leviton, and Legrand offer models specifically designed for ceiling fan applications with these critical safety features.
Basic Installation Safety Protocol
Essential Tools for Safe Replacement
If you decide to replace the dimmer yourself, gather these safety-critical tools:
- Non-contact voltage tester (double-check power is off)
- Wire strippers with safety guards
- Insulated screwdrivers with rubber grips
- Wire nuts rated for your wire gauge
- Electrical tape (for added insulation)
- Safety glasses (to protect from accidental sparks)
Never use damaged tools or metal ladders when working with electrical components. Aluminum ladders conduct electricity and create deadly shock risks.
Step-by-Step Connection Verification
After installing the new dimmer, follow this verification process before restoring power:
- Double-check wire connections against manufacturer diagram
- Ensure no bare copper shows outside wire nuts
- Confirm ground wire is properly secured
- Verify switch is mounted securely without pinched wires
- Perform final visual inspection of all connections
This systematic approach prevents common installation errors that cause immediate switch failure or create hidden hazards.
Preventing Future Dimmer Switch Problems
Regular Maintenance Schedule
Preventative care extends dimmer switch life and catches issues early:
- Monthly: Check for unusual warmth during operation
- Quarterly: Tighten faceplate screws (vibration loosens them over time)
- Annually: Turn off power and inspect for discoloration or dust buildup
- After major storms: Verify proper operation following power fluctuations
Dust accumulation inside switch boxes insulates components and causes overheating. A quick annual cleaning with compressed air prevents many premature failures.
Compatibility Upgrades for Modern Lighting
As you update your home lighting, remember that:
- LED bulb upgrades often require dimmer replacement
- Smart home integration needs compatible dimmers
- Increased lighting loads from added fixtures may exceed original dimmer capacity
When changing bulb types or adding fixtures, always verify your dimmer switch specifications match the new electrical requirements. Many “sudden” dimmer failures actually result from these unnoticed compatibility changes.
Final Note: Ceiling fan dimmer switch issues often stem from incompatible equipment rather than true malfunctions. Always prioritize safety over convenience when dealing with electrical components—when in doubt, consult a licensed electrician. Properly matched dimmer switches should provide years of reliable service when installed correctly according to manufacturer specifications and local electrical codes. Remember that the small investment in professional help for electrical work protects both your home and your family’s safety.
Leave a Reply