Your ceiling fan motor not working transforms a comfortable room into an unbearable space, especially during hot summer months. Whether your fan refuses to spin entirely, emits a loud humming sound without turning, or runs at inconsistent speeds, most failures stem from a handful of common issues you can diagnose with basic tools. Professional technicians report that electrical connection problems cause approximately 30% of ceiling fan motor failures, while capacitor issues account for another 40% of cases. Understanding these primary failure points helps you determine whether a simple DIY fix will restore operation or if professional service is needed.
This guide cuts through the confusion to show you exactly how to diagnose and fix the most common causes of a ceiling fan motor not working. You’ll learn to systematically verify power supply, test capacitors, inspect wiring connections, and identify mechanical issues—all without specialized expertise. Let’s get your fan spinning again.
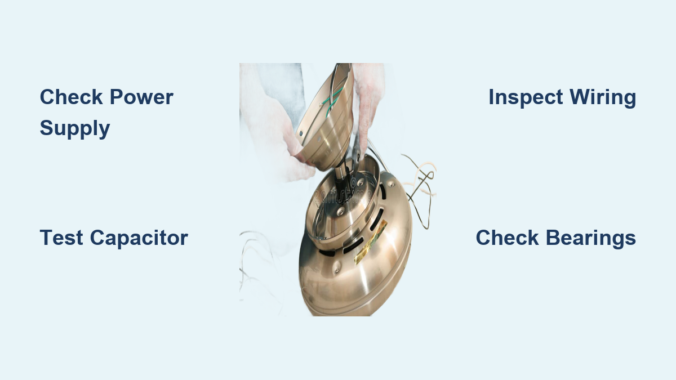
Verify Power Supply Before Touching the Fan
Before disassembling your ceiling fan, confirm electricity is actually reaching the unit—this simple step resolves many “ceiling fan motor not working” issues. Start by checking your electrical panel for tripped breakers. Even if a breaker appears “on,” it may have partially tripped without fully moving to the off position. Look for breakers sitting slightly between positions or feel the panel for warmth indicating recent tripping. Reset any suspect breakers by turning them completely off, then firmly back on.
Test outlets and switches methodically:
– For plug-in fans, verify power using a lamp you know works
– For hardwired installations, use a non-contact voltage tester near the ceiling mounting bracket while someone operates the wall switch
– Check all GFCI outlets on the same circuit—bathrooms and outdoor fans often connect through GFCI protection
If your ceiling fan motor not working persists despite confirmed power, move to control system diagnostics. Wall switches controlling fans experience significantly more wear than standard lighting switches due to the inductive load of motor circuits. Test switches by removing the cover plate and checking for discoloration or burning. With power off, examine wire connections for tightness and test continuity with a multimeter—properly functioning switches show near-zero resistance when closed.
Diagnose Capacitor Failure Symptoms Immediately

When your ceiling fan motor not working produces only a humming sound without rotation, the capacitor is the prime suspect in approximately 40% of failure cases. Capacitors provide the phase shift necessary for single-phase AC motors to develop starting torque. A completely failed capacitor prevents the motor from starting entirely, though windings still receive power and produce the characteristic hum. Partially degraded capacitors may allow the motor to start but only at reduced speeds, cause clicking during operation, or result in stalling under light loads.
Test capacitor condition with these steps:
1. Turn off power at the circuit breaker
2. Locate the capacitor (typically in the fan canopy or motor housing)
3. Discharge the capacitor safely by touching terminals together through an appropriate resistor
4. Use a multimeter with capacitance measurement capability
5. Compare readings to the value printed on the capacitor (typically 4-20 microfarads)
Capacitors showing readings more than 10-20% below rated value require replacement. Replace with identical specifications—matching voltage rating (usually 370VAC or 440VAC) and capacitance value. Physical size matters if space within the fan housing is limited. When installing, connect wires to the correct terminals (typically labeled FAN, LIGHT, and COM) and secure the capacitor to prevent vibration damage.
Inspect Wiring Connections for Thermal Damage

Faulty wiring connections rank among the most frequent causes of intermittent ceiling fan motor failure. Thermal cycling from motor operation causes repeated expansion and contraction at connection points, eventually leading to loosening, oxidation, or degradation that interrupts electrical flow.
Examine connections at these critical points:
– Ceiling mounting bracket wire nuts (look for discoloration or melted insulation)
– Connections within the fan housing (pull-chain switch terminals and motor leads)
– Wall switch terminals and electrical box connections
Gently tug on each wire connection to verify security—any wire that moves was not properly tightened. Corroded or oxidized connections require cleaning with a wire brush and re-termination with fresh wire nuts. Never ignore signs of overheating—discolored wire nuts, brittle insulation, or scorch marks indicate serious connection issues that can create fire hazards if left unaddressed. When reconnecting wires, ensure proper color matching and secure connections before reassembly.
Identify Mechanical Binding and Bearing Failures
When electrical systems test good but your ceiling fan motor not working continues, mechanical failures within the motor assembly itself may be the culprit. Bearings, rotors, and blade assemblies all contribute to motor function and can fail in ways that prevent rotation.
Diagnose bearing problems with these indicators:
– Grinding, squeaking, or rumbling sounds that change with fan speed
– Visible wobble in the fan blades when manually rotating the assembly
– Excessive heat in the motor housing during attempted operation
Check for blade and mounting assembly alignment issues that create symptoms mimicking motor failure. Imbalanced blades cause vibration that stresses motor bearings and accelerates wear. Verify all blades are seated properly in their blade arms and that mounting hardware securing the motor to the ceiling bracket is properly tightened. Manual rotation of the blade assembly should feel smooth with minimal resistance throughout the full rotation. If you encounter significant resistance or binding, investigate mechanical obstructions before assuming motor failure.
Troubleshoot Speed Control Systems Thoroughly

Modern ceiling fans employ various speed control methods, and failures in these systems often mimic complete motor failure. When your ceiling fan motor not working affects only certain speeds or control methods, the speed control system requires focused evaluation.
Examine pull-chain switch mechanisms:
– Access the switch by removing the motor housing cover
– Inspect for visible damage to the mechanism
– Test continuity between terminals at each speed position with a multimeter
– Replace if contacts show wear or inconsistent continuity
Electronic speed control modules fail due to heat stress, voltage surges, or component aging. Visual inspection often reveals failed components—bulging capacitors, discolored resistors, or damaged circuit board traces. Test wall controls using a multimeter to verify proper voltage output at each speed setting. For remote-controlled fans, first replace transmitter batteries, then test using the wall switch—if the fan operates with the wall switch but not the remote, the problem lies with either the transmitter or receiver module.
Prevent Future Failures with Strategic Maintenance
Regular maintenance significantly extends ceiling fan motor service life and prevents unexpected failures. Dust and debris accumulation on motor windings, bearings, and cooling vents impairs heat dissipation and accelerates wear. Implement these preventive measures:
- Clean fans annually (more frequently in dusty environments) using a vacuum with brush attachment
- Tighten all accessible connections annually to counteract thermal cycling effects
- Verify blade balance and alignment if you notice new wobble or vibration
- For fans with accessible bearings, apply manufacturer-recommended lubricant annually
Pay special attention to fans installed in challenging environments—porches, bathrooms, or unconditioned spaces face increased moisture-related failure risk. Ensure these fans have appropriate moisture resistance ratings for their location. Fans in direct sunlight or high-heat areas require additional ventilation to prevent overheating, the primary cause of premature motor failure.
Make Smart Repair or Replacement Decisions
When your ceiling fan motor not working investigation identifies the specific failure cause, deciding between repair and replacement requires careful consideration. Component replacement makes sense for specific failures in relatively young fans—capacitor replacement, pull-chain switch repair, and remote control fixes typically cost under $50 and extend fan life significantly.
Consider replacement when:
– The fan approaches or exceeds 15 years of age
– Multiple components show signs of wear or failure
– Parts for discontinued models become difficult to source
– The fan operates continuously (modern energy-efficient models offer 50-70% energy savings)
For fans still under warranty, check terms before attempting repairs—some manufacturers require professional service to maintain coverage. Complete motor replacement often proves more cost-effective than repair for older fans, as replacement parts may approach the cost of a new unit. When replacement makes sense, modern ceiling fans offer improved efficiency, quieter operation, and better aesthetics that enhance both comfort and home value.
A ceiling fan motor not working doesn’t always mean the end of your fan’s service life. By systematically verifying power supply, testing capacitors, inspecting wiring connections, and evaluating mechanical components, you can identify the specific cause and implement an effective solution. Most common failures can be resolved with basic tools and knowledge, saving you the cost of professional service. For persistent issues or complex electronic controls, don’t hesitate to call a qualified electrician—safety should always come first when working with electrical systems. Regular maintenance extends motor lifespan and prevents unexpected failures, ensuring your ceiling fan continues providing comfort for years to come.
Leave a Reply