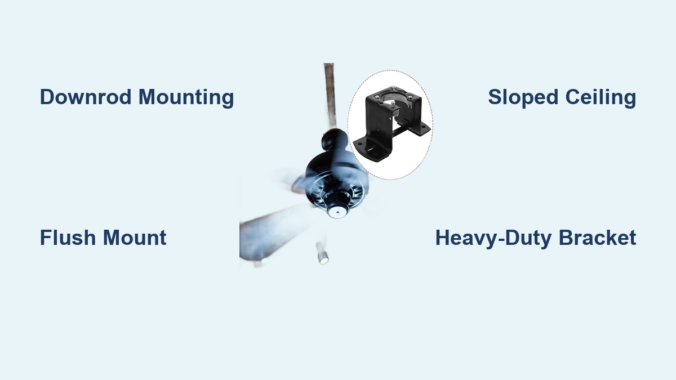
If your ceiling fan wobbles, makes unusual noises, or worse—feels unstable during operation—the problem likely stems from an improper mounting bracket selection. Choosing the wrong ceiling fan mounting bracket type compromises both performance and safety, potentially causing damage to your ceiling or creating hazardous conditions. With multiple bracket designs available for different ceiling configurations and fan weights, understanding which mounting system matches your specific installation needs is critical for a secure, vibration-free setup. This guide details the exact mounting bracket types you need based on your ceiling structure, fan specifications, and room requirements—helping you avoid common installation mistakes that lead to premature fan failure.
Standard Downrod Mounting Systems for Level Ceilings
The downrod mounting system represents the most common ceiling fan installation method for standard flat ceilings with adequate height. This bracket configuration suspends your fan from a vertical pipe (the downrod) that connects the motor housing to the mounting bracket secured in your ceiling.
How Downrod Mounting Brackets Ensure Stability
Downrod mounting brackets feature a circular canopy that conceals the electrical connections while distributing the fan’s weight across multiple attachment points. The bracket’s central mounting plate connects to your electrical box with heavy-duty screws, while the downrod attaches through a ball-and-socket mechanism that allows slight movement to absorb operational vibration.
Key installation considerations:
– Minimum ceiling height requirement of 8 feet for standard installations
– Downrod length selection depends on room dimensions (typically 3-12 inches)
– Weight capacity must exceed your fan’s total weight by at least 50%
– Electrical box must be rated for ceiling fan support (not standard light fixture boxes)
Selecting the Correct Downrod Length for Your Space
Choosing the wrong downrod length creates airflow inefficiency and safety hazards. Follow these precise measurements to determine your ideal configuration:
- Measure from ceiling to floor
- Subtract desired fan height (minimum 7 feet from floor to blade tips)
- Account for blade sweep (add 6 inches for proper air circulation)
- Consider ceiling height variations (add extra length for vaulted areas)
For example, a 9-foot ceiling with a fan featuring 52-inch blades requires an 18-inch downrod to maintain proper clearance while optimizing airflow distribution throughout the room.
Flush Mount Brackets for Low-Ceiling Applications
Flush mount brackets solve installation challenges in rooms with limited vertical space, eliminating the need for a downrod by mounting the fan motor housing directly against the ceiling surface.
When to Choose a Flush Mount Configuration
Identify if your space requires a flush mount bracket by checking these specific conditions:
– Ceiling height measures less than 8 feet
– Doorways or hallways restrict overhead clearance
– Aesthetics demand a low-profile appearance
– Existing wiring limits downrod installation options
Warning: Never retrofit a standard fan with a flush mount bracket unless the manufacturer specifically approves this configuration—improper adaptation creates dangerous stress points on the motor housing.
Flush Mount Bracket Installation Requirements
Unlike standard mounting systems, flush mount brackets require special attention to electrical box compatibility and weight distribution:
- Verify your electrical box supports at least 50 pounds without additional reinforcement
- Confirm the bracket’s mounting plate fully covers the electrical box opening
- Ensure sufficient space exists between ceiling and motor housing for wiring connections
- Use only manufacturer-supplied hardware to maintain warranty coverage
Angled Ceiling Mounting Solutions for Vaulted Spaces
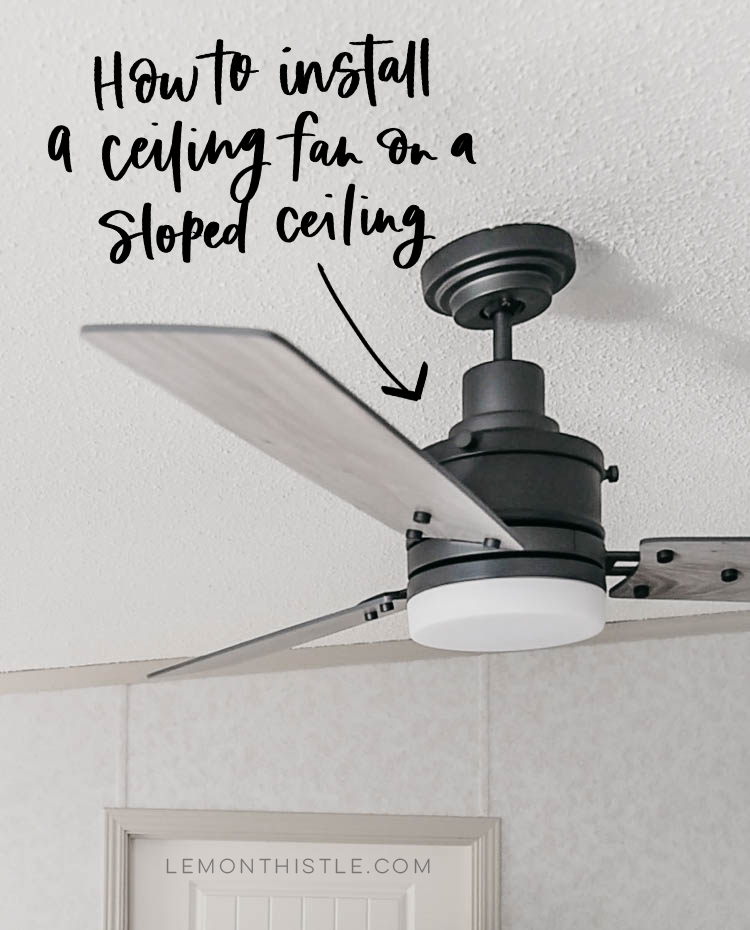
Installing fans on sloped ceilings demands specialized mounting hardware that maintains proper vertical alignment while securely anchoring to angled framing members.
Sloped Ceiling Bracket Design Features
Professional-grade angled mounting brackets incorporate these critical engineering elements:
– Adjustable swivel mechanisms that maintain fan levelness up to 45-degree slopes
– Reinforced mounting plates with extended flanges for secure attachment
– Integrated strain relief to prevent wire damage during installation
– Secondary safety locks that prevent accidental detachment
Pro Tip: For ceilings steeper than 25 degrees, select brackets with dual-mounting points that connect to both the electrical box and adjacent framing members—this distributes weight more effectively and reduces vibration.
Determining Your Slope Angle Before Installation
Accurately measuring your ceiling pitch prevents bracket selection errors:
- Place a 12-inch level against the ceiling surface
- Measure vertically from the level’s end to the ceiling
- Calculate slope as “X-in-12” (e.g., 4-in-12 means 4 inches of rise per foot)
- Match your measurement to bracket specifications (most support up to 45 degrees)
Reinforced Mounting Systems for Large or Heavy Fans

High-velocity commercial fans and oversized residential models require specialized mounting solutions that exceed standard bracket capabilities.
Heavy-Duty Bracket Specifications
When installing fans weighing more than 35 pounds or with blade spans exceeding 56 inches, verify these critical specifications:
- Minimum weight rating of 70 pounds (double the fan’s actual weight)
- Steel construction with minimum 14-gauge thickness
- Multiple attachment points connecting to structural framing
- UL-rated for “fan support” (not just “fixture support”)
Common Mistake: Homeowners frequently assume standard electrical boxes can handle larger fans—most require retrofit braces that span between ceiling joists to distribute weight safely.
Installation Process for Oversized Fan Brackets
Follow this sequence for secure heavy fan installations:
1. Turn off power at the circuit breaker and verify with voltage tester
2. Remove existing electrical box and install fan-rated retrofit brace
3. Secure mounting bracket to brace with 3-inch lag bolts
4. Connect wiring following color-coded specifications
5. Attach fan motor housing and perform stability test before installing blades
Universal Mounting Bracket Compatibility Issues
Many homeowners encounter problems when replacing older fans or mixing components from different manufacturers—universal brackets don’t always deliver promised compatibility.
Identifying True Universal Bracket Features
Genuine universal mounting systems include these adaptable elements:
– Multiple bolt patterns accommodating various motor housings
– Adjustable mounting plates that fit different electrical box sizes
– Tool-free conversion between flush and downrod configurations
– Interchangeable mounting hardware for different ceiling types
Critical Checkpoint: Before purchasing, verify the bracket specifically lists compatibility with your fan model—manufacturer websites typically provide cross-reference charts for proper matching.
Troubleshooting Bracket-Fan Mismatch Problems
When your new fan doesn’t align with the existing bracket:
– Check for hidden adapter plates left from previous installations
– Measure motor housing bolt circle diameter (typically 3.5-4.5 inches)
– Compare mounting slot configurations (straight vs. curved patterns)
– Contact manufacturer technical support with photos for verification
Safety Certification Requirements for Mounting Brackets
Not all mounting hardware meets safety standards—using uncertified brackets creates serious fall hazards and voids insurance coverage in many jurisdictions.
Essential Safety Certifications to Verify
Before installation, confirm your mounting bracket displays these mandatory certifications:
– UL 2021 listing (specifically for ceiling fan support systems)
– Intertek ETL mark with fan support designation
– ICC-ES evaluation report for structural performance
– Manufacturer’s written warranty covering installation failures
Warning: Brackets without visible safety certification labels likely don’t meet minimum load requirements—these can fail catastrophically under normal operating conditions.
Professional Installation vs. DIY Mounting Considerations
While many homeowners attempt ceiling fan installations themselves, certain scenarios absolutely require professional electrical expertise.
When to Call a Licensed Electrician
Schedule professional installation if you encounter any of these conditions:
– No existing ceiling electrical box in desired location
– Drywall damage around current mounting point
– Aluminum wiring in your home’s electrical system
– Ceiling construction involves plaster or specialty materials
– Local building codes require permitted electrical work
Time-Saver Tip: Most big-box home improvement stores offer professional installation services that include proper bracket selection—this often costs less than repairing damage from improper DIY mounting.
Maintenance Checks for Long-Term Bracket Security
Even properly installed mounting systems require periodic inspection to maintain safety and performance.
Quarterly Bracket Inspection Procedure
- Turn off power and allow fan to stop completely
- Visually examine bracket-canopy connection for gaps or misalignment
- Gently shake fan to test for excessive movement
- Check for screw holes elongating in mounting surface
- Tighten all visible hardware using manufacturer-recommended torque
Expert Note: Develop the habit of checking bracket security whenever you clean fan blades—this takes less than two minutes but prevents most mounting-related failures.
Final Installation Verification Checklist
Before operating your newly installed ceiling fan, complete this safety verification:
- [ ] All mounting screws are fully tightened to manufacturer specifications
- [ ] Electrical connections are properly secured with wire nuts
- [ ] Safety strap (if included) is correctly positioned
- [ ] Blade alignment shows no visible wobble
- [ ] Minimum 7-foot clearance maintained from floor to blade tips
- [ ] No wires are pinched between mounting components
Choosing the correct ceiling fan mounting bracket type transforms an ordinary installation into a safe, efficient, and long-lasting fixture. By matching your bracket selection to specific ceiling conditions, fan specifications, and safety requirements, you ensure optimal performance while eliminating preventable hazards. Remember that the mounting system represents the critical foundation of your entire ceiling fan—never compromise on proper bracket selection or installation quality. When in doubt about bracket compatibility or installation requirements, consult the fan manufacturer’s technical support or hire a qualified electrician to verify your mounting solution meets all safety standards.
Leave a Reply