That familiar tug on your ceiling fan’s pull chain meets resistance or produces no response—suddenly you’re stuck with a fan running at full speed or not working at all. This common household frustration affects millions of homeowners each year when the simple mechanism designed to control your comfort fails at the most inconvenient times. When your ceiling fan pull chain not working issue strikes, you don’t need to immediately call an electrician or replace the entire fixture. Most problems can be diagnosed and repaired in under an hour with basic tools you likely already own.
Before you resign yourself to sweltering nights or costly professional repairs, understand that pull chain failures typically stem from just a few identifiable causes. This guide reveals exactly how to pinpoint and fix your non-responsive pull chain, whether it won’t budge, moves freely without effect, or only partially functions. You’ll learn to safely access the mechanism, test components, and implement permanent solutions that restore control to your hands—saving you time, money, and unnecessary stress.
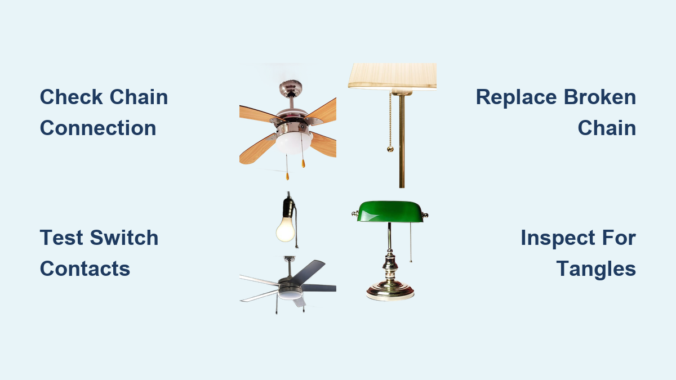
Why Your Pull Chain Suddenly Stopped Functioning
Most ceiling fan pull chain failures fall into four distinct categories, each with telltale symptoms that help you diagnose the problem quickly without specialized tools.
Chain mechanism detachment causes the most frequent issues, where the chain has physically separated from the internal switch. When this happens, you’ll feel the chain moving loosely without the characteristic “click” at each speed change. The chain might seem to slip or spin without engaging any mechanism—a clear sign the connector inside has come unhooked.
Worn-out switch contacts create problems where pulling the chain produces clicks but no fan response. Inside the pull switch, tiny metal contacts physically connect and disconnect to control speed settings. After years of use, these components wear thin or become coated with carbon buildup from electrical arcing, preventing proper electrical flow despite correct mechanical operation.
Internal chain tangles occur when the pull cord wraps around internal components, especially in older fans. You might feel unusual resistance when pulling or notice the chain only works after twisting it in a specific direction. These tangles develop gradually as the chain wears and frays from repeated use.
Complete chain breakage presents as a dangling chain segment with the remainder still inside the housing. This typically happens at stress points where the chain bends repeatedly—either at the switch connector or where it passes through the housing slot. The broken end often shows visible wear or separation at individual links.
Immediate Checks Before Taking Tools to Your Fan
Before removing any components, perform these three simple checks that resolve nearly one-third of pull chain issues without tools or electrical work.
First, pull the chain through its full range of motion while listening closely for clicking sounds. A functioning switch produces a distinct mechanical click with each speed change. If you hear clicks but the fan doesn’t respond, the problem lies with the switch contacts or wiring rather than the chain mechanism itself.
Next, examine the chain’s connection point inside the switch housing. Many fans feature a removable bottom cover secured by two small screws. Remove this cover and check whether the chain’s metal connector has simply popped off the switch lever. Reattaching this hook often restores function in minutes—no parts required.
Finally, test the fan’s operation from any wall control if available. Turn the wall switch off and on multiple times while observing fan behavior. If the wall control works but the pull chain doesn’t, you’ve confirmed the issue is isolated to the pull switch assembly rather than broader electrical problems.
Accessing the Pull Chain Mechanism Safely

Reaching the problematic components requires careful disassembly that takes less than five minutes with basic tools.
Turn off power at the circuit breaker controlling the fan circuit—never rely solely on the wall switch. Verify power is off using a voltage tester at the fan’s electrical box before proceeding. Locate the bottom housing cover (typically a dome-shaped piece directly below the fan blades) and remove its retaining screws, usually positioned around the perimeter.
Lower the housing carefully—it connects to the fan body via wires and a mounting bracket. You may need to loosen the central mounting nut slightly to create enough clearance. Once lowered, you’ll see the pull chain switch mounted on the side of the motor housing, identifiable as a small cylindrical or rectangular plastic unit with the chain emerging from one end.
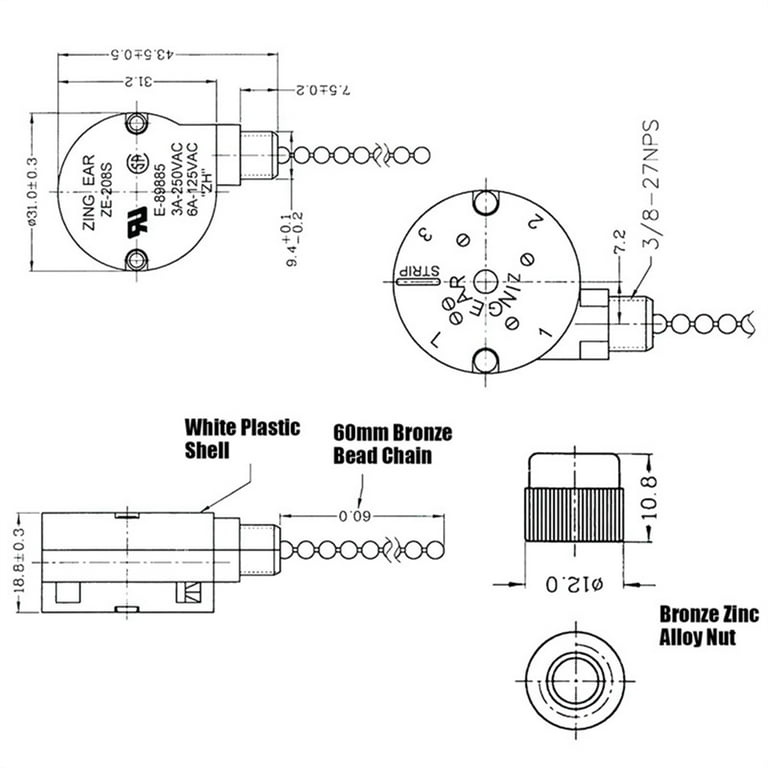
Inspect this switch for visible damage like melted plastic, scorch marks, or loose wires. Most standard switches have three to five wires connecting to different speed terminals, with the chain attached to a small lever mechanism that physically moves between contact points with each pull.
Testing the Pull Switch Without Special Tools
You can often determine switch functionality without a multimeter by performing these simple tests.
With power still off, remove the switch housing cover if present (usually secured by small screws or clips). Manually move the switch lever through its positions while observing the internal contacts. They should move cleanly between contact points without sticking or excessive play. Any visible corrosion, pitting, or burned spots on the contacts indicates a failed switch requiring replacement.
If you have a multimeter, set it to continuity mode and test between terminals as you manually operate the switch lever. Each speed position should show continuity between specific terminal pairs. No continuity in any position confirms switch failure, while inconsistent continuity suggests intermittent contact problems.
Replacing a Faulty Pull Chain Switch in 5 Minutes
When testing confirms switch failure, replacement takes minutes and costs less than $15 for the part.
Purchase an exact replacement by noting your fan’s brand and model number, or take the old switch to a hardware store for matching. Universal switches fit most installations but must match your fan’s speed configuration—three-speed switches are standard for most residential fans.
Before disconnecting anything, photograph or sketch the wire connections to ensure proper reinstallation. Most switches use black wires for power input and colored wires (blue, red, yellow) for different speed outputs. Loosen terminal screws on the old switch, remove wires one at a time, and transfer them to identical positions on the new switch. Hand-tighten terminal screws—over-tightening can strip the plastic housing.
After reassembly, restore power and test all fan speeds. The pull chain should produce distinct clicks at each position with corresponding speed changes. If the fan runs continuously or fails to start, double-check your wiring against the original configuration—reversed wires are the most common installation error.
Fixing Broken or Stuck Pull Chains

When the chain itself is damaged but the switch works, replacement costs under $5 and requires no electrical knowledge.
For completely broken chains, access the switch housing as described earlier and locate the chain connector inside—usually a small metal hook or crimp-on attachment. Remove the broken chain segment and feed a new chain through the housing slot, reconnecting it to the switch lever. Ensure the connection is secure by gently tugging before reassembling the housing.
For chains that won’t pull or feel stuck, untangle any internal loops while supporting the chain to prevent re-tangling. Clean accumulated dust and debris from the housing slot using compressed air or a small brush. Apply a tiny drop of silicone-based lubricant to the chain if binding persists, but avoid oil-based products that attract more dirt.
When to Call a Professional
While most pull chain issues are DIY-friendly, certain situations warrant professional assistance.
Stop immediately and call an electrician if you discover melted wires, scorched components, or burning smells during inspection—these indicate serious electrical problems that pose fire hazards. Older fans (over 15 years) with obsolete parts may be more cost-effective to replace than repair, especially when modern ENERGY STAR models offer significantly better efficiency.
Fans with complex control systems involving remote receivers or multiple wall switches often require manufacturer-specific knowledge that exceeds typical DIY capabilities. In these cases, professional diagnosis prevents costly mistakes from miswired components.
Preventing Future Pull Chain Failures
Extend your pull chain’s lifespan with these simple maintenance practices.
Operate the chain gently rather than yanking it forcefully—the mechanism is designed for smooth, deliberate engagement. Annual inspection during ceiling fan cleaning reveals early signs of wear before they cause complete failure. Look for fraying links, loose connections, or binding mechanisms that need attention.
Address minor problems immediately rather than continuing to use a malfunctioning chain. A slightly loose connection or early-stage tangle becomes a major failure if ignored, potentially causing additional damage to the switch mechanism.
Restoring Control Without Costly Repairs
A non-working pull chain rarely means replacing your entire ceiling fan. By methodically checking the chain connection, testing the switch mechanism, and replacing only the faulty components, you restore control to your comfort system with minimal expense. Most repairs require less than $25 in parts and under an hour of your time—far less than professional service calls.
Remember that electrical safety always comes first. Verify power is off at the circuit breaker before accessing any components, and never work on live wiring. When in doubt about your ability to complete a repair safely, consult a licensed electrician—your peace of mind is worth the investment.
With these straightforward solutions, you’ll transform that frustrating moment when your ceiling fan pull chain not working from a comfort crisis into a minor inconvenience you can solve yourself. The next time that tug on the chain doesn’t produce the expected response, you’ll know exactly how to diagnose and fix the problem—putting control back in your hands where it belongs.
Leave a Reply