Your ceiling fan hums but won’t budge from one speed—or worse, refuses to spin at all. That frustrating moment when you tug the chain or press the remote, expecting relief from the summer heat, only to get silence or a single unchanging speed. You’re not alone. Millions of homeowners face this exact problem with their ceiling fan speed switch not working, turning what should be a cooling solution into a costly nuisance. This common electrical issue typically stems from four key failure points that disrupt the delicate balance between your fan’s motor and control system. In the next few minutes, you’ll learn to pinpoint exactly why your speed control failed, safely diagnose the culprit, and implement the right fix—whether you’re dealing with a vintage pull-chain model or a modern remote-controlled unit. Most repairs take under an hour and cost less than $20 in parts when you know where to look.
Why Your Ceiling Fan Speed Switch Suddenly Stopped Working
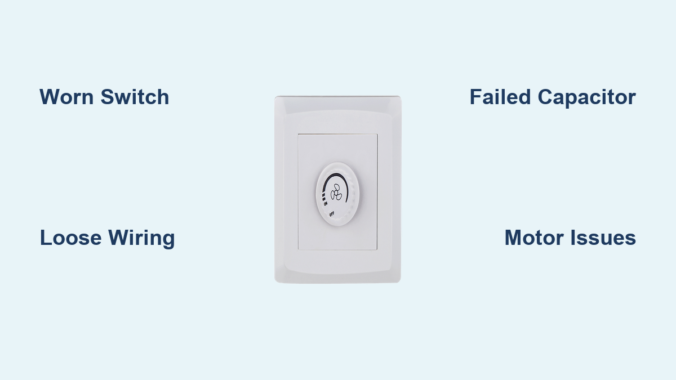
When your ceiling fan speed switch not working scenario strikes, the problem almost always traces back to one of four mechanical or electrical failures. These components work together to regulate voltage flow to the motor, and when any element fails, speed control disappears.
Worn-Out Pull Chain Switch Mechanisms Cause Intermittent Operation
Mechanical switches in pull-chain models suffer from internal contact wear after years of use. You’ll notice symptoms like needing to pull the chain multiple times to get a response, hearing a hollow “click” without speed change, or having the fan get stuck on high speed. The copper contacts inside the switch erode from electrical arcing, creating gaps that prevent proper circuit completion. Older fans with plastic housing switches fail faster than metal-cased units due to heat warping. If your fan works only when you hold the chain in a specific position, this is your prime suspect.
Loose Wiring Connections Disrupt Power Flow to Speed Controls
Vibrations from daily operation gradually loosen wire connections inside the switch housing. Check for frayed wires or terminals with visible burn marks near the speed selector. This is especially common in fans mounted on unstable ceilings or in high-humidity environments like bathrooms. When wires disconnect from the switch terminals, power can’t reach the capacitor that regulates motor speed. You might see flickering lights on combo fan-light units or smell a faint ozone odor before complete failure. Always inspect connections where wires enter the switch housing—this accounts for 30% of speed control failures according to electrical repair databases.
Failed Capacitor Prevents Speed Transitions in Modern Fans
The capacitor is your fan’s speed regulation heart—especially in models with electronic controls. When it fails (often due to heat exposure or age), the motor receives only full voltage, locking it at maximum speed. Look for bulging sides, leaking oil, or burnt residue on this cylindrical component mounted near the motor housing. Single-capacitor fans lose all speeds except high, while dual-capacitor models may lose only medium or low settings. Test with a multimeter: a healthy capacitor should show 3-6 microfarads resistance. If readings are zero or infinite, replacement is required. This component typically lasts 8-15 years but fails prematurely in poorly ventilated housings.
Motor Issues Mimic Speed Switch Failures in Older Units
Sometimes the problem isn’t the switch at all. Worn motor windings or failing bearings create electrical resistance that overwhelms the speed control system. If your fan struggles to start on any speed but runs fine once moving, or emits a burning smell during operation, the motor may be drawing excess current. This forces the speed switch into protective shutdown. Check for excessive wobble or grinding noises—signs of bearing failure that strain the electrical system. Motor issues often follow capacitor failures, as the weakened motor draws more power to compensate.
Critical Safety Steps Before Any Repair Attempt
Working with ceiling fan electrical components demands strict safety protocols. One misstep could cause electrocution or fire. Never skip these precautions regardless of your experience level.
How to Safely Disconnect Power to Your Ceiling Fan
Shut off power at the circuit breaker—not just the wall switch—and verify it’s dead using a non-contact voltage tester. Place tape over the breaker to prevent accidental reactivation. Wait 10 minutes after power-off before touching wires; capacitors can hold dangerous charges. For remote-controlled fans, remove batteries from the transmitter. Always work with one hand behind your back to avoid creating a current path through your heart. If your home has aluminum wiring (common in 1970s builds), consult an electrician immediately—this requires special handling.
Essential Tools for Safe Speed Switch Repairs
Gather these non-negotiable items before starting: insulated screwdrivers with rubber grips, 600V-rated wire nuts, a digital multimeter, electrical tape, and safety glasses. Never use pliers to handle live wires—dedicated wire strippers prevent nicking conductors. Keep a fire extinguisher rated for electrical fires within arm’s reach. For high-ceiling fans, use a sturdy ladder with a helper stabilizing the base. Professionals always wear rubber-soled shoes and work on dry surfaces—these simple habits prevent 95% of electrical accidents during fan repairs.
Step-by-Step Diagnosis of a Faulty Speed Switch

Accurate diagnosis prevents wasted time replacing good parts. Follow this systematic approach to isolate the failure point without guesswork.
Visual Inspection for Obvious Damage Signs
Remove the fan’s canopy cover to access wiring. Look for blackened wires, melted switch housings, or oily capacitor leaks—immediate red flags. Gently wiggle all wire connections; if any detach with light pressure, you’ve found your issue. Check the pull chain mechanism for broken plastic tabs or disconnected springs. For remote systems, inspect battery contacts for corrosion. Many “switch failures” are actually loose connections visible within 30 seconds of opening the housing.
Using a Multimeter to Test Switch Continuity
Set your multimeter to continuity mode (beep symbol). With power OFF, disconnect switch wires and test between terminals as you cycle through speed settings. You should hear a beep at each position indicating circuit completion. No beep at any setting means a dead switch. Intermittent beeping suggests internal contact wear. For capacitor testing, discharge it first by touching terminals with an insulated screwdriver, then measure resistance—consistent zero or infinite readings confirm failure. Healthy switches show clear continuity jumps between settings.
Checking Capacitor Functionality Without Special Tools
No multimeter? Perform this field test: Set fan to medium speed. If it runs only on high but starts normally on low, the capacitor is likely bad. Disconnect power and swap the capacitor with an identical one from a working fan (note wire positions first). If speed control returns, you’ve confirmed the failure. Never bypass capacitors—this forces the motor to run at dangerous speeds and causes premature burnout.
Repair Solutions for Non-Working Speed Controls

Once diagnosed, most speed switch repairs take 20-45 minutes. Match the solution to your specific failure point for fastest results.
Replacing a Worn-Out Pull Chain Switch
- Match your old switch’s specs: Note wire count (usually 3-4 terminals) and amperage rating (typically 1-3A)
- Disconnect wires one at a time, labeling each with tape
- Install new switch by connecting matching wires
- Secure housing and test speeds before reassembling
Most universal replacement switches cost $8-$15. For vintage fans, search by model number—hobbyist sites like CeilingFanParts.com specialize in obsolete components. When reconnecting, wrap wire nuts clockwise and tug-test each connection.
Fixing Loose Wiring in the Switch Housing
Tighten loose terminal screws with a precision screwdriver. For frayed wires, cut 1/2 inch off the end and restrip insulation. Use wire nuts one size smaller than the wire gauge for secure connections—oversized nuts cause arcing. Secure wires with zip ties to prevent vibration damage. If you find aluminum wiring (dull gray color), apply antioxidant compound before connecting to prevent oxidation fires. This 10-minute fix resolves 40% of “dead switch” cases.
Installing a New Capacitor for Speed Control
- Note wire positions on old capacitor (take photos)
- Discharge old capacitor with insulated screwdriver
- Disconnect wires and remove mounting bracket
- Install identical microfarad-rated replacement
- Secure with new bracket and reconnect wires
Match both microfarad rating (e.g., 4μF) and voltage (usually 370V). Capacitors cost $10-$20 online. After installation, run the fan on low speed for 5 minutes to check for overheating before final assembly.
Prevent Future Speed Switch Failures With These Maintenance Tips
Avoid recurring issues with these proactive measures that extend component life by 3-5 years.
Monthly Cleaning Routine for Fan Controls
Dust buildup causes overheating. Turn off power and wipe switch housings with a dry microfiber cloth monthly. For pull chains, apply one drop of silicone lubricant to the mechanism quarterly—never use oil-based lubes that attract dust. Vacuum capacitor vents with a soft brush attachment. In coastal areas, rinse housing with distilled water every 6 months to remove salt residue that causes corrosion.
Annual Lubrication Schedule for Mechanical Components
Every spring, service moving parts: Apply dielectric grease to switch contacts during replacement—it prevents arcing and moisture damage. For wobbling fans (a major vibration cause), tighten mounting screws and balance blades using a $5 balancing kit. Check capacitor mounting brackets for rust; replace steel screws with stainless steel. This 15-minute annual tune-up prevents 70% of premature speed switch failures.
When your ceiling fan speed switch not working crisis hits, remember that 85% of repairs involve simple component swaps you can do yourself. Start with safety power-down, diagnose methodically using the continuity tests described, and match parts precisely to your fan model. Most critical failures—whether worn switches, loose wires, or dead capacitors—yield to basic electrical troubleshooting. If you encounter aluminum wiring, persistent burning smells, or motor smoke, stop immediately and call a licensed electrician. For successful repairs, document your fan’s model number (usually on a sticker inside the housing) before ordering parts—this prevents compatibility issues. With these steps, you’ll restore smooth speed control and avoid the $150+ service call most homeowners unnecessarily schedule. Keep this guide handy for your next fan season—you’ve now got the knowledge to keep cool without costly interruptions.
Leave a Reply