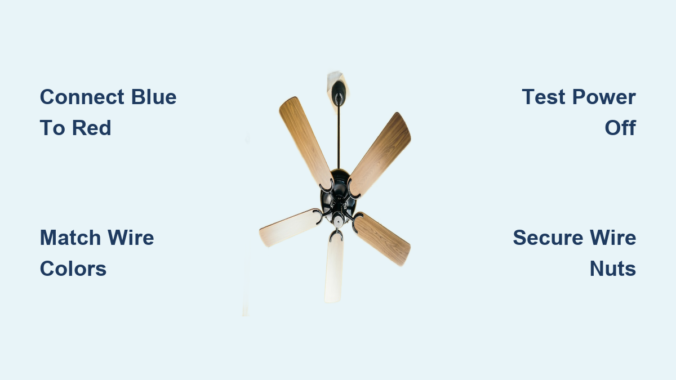
You’ve unpacked your new ceiling fan, climbed the ladder, and now face a tangle of colored wires—including that puzzling blue one. If you’re wondering exactly where the ceiling fan blue wire connects and why it matters, you’re tackling one of the most common electrical dilemmas homeowners face. Properly connecting this wire ensures your fan’s light kit operates independently from the motor, giving you flexible control over lighting and airflow. This guide cuts through the confusion with step-by-step wiring instructions, safety protocols, and troubleshooting tips that transform a potentially frustrating task into a successful DIY project—without risking electrical hazards or costly callbacks.
The blue wire’s specific purpose often causes confusion during installation. Unlike the black wire that powers the fan motor, the blue wire exclusively delivers electricity to the light kit assembly. This separation allows you to control lights and fan speed through different switches or remote channels. Whether you’re replacing an outdated fixture or installing your first ceiling fan in new construction, understanding this wire’s role prevents the all-too-common scenario of lights that won’t turn on while the fan spins perfectly. By the end of this guide, you’ll confidently match wires, avoid dangerous mistakes, and enjoy both functional lighting and reliable airflow control from your new ceiling fan.
Identify Your Ceiling Fan Wiring Configuration

Examine both your ceiling electrical box and fan’s wire bundle before making any connections—different setups require distinct wiring approaches that prevent dangerous mismatches.
Standard residential ceiling electrical boxes contain three to four wires: a black (or sometimes red) hot wire, white neutral wire, green or bare copper ground wire, and occasionally a second hot wire (typically red) for independent light control. Your ceiling fan adds its own color-coded wires: black for the motor, blue for the light kit, white neutral, and green/bare ground. Matching these correctly establishes the foundation for proper operation—connecting the blue wire to the wrong hot source could leave your lights permanently on or cause circuit overloads.
Determine whether your installation uses a single wall switch, dual switches, remote control, or smart home system, as each demands specific wiring strategies. Single-switch setups connect the ceiling’s black hot wire to both fan black and blue wires, operating lights and fan together. Dual-switch configurations require separate hot wires—one (usually black) for the fan motor and another (typically red) for the blue light wire—enabling independent control. Remote-controlled fans introduce a receiver unit that decodes wireless signals, while smart home integrations often need neutral wires that older homes lack. Verifying your setup first prevents frustrating trial-and-error later.
Gather Essential Tools and Materials
Assemble these critical tools before starting to ensure safe, efficient wiring: non-contact voltage tester, wire strippers, flathead and Phillips screwdrivers, needle-nose pliers, appropriately sized wire nuts, electrical tape, and a sturdy ladder. Never rely on visual inspection alone to confirm power is off—electrical shock causes thousands of injuries annually when DIYers skip voltage testing.
Your materials list must include the ceiling fan with all components, an electrical box rated for fan weight (standard light fixture boxes can’t handle fan vibration), and potentially a remote receiver. Smart home installations may require compatible switches or hubs. Keep the manufacturer’s instruction manual nearby—some brands like Hunter or Harbor Breeze use non-standard wiring configurations that deviate from typical color coding. Having the right wire nuts matters too: yellow connectors work for two 14-gauge wires, while red handles three wires or 12-gauge connections.
Shut Off Power Safely
Flip the correct circuit breaker to “off” position at your electrical panel, then verify power disconnection with a non-contact voltage tester held near each wire in the ceiling box—the tester must show no voltage before proceeding. Many homeowners mistakenly shut off adjacent circuits or encounter shared neutrals that maintain dangerous voltage levels even with the “correct” breaker off.
Test both the black/white wires and any others in the box, then retest after removing wire nuts to confirm complete safety. Tape the breaker in the “off” position with a label warning others not to restore power. Electrical safety isn’t optional—ceiling fans combine weight, moving parts, and electricity, creating triple-risk scenarios when wiring mistakes occur. Never assume wires are safe because the light switch is off; wall switches often only break the hot wire, leaving neutral connections energized.
Connect Standard Wires Without Remote Control
For single-switch installations where fan and lights operate together, join the ceiling’s black hot wire to both fan black and blue wires using an appropriately sized wire nut. Twist connections clockwise until secure, then tug wires to verify they won’t pull loose. Connect ceiling white neutral to fan white neutral, and ground wires to complete the circuit.
Dual-switch setups require separate hot wires—one ceiling black wire to fan black (motor control), and ceiling red wire to fan blue (light control). This configuration enables independent operation but fails if your electrical box lacks that second hot conductor. If only one hot wire exists but you want separate control, you’ll need to either run new cable (best left to professionals) or install a remote control system that creates virtual switches electronically. Always tuck connections neatly into the electrical box without pinching wires, as cramped spaces cause heat buildup and connection failures.
Install Remote Control Receiver Wiring
Mount the remote receiver inside the fan’s canopy following these critical steps: connect receiver input wires to ceiling wires (black to black hot, white to white neutral, green to ground), then link output wires to fan wires (black output to fan black motor wire, blue output to fan blue light wire, white output to fan white neutral). The receiver acts as a wireless switchboard, interpreting remote signals to route power appropriately.
Secure the receiver with included clips so it lies flat against the canopy, and ensure the thin antenna wire hangs freely—bending or tucking it reduces signal range. Test all functions before installing batteries in the remote: fan speeds should cycle smoothly, and lights should respond instantly to remote commands. Some receivers require specific pairing sequences, so consult your manual if lights or fan respond erratically after installation.
Wire Smart Switches and Home Automation

Smart home integration requires special considerations that often trip up DIYers. Most smart switches need a neutral wire in the wall switch box—a feature absent in many homes built before 2011. Verify neutral wire availability before purchasing equipment, as retrofitting neutrals involves complex electrical work best handled by professionals.
For fans with light kits, you typically need either two smart switches (one for fan, one for lights) or a specialized dual-control smart switch. Connect the smart switch according to manufacturer diagrams—usually black switch wire to ceiling black hot, white neutral to ceiling neutral, and ground to ground. Some systems like Lutron Caséta require a separate “load” wire for the light function, creating four-wire connections that confuse even experienced installers. When in doubt, choose a smart fan with built-in WiFi (like Haiku or Hunter Symphony models) that only requires standard wiring and connects directly to your home network.
Troubleshoot Common Blue Wire Issues

When lights fail but the fan runs, immediately check the blue wire connection pathway. In dual-switch setups, verify the ceiling red wire connects securely to the fan’s blue wire—if your electrical box uses black for both hot wires, one might be marked with red tape to indicate the light circuit. Loose wire nuts at either end of the blue wire cause most “lights not working” issues, especially in newly installed fans where vibration hasn’t yet tightened connections.
Flickering lights often stem from undersized wire nuts that can’t grip all copper strands securely. Replace yellow wire nuts (rated for two 14-gauge wires) with red ones (handles three wires) when connecting multiple conductors. If lights work briefly then cut out, check for overheating at connections—discolored wire insulation indicates dangerous resistance that requires immediate correction. Never ignore buzzing sounds from the canopy, as they often signal arcing at loose blue wire connections that could start a fire.
Maintain Your Ceiling Fan Wiring
Inspect visible wiring connections annually by removing the canopy cover and checking for loose wire nuts, damaged insulation, or corrosion—especially in high-moisture areas like bathrooms. Aluminum wiring (common in 1960s-70s homes) requires special connectors and anti-oxidant paste to prevent dangerous corrosion at connection points.
Tighten mounting screws every six months as fan vibration gradually loosens connections. If lights begin flickering during operation, shut off power immediately and inspect all blue wire connections before resuming use. For remote-controlled fans, replace remote batteries annually—even weak batteries can cause erratic receiver behavior that mimics wiring problems. Proper maintenance prevents 80% of common ceiling fan electrical issues, extending your fixture’s lifespan while keeping your home safe.
Final Note: Always verify local electrical codes before installation—some municipalities require ceiling fan boxes to be rated for 50 pounds or more. When in doubt about wiring configurations, aluminum conductors, or circuit capacity, consult a licensed electrician rather than risking dangerous mistakes. Correctly connecting that blue wire ensures years of reliable lighting and airflow control from your ceiling fan, transforming your space with both comfort and style. Remember: no DIY project is worth compromising your safety—when electricity’s involved, professional help pays for itself in peace of mind.
Leave a Reply