Nothing disrupts your home comfort like a ceiling fan that suddenly stops working on a hot summer day. When your Craftmade fan won’t start, wobbles excessively, or makes strange noises, you need solutions fast—not vague advice that wastes your time. This targeted troubleshooting guide cuts through the fluff to help you diagnose and fix your Craftmade ceiling fan problems efficiently, using proven methods that address the actual components causing issues. By following this systematic approach, you’ll save money on unnecessary service calls and restore your fan’s performance with confidence.
Before grabbing tools, understand that 80% of ceiling fan problems stem from simple power or connection issues—not motor failure. Most Craftmade fan issues can be resolved in under 30 minutes with basic tools and this step-by-step diagnostic process. Starting with the most common culprits saves hours of unnecessary disassembly and prevents you from overlooking obvious solutions while chasing complex problems. Whether you’re dealing with a non-spinning fan, annoying wobble, or unexplained noises, this guide gives you the precise steps to identify the root cause and implement effective fixes.
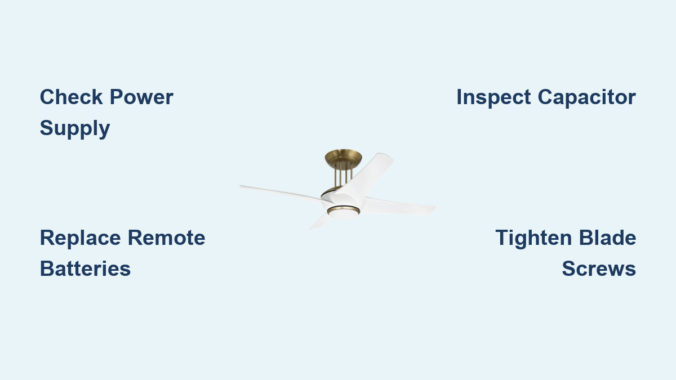
Confirm Proper Power Delivery to Your Craftmade Fan
Power interruptions cause the majority of “broken” ceiling fan reports. Before assuming component failure, verify your Craftmade fan is actually receiving electricity—this quick check often solves the problem immediately.
Check your home’s electrical panel for tripped breakers controlling the fan circuit. Locate the specific breaker (often labeled “living room” or “bedroom”) and ensure it hasn’t flipped to the middle position. Reset it fully to “off” before switching it back to “on” with firm pressure. If the breaker trips again when you attempt to operate the fan, stop immediately—this indicates a serious electrical fault requiring professional attention, not DIY repair. Repeated tripping suggests potential wiring damage or motor short circuiting that could create fire hazards if ignored.
Test all wall switches controlling your Craftmade fan, including any dedicated fan switches separate from light controls. Many homeowners mistakenly believe their fan operates solely through remotes or pull chains, overlooking physical switches that may have been accidentally turned off. Toggle these switches multiple times while listening for the fan attempting to start. If your fan connects to a dimmer switch (common in newer homes), this could be causing humming or erratic operation—temporarily bypass the dimmer by connecting the fan directly to a standard switch to test functionality.
Examine internal wire connections inside the fan canopy after turning off power at the breaker. Remove the canopy cover and visually inspect all wire nuts: black (hot), white (neutral), and green/bare copper (ground) wires must have secure connections with no exposed copper. Gently tug each connection to confirm tightness—loose wires cause flickering, intermittent operation, or complete failure. Resecure any loose connections with properly sized wire nuts before reinstalling the canopy.
Fix Remote Control Communication Failures

When your Craftmade fan doesn’t respond to remote commands, the problem usually lies with the remote system—not the fan itself. Remote-related issues account for nearly half of all “non-working” fan reports.
Replace remote batteries with fresh ones, ensuring correct orientation according to the +/- markings inside the compartment. Weak batteries cause delayed responses, partial functionality, or complete communication failure. After battery replacement, test the remote by pressing multiple buttons while pointing directly at the fan receiver (infrared remotes require line-of-sight). Most remotes have an indicator light that flashes when buttons are pressed—a non-flashing light typically indicates dead batteries or remote failure.
Verify remote signal transmission using your smartphone camera. Point the remote at your phone’s camera lens and press any button—you should see a flashing light on your screen if the remote is transmitting infrared signals. No visible flash confirms the remote is defective and needs replacement. Clean the remote’s surface with a slightly damp cloth if sticky residue affects button function, being careful to prevent moisture from entering the battery compartment.
Check if your Craftmade fan has both remote and wall control options. Test operation using the wall switch—if the fan works normally with wall controls but not the remote, the issue is isolated to the remote system. Consult your manual for re-pairing procedures if the remote and receiver have lost synchronization, typically involving specific button sequences that reset communication between components.
Resolve Motor Start and Operation Failures
When power reaches your Craftmade fan but the motor won’t spin, you’ve moved beyond simple fixes into motor-related diagnostics. These issues range from easily replaceable components to potential motor replacement.
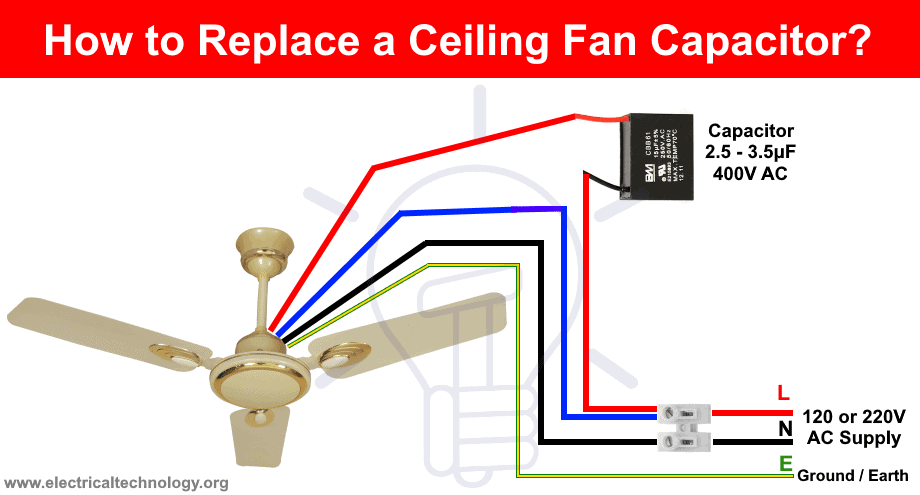
If your fan hums but blades don’t rotate, the motor receives power but can’t generate starting torque—a classic sign of capacitor failure. The capacitor provides the initial energy burst needed to overcome inertia. Over time, capacitors degrade or fail completely. Replacing the capacitor (a small cylindrical component attached to the motor housing) is often the solution. Turn off power at the breaker, remove the canopy, locate the capacitor, note its specifications (voltage and microfarad rating), and install an exact replacement. If you’re uncomfortable working with electrical components, hire a qualified electrician—capacitor replacement is generally more cost-effective than fan replacement.
Fans that start slowly, run at reduced speeds, or struggle to maintain momentum often have weakening capacitors or developing bearing issues. Worn bearings create distinctive rumbling sounds and may cause excessive wobble. Some Craftmade fans have oil ports on the motor housing—applying 2-3 drops of machine oil (not WD-40) can temporarily restore smooth operation. For sealed bearings, replacement is usually more cost-effective than repair attempts.
Complete motor failure—where the fan makes no sound when powered—suggests burned-out windings, a failed receiver (for remote-controlled models), or an open circuit in internal wiring. Before concluding motor failure, verify power reaches the fan using a non-contact voltage tester on wires inside the canopy, test with a known-working remote or wall control, and inspect for burned smells or visible damage. If these tests confirm motor failure, professional replacement is typically recommended as rewinding motors is rarely cost-effective.
Eliminate Blade Wobble and Imbalance Issues
Excessive wobble not only looks unsightly but can loosen mounting hardware over time, creating safety hazards. Address wobble systematically by checking three primary sources: blade balance, blade angle consistency, and mounting security.
Visually inspect all blades for cracks, warping, or damage—replace any damaged blades in complete sets to maintain aerodynamic balance. Check each blade’s angle by holding a ruler vertically against the blade edge; all blades should have identical angles relative to the ceiling. Variations as small as two degrees cause significant wobble at high speeds. Some Craftmade fans have blade arm adjustment screws allowing fine-tuning of blade pitch—adjust these to equalize angles across all blades.
Tighten all blade attachment points, which often loosen during operation. Turn off the fan and secure the screws connecting each blade to its arm, then tighten the blade arm screws connecting arms to the motor hub. Use a screwdriver (not a drill) for final tightening to avoid stripping screw holes. After tightening all connections, manually rotate the fan assembly to ensure smooth movement without catching.
Verify mounting bracket levelness using a torpedo level on the bracket arms before fully tightening mounting screws. Check that the downrod isn’t bent by sighting along its length from below—a bent downrod requires replacement. Finally, ensure the junction box is securely anchored to a ceiling joist—loose boxes amplify movement into visible wobble. If mounting security is questionable, consider upgrading to a newer IC-rated junction box.
Diagnose and Silence Annoying Fan Noises

Ceiling fans should operate quietly; any clicking, humming, squeaking, or grinding sounds indicate developing problems requiring attention. Identifying noise sources helps target repairs effectively.
Clicking sounds typically originate from loose components. Check all blade arm screws, blade screws, and canopy mounting screws for tightness—vibration during operation causes gradual loosening. Also inspect the canopy set screw (usually on the side where canopy meets downrod); this critical safety component’s loosening creates distinctive clicking as the fan oscillates. Tighten gently but firmly without stripping threads.
Humming sounds without rotation indicate capacitor issues. Humming during normal operation may stem from loose wire connections, a loose light fixture kit, or motor failure. While some subtle humming is normal for certain models, loud or increasing hum warrants investigation.
Squeaking or squealing typically comes from motor bearings or blade pivot points. Apply machine oil to visible oil ports and work it into bearings by manually rotating the fan. If squeaking persists from blade pivots, use silicone-based lubricant on pivot screws where blades attach to arms—avoid oil-based lubricants on plastic components.
Rattling sounds suggest loose debris inside fan housing or light fixture. Remove the light kit and inspect for fallen objects or loose hardware. Check that glass shades are secure and globe screws are tightened. Rattling from the motor housing itself often indicates internal component loosening requiring professional assessment.
Prevent Future Problems with Seasonal Maintenance
Regular maintenance prevents most common ceiling fan problems and extends operational lifespan considerably. Establish a twice-yearly routine taking less than thirty minutes but delivering years of reliable performance.
Clean all fan blades using a damp cloth, reaching both top and bottom surfaces where dust accumulation affects aerodynamics. Clean the motor housing with a soft brush to remove dust that can work into bearing surfaces. For fans with light fixtures, clean glass components and check for heat damage around sockets.
Lubricate moving components according to your fan’s specifications—some modern fans have sealed bearings requiring no lubrication while others need annual oiling. Apply only light machine oil sparingly, as excess attracts dust. Test all pull chains for smooth operation, cleaning them with a damp cloth if sticky.
Inspect all visible hardware during maintenance: tighten blade screws, blade arm screws, canopy screws, and mounting bracket screws. Check the canopy set screw specifically, as its critical function is often overlooked. Examine blades for developing cracks or warping, especially near tips and screw holes—catching damage early allows replacement before complete failure.
Leave a Reply