Your Emerson ceiling fan has served you well for years, quietly circulating air through your living space—until suddenly it starts making strange noises, wobbling excessively, or refuses to turn on completely. Before you call an electrician or replace the entire unit, try these proven troubleshooting steps that solve 90% of Emerson ceiling fan issues. Most problems stem from simple causes like loose connections, dead batteries, or minor balance issues that you can fix yourself in under 30 minutes with basic tools.
Emerson ceiling fans are known for their reliability, but even the best units develop issues over time due to normal wear, electrical fluctuations, or improper maintenance. This guide walks you through systematic diagnostics for electrical problems, control malfunctions, motor issues, and wobbling—helping you identify the exact cause and implement the correct solution. You’ll save money on service calls and extend your fan’s lifespan with these practical fixes that professional technicians use.
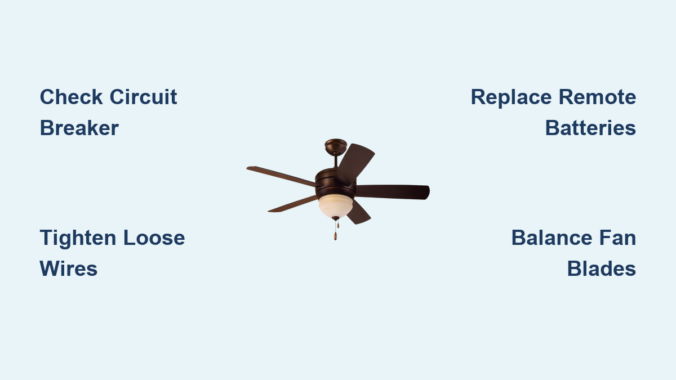
Power Supply and Electrical Connection Fixes

Electrical issues cause most Emerson ceiling fan malfunctions, yet they’re often the simplest to resolve. Start with these fundamental checks before diving into complex diagnostics that might not be necessary.
Verify Circuit Breaker and Wall Switch Functionality
Begin troubleshooting by confirming your fan is actually receiving power. Head to your electrical panel and check if the circuit breaker serving the fan has tripped—this happens more frequently than you might think, especially after power surges or storms. If the breaker appears fine, test other outlets or lights on the same circuit to verify power flow.
Next, examine the wall switch controlling your fan. Older switches develop worn contacts that fail to complete the circuit properly. Toggle the switch repeatedly while listening for a distinct “click” sound—weak or inconsistent clicking indicates a failing switch needing replacement. For fans with pull-chain controls, ensure the chain moves freely without resistance, as stuck chains prevent the internal switch from engaging properly.
Secure Loose Wiring Connections in Canopy
Vibration from normal operation gradually loosens electrical connections inside your fan’s canopy—the decorative cover where the fan mounts to the ceiling. Turn off power at the circuit breaker, then carefully remove the canopy to inspect wire connections. Look for wires that have pulled loose from wire nuts, corroded terminals, or frayed insulation that could cause intermittent operation.
Reconnect any loose wires by twisting them together clockwise before securing with new wire nuts. For corroded connections, gently clean the affected areas with a small wire brush before making fresh connections. This simple fix resolves most cases where the fan works intermittently or only on certain speed settings.
Remote and Wall Control Troubleshooting

Modern Emerson ceiling fans rely on electronic controls that frequently develop issues unrelated to the fan itself. Diagnose these components systematically to avoid unnecessary fan disassembly.
Remote Control Battery and Signal Issues
Dead batteries cause more remote control failures than any other single issue. Replace the batteries with fresh ones of the exact type specified in your owner’s manual—using incorrect batteries creates inconsistent performance. After replacement, test the remote from multiple angles and distances, as infrared remotes require direct line-of-sight while radio-frequency models work through obstacles but have limited range.
When remotes work inconsistently, resync them to the fan’s receiver by following the manufacturer’s pairing procedure. Power interruptions often desync remotes, and this simple step restores functionality without parts replacement. If you have multiple Emerson fans in your home, ensure remotes aren’t accidentally controlling the wrong unit by checking each remote’s unique pairing code.
Wall Control Compatibility and Wiring Checks
Wall-mounted controls fail due to incompatible components or loose wiring. Verify you’re using a fan-rated control rather than a standard light dimmer, as incompatible dimmers cause humming, flickering, and motor damage. Test the control by turning it slowly through its range while listening for smooth transitions between speeds—jerky operation or dead zones indicate internal component failure.
Inspect wiring connections at the control if you’re comfortable working with electrical fixtures. Loose wires create intermittent operation that mimics more serious problems. Ensure connections match the manufacturer’s diagram, particularly the capacitor wire which must connect to the correct terminal for proper speed control.
Motor Performance and Noise Diagnosis
Motor issues range from simple maintenance needs to serious mechanical failures. Accurate diagnosis prevents unnecessary part replacements and identifies when professional service is truly needed.
Capacitor Problems Causing Humming or Weak Operation
A fan that hums but won’t start almost always has a failed start capacitor—the component that provides the initial electrical boost to overcome static friction. This small cylindrical component typically sits inside the motor housing and can be replaced in minutes with basic tools. When replacing, match the microfarad rating and voltage specifications exactly to prevent motor damage.
For fans that start but run weakly or have reduced airflow, clean dust accumulation from motor vents and blade brackets using a soft brush. Check all blades for warping or damage that creates imbalance and reduces efficiency. Tighten blade mounting hardware gently—overtightening cracks plastic components while loose hardware creates vibration that stresses motor bearings.
Identifying Noise Sources by Sound Type
Different noises indicate specific problems requiring targeted solutions. Rattling or clicking sounds almost always come from loose hardware—methodically check all visible screws including mounting bracket bolts, blade arm attachments, and blade-to-arm connections. Tighten hardware to snug but avoid excessive force that damages components.
Humming or buzzing typically points to electrical issues like failing capacitors or incompatible dimmers. Grinding or scraping sounds require immediate attention as they indicate bearing failure—continue operation and you’ll destroy the motor. Turn off the fan immediately and inspect motor bearings; some Emerson models allow lubrication while others require complete bearing replacement.
Eliminate Wobbling with Proper Balancing Techniques
Wobbling isn’t just annoying—it accelerates wear on motor bearings and mounting hardware. Most wobbling issues resolve with systematic balancing rather than expensive part replacements.
Verify Secure Mounting and Downrod Installation
Improper mounting causes many wobbling problems. Confirm your ceiling electrical box is rated for fan installation—standard light fixture boxes can’t handle fan vibration and create dangerous movement. The mounting bracket should be completely secure with no movement when you gently push against it.
For downrod-mounted fans, ensure the downrod is fully inserted into the motor housing coupling and that set screws are tightened to specification. A downrod that’s even slightly loose creates significant wobble at higher speeds. Check that the canopy cover sits flush against the ceiling without gaps indicating improper seating.
Precision Blade Alignment and Balancing
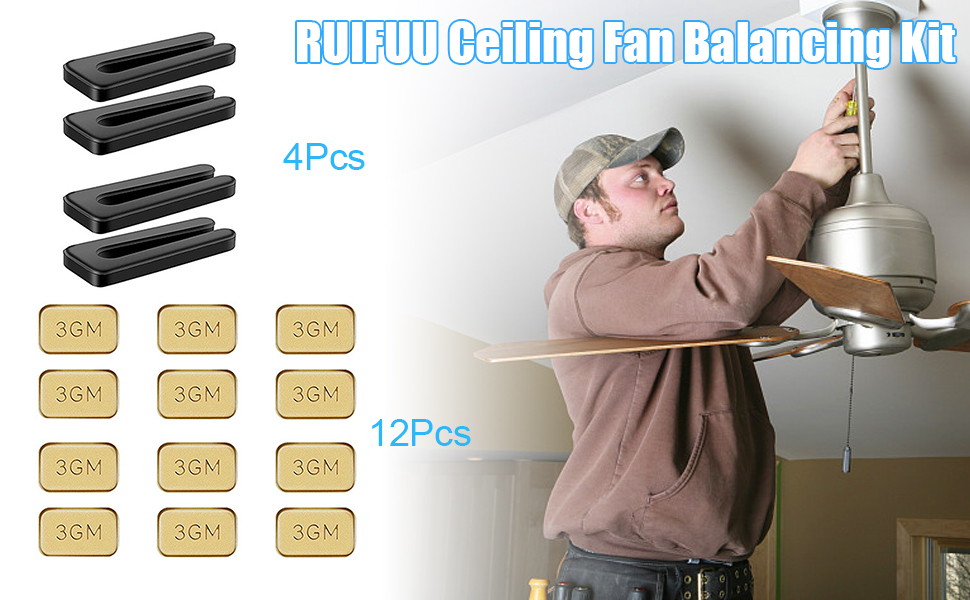
Even minor blade angle differences cause noticeable wobbling. Use a smartphone level app to measure each blade’s pitch relative to the ceiling—adjust by loosening blade mounting screws, repositioning the blade, then retightening. Many Emerson fans include balancing kits with clip-on weights; attach these to the lightest blade until wobble disappears.
Clean blades thoroughly with a damp cloth before balancing, as uneven dust accumulation creates imbalance. Inspect each blade for warping or damage—replace any blades that can’t lie flat on a level surface. Balance your fan after cleaning or blade replacement, as these activities often disturb the delicate equilibrium.
Prevent Future Problems with Simple Maintenance
Regular care prevents most Emerson ceiling fan issues before they start. These quick maintenance tasks extend your fan’s lifespan significantly while keeping it running quietly and efficiently.
Monthly Cleaning and Quarterly Hardware Checks
Dust blades monthly with a microfiber cloth, working from the motor outward to avoid pushing debris into the motor housing. Clean motor vents quarterly using a soft brush—never spray liquids directly on the fan. Inspect all visible hardware quarterly, tightening any screws that have loosened from vibration.
Apply a light coat of machine oil to accessible moving parts annually, particularly blade pivot points on models with reversible airflow. Check for signs of corrosion at electrical connections, especially in humid environments—clean minor corrosion with a pencil eraser before it compromises connections.
When to Call a Professional Instead of DIY
While most Emerson fan problems are DIY-friendly, certain situations require professional help. Seek an electrician for any signs of electrical damage like burnt wiring, melted components, or burning smells—these indicate serious hazards beyond DIY repair. If your fan is under warranty, check terms carefully as self-repair may void coverage.
Consider replacement rather than repair for fans over 10 years old with recurring problems—newer models offer better energy efficiency and features. When motor bearings fail or the housing cracks, repair costs often approach replacement value. Professional service makes sense when you’ve completed all basic troubleshooting without success, indicating internal component failure.
Leave a Reply