Nothing disrupts home comfort like a Harbor Breeze ceiling fan that won’t maintain proper speed settings. When your fan suddenly runs only on low, skips speed levels, or cycles unpredictably between settings, the frustration is immediate. These common Harbor Breeze ceiling fan speed problems transform what should be a cooling solution into a source of annoyance and diminished airflow. The good news is that most speed issues stem from just a few components that you can often diagnose and fix yourself without professional help.
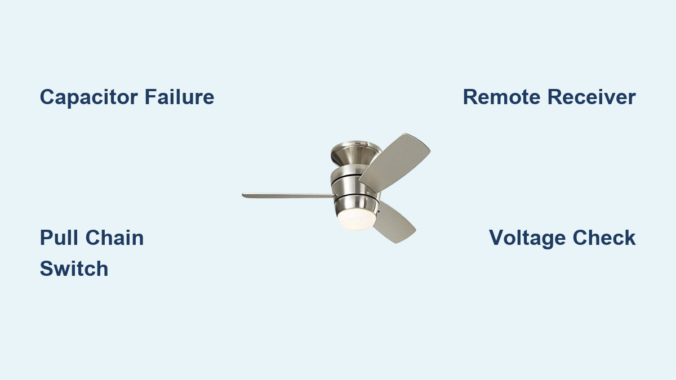
Understanding why your Harbor Breeze fan struggles with speed control requires knowing how its electrical system works. Unlike simple on/off appliances, ceiling fans use a carefully balanced system of capacitors, switches, and motor windings to deliver multiple speed settings. When one component fails, the entire speed regulation system can malfunction. This guide cuts through the confusion with step-by-step diagnostics that help you identify whether your problem lies with the capacitor, pull chain switch, remote receiver, or other critical components—saving you time, money, and unnecessary service calls.
Diagnose Speed Control Issues
Your Harbor Breeze ceiling fan speed problems become easier to solve when you first characterize the exact symptoms. Does your fan run only at the lowest speed regardless of switch position? Does it jump erratically between settings? Or does it fail to reach higher speeds entirely? These distinctions matter because they point directly to the failing component. A fan stuck on low speed typically indicates capacitor failure, while inconsistent speed selection often points to switch problems.
Begin your diagnosis by mapping which speed settings work and which don’t. With the fan running, operate the pull chain through all positions while noting which speeds activate. If your fan has a remote, test both control methods separately. This simple exercise reveals patterns that guide your troubleshooting—like a fan that works perfectly with the pull chain but ignores remote commands, which immediately isolates the problem to the remote system rather than the fan’s internal components.
Before touching any electrical components, always turn off power at the circuit breaker and verify it’s off by attempting to operate the fan. This non-negotiable safety step prevents electrical shock and protects sensitive electronics from accidental short circuits during your inspection. Use a non-contact voltage tester on the fan’s wiring to confirm power is completely disconnected before proceeding with physical checks.
Test Capacitor Functionality

The capacitor represents the most frequent culprit behind Harbor Breeze ceiling fan speed problems, especially when higher speeds become unavailable. This small, cylindrical component stores electrical energy to provide the initial boost needed for motor startup and regulates speed transitions between settings. When capacitors fail—which happens frequently due to heat exposure and age—they typically cause symptoms like the fan running only on low speed or failing to reach maximum RPM.
Start with a visual inspection of the capacitor, usually mounted in the fan’s switch housing or canopy assembly. Look for telltale signs of failure: bulging or swelling at the top or sides, leaking electrolyte (appearing as brown, crusty residue), or discoloration from overheating. Even capacitors that appear normal externally can fail internally, so electrical testing provides the definitive diagnosis.
To properly test the capacitor, you’ll need a multimeter with capacitance measurement capability. With power completely off, discharge the capacitor by safely touching its terminals together with an insulated screwdriver, then disconnect the wires. Set your multimeter to measure microfarads (μF) and connect the probes to the capacitor terminals. Compare the reading to the rating printed on the capacitor body—any reading below 80% of the specified value means replacement is necessary. Always match the replacement capacitor’s voltage rating (typically 250V or 370V) and microfarad specifications exactly, as mismatches cause immediate speed problems or motor damage.
Inspect Pull Chain and Speed Switch

When your Harbor Breeze ceiling fan speed problems include inconsistent speed selection or complete failure to respond to chain pulls, the mechanical switch deserves close attention. This component physically routes power through different capacitor values to achieve each speed setting, and its internal contacts wear out over time from repeated use and dust accumulation.
Access the switch housing by removing the decorative cover (with power off) and examine the pull chain mechanism for smooth operation. Stiffness or resistance when pulling indicates internal binding that prevents proper contact engagement. Remove the switch assembly and inspect all wire connections for looseness, corrosion, or signs of arcing like melted insulation or discolored terminals.
Testing requires a multimeter set to continuity mode. With the switch removed from the circuit, touch probes to the appropriate terminals while cycling through each speed position. Each setting should produce an audible continuity beep when properly engaged. Dead positions indicate worn contacts that need replacement. Many homeowners successfully restore function by carefully cleaning the switch housing with electrical contact cleaner and compressed air to remove accumulated dust and oxidation, though severely worn switches require complete replacement.
Check Remote Control and Receiver
For Harbor Breeze fans with remote operation, speed problems often trace back to the wireless control system rather than the fan itself. When your fan responds correctly to the pull chain but ignores remote commands, or when speeds change unexpectedly during operation, focus your troubleshooting on the remote transmitter and receiver module.
Start with the simplest fix: replace the remote’s battery with a fresh one. Weak batteries cause more remote-related speed problems than any other single issue. While changing the battery, inspect the contacts for corrosion and ensure proper polarity. Next, verify the remote’s infrared signal by pointing your smartphone camera at the LED while pressing buttons—the camera should show visible flashes confirming transmission.
The receiver module, typically mounted inside the fan canopy, can fail due to power surges or moisture exposure. If battery replacement doesn’t resolve the issue, access the receiver (with power off) and check for visible damage like burned components or melted plastic. Test connections between the receiver and fan motor for proper seating, as vibration can gradually loosen these critical links. When in doubt, replacing the entire receiver module—available as model-specific kits from Harbor Breeze—is often faster and more reliable than component-level repair.
Verify Power Supply and Voltage

Electrical supply issues frequently masquerade as Harbor Breeze ceiling fan speed problems, especially when the fan runs slowly across all settings. Before concluding the fan itself is faulty, verify that adequate power reaches the unit and that your home’s electrical system delivers stable voltage.
Use a multimeter to measure voltage at the fan’s junction box with power on and other household appliances operating normally. A reading below 110 volts AC suggests circuit problems that affect fan performance. Check for loose connections at the circuit breaker panel, as well as at wall switches controlling the fan. Many speed problems disappear after tightening a loose wire nut in the ceiling electrical box that was causing intermittent voltage drops.
Examine all wiring connections within the fan assembly for signs of overheating—discolored wire nuts, brittle insulation, or melted plastic components. These indicate connections that have been arcing over time, creating resistance that reduces voltage to the motor. Tighten all connections securely and replace any damaged wire connectors. If you discover problems beyond the fan itself (like at the wall switch or breaker panel), consult a qualified electrician to address potential fire hazards.
Maintain Optimal Fan Performance
Preventing future Harbor Breeze ceiling fan speed problems requires simple but consistent maintenance. Clean fan blades and motor housing every three months using a soft cloth or duster—never spray liquids directly onto the motor. Dust accumulation creates imbalance that strains the motor and accelerates component wear.
Inspect blade brackets and mounting hardware twice yearly, tightening any loose screws that cause wobble and vibration. Check pull chain operation monthly to catch developing switch problems early. If your fan model has oil ports (consult your manual), apply 2-3 drops of lightweight machine oil to motor bearings annually—never lubricate sealed bearings as this causes damage.
Address speed problems immediately rather than operating a struggling fan. Motors running at reduced speeds due to capacitor or winding issues draw excessive current, generating dangerous heat that accelerates failure. Early intervention through proper diagnosis and component replacement keeps your Harbor Breeze fan running safely and efficiently for decades.
When speed issues persist despite basic troubleshooting, consult your fan’s specific model manual or contact Harbor Breeze customer support with your model number. For electrical testing or component replacement beyond your comfort level, always enlist a qualified electrician—safety should never be compromised when working with household electricity.
Leave a Reply