You’ve pressed the button on your ceiling fan remote, but nothing happens. Understanding how do ceiling fan remotes work can transform your troubleshooting ability and help you maximize this convenient technology. These wireless controllers communicate with your fan through sophisticated radio frequency signals that bypass walls and furniture—no line-of-sight required. The magic happens when you press a button, triggering a specific coded signal that travels through the air to a receiver hidden inside your fan housing, which then activates the corresponding electrical function. This seamless wireless interaction between your handheld transmitter and the fan’s internal receiver creates the effortless control experience that has made remote-operated fans increasingly popular in modern homes.
When your remote stops responding, knowing the underlying technology helps you diagnose problems efficiently rather than replacing components unnecessarily. Most ceiling fan remotes use radio frequency (RF) technology operating around 300-400 MHz, transmitting signals through obstacles that would block infrared remotes. This guide explains the transmitter-receiver relationship, electrical wiring configurations, speed control mechanisms, and troubleshooting techniques that keep your fan operating smoothly. You’ll learn why capacitors regulate speed instead of resistors, how to fix common pairing issues, and what separates basic RF remotes from smart home-integrated systems.
Inside Your Ceiling Fan Remote: Button Functions Decoded

When you press a button on your remote, a specific circuit completes inside the transmitter, sending a unique coded signal to your fan’s receiver. Modern ceiling fan remotes typically control four primary functions: power on/off, multiple speed settings (low, medium, high), light control (on/off or dimming), and direction reversal for seasonal airflow adjustment. Each button press generates a distinct signal pattern that the receiver interprets to activate the corresponding electrical pathway within your fan assembly.
The remote’s internal circuitry converts your physical button press into an electrical signal that modulates the radio frequency carrier wave. Battery power (usually two AAA cells) energizes the transmitter circuit, with typical remotes drawing minimal current—about 10-20 milliamps during transmission. Most quality remotes include an LED indicator that flashes when buttons are pressed, confirming signal transmission and alerting you to low battery conditions. The indicator typically illuminates for 1-2 seconds after each button press, providing immediate feedback that your command was registered.
Key remote components to understand:
– Transmitter chip: Encodes button presses into unique signal patterns
– RF oscillator: Generates the carrier frequency for signal transmission
– Antenna: Radiates the encoded signal (often a simple wire trace on the circuit board)
– Battery contacts: Provide power to the circuit (prone to corrosion over time)
– Button membrane: Conductive layer that completes circuits when pressed
Why Frequency Matching Is Critical for Remote Operation

Your ceiling fan remote won’t work unless both the transmitter and receiver operate on the same frequency—a configuration typically set using dip switches inside both components. These small toggle switches create unique binary codes that prevent your remote from controlling neighboring fans and allow customization of multiple fan setups. Most systems use 8-12 dip switches, creating thousands of possible combinations to ensure your remote communicates exclusively with your fan.
The pairing process follows these critical steps:
1. Turn off power at the circuit breaker for safety
2. Access dip switches inside remote (usually behind battery compartment)
3. Set identical switch patterns in both remote and receiver units
4. Restore power and initiate pairing sequence (typically holding sync button for 5+ seconds)
5. Confirm successful pairing through indicator light behavior (flashing pattern)
If your remote suddenly stops working, a frequency mismatch is often the culprit. This commonly occurs after battery replacement when the remote housing is reassembled incorrectly, or when nearby electronic devices create interference. Always verify dip switch alignment first before replacing batteries or suspecting component failure—this simple check resolves approximately 70% of “dead remote” issues according to industry technicians.
Electrical Wiring Behind Remote-Controlled Ceiling Fans
The wiring configuration for remote-controlled ceiling fans differs significantly from traditional wall-switch installations, with the receiver unit serving as the critical intermediary between your electrical system and fan components. Three essential wire types create this infrastructure:
Hot wire (black): Delivers power from your electrical panel to the receiver unit, which then regulates current flow to the fan motor based on remote commands. When you press “on,” the receiver completes the circuit through this wire to the appropriate output.
Neutral wire (white): Completes the electrical circuit by providing a return path to the power source. All neutral wires (house, receiver, fan) must connect together for proper operation—this is the most commonly overlooked connection during DIY installations.
Ground wire (green/bare copper): Provides safety protection by creating a low-resistance path for fault currents, preventing electrical shock hazards. While the receiver doesn’t connect to ground wires directly, proper grounding throughout the system protects both equipment and occupants.
The receiver’s output wires determine your control capabilities—single-output systems control only fan speed, while dual-output models independently manage fan and light functions. Some advanced systems include third output wires for dimmable lighting control, requiring compatible LED fixtures and receiver circuitry.
Capacitor-Based Speed Control: How Your Fan Adjusts Speeds

Capacitors regulate ceiling fan speed through reactance rather than resistance, creating voltage drop without generating excessive heat—a critical design consideration for enclosed fan housings. When you select a lower speed setting, the receiver introduces a specific capacitor value into the circuit, reducing effective voltage to the motor. Higher capacitance values (measured in microfarads) create greater voltage drop, resulting in slower rotation speeds.
Typical capacitor values for three-speed control:
– High speed: Direct connection (no capacitor, ~0 μF)
– Medium speed: Intermediate capacitance (~2.1 μF)
– Low speed: Highest capacitance (~4.3 μF)
This capacitor-based approach offers significant advantages over resistive methods. Resistors would dissipate excess energy as heat, creating fire hazards in enclosed spaces and wasting electricity. Capacitors store and release energy through reactance, maintaining cooler operating temperatures while providing precise speed control. A 4.3 μF capacitor creates approximately 616 ohms of reactance at 60 Hz, reducing voltage to the motor without significant power loss as heat.
RF vs. Infrared: Which Remote Technology Powers Your Fan?
Most modern ceiling fans use radio frequency (RF) technology rather than infrared (IR), and for good reason. RF remotes transmit signals through walls and obstacles with typical ranges of 40+ feet, while IR remotes require direct line-of-sight like television remotes and struggle with distances over 20 feet. The practical difference means you can operate RF-controlled fans from any room position—even from adjacent rooms—without pointing the remote toward the fan.
RF remote advantages over infrared:
– Works through walls, furniture, and other obstacles
– No requirement for line-of-sight positioning
– Less susceptible to interference from ambient light
– Longer operational range (typically 2-3x IR remotes)
– Frequency matching prevents cross-talk between multiple fans
If your remote requires precise aiming at the fan to function, you likely have an older infrared model. While functional, these systems lack the convenience of modern RF technology and are increasingly rare in new installations. Most replacement remotes for older fans now use RF technology to improve usability.
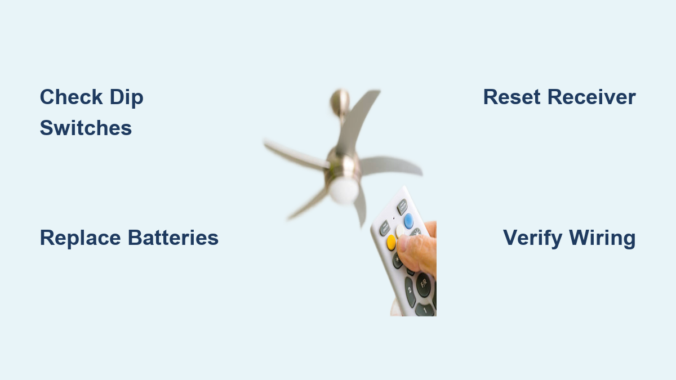
Troubleshooting Non-Responsive Ceiling Fan Remotes
When your ceiling fan remote stops working, follow this systematic troubleshooting sequence before replacing components:
Step 1: Battery verification
– Replace batteries with fresh AAA cells (don’t assume existing ones work)
– Clean battery contacts with rubbing alcohol and cotton swab
– Confirm LED indicator illuminates when buttons pressed
Step 2: Signal testing
– Bring remote within 10 feet of fan canopy
– Verify no physical obstructions between remote and receiver
– Check for potential interference from Wi-Fi routers or Bluetooth devices
Step 3: Reset procedures
– Remove remote batteries for 60 seconds, then reinstall
– Power cycle the fan (turn off breaker for 30 seconds, then restore)
– Re-pair remote and receiver following manufacturer instructions
If issues persist after these steps, check dip switch alignment or consider receiver failure—symptoms include fans operating erratically or responding to incorrect commands. Most receiver units cost $15-$30 to replace and install in under 15 minutes with basic electrical knowledge.
Maintaining Your Remote Control System for Longevity
Regular maintenance extends your ceiling fan remote system’s lifespan and prevents common failures. Replace remote batteries annually as preventive maintenance, or immediately when response time slows or the LED indicator dims. Before installing new batteries, inspect contacts for corrosion—white or green deposits indicate chemical reaction that must be cleaned with isopropyl alcohol and a soft brush.
Protect remotes from environmental damage by:
– Keeping handheld units away from moisture sources
– Avoiding extreme temperature exposure (don’t leave in direct sunlight)
– Storing remotes in designated locations to prevent physical damage
– Cleaning button surfaces monthly with slightly damp microfiber cloth
Wall-mounted remote systems require similar care—ensure mounting hardware remains tight to prevent stress on internal components. If your remote develops sticky buttons or inconsistent response, disassemble carefully (power off first!) to clean the membrane contact points. For persistent electrical issues or signs of burning smells, consult a qualified electrician rather than risking DIY repairs.
Why Remote Controls Transform Ceiling Fan Usability
Remote-controlled ceiling fans fundamentally change how you interact with home climate systems, eliminating the inconvenience of getting up to adjust settings. This convenience encourages more frequent adjustments to match actual comfort needs rather than leaving fans running unnecessarily—potentially saving 5-10% on cooling costs through optimized usage. The ability to operate fans from bed or comfortable seating positions makes remote controls particularly valuable for individuals with limited mobility.
Beyond basic convenience, remote systems enable features impossible with traditional controls. Timer functions automatically turn off fans after specified periods, preventing energy waste while you sleep. Light dimming creates adaptable ambiance without additional wiring. Direction reversal switches between cooling and heating modes with a single button press. Understanding how do ceiling fan remotes work helps you maximize these features, troubleshoot problems efficiently, and enjoy years of reliable, convenient comfort control.
Leave a Reply