Most homeowners never realize their ceiling fan can work smarter, not harder, simply by reversing its rotation. Changing your ceiling fan direction with remote control takes mere seconds but delivers significant comfort and energy savings year-round. If your fan blows air the wrong way for the season, you’re missing out on potential energy savings of up to 10% on heating and cooling costs. This simple adjustment creates the perfect airflow pattern whether you’re trying to beat the summer heat or distribute warm air during winter months.
You don’t need to be a handyman to master this essential home comfort technique. Whether your fan came with a remote when installed or you added one later, this guide gives you the precise steps to flip your fan’s rotation direction instantly. By the time you finish reading, you’ll know exactly how to optimize your ceiling fan for seasonal comfort, troubleshoot common direction-changing problems, and verify your fan is working at peak efficiency.
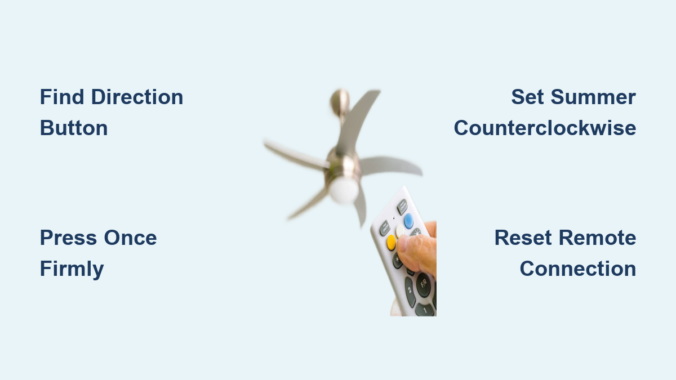
Locate Your Remote’s Direction Button Immediately
Finding the direction control on your ceiling fan remote is the critical first step that many homeowners overlook. Most modern remotes feature a dedicated direction button prominently displayed with a dual-arrow icon showing circular motion in opposite directions. This button might be labeled “DIR,” “REV,” “FAN DIR,” or simply display the universal direction symbol. On Hampton Bay remotes, it’s typically the third button from the left, while Hunter models often place it near the bottom edge of the remote.
If you can’t spot the direction button after careful examination, check for these brand-specific variations:
– Casablanca fans sometimes hide the direction function under a “Settings” menu
– Harbor Breeze models may require pressing “Light” and “Fan” buttons simultaneously
– Some remotes have a small sliding cover that must be moved to access the direction button
When in doubt, examine the remote with good lighting and press each button while watching the fan—this trial method often reveals which button controls direction. Remember that some older fans, particularly Hunter models, use a pull chain for direction changes even when equipped with a remote for speed and light control.
Execute the Direction Change Correctly on First Try
Pressing the direction button properly makes all the difference between a successful rotation change and frustration. Press the direction button once firmly and release immediately—do not hold it down. Most fans respond with an audible “click” from the motor housing within 2-3 seconds as the internal switch engages. Watch the blades carefully; they’ll gradually slow, stop momentarily, then restart spinning in the opposite direction.
If your fan doesn’t respond after pressing the button:
– Reduce fan speed to medium or low first (many fans won’t change direction at high speeds)
– Try pressing the button two or three times in quick succession
– Wait 10 seconds between attempts to allow the receiver to reset
Critical mistake to avoid: Never attempt to change direction while the fan is completely stopped—most remotes require the fan to be running at some speed for the direction command to register. If you’ve just turned the fan on, wait 5 seconds before pressing the direction button.
Set Summer and Winter Directions for Maximum Efficiency
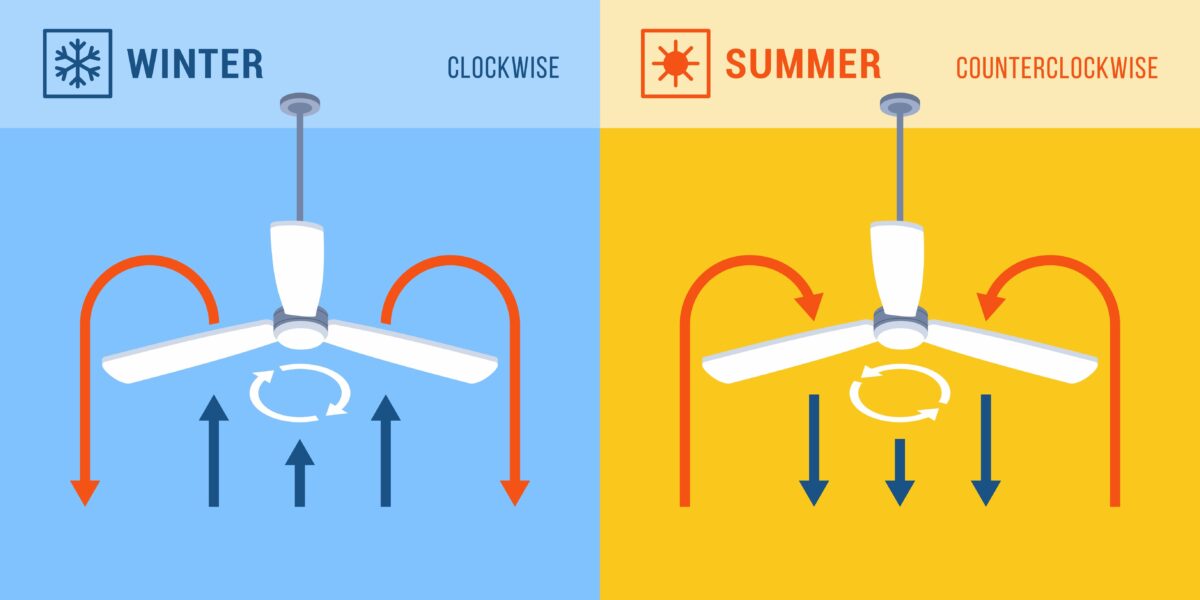
Knowing which direction works best for each season transforms your ceiling fan from a simple air mover to an energy-saving climate control system. For summer cooling, set your fan to rotate counterclockwise when viewed from below. This creates a downward breeze that speeds up evaporation from your skin, making you feel up to 8°F cooler without lowering your thermostat. The faster the fan spins in this direction, the stronger the cooling effect—run it at medium to high speeds when you’re in the room.
During winter months, switch to clockwise rotation at low speed. This gentle upward draft pushes warm air off the ceiling and down along the walls, distributing heat evenly throughout the room without creating a chilling breeze. Run your fan at the lowest speed setting for 1-2 hours after turning on your heating system, then turn it off once the room reaches a comfortable temperature.
Pro tip: Mark your calendar to change fan direction on the first day of spring (March 20) and fall (September 22). This simple habit ensures you never waste energy running your fan in the wrong direction.
Fix Direction Button That Won’t Respond in 5 Minutes
When your remote’s direction button fails, follow this systematic troubleshooting approach before calling for professional help. First, replace the remote batteries with fresh ones—even if the other buttons work, weak batteries often affect the direction function first. Test the remote by turning the fan on and off to confirm basic functionality before attempting direction changes.
Next, check these often-overlooked issues:
– Ensure the fan’s wall switch is in the “on” position (many remotes won’t work if the wall switch is off)
– Verify the manual override switch on the fan motor is set to “remote” mode
– Look for physical obstructions between remote and fan receiver (furniture, decorations)
– Eliminate interference from nearby electronics like routers or cordless phones
If problems persist, reset the remote-receiver connection by turning off the circuit breaker for 60 seconds, then restoring power. Most fans will automatically reconnect within 30 seconds of power restoration.
Reset Remote-Receiver Connection When Direction Fails
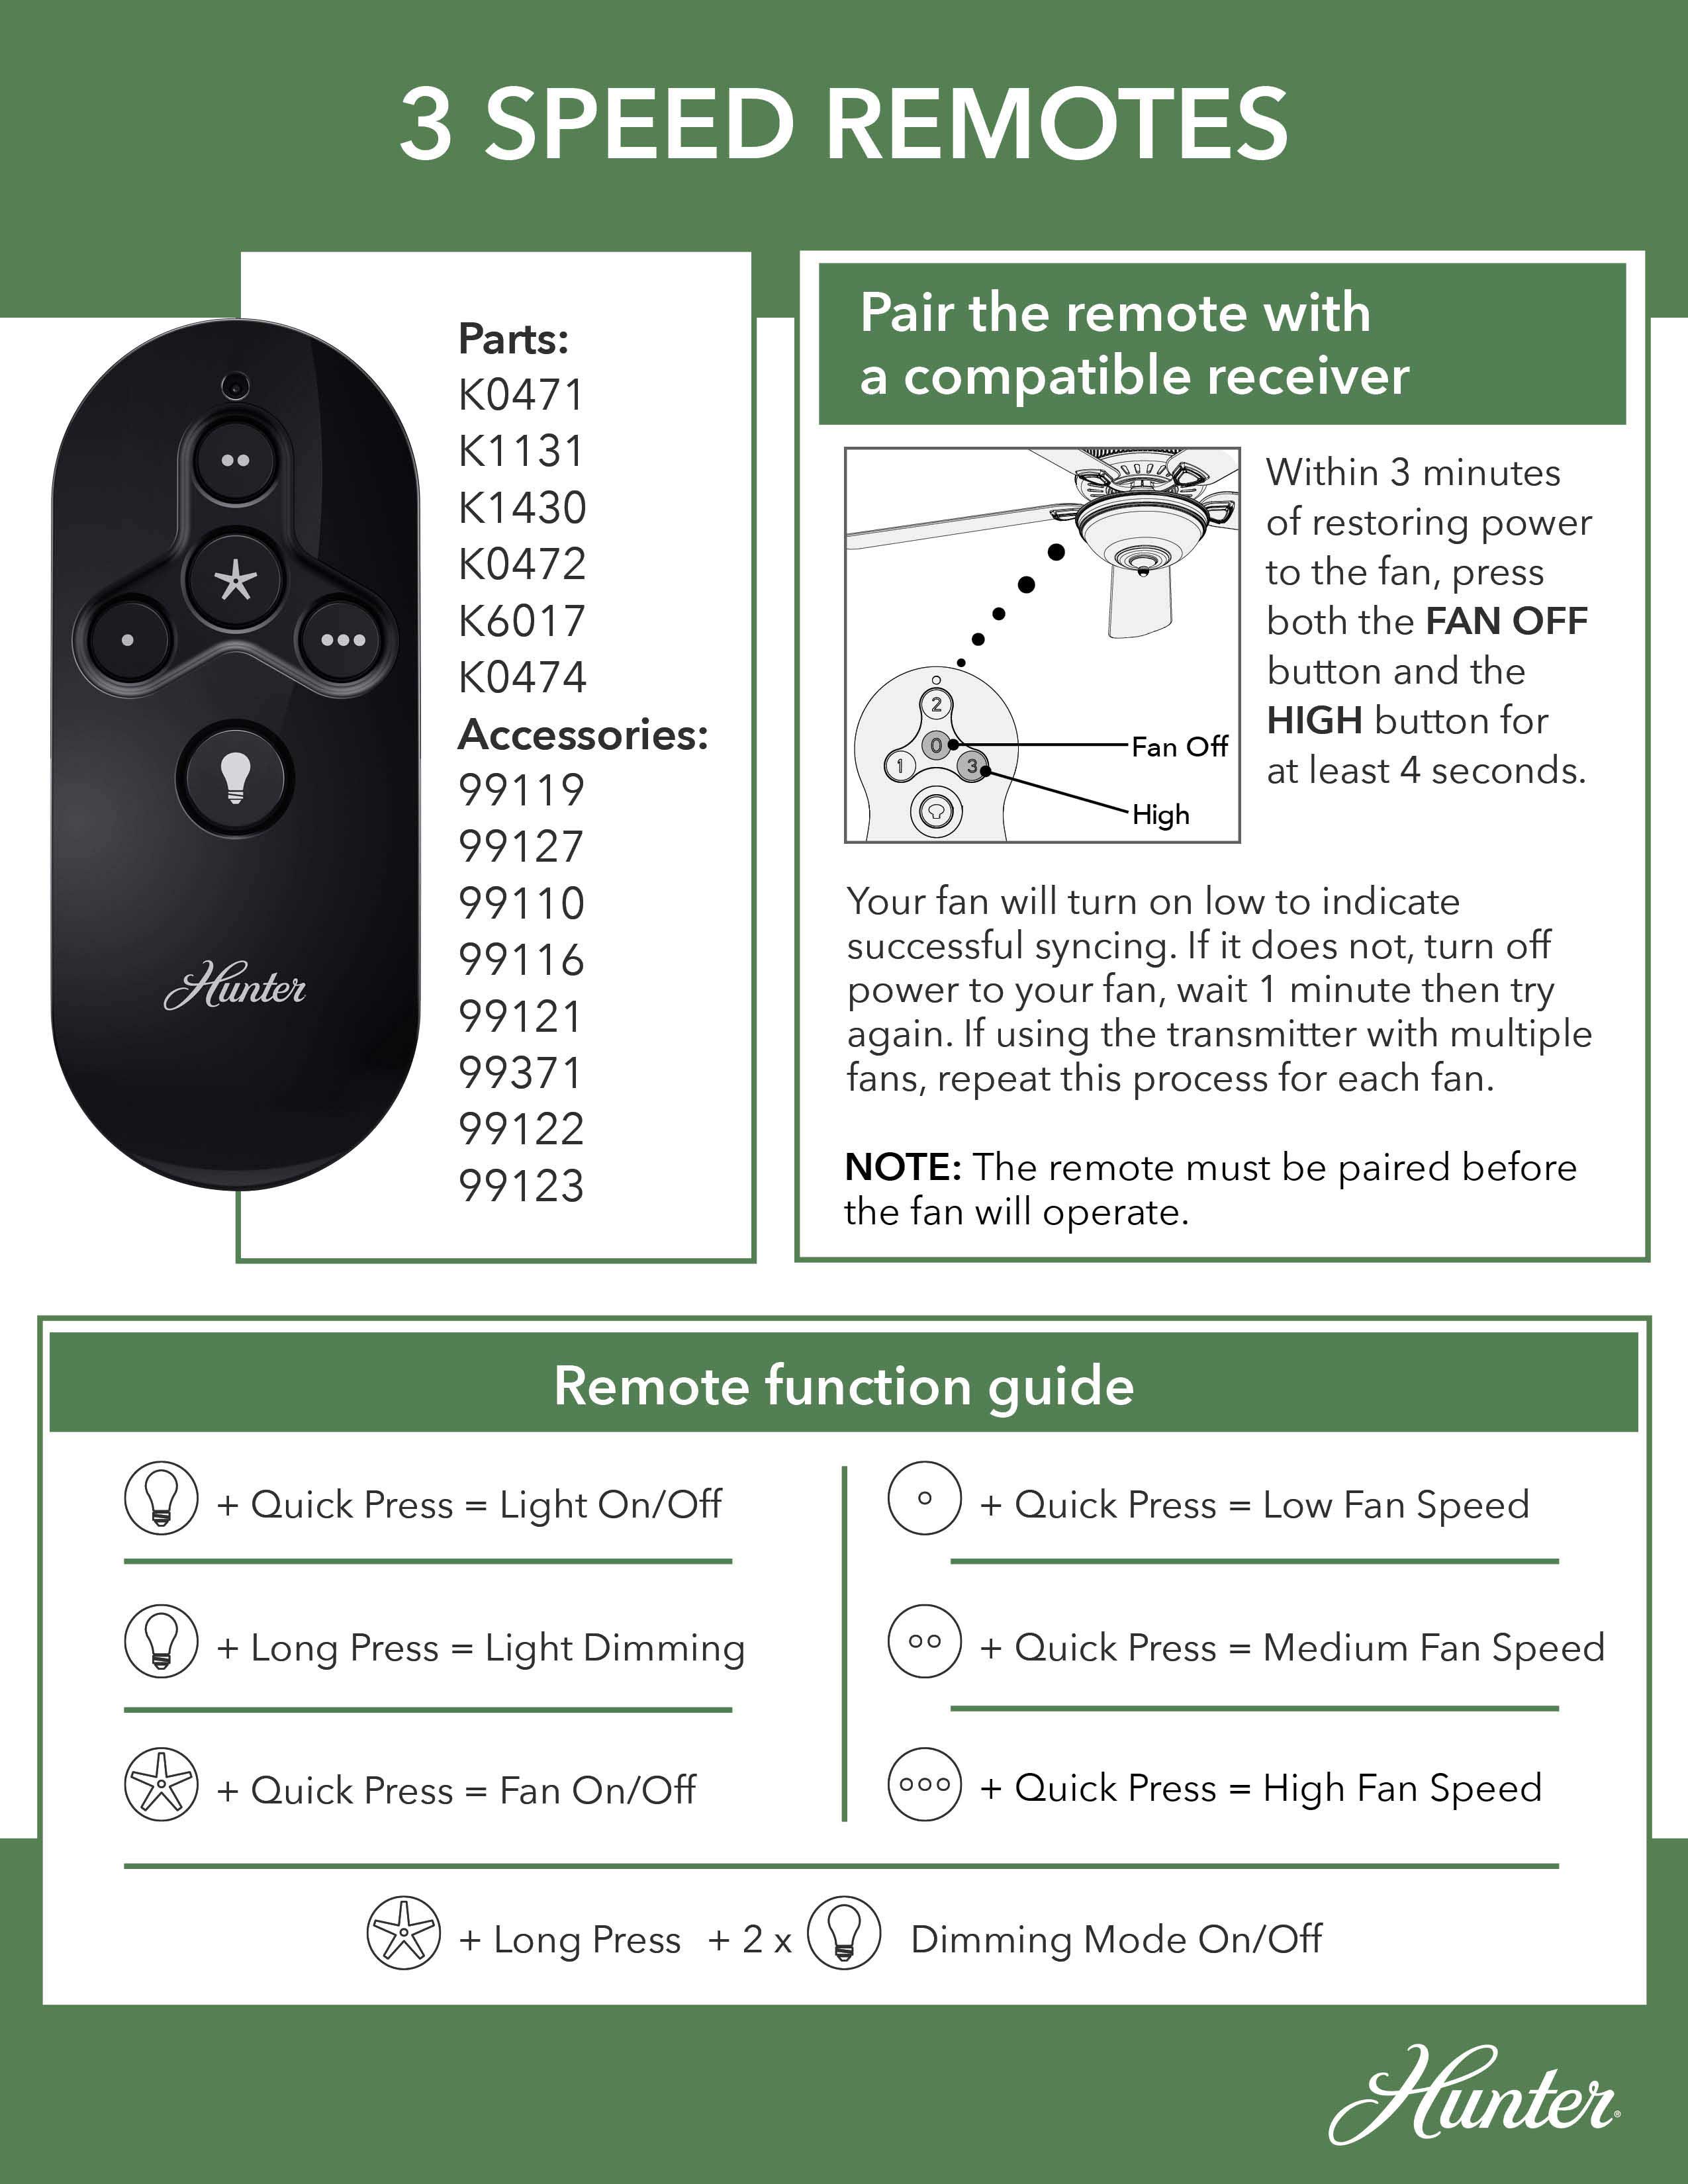
Persistent direction control issues often stem from communication breakdowns between your remote and the fan’s receiver. Perform a complete reset using this manufacturer-approved sequence: Turn off power at the circuit breaker for exactly 60 seconds (use a timer), then restore power. Within 15 seconds of power restoration, press and hold the “Learn” button on your remote (usually inside the battery compartment) for 8 seconds.
You’ll know the reset succeeded when:
– The fan lights flash twice
– You hear a distinct double-click from the motor
– The fan automatically starts at medium speed
After resetting, test the direction button immediately while the connection is fresh. Some advanced remotes require you to re-pair all functions—consult your manual if standard reset doesn’t restore direction control. For Hunter fans with remote issues, try the alternative reset by pulling the direction chain once while the fan operates at medium speed.
Navigate Smart Remote Direction Settings Successfully
Modern smart remotes with digital displays require different steps than traditional button remotes. For Casablanca’s iFan02 or similar smart models, press the “Menu” button until “FAN SETTINGS” appears, then use arrow keys to select “ROTATION DIRECTION.” Press “Enter” and choose between “SUMMER” (counterclockwise) or “WINTER” (clockwise) mode. Confirm your selection by pressing “Enter” again and exit the menu.
If your fan connects to smart home systems:
– In the Bond app: Tap your fan > Settings > Rotation > Select direction
– With Alexa: Say “Alexa, set fan direction to summer mode”
– Through Google Home: Open app > Device controls > Tap fan icon > Direction
Important: Smart remotes sometimes require firmware updates for direction control to function properly. Check for updates in your app’s settings menu if direction changes fail consistently.
Confirm Direction Change with Visual Verification
After changing direction, verify the setting actually took effect by observing blade movement from directly beneath the fan. For summer mode (counterclockwise), stand under the fan with your hand raised—you should feel a strong downward breeze. The blades will appear to move from right to left as they approach you. In winter mode (clockwise), the airflow should be barely noticeable, with blades moving from left to right as they approach you.
If you’re unsure about the direction:
– Tape a small piece of tissue paper to a blade tip
– Turn fan on low speed and watch the paper’s movement
– Counterclockwise = paper moves toward the right as it approaches you
– Clockwise = paper moves toward the left as it approaches you
Warning: Never attempt to verify direction by touching the blades, even at low speeds. Use visual indicators only for safety.
Use Pull Chain When Remote Direction Control Fails
When remote direction control proves impossible, many fans have a mechanical backup—the pull chain. Locate the chain hanging from the motor housing (usually near the light kit) and pull it once while the fan operates at medium speed. You’ll hear a distinct click as the direction switch engages. Wait 10 seconds for the fan to complete the direction change.
Pull chain direction changes work differently than remotes:
– First pull: Counterclockwise (summer mode)
– Second pull: Clockwise (winter mode)
– Third pull: Returns to counterclockwise
If the chain feels stiff or produces no click, don’t force it—this could damage the internal switch. Instead, turn off power at the breaker and apply a small amount of lubricant to the chain mechanism before trying again.
Maintain Perfect Direction Settings Year-Round
Once set correctly, your fan’s direction should remain stable through normal operation. However, power surges, electrical interference, or accidental button presses can reset the direction. Establish this simple maintenance routine:
– Check fan direction monthly during extreme weather
– Verify direction after any power outage
– Test direction when seasons change (March and September)
– Clean remote buttons quarterly to prevent sticking
Pro tip: Place a small sticker on your remote indicating current season direction—blue for summer, red for winter. This visual reminder prevents accidental direction changes and helps household members understand proper settings.
Mastering how to change direction of ceiling fan with remote puts you in complete control of your home’s comfort and energy efficiency. By following these precise steps, you’ll never waste money running your fan in the wrong direction again. Take just 30 seconds today to verify your fan’s rotation matches the current season—this tiny adjustment delivers noticeable comfort improvements and measurable energy savings throughout the year. When summer heat arrives or winter chill sets in, you’ll appreciate having this simple skill ready to maximize your ceiling fan’s performance.
Leave a Reply