Dust clinging to your ceiling fan blades does far more than create an unsightly layer—it transforms your fan into a dust distributor every time you flip the switch. Those swirling particles trigger allergies, worsen asthma symptoms, and circulate respiratory irritants throughout your entire living space. Beyond health concerns, accumulated dust unbalances blades over time, causing annoying vibrations and potentially shortening your fan’s motor lifespan. The good news? Properly learning how to dust ceiling fan takes less than thirty minutes with tools you likely already own. This guide delivers everything you need—from quick weekly maintenance routines to deep cleaning techniques that restore both appearance and performance.
Gather Essential Dusting Tools Without Breaking Your Budget
Having the right equipment transforms ceiling fan cleaning from a dangerous chore into a straightforward task that actually works. The tools you choose directly impact how effectively dust is removed and how much mess you create in the process.
Microfiber Dusters and Extendable Poles That Actually Work
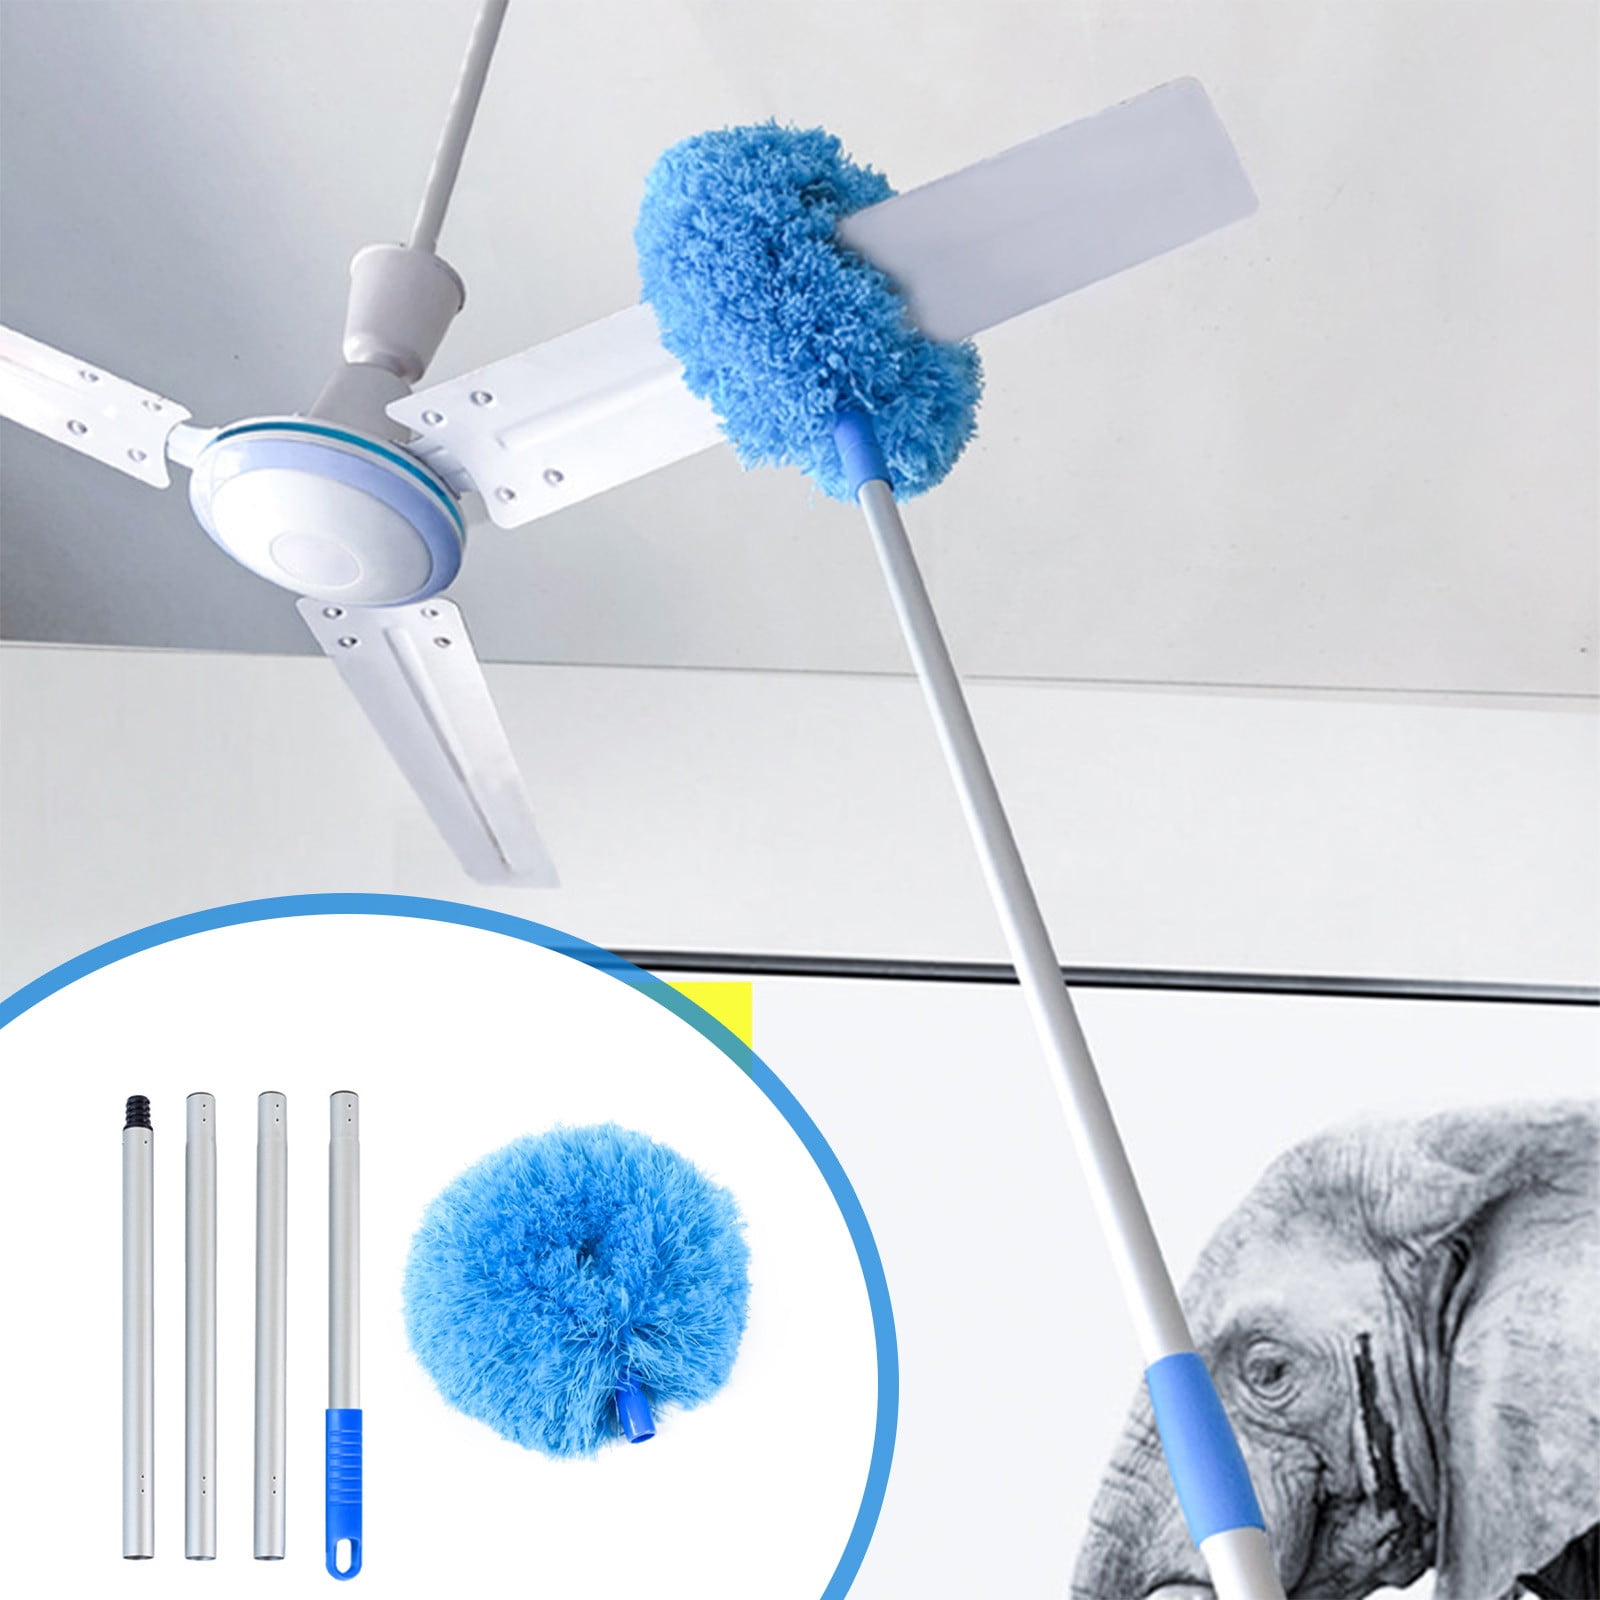
Microfiber dusters outperform traditional feather dusters because their electrostatic fibers attract and trap dust rather than simply pushing it around your room. Look for models with extendable handles that reach from floor to ceiling without requiring a ladder—this eliminates the most dangerous part of the job. Lambswool dusters excel at reaching between blade slats and into tight corners where dust builds up unnoticed. Some premium extendable dusters feature articulating heads that angle to match blade positioning, letting you clean both sides of each blade from a single position without constantly repositioning your ladder.
Cleaning Solutions for Stubborn Buildup (No Harsh Chemicals Needed)
For routine maintenance, plain water in a spray bottle provides enough moisture to capture remaining particles without risking damage to your fan. When sticky grime has accumulated, mix one teaspoon of mild dish soap into a gallon of warm water for a solution that cuts through residue without harming blade finishes. A simple equal-parts white vinegar and water mixture offers a natural, streak-free alternative that dissolves mineral deposits common in many homes. Always keep two microfiber cloths handy—one damp cloth for cleaning and a dry one immediately behind it to prevent water spots and ensure blades are completely dry before operation.
Safety Equipment You Can’t Skip
A sturdy step ladder provides stable access to ceiling height, letting you work comfortably without overreaching and losing your balance. Non-slip footwear prevents dangerous slips when climbing, and having someone hold the ladder base adds crucial security. Safety glasses shield your eyes from falling dust and debris, which becomes especially important when cleaning neglected fans. Spread a drop cloth or old sheet beneath the fan before starting—cleanup becomes dramatically simpler when dust falls onto a protected surface rather than your furniture or carpet.
Prepare Your Space and Safety Before Climbing

Proper preparation prevents accidents and makes the cleaning process far more efficient. Taking just five minutes to set up correctly saves significant time and frustration later.
Room Preparation Steps That Prevent Mess
Remove fragile items, electronics, and anything you don’t want coated in dust from directly beneath the fan’s rotation area. Cover remaining furniture with sheets or drop cloths to protect against inevitable dust fall during cleaning. Open windows or turn on ventilation fans to improve air circulation, helping dust dissipate rather than settling back onto surfaces you’ve just cleaned. Most importantly, turn off the ceiling fan at the wall switch—not just the remote control—and wait for the blades to come to a complete stop before touching them. Moving blades create both injury risks and make cleaning significantly more difficult.
Personal Preparation Checklist for Safe Cleaning
Wear old clothing that you don’t mind getting dusty, or drape an apron over your current outfit to protect your torso and arms. If you have allergies or respiratory sensitivities, a dust mask prevents you from inhaling particles as you disturb accumulated dust. Ensure all your cleaning tools sit within arm’s reach before climbing the ladder, eliminating dangerous reaches or descents mid-task. Keep a trash bag nearby for disposing of heavily soiled cloths or those dust bunnies that have been growing unnoticed on your blades.
Dry Dusting Techniques for Weekly Maintenance
Regular dry dusting prevents the heavy buildup that requires intensive cleaning sessions. These techniques work well for weekly maintenance or as the first step before wet cleaning.
Quick Weekly Dusting Method That Actually Captures Dust
Attach a microfiber duster to your extendable pole and sweep lightly across all surfaces of each blade, moving from the center outward along the blade’s length. Work systematically from one side of the fan to the other, ensuring you address both the top and bottom surfaces of every blade. The extendable pole lets you reach the entire fan span without strain, while microfiber’s properties attract dust instead of dispersing it into the air. After completing each blade, step outside and shake the duster to release collected dust before continuing—this prevents redistributing debris onto already-cleaned surfaces.
Vacuum Attachment Approach for Heavy Dust
The brush attachment on your vacuum cleaner offers the most effective method for heavy dust accumulation because it captures particles immediately rather than releasing them into the air. Move the brush attachment slowly along each blade surface, overlapping your strokes slightly to ensure complete coverage without missing spots. Switch to the crevice tool attachment to reach dust trapped between blades and in the motor housing gaps where normal dusters cannot reach. This method generates the least airborne dust and eliminates the need for secondary cleanup of your floor.
Wet Cleaning for Deep Grime Removal
When dry dusting no longer restores your fan’s appearance, wet cleaning removes the stubborn grime that accumulates over time. This deeper approach requires more careful technique to protect both the fan and yourself.
Blade-by-Blade Cleaning Process That Prevents Damage
Stand on your stable ladder and support one blade with your free hand to prevent excessive wobbling while you work. Wipe along the blade’s length with a damp microfiber cloth, starting near the motor housing and moving outward toward the blade tip. Flip to a dry section of the cloth and immediately follow behind the damp pass to remove moisture and prevent streaking. Complete both sides of the same blade before moving to the next one, and verify each blade feels completely dry before you consider the job finished.
Motor Housing and Light Fixtures Cleaning
Wipe the motor housing with a slightly damp cloth, carefully avoiding any openings where moisture could enter and damage electrical components. Textured surfaces benefit from a soft-bristled brush that loosens dust before you wipe it away. Remove glass light fixtures if your fan design allows this, washing them separately in warm soapy water, rinsing thoroughly, and drying completely before reinstalling. For fixtures that cannot be removed, wipe glass surfaces with a damp cloth followed immediately by a dry one, paying special attention to where glass meets metal housing.
Reach High Ceiling Fans Without Risking Injury

Standard ladders won’t reach very high ceilings, but several solutions exist for safely cleaning fans installed in two-story entryways or vaulted spaces.
Extension Pole Techniques for Two-Story Ceilings
Select an extension pole long enough to let you work comfortably without overextension, which compromises your balance and cleaning effectiveness. Ceiling fan dusters designed with angled heads that conform to blade angles clean more effectively than flat mop heads, though the latter work in a pinch. Test your reach at floor level before climbing—your arm should extend comfortably upward without straining or leaning. Move systematically around the fan’s perimeter rather than twisting your body, which can shift the ladder’s position.
Safe Ladder Positioning for Vaulted Ceilings
When using a step stool or platform ladder positioned directly beneath the fan’s center, ensure all legs rest on a flat, stable surface—never on rugs, uneven flooring, or soft ground. Maintain three points of contact at all times: either two hands and one foot or two feet and one hand on the ladder rails. Never stand on the top rungs of a step ladder, and never reach beyond your side rails while positioned aloft. A ladder stabilizer bar provides extra security when working alone, preventing dangerous side-to-side movement.
Clean Tricky Spots Where Dust Hides
Dust always accumulates in the hardest-to-reach places, requiring specialized techniques to address these neglected areas effectively.
Between Blade Gaps That Trap Dust
The narrow spaces between fan blades and where blades attach to the central hub collect dust that normal dusting completely misses. Use a thin, flexible tool such as a paint edger, flexible spatula wrapped in microfiber cloth, or a brush specifically designed for fan cleaning to reach these gaps. Alternatively, wrap a thin microfiber cloth around a flexible putty knife or ruler to create a custom cleaning tool for tight spaces. Vacuum these areas immediately after dislodging dust to prevent redistribution onto other surfaces.
How Often to Dust Ceiling Fans Based on Your Home
Thorough ceiling fan cleaning should occur at minimum every three to four months, with light dusting every week or two in high-traffic rooms. During seasons when the fan runs continuously for cooling, more frequent attention prevents the dust circulation that affects your home’s air quality. Homes with pets require twice as frequent cleaning because pet dander, fur, and tracked-in outdoor debris significantly increase dust accumulation. Households with allergy sufferers benefit from weekly light dusting to minimize airborne allergens that trigger symptoms.
Prevent Dust Accumulation Between Cleanings
Reducing dust on your ceiling fan between cleanings makes maintenance far less labor-intensive over time.
Reduce Airborne Dust With Smart Fan Operation
Running ceiling fans in reverse direction during winter months (clockwise when viewed from below) redistributes warm air without creating the cooling breeze of summer operation, significantly reducing dust circulation into living spaces. Installing a HEPA air purifier in rooms with ceiling fans helps reduce overall airborne dust that eventually settles on all surfaces, including your fan. Regular vacuuming and dusting of other surfaces in the room decreases the overall dust load that eventually finds its way onto your fan blades.
Fix Common Post-Cleaning Issues Immediately
Sometimes cleaning creates new problems that require quick troubleshooting to resolve before they become bigger issues.
Wobbling After Cleaning: Quick Fixes
Excessive moisture on fan blades causes temporary imbalance that resolves as blades dry completely. If wobbling persists, check that all blade screws tightened securely during cleaning haven’t loosened again. Inspect blades for uneven dust accumulation that might throw off balance, and reclean if needed. Persistent wobbling may indicate the fan requires professional balancing or that blade warping has occurred and needs replacement.
Learning how to dust ceiling fan properly protects your family’s air quality, extends your fan’s lifespan, and keeps your home looking its best. With the right tools, proper preparation, and consistent maintenance, ceiling fan cleaning becomes a quick task rather than a dreaded chore. Establish a regular cleaning schedule based on your household’s specific needs, and your ceiling fan will run efficiently while adding style and comfort to your living space for years to come.
Leave a Reply