That annoying wobble in your ceiling fan isn’t just irritating—it’s a sign that something’s wrong with your fan’s balance or installation. A shaky ceiling fan creates distracting noise, reduces airflow efficiency, and can even damage the motor over time. The good news? Most ceiling fan wobbles stem from common, easily fixable issues you can tackle yourself with basic tools. Whether your fan has suddenly started shaking or it’s been wobbling since installation day, this guide gives you a complete step-by-step solution to restore smooth, quiet operation without calling a professional.
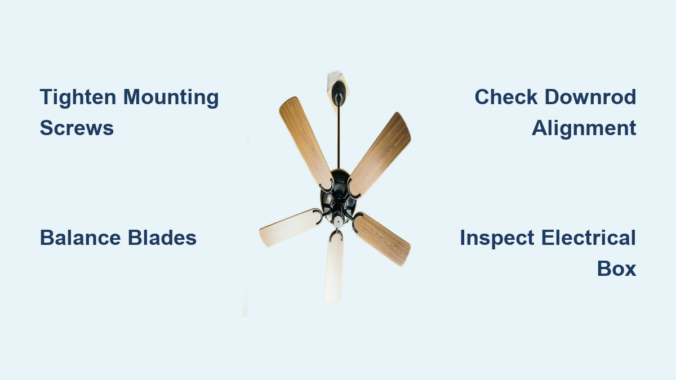
Before you grab your ladder and tools, understand that ceiling fan wobble typically comes from one of five specific problems: loose mounting hardware, unbalanced blades, bent components, improper installation, or accumulated dust. By systematically checking each potential cause in the right order, you can diagnose and fix your fan’s wobble in less than an hour. Let’s dive into the exact process that thousands of homeowners have used to eliminate ceiling fan vibration for good.
Why Your Ceiling Fan Suddenly Started Shaking
The physics behind ceiling fan wobble is straightforward: when blades don’t rotate perfectly level, centrifugal force magnifies even tiny imbalances into noticeable vibration. At typical operating speeds of 200-300 RPM, a blade just 1/8 inch out of alignment creates significant wobble that transmits through the entire fan structure. This explains why minor issues become major problems at higher speeds.
Most shaking begins after several months or years of operation as vibration gradually loosens critical hardware. The top three culprits are mounting bracket screws working loose from the electrical box, blade screws becoming loose on individual arms, and downrod connections developing play. Less commonly, blade warping from humidity changes, accidental impacts bending a blade arm, or dust buildup on one side of blades creates uneven weight distribution. Understanding these specific causes helps you target your repair efforts efficiently rather than randomly tightening random screws.
Critical Safety Steps Before Fixing Your Wobbly Fan
Turning off power at the circuit breaker isn’t just recommended—it’s non-negotiable when working on ceiling fans. Locate your electrical panel and flip the breaker controlling the fan circuit to “OFF.” Never rely solely on the wall switch, as faulty wiring could still energize components. Verify power is off by attempting to turn on the fan; if it moves at all, return to the breaker panel immediately. This simple step prevents potentially fatal electrical contact with live components inside the fan housing.
Work from a stable ladder positioned directly beneath the fan—never stand on chairs or unstable surfaces. Have all tools within easy reach in a tool belt or magnetic tray to avoid dropping items. Use a bright work light to illuminate shadowed areas around the mounting bracket. If you’re uncomfortable working at heights or lack experience with electrical fixtures, hire a professional rather than risking injury. Remember: taking 10 extra minutes to prepare properly protects you from life-altering accidents during this otherwise simple repair.
How to Perform a Targeted Visual Inspection

Start your diagnosis from the ground with a visual assessment using a ruler or laser level app on your phone. Hold the measuring tool vertically against a wall and sight along it to each blade tip. Note if any blade sits higher or lower than others—differences as small as 1/16 inch cause noticeable wobble. Check for visible blade damage like cracks, warping, or bent edges that would disrupt airflow symmetry.
Move closer with your ladder for a detailed inspection. Examine the mounting bracket for gaps between it and the ceiling—this indicates loose mounting screws. Gently push on the fan housing to test for excessive movement at the downrod connection. Inspect all visible screws for rust, stripped heads, or signs they’ve pulled away from their holes. Pay special attention to blade-to-arm connections; one loose screw often causes disproportionate wobble. Take photos of your current setup before disassembly—they’ll prove invaluable during reassembly and help you track your progress.
Tightening Loose Hardware: The #1 Fix for Wobbling Fans
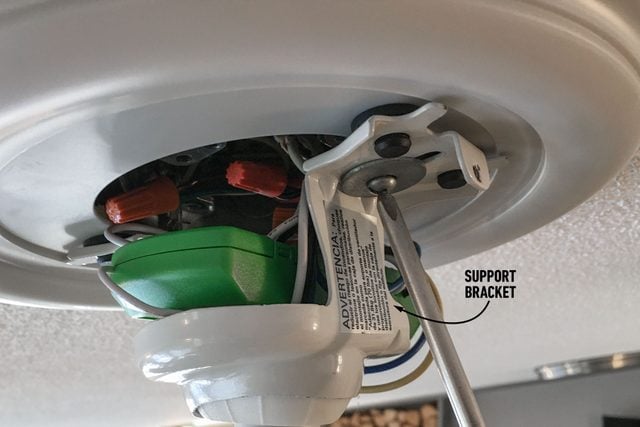
Loose mounting hardware causes over 60% of ceiling fan wobble issues, making systematic tightening your most important repair step. Start at the top with the bracket-to-ceiling connection. Remove the canopy cover to access the mounting screws securing the fan to the electrical box. Use a socket wrench or appropriately sized screwdriver to firmly tighten each screw—snug but not overtightened, as excessive force can crack plastic components.
Next, address the downrod connections. Most fans have set screws securing the downrod ball joint at both the mounting bracket and motor housing. Tighten these hex screws with an Allen wrench until firm resistance is felt. Then move to blade components: tighten each blade-to-arm screw (typically 3-4 per blade) followed by each arm-to-motor connection point. Work in a star pattern around the fan to maintain even tension. After your first pass, repeat the process—vibration often loosens multiple connections simultaneously, and your initial tightening may reveal previously hidden looseness.
Precision Blade Balancing Techniques That Actually Work
Even with all hardware tightened, imperfect blade alignment causes persistent wobble. The professional blade balancing method requires a simple balancing kit (available for $5-10 online) but delivers permanent results. Start by cleaning all blades thoroughly—dust accumulation creates uneven weight distribution that mimics mechanical imbalance.
Attach the balancing clip to the midpoint of one blade’s top surface and run the fan at medium speed. Note the vibration level, then move the clip to the next blade and repeat. The blade that shows the least vibration when weighted needs permanent balancing. Attach the clip permanently at that location, then fine-tune position by moving it slightly toward the blade tip or hub until vibration minimizes. For severe imbalance, add small weights (like adhesive-backed washers) incrementally—test after each adjustment. Properly balanced blades eliminate 95% of residual wobble after hardware tightening.
Downrod Alignment: The Hidden Cause of Persistent Wobble
A misaligned downrod transfers angular stress directly to the fan motor, creating vibration that worsens at higher speeds. Check for visible bending by sighting along the downrod’s length from multiple angles. Even slight curvature requires replacement—attempting to straighten steel downrods usually weakens them further.
Verify proper ball joint seating in the mounting bracket. The ball should sit fully within the socket with set screws tightened against the groove. At the motor connection, ensure the downrod pin is fully inserted and secured with its retaining clip. Some models require specific downrod orientation—check your manual for alignment marks. A properly aligned downrod creates a straight mechanical path from ceiling to fan motor, eliminating one of the most insidious causes of chronic wobble.
Electrical Box Inspection: Critical Safety Check
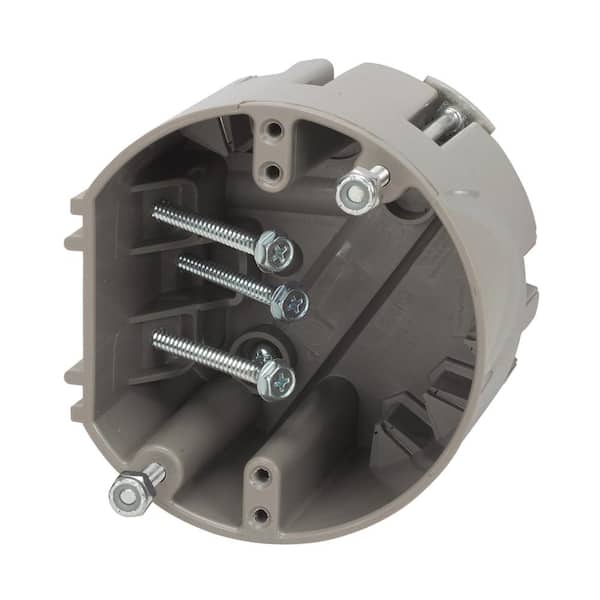
Your fan’s mounting stability depends entirely on the electrical box’s integrity. Standard light fixture boxes cannot handle ceiling fan vibration and will eventually pull loose from the ceiling joist. Look for a label inside the box stating “Acceptable for Fan Support” or confirming 50+ pound capacity. If missing, assume it’s unsafe for fan mounting.
Check box stability by gently pushing the fan sideways—excessive movement indicates inadequate support. Proper installation requires either a retrofit ceiling fan brace spanning between joists or a new box with built-in support arms. Never continue using a fan mounted to an inadequate box—this creates a falling hazard. Replacement takes 20 minutes with the right tools but requires electrical work; if uncomfortable, hire an electrician to install proper support before addressing wobble issues.
Component Replacement Guide for Damaged Parts

Sometimes tightening and balancing aren’t enough—worn components require replacement. Bent blade arms (common after accidental impacts) should be swapped rather than straightened, as metal fatigue makes them prone to further bending. Downrods with visible corrosion or play at connections need replacement for safety.
Use manufacturer part numbers when ordering replacements—most major brands like Hunter, Hampton Bay, and Minka-Aire offer affordable replacement arms and downrods. Blade balancing clips lose adhesion over time; replace them with new weighted clips designed for your fan model. When replacing screws, match thread type and length exactly—using longer screws can damage internal components. Replacing compromised parts ensures your fan operates safely without recurring wobble issues.
Preventative Maintenance Routine for Wobble-Free Operation
Schedule bi-annual maintenance to prevent future wobble: tighten all visible screws, clean blades with a microfiber cloth, and inspect for developing issues. Apply a drop of light machine oil to the downrod ball joint annually to reduce friction and vibration transmission. Check blade alignment using the ruler method described earlier—catching minor misalignment early prevents major wobble development.
Listen for new operational sounds that signal emerging problems. A faint clicking noise often indicates a slightly loose screw that will cause significant wobble within weeks. Address these early warnings immediately before vibration damages other components. Homes in humid climates should check for blade warping more frequently, as wood blades expand and contract with moisture changes. Consistent maintenance extends fan lifespan by 5-7 years while ensuring silent, vibration-free operation.
When Professional Help Is Actually Necessary
While most wobble issues are DIY-fixable, certain situations require professional intervention. If your fan wobbles severely despite thorough hardware tightening and blade balancing, internal motor bearing failure may be the culprit—this requires motor replacement. Fans mounted to inadequate electrical boxes need professional correction to meet safety codes. Complex installations with integrated lighting or smart features sometimes have wobble caused by internal component conflicts that electricians diagnose more efficiently.
Professionals typically charge $75-150 for fan wobble repairs but guarantee proper resolution. If you’re uncomfortable working with electrical components or at heights, the small cost provides peace of mind compared to potential injury or further damage. Consider professional help as an investment in safety rather than an admission of inability—some repairs genuinely require specialized knowledge.
A shaky ceiling fan doesn’t have to disrupt your home comfort. By methodically addressing each potential cause—from loose mounting hardware to blade imbalance—you can eliminate vibration and enjoy smooth, quiet operation. Most fixes require only basic tools and less than an hour of your time, saving you the cost of professional repair. Remember to prioritize electrical safety at every step and replace compromised components rather than attempting makeshift repairs. Implement the bi-annual maintenance routine described to prevent recurrence, and your fan will provide reliable, wobble-free service for years to come. If persistent wobble continues after thorough troubleshooting, consult a professional to address potential internal motor issues or unsafe mounting conditions.
Leave a Reply