That frustrating moment when you pull your ceiling fan light chain only to hear a snap or feel nothing happen is more common than you might think. When your pull chain breaks or stops functioning, you lose convenient control over both fan speeds and lighting—two features you probably relied on daily without a second thought. The good news is that fixing a pull chain on a ceiling fan light is a manageable DIY project that typically costs under $20 and takes less than an hour to complete. Whether your chain snapped completely, feels stuck, or simply won’t cycle through settings properly, this guide provides the exact steps to restore full functionality to your ceiling fan without calling an expensive electrician.
Most pull chain failures fall into two distinct categories: visible breaks in the accessible portion of the chain, or internal failures requiring switch replacement. Understanding which problem you’re facing determines your repair approach. If the chain broke where you can see it outside the fan housing, you may only need an extension chain. But when the chain breaks internally or the switch mechanism fails, you’ll need to replace the entire pull chain switch assembly. This guide covers both scenarios with detailed instructions for the more complex switch replacement that becomes necessary when internal components fail.
Diagnose Your Specific Pull Chain Failure
Pull chain malfunctions present in three distinct ways, each requiring a different solution. A completely broken chain that pulls apart in your hand indicates a visible break where the chain separated, often at a weak link. If you can see both broken ends hanging from the fan housing, you’re dealing with the simplest type of failure that may only require an extension chain to fix.
A chain that feels stuck or requires excessive force to pull signals internal switch mechanism wear. When the chain doesn’t move smoothly through its full range of motion or catches midway, the internal components are beginning to fail. Addressing this early prevents complete failure and avoids being left without fan control during hot weather.
A chain that appears intact but won’t change settings points to a failed internal switch mechanism. When pulling the chain produces no response, cycles through only some speed settings, or requires multiple pulls for a single setting change, the electrical contacts inside the switch have degraded. This requires complete switch replacement since the chain itself remains attached but the internal components no longer function properly.
Essential Tools for Pull Chain Repair

The how to fix pull chain on ceiling fan light process requires only basic tools found in most home toolkits. A standard screwdriver set handles all the fasteners securing the fan housing and cover components. Depending on your fan model, you may need Phillips head, flathead, or both, so having a complete set ensures compatibility with your fixture’s hardware.
Wire cutters serve a critical role when disconnecting the old switch from the fan’s wiring. You’ll use these to carefully cut the colored wires from their terminals on the old switch, freeing the wiring for connection to your replacement. Some switch models feature a pull-away connector design that eliminates cutting—I’ll explain how to identify which type you have during the repair process.
The most crucial component is a replacement pull chain switch matching your fan’s configuration. These switches vary by voltage, amperage ratings, terminal configurations, and mounting styles. Bring your old switch to the hardware store or search online using your fan’s model number to ensure perfect compatibility. The wrong switch won’t function correctly with your fan’s electrical system.
Critical Safety Steps Before Starting
Working on an energized ceiling fan exposes you to potentially fatal voltage levels, so electrical safety must be your absolute priority. Begin by locating your home’s electrical panel and finding the circuit breaker controlling the ceiling fan circuit. Switch this breaker completely to the OFF position—don’t assume it’s off based on its position.
Turn off any wall switches that provide power to the ceiling fan. Some electrical configurations route power through multiple pathways, so flipping wall switches to OFF ensures no electricity reaches the fixture. Only after confirming the fixture is completely powerless should you proceed with disassembly.
Verify power is off by attempting to operate the fan both via the wall switch and by pulling the chain. If the fan responds in any way, return to the breaker panel and try again. This verification step is non-negotiable—never proceed until you’ve confirmed no electricity reaches the fan.
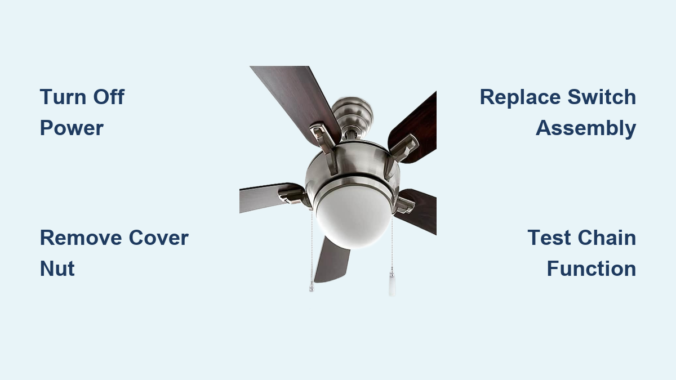
Remove the Fan Light Cover Safely
With power confirmed off, locate the white cover at the bottom of your ceiling fan assembly where the pull chain emerges. This cover conceals the switch mechanism and is secured by a central retaining nut. Support the cover from below with one hand while using your other hand to unscrew the retaining nut counterclockwise.
Remove any light bulbs before proceeding further. Allow bulbs to cool completely if recently lit, as hot glass is more susceptible to thermal shock. Setting bulbs aside prevents accidental damage during housing removal and eliminates broken glass hazards.
Carefully lower the cover away from the fan housing once the retaining nut is fully removed. Set both the cover and nut in a safe location where they won’t be damaged or lost. With the cover removed, you now have visual access to the pull chain switch assembly.
Access the Internal Switch Mechanism
The fan housing base containing the pull chain switch is typically secured by several screws around its perimeter. Remove these housing screws systematically, working in a pattern (opposite sides rather than all from one side) to prevent binding. Place each screw in a container where it won’t roll away or get lost.
Gently pull the fan housing away from the fan body once all screws are removed. Take care not to damage any wiring connections during this process. With the housing removed, you can now see how the pull chain switch connects to your fan’s electrical system.
Disconnect Wires from the Old Switch

Examine your current switch to determine how its wires are connected. Many switches use terminals with small screws that clamp wire ends in place. If your switch has these screw terminals, cut the wires as close to the terminal connector as possible using wire cutters to preserve maximum wire length for the new switch.
Some switches feature pull-away connectors where wires detach by pulling firmly. If your existing switch has this design, simply pull each wire from its terminal block without cutting—this preserves all original wire length for easier reconnection.
Install Your New Pull Chain Switch
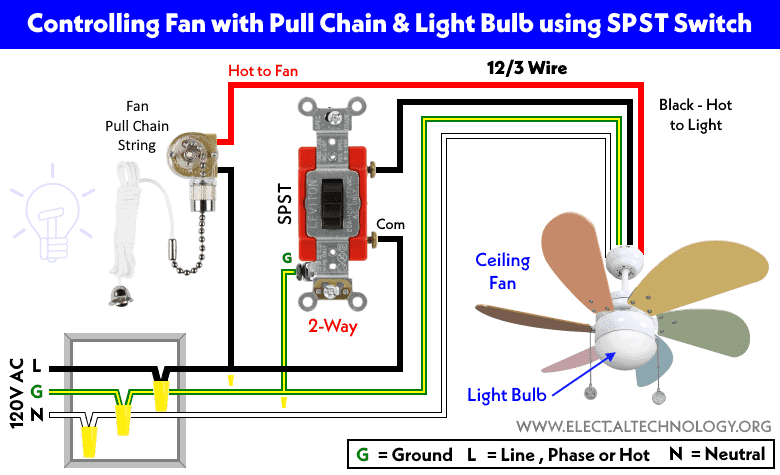
Obtain your replacement switch and verify it matches your old switch’s terminal configuration. Connect the colored wires from your fan’s wiring harness to corresponding terminals on the new switch, matching each wire to the terminal that corresponds to its original connection.
Ensure each connection is secure with no exposed copper wire outside the connector—exposed copper creates a short circuit hazard. Tighten terminal screws firmly but avoid overtightening, which could strip threads or damage wires.
Reassemble and Test Your Repair
Position the new switch back into the mounting hole in the fan housing, ensuring it fits snugly. Secure it with mounting screws tightened firmly but not excessively. Reposition the white cover over the switch area, aligning the central shaft with the cover’s hole, then thread the retaining nut clockwise until snug.
Before reinstalling bulbs, restore power and test the new pull chain switch by pulling it through all settings. Each pull should produce immediate, consistent response with smooth chain movement. If issues persist, turn power off again and verify all wire connections.
Once confirmed working, reinstall light bulbs and restore full operation. Your ceiling fan should now respond to pull chain commands as it did when new.
Quick Fix: Extension Chain Solution
When the chain breaks in the accessible middle section outside the fan housing, a complete switch replacement may be unnecessary. Extension chain kits provide a simple solution with an additional chain length and connector link that joins to the remaining chain portion.
This approach works only when the break occurs where you can grip both ends. If the chain broke flush with the housing or inside where invisible, you’ll need the full switch replacement process. But when applicable, this solution restores functionality in minutes with minimal effort.
Prevent Future Pull Chain Failures
Periodically inspect your chain for signs of wear, fraying, or damage at stress points where it bends around corners. Avoid pulling at sharp angles or with excessive force—pull straight down in a smooth motion to minimize wear on both chain and internal mechanism.
Address early warning signs promptly—if the chain becomes difficult to pull or speeds don’t cycle properly, replace the switch before complete failure occurs. Keeping the chain clean and free from dust extends its operational life and maintains smooth function.
Troubleshoot Common Post-Repair Issues
If your new pull chain switch fails to resolve issues, verify power restoration by double-checking breaker and wall switch positions. Confirm switch compatibility with your specific fan model—different manufacturers use different wiring configurations.
If fan operates but light fails, test with a known-working bulb first. If the light still doesn’t work, the issue may be with the socket rather than the pull chain switch. Persistent inconsistent operation could indicate a faulty capacitor within the fan motor assembly, which typically requires professional service.
Leave a Reply