Installing a Hampton Bay ceiling fan with light brings immediate comfort and style to any room while reducing your energy costs significantly. Most homeowners complete this project in 2-4 hours using basic tools and electrical knowledge, avoiding expensive electrician fees. Hampton Bay fans are renowned for their sturdy construction, attractive designs, and user-friendly installation process that follows standard electrical practices. Before you begin, understanding the complete workflow—from preparation through final testing—ensures a safe installation that delivers years of reliable performance without unexpected wobbling or electrical issues.
This comprehensive guide walks you through every step of mounting, wiring, and finishing your Hampton Bay ceiling fan installation. You’ll learn essential safety precautions, required tools, electrical connections specific to fans with light kits, and troubleshooting tips for common issues. By following these instructions carefully, you’ll achieve professional-quality results without hiring outside help, adding both function and value to your living space.
Gather Your Essential Installation Tools and Materials
Having all necessary tools and materials ready before you start prevents frustrating mid-project trips to the hardware store. For installing a Hampton Bay ceiling fan with light, you’ll need both electrical supplies and standard installation tools that most homeowners already possess.
Electrical supplies you’ll need include a non-contact voltage tester to confirm power is off (critical for safety), wire strippers for preparing conductors, and appropriately sized wire connectors (wire nuts) to secure electrical connections. You’ll also need electrical tape for wrapping connections and a circuit tester to verify your work. If your existing electrical box isn’t rated for fan support, purchase an approved ceiling fan electrical box rated for at least 50 pounds—standard light fixture boxes cannot safely support fan weight and vibration.
Standard tools required comprise a complete screwdriver set with Phillips and flathead options, a drill with bits for pilot holes, and a sturdy ladder tall enough to reach your ceiling comfortably. A helper is essential for holding heavy components during installation—ceiling fans typically weigh 15-30 pounds. A stud finder helps locate ceiling joists for secure mounting, while a pencil and level ensure accurate positioning. Keep a flashlight nearby to illuminate work areas, particularly in rooms with dim lighting.
Verify Power Is Off and Remove Existing Fixture
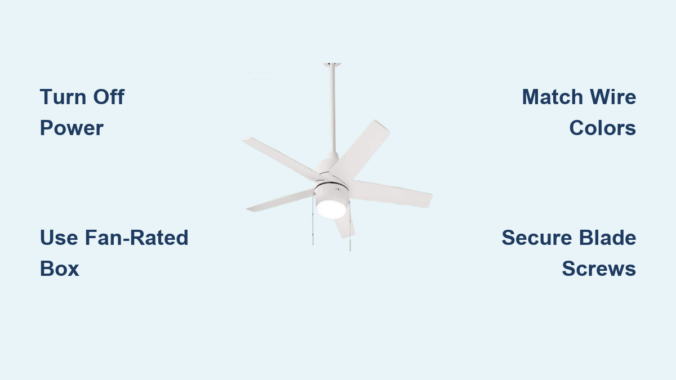
Safety must be your absolute priority when working with electrical installations. Before touching any wiring, completely disable power to the circuit and verify it’s truly disconnected—never skip this step, as live electrical contact can cause severe injury.
Locate your home’s electrical panel and find the breaker controlling the ceiling fan circuit. Flip the breaker to “off” and place tape over it with a warning note. Return to the fan location and test the wall switch multiple times to confirm no power reaches the fixture. Using your voltage tester, check all wires in the ceiling junction box—the tester should not light up or beep near any conductors.
Once confirmed safe, remove the existing light fixture by unscrewing mounting screws and carefully lowering the fixture. Disconnect wire connections by twisting off wire nuts, separating black (hot), white (neutral), and green/bare copper (ground) wires. Remove the old electrical box if it’s not fan-rated—standard boxes cannot safely support fan weight and vibration.
Install or Verify Fan-Rated Electrical Box Support

The electrical box supporting your Hampton Bay ceiling fan must be specifically rated for fan installations. Standard electrical boxes designed for light fixtures cannot withstand dynamic forces from a spinning fan, risking dangerous falls.
If your existing box is fan-rated (marked “For Use with Ceiling Fans” with weight capacity), proceed with installation. If not, install a new fan-rated box. For rooms with attic access, a brace box spanning ceiling joists provides the most secure mounting. These adjustable braces install through the ceiling hole and lock into place without requiring attic access.
When mounting directly to a ceiling joist, use a pancake-style fan box that screws firmly to the joist. Secure the box with provided screws, ensuring it’s flush with the ceiling surface. Test stability by applying moderate upward pressure—the box must show no movement or loosening to ensure long-term safety.
Assemble Fan Motor and Mounting Components

Before climbing your ladder, spend time on the ground assembling major fan components. This approach makes installation easier and reduces time spent overhead. Hampton Bay ceiling fans typically arrive with motor assembly, hanging ball, downrod, canopy, and blade arms packaged separately.
Start by threading the downrod through the canopy, then attach the downrod to the motor housing. Hang the motor assembly on the hanging ball located at the downrod’s top end—this temporary hanging capability allows hands-free wiring. Secure the downrod to the motor housing using set screws, tightening firmly with the included hex wrench.
Next, attach blade arms to the fan motor. Each blade arm typically secures with two screws—tighten these securely as loose blades cause wobbling. Install all blade arms before proceeding, ensuring they’re oriented correctly (most have directional arrows). Many installers attach fan blades after mounting to reduce weight overhead.
Mount the Ceiling Fan Bracket Securely
The mounting bracket forms the critical connection between your home’s electrical system and the fan assembly. Proper bracket installation ensures stable, vibration-free operation.
Hold the bracket against the electrical box and align mounting holes. The bracket features a hook for temporarily hanging the fan motor during wiring. Secure the bracket using provided screws, ensuring they thread firmly into the fan-rated electrical box. Use a level to confirm the bracket is perfectly horizontal—any tilt causes wobbling during operation. Tighten mounting screws progressively, alternating between them for even pressure distribution.
For angled or vaulted ceilings, use Hampton Bay’s specialized mounting kits. These allow the fan to hang straight down from sloped surfaces by tilting the bracket to match the ceiling angle—purchase the appropriate adapter before beginning installation.
Make Correct Electrical Connections
Wire connection is the most critical—and potentially dangerous—step. Take your time and double-check each connection. Hampton Bay ceiling fans with light kits typically include four wire sets: fan motor (black and white), light kit (black/blue and white), and ground connections (green/bare copper).
Strip approximately ½ inch of insulation from each wire end, being careful not to nick copper conductors. Match wires by color: black to black (fan motor hot), white to white (neutral), and green/bare copper to green/bare copper (ground). For the light kit, connect the blue fan wire to the black ceiling wire along with the black motor wire.
Hold matched wire ends parallel, twist together clockwise with needle-nose pliers, then secure with wire connectors. Twist connectors firmly and gently tug each connection to confirm security. Push connected wires into the electrical box, ensuring no bare copper is exposed. The canopy should cover the box completely when properly installed.
Install the Light Kit Properly
With the fan motor mounted and wired, installing the light kit completes your Hampton Bay ceiling fan. Most models include either integrated or detachable light fixtures.
For detachable light kits, locate the receptacle on the fan motor bottom—typically three prongs protected by a plastic cover. Remove the cover and align the light kit’s plug with the receptacle, pushing firmly until fully seated. Some models require removing a small knockout plate—consult your owner’s manual for specifics.
Secure the light kit to the motor housing using provided screws, typically installed through mounting holes on the light fixture’s rim. Install correct bulb type and wattage specified in documentation. Attach glass shades or decorative covers carefully to prevent breakage.
Attach Blades and Final Canopy
With electrical connections complete, attach fan blades to blade arms, ensuring consistent orientation for balanced operation. Most Hampton Bay fans use three attachment points per blade—align holes with arm posts and secure with provided screws.
Before raising the canopy, inspect all connections: verify blade screws are tight, wire connections secure inside the junction box, and hanging ball properly seated. Slide the canopy up the downrod and secure to the mounting bracket using provided screws. The canopy should sit flush against the ceiling with no visible gaps.
Test Operation Thoroughly
Before considering the project complete, test the fan thoroughly. Restore power at the electrical panel and test all fan speeds using pull chains or wall control. The fan should start smoothly, run without wobbling, and operate at all speeds without unusual noise.
Test the light kit separately—flickering indicates loose wire connections requiring attention. Check all pull chains for proper length and operation. Listen for concerning sounds—clicking, grinding, or rattling may indicate loose components. Watch for excessive wobble, which can result from uneven blade mounting.
Fix Common Installation Problems
Wobbling or shaking typically results from uneven blade mounting. Turn off the fan and check that all blades are installed at the same height. Use a ruler to measure distance from blade tip to ceiling—variations indicate alignment problems. Loosen blade screws, adjust position, and retighten.
Light kit not functioning usually indicates wiring issues. Verify bulbs work in another fixture. Check that the light kit plug is fully seated in the motor receptacle. If the light flickers, turn off power and verify all wire connections are secure.
Fan not starting requires systematic electrical diagnosis. Confirm the wall switch is “on” and the breaker hasn’t tripped. Check wire connections for security, particularly black and white wires carrying power to the motor.
Maintain Your Fan for Longevity
Proper maintenance extends your ceiling fan’s lifespan. Periodically dust blades and motor housing using a clean, dry cloth—built-up dust affects balance. Check blade screws and mounting hardware annually, tightening any loosened by vibration.
Listen for unusual sounds during operation, which may indicate developing mechanical issues. Modern Hampton Bay fans typically use sealed bearings that don’t require oiling—if your model has oil ports, use only lightweight household oil sparingly. For fans with light kits, replace bulbs promptly with the correct type and wattage to prevent electrical strain.
Your newly installed Hampton Bay ceiling fan with light enhances comfort, energy efficiency, and aesthetic appeal. By prioritizing safety, preparing thoroughly, and taking time with each step, you’ve achieved professional-quality results. This fan will provide years of reliable service, keeping your space comfortable while adding visual interest to any room—enjoy the immediate benefits of your successful installation!
Leave a Reply