A wobbling ceiling fan that barely moves air or an outdated light fixture wasting energy can make your living space uncomfortable and expensive to maintain. Knowing how to put ceiling fan correctly transforms your home’s comfort while potentially reducing cooling costs by up to 40% during warmer months. Proper installation ensures your fan operates safely, quietly, and efficiently for years to come—without dangerous wobbling or electrical hazards.
Before you reach for your tools, recognize that installing a ceiling fan involves working with electricity at heights, requiring both safety awareness and systematic execution. Many homeowners attempt this project only to discover they’ve mounted their fan on an inadequate electrical box or made improper wire connections that create fire risks. This guide eliminates those pitfalls by walking you through each critical step with precise instructions that match manufacturer requirements and electrical code standards.
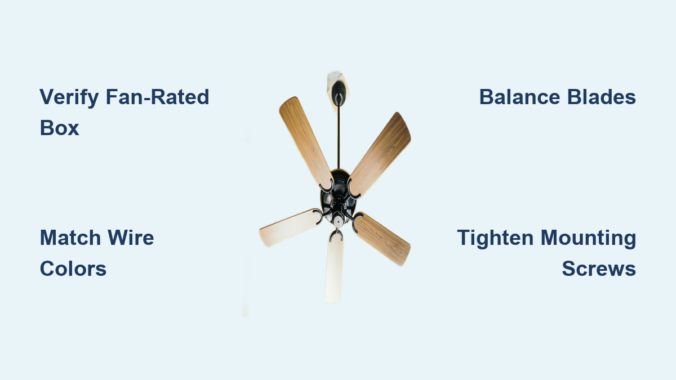
Select Your Ceiling Fan and Verify Compatibility
Choosing the right ceiling fan prevents costly mistakes during installation. Measure your room dimensions first—small rooms under 75 square feet need fans with 29-36 inch blades, while larger spaces require 50-54 inch models for proper air circulation. Check ceiling height: standard 8-9 foot ceilings work with flush-mount or “hugger” fans, while vaulted or high ceilings need downrods of appropriate length to position the fan blades 8-9 feet above the floor.
Confirm your electrical box is rated for ceiling fan support before purchasing your fan. Standard light fixture boxes support up to 50 pounds statically, but ceiling fans create dynamic loads during operation that require special “fan-rated” boxes. When you learn how to put ceiling fan safely, you’ll discover these boxes have reinforced mounting brackets and secure attachment points to ceiling joists that prevent dangerous detachment.
What Fan Features Matter Most for Installation?
The remote control versus wall switch decision affects your wiring setup. Fans with remote controls typically connect directly to power without requiring a wall switch loop, while standard fans need proper switch wiring. If replacing a light fixture, verify your existing wiring includes a neutral wire (white) and ground wire—older installations sometimes lack proper grounding that creates safety hazards.
Light kit compatibility is another crucial consideration. Some fans require specific light kits that attach during installation, while others offer universal mounting. Check whether your chosen model needs additional wiring for the light fixture or if it uses a separate pull chain—this affects how many wires you’ll connect during installation.
Prepare Your Workspace and Safety Equipment
Working at heights with electrical components demands serious safety preparation. Set up two sturdy ladders or scaffolding that positions you comfortably at ceiling height without overreaching—never stand on chairs or unstable surfaces. Wear safety glasses to protect against falling debris when removing old fixtures, and use non-contact voltage testers to double-check that power is truly off before touching any wires.
Essential Safety Checks Before Starting
Test your electrical panel labeling by turning off the suspected circuit breaker, then attempting to operate the room’s light switches. If lights still work, you’ve turned off the wrong breaker—a potentially deadly mistake. Verify complete power shutdown using a reliable voltage tester at the fixture location. Place warning tape around your work area and inform household members you’re working with electricity to prevent accidental breaker restoration.
Mount the Electrical Support Box Properly
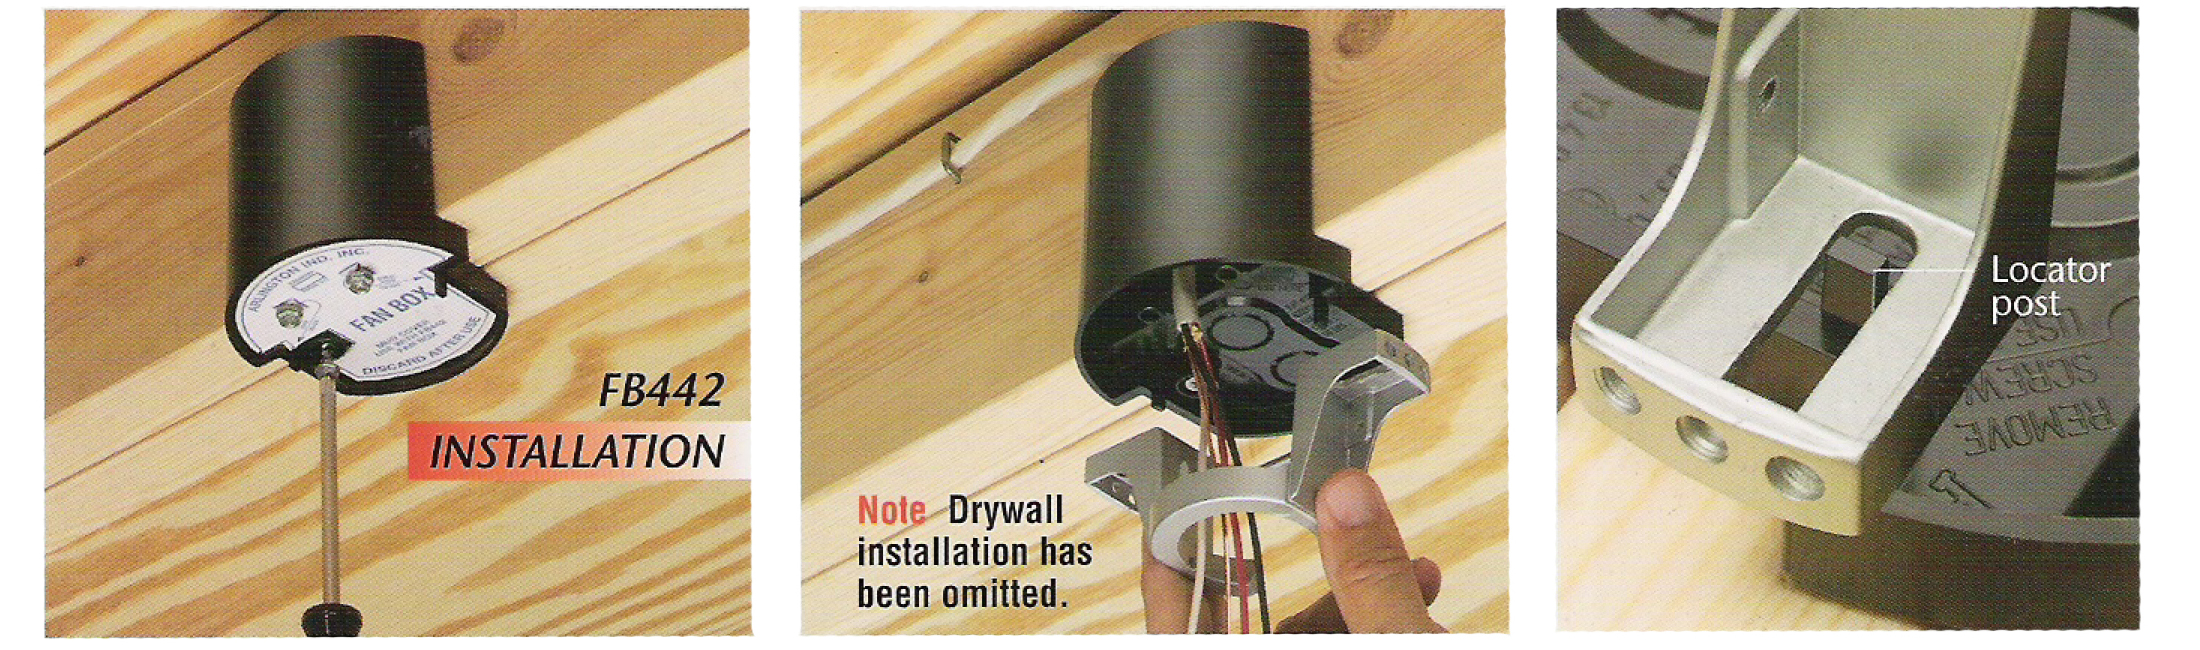
The electrical box serves as your fan’s foundation, and improper installation causes 70% of ceiling fan failures. For new construction where you can access the ceiling from above, secure a fan-rated metal or plastic box directly to a ceiling joist using 2-inch wood screws—not drywall anchors, which cannot support dynamic fan loads. Position the box so its front edge aligns with the ceiling surface after drywall installation.
Installing Support for Existing Ceilings
Existing drywall installations require special “old work” fan-rated boxes with adjustable support arms. Cut a precise hole matching the box dimensions, then feed the box through the opening. Tighten the mounting screws to expand the support arms against the back of the drywall, creating a secure anchor point that distributes weight across multiple drywall sections. Never attempt to mount a ceiling fan on a standard light fixture box—the vibration will eventually pull it loose from the ceiling.
Connect Wires Using Code-Compliant Methods
With power confirmed off and your support box installed, it’s time to connect wiring correctly. Match wire colors: black (hot) to black, white (neutral) to white, and green or bare copper (ground) to ground. Some fans include blue wires for light kits that connect to the black hot wire if using a single switch, or to a red wire if you have separate fan and light controls.
Critical Wiring Mistakes to Avoid
Never rely solely on wire nuts without additional strain relief—the weight of the fan can pull connections apart over time. Wrap connections with electrical tape after securing wire nuts to prevent accidental disconnection. Ensure no bare copper shows outside wire connectors, and organize wires neatly in the box without cramming, which creates overheating risks. Before securing the canopy, gently tug each connection to verify it won’t pull apart when mounting the fan.
Balance Blades for Silent, Smooth Operation
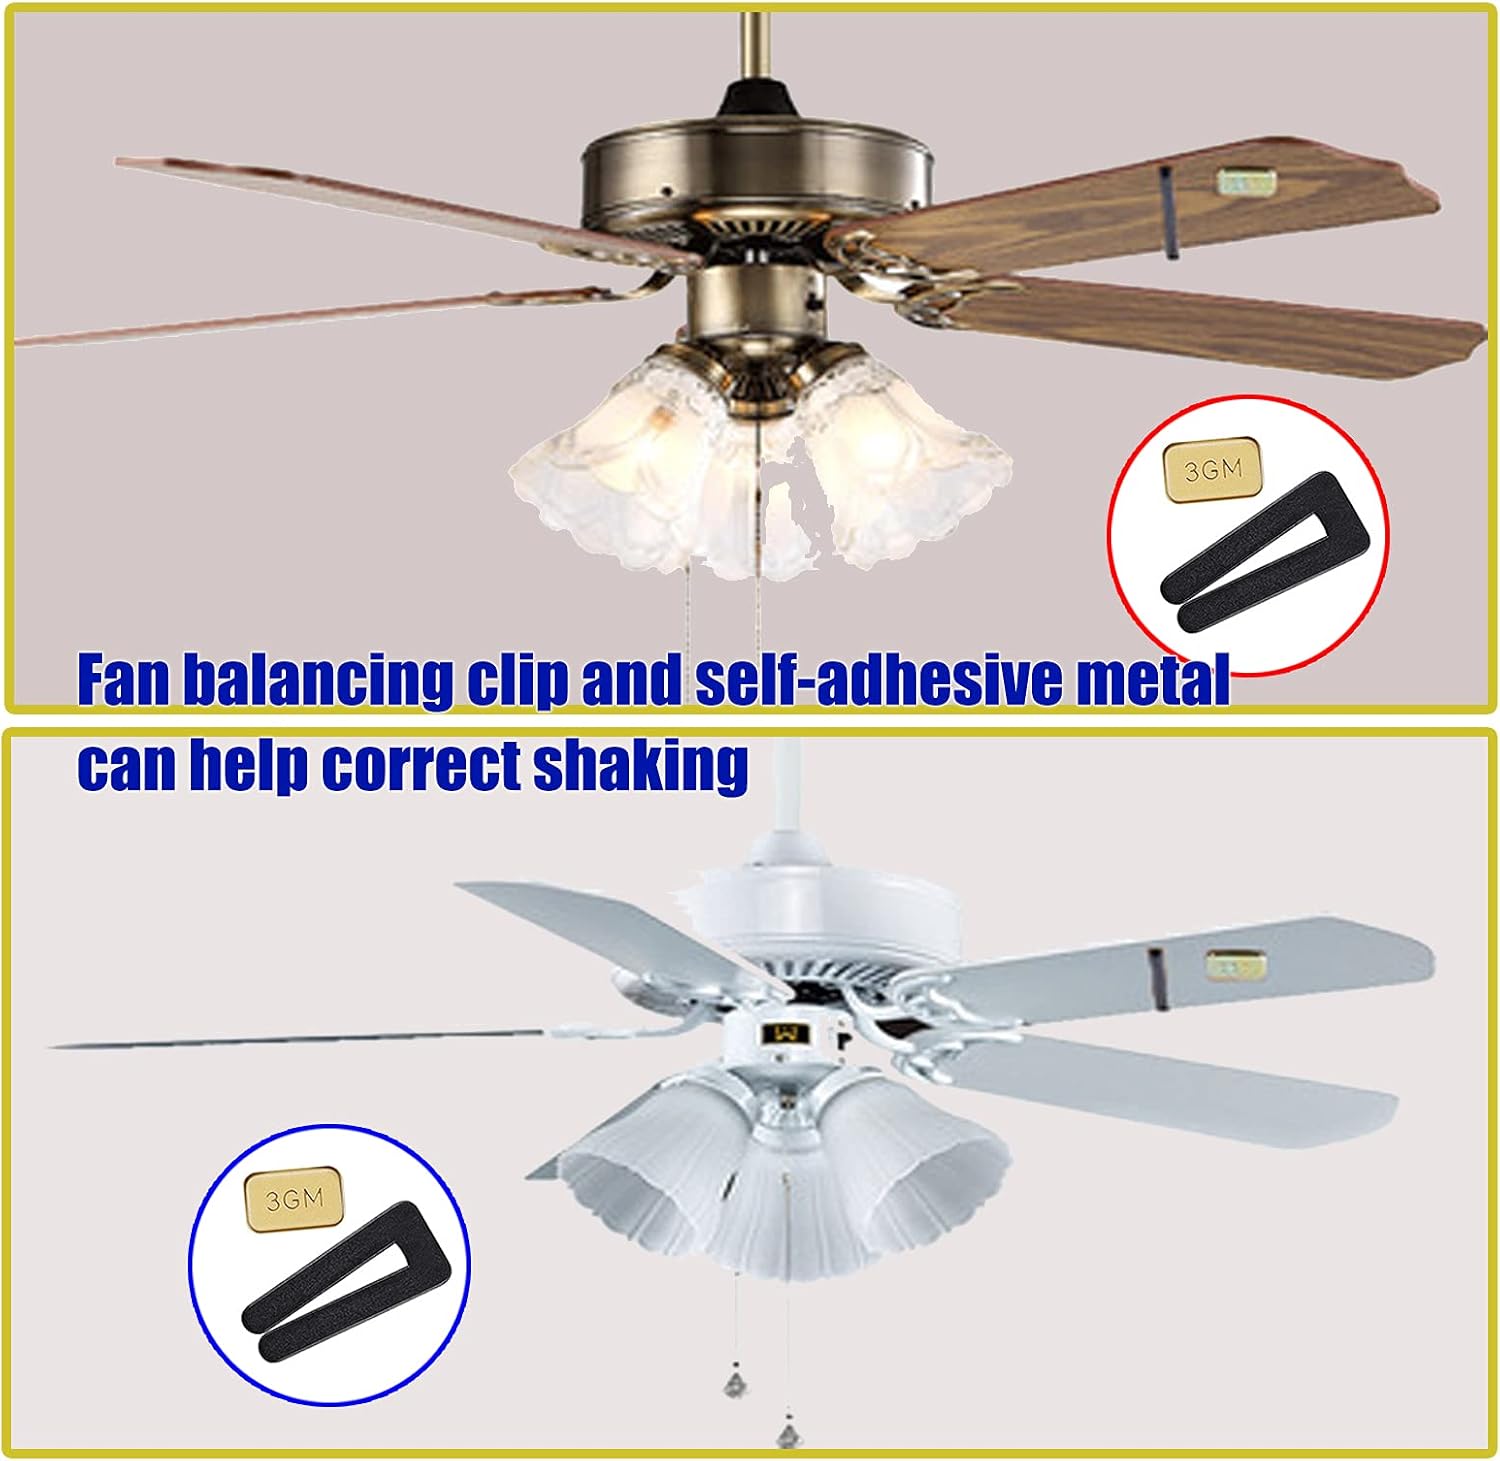
After mounting your fan and attaching blades, test for balance before regular use. Start the fan on low speed and observe blade movement—excessive wobbling indicates uneven blade alignment or loose components. Turn off the fan and check that all blade screws are tightened to the same torque using a small wrench rather than just a screwdriver.
Quick Balance Test Method
Attach a blade balancing clip (included with most fans) to the leading edge of one blade and run the fan again. If wobbling decreases, move the clip around that blade to find the optimal position. If wobbling increases, try the clip on the opposite blade—this identifies which blade needs adjustment. Properly balanced blades not only reduce noise but also extend motor life by minimizing unnecessary vibration stress.
Troubleshoot Common Post-Installation Problems
Even perfect installations sometimes develop issues that require quick fixes. A fan that runs but makes clicking sounds likely has a loose blade screw or canopy component—tighten all visible hardware before operating further. If your fan won’t start but the light works, check that the pull chain switch hasn’t become disconnected inside the motor housing.
Immediate Action for Dangerous Symptoms
Shut off the fan immediately if you notice burning smells, excessive heat from the motor housing, or sparks at any connection point. These indicate serious electrical problems requiring professional inspection before further use. Persistent wobbling that worsens over time suggests mounting hardware has loosened—a potentially dangerous situation that requires complete disassembly and reinstallation with proper torque on all mounting components.
Establish a Simple Maintenance Routine
Your ceiling fan will deliver years of reliable service with minimal maintenance. Every three months, check mounting screws for tightness—vibration gradually loosens even properly installed hardware. Clean blades monthly with a microfiber cloth to prevent dust buildup that throws blades out of balance and reduces airflow efficiency.
Seasonal Adjustments for Maximum Efficiency
Reverse your fan’s direction seasonally using the small switch on the motor housing—counterclockwise in summer for cooling breeze, clockwise in winter to redistribute warm air trapped at the ceiling. This simple adjustment, performed when you learn how to put ceiling fan settings to work for you, can reduce HVAC costs by up to 15% year-round.
Installing a ceiling fan properly transforms your home’s comfort while avoiding dangerous mistakes that compromise safety. By verifying electrical support, making secure wire connections, and balancing blades correctly, you ensure years of quiet, efficient operation. The initial investment of careful installation pays dividends through lower energy bills and improved air circulation that enhances every room’s livability. When you master how to put ceiling fan installations done right, you gain both immediate satisfaction and long-term home value that standard light fixtures simply can’t match.
Leave a Reply