Dust accumulation on your ceiling fan light cover isn’t just unsightly—it can reduce light output by up to 30% over time. Whether you need to replace a burnt-out bulb, clean years of grime, or upgrade to a new fixture, knowing how to safely remove your ceiling fan’s glass cover is essential household knowledge. Many homeowners attempt this simple task only to end up with cracked glass, stripped screws, or even minor electrical shocks because they didn’t understand their specific cover type. Most ceiling fan light covers fall into three distinct mounting categories—screw-mounted, twist-lock, or clip-on designs—and using the wrong removal technique for your particular model is the primary cause of damage.
This guide provides precise, step-by-step instructions for identifying your glass cover type and removing it safely without damage. You’ll learn professional techniques for tackling stubborn covers, avoiding common pitfalls, and completing the entire process in under 15 minutes. Whether you’re a first-time homeowner or an experienced DIYer, these proven methods will help you maintain your lighting fixtures properly while preventing costly repairs or replacements.
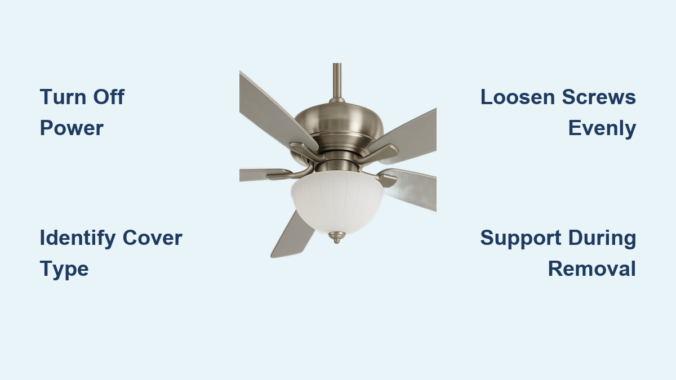
Essential Safety Steps Before Starting
Before you even consider touching that glass cover, you must eliminate the risk of electrical shock by turning off power at the circuit breaker—not just the wall switch. Many homeowners mistakenly believe switching off the light at the wall is sufficient, but ceiling fans often have separate circuits for the fan and light, and some installations may have wiring errors. Locate your home’s electrical panel and flip the breaker controlling the ceiling fan to the OFF position. This single step prevents potentially fatal accidents during your repair.
After switching off the breaker, verify power is actually disconnected by attempting to turn on the fan light using both the wall switch and any remote control. If the light doesn’t illuminate, you’ve confirmed the circuit is safe. For absolute certainty, use a non-contact voltage tester near the fixture—this inexpensive tool beeps when electrical current is detected, providing an extra layer of safety confirmation.
Position a sturdy, preferably A-frame ladder on a level surface directly beneath the fixture, ensuring all feet make solid contact with the floor. Never stand on the top two rungs or overextend your reach—move the ladder instead. Have a helper nearby to stabilize the ladder and catch any falling tools or glass. Wear safety glasses to protect your eyes from dust and glass particles, and consider work gloves for better grip on slippery glass surfaces. These precautions take only minutes but prevent most ceiling fan light accidents.
Identify Your Glass Cover Type

Take a moment to examine your ceiling fan’s light fixture before attempting removal, as forcing the wrong technique can crack the glass. Most residential ceiling fan light covers use one of three attachment systems, each requiring a specific removal approach. Count the number of visible screws around the perimeter—if you see three or four small screws holding a metal ring against the glass, you have a screw-mounted cover, common on older Hampton Bay and Harbor Breeze models.
If you don’t see any visible screws but notice small knobs or slots on the inner edge of the glass, you likely have a twist-lock cover. These designs require a quarter to half-turn counterclockwise to release from the mounting ring. Modern Hunter and Emerson fans frequently use this mechanism because it allows for tool-free removal once you know the technique.
For clip-on covers, look for small metal tabs spaced evenly around the mounting ring that press against the glass rim. These covers snap into place and release with downward pressure while pressing the clips outward. You’ll often find these on newer budget-friendly fans from big-box stores. Some fixtures combine systems—like a central screw with peripheral clips—so check the entire assembly carefully before proceeding.
Remove Screw-Mounted Glass Covers

When working with screw-mounted covers, always loosen all screws partially before removing any completely. Begin by identifying all mounting screws (typically three to four) around the glass perimeter. Using the correct screwdriver size—usually a #2 Phillips—loosen each screw one full turn in a star pattern, alternating between opposite screws to maintain even pressure on the glass.
As you remove the final screws, support the glass cover with your non-dominant hand, keeping it perfectly level as you lower it. Glass covers often feel lighter than expected but can slip easily when your grip shifts. Place a soft towel in the bottom of a bucket to safely catch the glass if you lose your grip during removal.
For stubborn or stripped screws, place a wide rubber band over the screw head before inserting your screwdriver—this creates additional friction for better grip. If the screw remains stuck, apply a few drops of penetrating oil and wait five minutes before trying again. Never use excessive force with a screwdriver, as this often damages the screw head further and may crack the surrounding glass mounting ring.
Remove Twist-Lock Glass Covers
Twist-lock covers require precise rotational movement to disengage properly. Stand directly beneath the fixture for optimal leverage and place one palm flat against the glass for stability. With your other hand, grip the cover’s edge firmly and rotate counterclockwise—most designs require a quarter to half-turn before releasing.
If the cover doesn’t move after gentle pressure, check for a central decorative finial that must be removed first. Many twist-lock designs hide a small screw beneath a center cap that secures the entire assembly. Use a flathead screwdriver to gently pry off the finial cap before attempting rotation.
For covers that have been installed for years, accumulated dust may create resistance. Warm the glass edge with a hair dryer on low heat for 30 seconds to expand the metal mounting ring slightly, then try rotation again. Always support the cover with both hands as it releases—you’ll feel it drop slightly when the locking mechanism disengages.
Remove Clip-On Glass Covers
Clip-on covers require simultaneous downward pressure and outward clip manipulation. Position your ladder so you can comfortably reach all sides of the fixture. Place one hand beneath the glass to support its weight, then use your fingertips to press each metal clip outward while lowering the cover.
Work methodically around the cover, releasing each clip incrementally rather than forcing one completely free. Most fixtures have four clips at 3, 6, 9, and 12 o’clock positions, but some use three or five. If clips resist movement, wrap a flathead screwdriver in a microfiber cloth and gently pry each clip away from the glass edge.
Some clip-on designs actually require you to push the glass upward slightly before it releases—this counterintuitive technique relieves tension on the spring mechanism. If you hear a faint “click” when pressing upward, you’ve found the correct release method for your specific fixture.
Troubleshoot Common Removal Problems

Stripped screws represent the most frequent challenge with screw-mounted covers. When standard techniques fail, try a screw extractor kit—these small, reverse-threaded bits grab onto damaged screw heads. Alternatively, clamp locking pliers onto the screw head for increased torque, but protect the surrounding fixture with masking tape to prevent scratches.
For twist-lock covers that won’t budge despite proper rotation, check if paint overspray has fused the glass to the mounting ring. Carefully run an X-Acto knife around the seam to break the seal before attempting rotation again. Use minimal pressure to avoid scratching the glass surface.
When clip-on covers seem impossible to release, examine whether a central mounting screw exists beneath decorative elements. Many homeowners waste time struggling with clips only to discover a single screw holds the entire assembly together. Remove this central screw first, then the clips will release with minimal effort.
Reinstall the Glass Cover Correctly
Proper reinstallation prevents future problems and ensures safety. For screw-mounted covers, thread all screws by hand first to avoid cross-threading, then tighten gradually in a star pattern. Stop tightening when the cover feels snug—overtightening by just a quarter-turn can create stress fractures that cause the glass to shatter weeks later when exposed to heat from light bulbs.
Twist-lock covers require precise alignment during reinstallation. Hold the cover above the mounting ring and orient the slots to match the fixture’s pins. Press upward firmly while rotating clockwise until you feel definite resistance, then give the cover a gentle downward tug to confirm it’s locked securely.
Clip-on covers need special attention to ensure all clips engage properly. Start with the bottom clip (6 o’clock position), pressing the glass firmly against the mounting ring until you hear a distinct click. Work your way around the cover, checking each clip by gently pushing upward from below—any movement indicates incomplete engagement that could cause the cover to fall later.
Final Maintenance Tips
Establish a quarterly cleaning schedule to prevent excessive buildup that complicates future removal. When reinstalling the cover, apply a tiny amount of silicone-based lubricant to metal contact points—this prevents corrosion and makes next time’s removal significantly easier. Avoid petroleum-based products that can degrade plastic components over time.
During each cleaning session, inspect light bulbs for darkening at the base—a sign they’re nearing end-of-life. Replace bulbs in pairs to maintain consistent light color temperature, as bulbs gradually shift color as they age. Keep replacement glass covers on hand by noting your fan’s model number during this maintenance—most manufacturers list it on a sticker inside the mounting canopy.
If you encounter persistent problems with your ceiling fan light fixture, consult the manufacturer’s website for exploded diagrams of your specific model. Many companies provide free downloadable manuals that show exact cover attachment mechanisms, saving you from unnecessary guesswork during future maintenance.
Leave a Reply