That persistent wobble in your ceiling fan isn’t just irritating—it’s a sign something needs attention before minor vibration becomes major damage. When your fan shakes noticeably, it strains motor bearings, loosens mounting hardware, and can even damage your ceiling structure over time. Learning how to stop a ceiling fan from shaking properly addresses the root cause rather than just masking symptoms. This guide provides actionable steps to diagnose and eliminate fan vibration, restoring quiet operation and extending your fan’s lifespan without unnecessary repairs or replacement.
Diagnose Your Specific Fan Shaking Problem

Identifying why your ceiling fan wobbles determines whether you need a five-minute fix or professional assistance. Most vibration issues stem from one of four common problems, each requiring different solutions.
Loose or Uneven Fan Blades Cause Most Shaking Issues
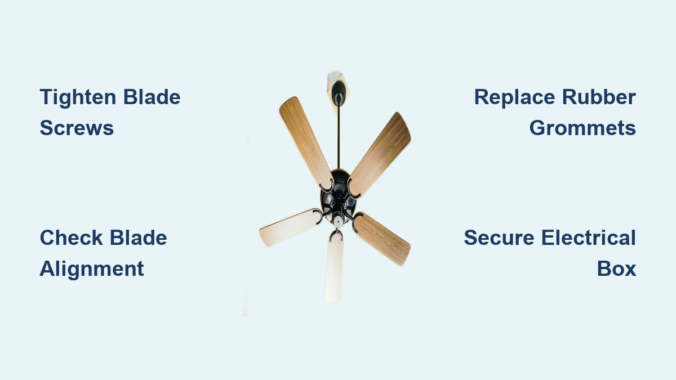
Loose blade screws represent the single most frequent culprit behind ceiling fan vibration. As your fan operates daily, constant movement gradually loosens the hardware connecting blades to arms. Even a slight difference in tightness between blades creates imbalance that worsens at higher speeds. Before attempting complex solutions, systematically tighten every screw connecting blades to arms and arms to the motor hub. Use a screwdriver to snug each connection without overtightening—stripped screws create more serious problems. This simple step resolves approximately sixty percent of ceiling fan shaking complaints immediately.
Check for Warped Blades or Incorrect Blade Pitch
Each blade must maintain identical pitch—the angle at which it cuts through air—to prevent vibration. Impact from cleaning tools, accidental bumps, or moisture exposure can warp blades enough to disrupt balance. To check for warping, sight along each blade’s edge against a straight reference like a door frame. Any visible curve or twist means that blade transfers uneven force during rotation. Similarly, blades with inconsistent pitch create asymmetric airflow patterns that directly cause shaking. This problem requires blade replacement rather than adjustment, as modifying blade pitch risks structural failure.
Inspect Motor Mount and Canopy Stability
Rubber grommets between the motor housing and mounting bracket absorb vibration during operation. Over time, these components harden, crack, or fall out completely, allowing motor vibration to transfer directly to your ceiling. A loose canopy—the dome covering electrical connections—also rattles audibly when mounting screws loosen from building settling or improper installation. Gently push against the stationary fan assembly; any movement beyond minimal play indicates mounting hardware needs tightening throughout the entire support structure.
Verify Electrical Box and Mounting Bracket Integrity
Violent shaking at high speeds often indicates inadequate electrical box support. Standard electrical boxes can’t handle the dynamic weight and vibration of ceiling fans—only fan-rated boxes meet this demand. If your fan shakes regardless of blade condition, the mounting bracket might be misaligned or the electrical box improperly secured to ceiling joists. Visible movement in the ceiling fixture or developing cracks around the installation point confirm this serious issue. Addressing box-related problems requires electrical work and should be handled by a licensed professional.
Execute Precision Blade Balancing Techniques
When loose hardware isn’t the culprit, blade balancing corrects weight distribution issues causing vibration. This methodical process eliminates wobble without replacement parts when performed correctly.
Tighten All Critical Connection Points Systematically
Begin by tightening every mounting point in sequence: blade-to-arm connections first, then arm-to-hub connections. Work clockwise around the fan to maintain consistent tension. Use a screwdriver rather than power tools to avoid stripping screws in wood components. Check that blade arms sit flush against the motor hub—any gap indicates warped arms requiring replacement. This comprehensive tightening addresses subtle imbalances invisible during casual inspection.
Perform Accurate Blade Alignment Checks
With power off, hold a level or straightedge perpendicular to the ceiling near each blade tip. Measure the gap between tip and reference point—variation exceeding 1/8 inch requires adjustment. Alternatively, mark the lowest-hanging blade with tape after brief operation, then compare its position to others when stationary. Uneven blades create centrifugal force imbalances that directly cause shaking. Correct alignment ensures each blade travels through identical air resistance during rotation.
Apply Targeted Balancing Weights When Needed
If vibration persists after alignment, use balancing clips to counteract residual imbalance. Start with one clip midway along a blade, then test at medium speed. Move the clip toward tip or hub until vibration minimizes, then add additional clips as needed. Most fans require only one or two weights totaling 5-10 grams. Once positioned correctly, permanently attach weights with adhesive backing from your balancing kit. This precise correction addresses microscopic weight variations impossible to detect visually.
Secure Critical Mounting Components Thoroughly

When blade balancing fails, mounting hardware requires systematic attention to eliminate vibration transfer points throughout the support structure.
Reinforce Canopy and Bracket Connections
Remove the canopy by loosening mounting screws, then clean any paint or debris from contact surfaces before reinstallation. Ensure the mounting bracket sits completely flush against the ceiling—any gap allows movement that amplifies vibration. Tighten bracket screws incrementally in a star pattern rather than sequentially to distribute pressure evenly. Check that canopy screws engage fully with mounting bracket threads; stripped holes require longer screws or repair anchors.
Replace Degraded Vibration Dampening Components
Access motor housing connections by removing the lower canopy cover. Inspect each rubber grommet for cracks, hardening, or complete deterioration. Replace compromised components with manufacturer-specified parts—generic rubber won’t provide adequate vibration isolation. Pay special attention to the central mounting bolt’s washer system, which often contains multiple dampening layers that degrade independently. Properly functioning dampeners absorb 70-80% of motor vibration before it reaches your ceiling.
Confirm Electrical Box Compatibility and Security
Gently shake the stationary fan assembly—if movement exceeds 1/4 inch, your electrical box likely isn’t fan-rated. Fan-rated boxes feature reinforced mounting brackets that secure directly to ceiling joists. Replacement requires turning off power at the circuit breaker and temporarily removing the fan. If you’re uncomfortable working with electrical connections, hire a licensed electrician. Proper box installation eliminates the most severe vibration issues that blade balancing can’t resolve.
Implement Preventative Maintenance to Avoid Future Shaking
Regular care prevents most ceiling fan vibration issues before they develop into serious problems requiring component replacement.
Establish Quarterly Inspection Routine
Every three months, power off your fan and check blade screw tightness by gently attempting to wiggle each blade. Examine the canopy for gaps indicating loosened mounting hardware. Listen for new operational sounds that might indicate developing bearing wear. This five-minute inspection catches developing issues when they’re still simple fixes, preventing 90% of serious vibration problems.
Schedule Seasonal Deep Cleaning Sessions
Dust accumulation creates subtle weight imbalances that develop into noticeable shaking over weeks of operation. Clean each blade thoroughly using a microfiber cloth dampened with water, focusing on the leading edge where dust concentrates. Allow blades to dry completely before operation—moisture weight affects balance temporarily. Fans in kitchens require monthly cleaning to prevent grease buildup that significantly alters blade weight distribution.
Know When to Call Professional Help
If your ceiling fan continues shaking after attempting all troubleshooting steps, professional assessment identifies hidden problems. Licensed technicians diagnose bearing wear, motor winding issues, and structural mounting problems requiring specialized tools. Professional intervention ensures repairs meet electrical codes and maintain your home’s safety standards, particularly important when electrical box replacement is needed.
Final Note: Stopping ceiling fan shaking requires methodical troubleshooting starting with blade alignment and progressing through mounting integrity checks. Most vibration issues resolve with simple hardware tightening and balancing techniques that take less than thirty minutes. Regular quarterly maintenance prevents the gradual loosening that causes most shaking problems, while professional assessment handles complex issues beyond DIY capabilities. A properly balanced ceiling fan operates silently and efficiently for years, providing comfortable cooling without the annoyance of disruptive vibration. Address shaking promptly to protect your investment and maintain a peaceful home environment.
Leave a Reply