You’ve decided it’s time to replace that outdated ceiling fan that’s been hanging in your dining room for years. Maybe it’s making strange noises, the pull chains are broken, or you’re simply updating your home decor. Whatever your reason, taking down an old ceiling fan requires careful attention to electrical safety and proper handling techniques. Without proper precautions, you risk electrical shock, falling from your ladder, or damaging your ceiling. This guide walks you through each critical step to safely remove your existing ceiling fan while protecting yourself, your home, and preserving wiring for your new installation. You’ll learn the essential safety checks, tools needed, and systematic approach that prevents common mistakes homeowners make when tackling this project.
Essential Safety Preparations Before Touching Your Ceiling Fan
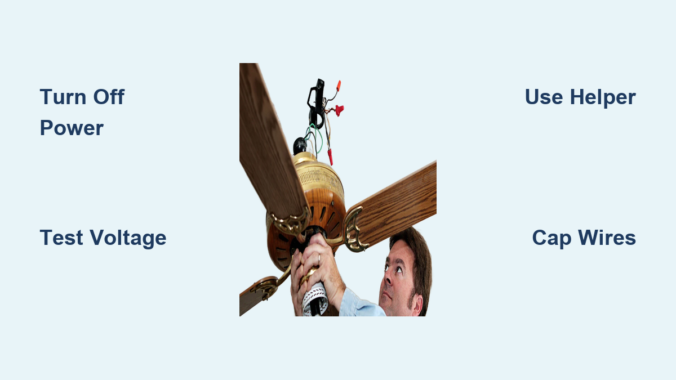
Before you even bring out a ladder, proper electrical safety must be your top priority. Working with ceiling fixtures involves potentially lethal electrical currents, so cutting power at the source is non-negotiable. Head directly to your main electrical panel and locate the circuit breaker that controls your ceiling fan—don’t rely on just flipping the wall switch. Once you’ve turned off the correct breaker, use a non-contact voltage tester to confirm power is completely disconnected at the fan housing. Test both the wall switch and the fan wires themselves to be absolutely certain. Many homeowners skip this verification step and assume the breaker is correctly labeled, but mislabeled circuits are surprisingly common and could result in serious injury.
What Safety Gear You Absolutely Need
Skip the bare-handed approach—proper protection separates a successful project from a hospital visit. You’ll need:
– Non-contact voltage tester (tested on a known live circuit first to verify it works)
– Rubber-soled shoes for insulation from ground
– Safety glasses to protect eyes from falling debris
– Work gloves to prevent cuts from sharp metal edges
– Sturdy step ladder rated for your weight plus tools (never use a chair)
Without these basic safety items, you’re taking unnecessary risks with electricity and working at height. The few dollars spent on proper equipment could prevent thousands in medical bills or home damage.
Why You Should Never Skip the Double-Check Power Test
That quick beep from your voltage tester could save your life. After turning off the breaker, operate the wall switch to ensure it’s not sending power, then test inside the fan canopy where wires connect. Many older installations have complex wiring setups where multiple circuits might feed into the same junction box. I’ve seen cases where homeowners turned off what they thought was the right breaker, only to discover the light kit was on a separate circuit. If your tester indicates any voltage presence, stop immediately and consult a professional electrician—don’t proceed until you’ve confirmed complete power disconnection.
Proper Tools and Equipment for Ceiling Fan Removal

Must-Have Tools Checklist
Attempting fan removal with improper tools leads to stripped screws, damaged wiring, and unnecessary frustration. Gather these essentials before you begin:
– Insulated screwdrivers (both flathead and Phillips)
– Wire cutters/strippers for any necessary wire adjustments
– Wire nuts (various sizes for safe wire separation)
– Flashlight or headlamp for clear visibility in the junction box
– Drop cloth to protect floors from debris
– Helper (ceiling fans are heavy and awkward to manage alone)
The right tools make the difference between a smooth 20-minute removal and a dangerous, drawn-out struggle that could damage your ceiling.
Why You Need a Helper for Safe Removal
Ceiling fans typically weigh between 15-50 pounds, making them too heavy to safely support while disconnecting wiring. That decorative pull chain suddenly becomes much less charming when you’re struggling to hold 30 pounds of metal with one hand while trying to unscrew wire nuts with the other. Have someone stand ready to support the fan’s weight as soon as you loosen the mounting bracket—this prevents sudden drops that could damage your ceiling, injure you, or cause electrical shorts. Professional electricians never work alone on ceiling fixtures for this exact reason.
Step-by-Step Ceiling Fan Removal Process
Removing the Fan Blades and Light Components First
Start by taking down the most accessible parts before tackling the heavy motor housing. Remove all fan blades by unscrewing their mounting hardware—usually 3-5 screws per blade. Keep each blade’s screws organized in separate bags labeled for their position to simplify reinstallation if you’re just replacing the fan. Next, remove any light fixtures, glass covers, or decorative elements. This staged approach reduces the fan’s overall weight significantly before you handle the main motor housing.
Disconnecting Wiring Safely and Correctly
With power confirmed OFF and your helper supporting the fan housing, carefully remove the canopy cover to access the wiring junction. Take a photo of the current wiring configuration before disconnecting anything—this visual reference prevents mistakes when installing your new fan. Typically, you’ll find black (hot), white (neutral), and green or bare copper (ground) wires connected with wire nuts. Unscrew each wire nut carefully, separate the wires, and immediately cap each house wire with its own wire nut for safety. Never leave exposed wires hanging—even with the breaker off, mistakes happen.
Removing the Mounting Bracket and Final Components
Once wiring is safely capped, focus on the mounting hardware that secures the fan to your electrical box. Most older fans use a mounting bracket secured with two 1/4-inch lag bolts or screws. With your helper firmly supporting the fan’s weight, slowly loosen and remove these mounting screws. As the fan comes free, your helper should lower it gently to the ground. Finally, remove the mounting bracket from the electrical box, being careful not to damage the box itself if you plan to install a new fan in the same location.
Common Mistakes to Avoid During Ceiling Fan Removal

Assuming Your Electrical Box Can Support a New Fan
Many older homes have standard light fixture boxes that cannot safely support ceiling fan weight. Before removing your old fan, verify your electrical box is rated for fan installation—look for “Acceptable for Fan Support” stamped on the box or check for metal cross braces. If you have a standard plastic box not designed for fans, you’ll need to install a proper fan-rated retrofit brace before installing any new fan, or you risk the entire fixture crashing down.
Forgetting to Label Wires for Reinstallation
That tangle of wires might seem obvious now, but when you’re installing your new fan tomorrow, will you remember which wire went where? Before disconnecting anything, label each wire with masking tape indicating its function (black/hot, white/neutral, etc.). Better yet, take multiple clear photos from different angles. This simple step prevents dangerous wiring mistakes during reinstallation that could cause short circuits or fire hazards.
Post-Removal Safety and Next Steps
Properly Securing Exposed Wiring After Removal
Never leave disconnected house wires exposed in your ceiling—even temporarily. After removing your fan, ensure all individual house wires are capped with wire nuts and securely tucked back into the electrical box. Fold them carefully to avoid pinching and double-check that no copper is visible outside the wire nuts. This prevents accidental contact if someone mistakenly turns the breaker back on while the fan is removed.
Evaluating Your Electrical Box for Future Installation
With the fan removed, inspect your ceiling electrical box closely. Fan-rated boxes have special mounting features and are secured directly to ceiling joists. If you have a standard light fixture box, you’ll need to install a fan-rated retrofit brace before installing any new ceiling fan. These braces expand inside your ceiling to attach securely to joists, providing the necessary support for fan weight and movement. Skipping this critical step risks your new fan becoming loose and potentially falling.
Safe Disposal Options for Your Old Ceiling Fan
Don’t just toss your old fan in the trash—many components can be recycled or repurposed. Metal parts like the motor housing and blades often qualify for scrap metal recycling. Some hardware stores accept old fans for proper disposal, and certain charities might accept working fans for reuse. If the fan still functions, consider listing it on community marketplaces—someone might want it for a renovation project or as replacement parts.
When to Call a Professional Electrician Instead

While removing a ceiling fan seems straightforward, certain situations demand professional help. If you discover aluminum wiring in your home (common in 1960s-70s construction), don’t attempt fan removal yourself—aluminum requires special handling to prevent fire hazards. Similarly, if your electrical box shows signs of damage, overheating (discoloration), or isn’t properly secured to a joist, stop immediately. Older homes sometimes have outdated wiring systems that don’t meet current electrical codes, and tampering without proper knowledge could create serious safety risks. When in doubt, spend the $75 for a professional consultation rather than risking thousands in property damage or personal injury.
Removing an old ceiling fan properly protects your home’s electrical system for future installations. By following these safety-focused steps, you’ve not only cleared the way for your new fixture but also ensured your ceiling wiring remains in safe, code-compliant condition. Before installing anything new, double-check that your electrical box can support a fan’s weight and movement—this single verification prevents the most common cause of ceiling fan failures. With your old fan safely removed and wiring properly secured, you’re ready to either install your replacement or call in a professional for the next phase of your project. Remember, when it comes to electricity, taking extra time for safety always pays off in the long run.
Leave a Reply