Your Hunter ceiling fan suddenly stops working, and you need to identify which part has failed. Without a proper Hunter ceiling fan parts diagram, finding the right replacement component can feel like searching for a needle in a haystack. Understanding the specific terminology Hunter uses for each component transforms confusing repairs into straightforward fixes, saving you time, money, and frustration. This comprehensive guide breaks down every major part in your Hunter fan using the manufacturer’s standardized terminology, making it simple to identify exactly what you need for repairs or maintenance.
Whether you’re troubleshooting a wobbly fan, replacing a failed capacitor, or simply want to understand your ceiling fan’s anatomy before attempting a DIY project, this detailed parts reference covers every system from the motor assembly at the core to the decorative glassware that completes your installation. Hunter Fan Company uses consistent naming conventions across their product line, creating a reliable parts ecosystem that spans their entire range of ceiling fans.
With this Hunter ceiling fan parts diagram reference in hand, you’ll confidently diagnose issues, order correct replacement components, and perform maintenance with professional-level accuracy. No more guessing whether you need a blade iron or a blade medallion—this guide shows you exactly what each component looks like and explains its specific function within the fan system.
Hunter Motor Assembly Breakdown: Housing, Bearings & Cooling

The motor assembly serves as the heart of your Hunter ceiling fan, containing multiple internal components that convert electrical energy into rotational motion. Understanding this core assembly helps you diagnose performance issues and determine whether professional service or a complete motor replacement is necessary when problems arise.
Motor Housing Structure and Sealed Design
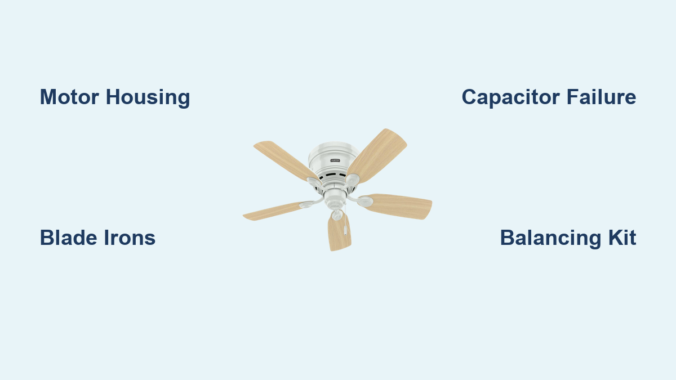
The motor housing, also called the fan housing, acts as the decorative ceiling fan motor cover that encases all critical internal components including the armature, bearings, windings, rotor, stator, and shaft. It’s crucial to know that most Hunter motor housings cannot be opened without voiding your warranty due to their sealed design, which protects internal mechanisms from dust contamination while maintaining proper bearing lubrication.
The motor adapter performs the specific function of attaching the downrod to the motor housing at the top of the motor, creating a secure connection point between the suspension assembly and the rotational components. This adapter must maintain structural integrity to prevent detachment during operation, as it bears the entire weight of the fan assembly.
Critical Bearing Components and Lifespan
Hunter implements sealed ball bearings that prevent lubrication escape while blocking contaminants from entering the bearing chamber. These self-lucrated cylindrical components enable the smooth rotation essential to fan operation. Unfortunately, this sealed design means bearings are not replaceable as standalone components—when bearing failure occurs, the entire motor assembly typically requires replacement.
Signs of bearing failure include persistent grinding noises across all speed settings. Before concluding bearing failure, always verify that shipping pads have been completely removed, as residual shipping blocks can cause similar grinding noises during rotation.
Grille Filter Function and Airflow Management
The grille filter, also known as grill mesh or vent cover, consists of mesh material covering holes or slots in the fan’s bottom cover. This mesh allows air to move freely into the fan’s interior so the motor operates at cooler temperatures during extended use. Proper airflow through the motor housing prevents overheating and extends the operational lifespan of electrical components. Without adequate cooling, motor windings can degrade prematurely, leading to reduced performance or complete failure.
Blade Attachment System: Blade Irons, Medallions & Stability Components
The blade assembly transforms the motor’s rotational energy into the air circulation that makes ceiling fans valuable home accessories. Multiple components work together to attach the blades securely while maintaining proper pitch angle and balance throughout operation.
Blade Irons vs. Blade Medallions: Attachment Hardware Explained
The blade iron, also known as the blade holder or blade bracket, serves as either a decorative or functional part that connects the blade directly to the motor. These blade irons affix to a blade carrier (also called a blade mounting ring) on certain fan designs where all blade irons connect to a central ring rather than directly to the motor housing. The blade assembly screw performs the specific function of attaching the blade to the blade iron.
For fans utilizing a blade medallion design, this decorative piece provides the attachment point between the blade and the blade iron, adding aesthetic value while maintaining functional integrity. When ordering replacement blade components, having your specific model number helps ensure compatibility, as blade attachment systems vary across Hunter’s product line.
Grommets and Balancing Kits: Eliminating Wobble and Noise
Grommets are rubber cushions inserted into the holes in the blades to reduce fan noise during operation. These small components dampen vibrations that would otherwise transfer from the motor assembly through the blade irons and into the blades themselves. Grommets are available in both black and white color options to match different fan finishes and blade color schemes.
A balancing kit becomes necessary when a fan develops a visible wobble during operation. This kit consists of a plastic clip and weights that attach to the blade assembly to balance the fan blades and eliminate unwanted wobble. The weights attach to different blades at various positions until the rotational imbalance is corrected, restoring smooth and quiet operation.
Downrod & Mounting Hardware: Flush Mount vs. Standard Installation
The mounting and suspension system secures your Hunter ceiling fan to the building structure while providing the electrical connections necessary for operation. Understanding these components ensures safe installation and helps diagnose mounting-related issues.
Ceiling Plate vs. Hanger Bracket: Secure Attachment Points
The ceiling plate functions as the bracket that attaches directly to the ceiling fan-rated electrical box, serving as the primary connection point between the fan assembly and the building structure. For Hunter Original fans specifically, the term “hanger bracket” refers to the bracket that threads onto a downrod for hanging the fan.
Isolators are rubber spacers that provide a cushion between either the ceiling plate or hanger bracket and the ceiling surface itself. These components dampen the noise caused by vibrations generated during fan operation, preventing transmission of mechanical noise into the ceiling structure.
Downrod Options for Vaulted Ceilings: Pipe and Ball Assembly
The downrod is a pipe used to suspend the fan down from the ceiling, included with all non-flush mounted fan models. The pipe and ball assembly represents a specific type of downrod design featuring a round or triangular-shaped pivot ball attached at the upper end. This ball-and-socket style connection allows the fan to hang at an angle when installed on sloped or vaulted ceilings.
The rubber bushing and pin consists of a large rubber cushion with a metal pin through the center, used inside the hanger bracket along with the U bracket in Hunter Original fan models. The U bracket itself is a U-shaped component that the rubber bushing and pin rest within, creating the pivot mechanism permitting angular adjustment.
Capacitor System Explained: Start vs. Run Capacitors for Speed Control
The capacitor system in a Hunter ceiling fan consists of two distinct electrical components that work together to control fan operation. Understanding these components helps diagnose electrical issues and enables proper maintenance.
Start Capacitor Failure: Why Your Fan Won’t Begin Spinning
The start capacitor is the electrical component used to start the fan by altering the amount of current that goes to the motor, causing the motor to begin its rotation from a standstill condition. Capacitor failure represents one of the most common electrical issues in aging ceiling fans. Symptoms include fan blades that won’t start spinning despite the motor making humming sounds, inconsistent speed selection, or complete motor failure.
Run Capacitor Issues: Inconsistent Speed and Performance Problems
The run capacitor, also simply called a capacitor, controls the fan speed by altering the amount of current that goes to the motor once operation has begun. Both capacitors are part of the switch housing and wiring harness assembly, and together they enable the variable speed operation allowing users to adjust fan speed according to comfort preferences.
When troubleshooting electrical issues, always check capacitors first if your fan shows inconsistent speed behavior or won’t start properly. These components are among the most common failure points in Hunter fans over time.
Light Kit Components: Sockets, Glassware & Decorative Elements
Light kits transform ceiling fans from purely functional devices into attractive lighting fixtures, while glassware and decorative elements complete the visual presentation of the installation. Understanding these components helps maintain both functionality and aesthetics.
Light Kit Adapter and Socket Assembly Requirements
The light fixture, also called a light kit, encompasses the parts used for the fan’s illumination function. Light kits can either come integrated into the fan’s design from the factory or added as an accessory component after purchase. For fans designed to accept accessory light kits, the light kit adapter provides the necessary mounting interface.
The socket is the part into which the light bulb screws, providing both electrical contact and physical support for the bulb. Hunter notes that sockets cannot be sold as separate replacement parts, as they are integral to the light kit assembly design. When socket failure occurs, the complete light kit assembly requires replacement.
Glassware Components: Finials, Silencer Bands and Bottom Covers
The bottom cover, also called the case cover, is the decorative ceiling fan base cover located at the bottom of the motor housing. This component normally has slots or holes serving both aesthetic and functional purposes—allowing light from the light kit to escape and providing airflow pathways for motor cooling.
The finial cover, also called a cap, is a decorative cover used at the bottom of a glass globe to cover the globe retainer. The finial nut is a decorative ceiling fan nut used to hold the glassware and finial cover in place. Silencer bands consist of neoprene rubber bands on the rim or neck of the glassware, serving to reduce vibration noise that might otherwise transmit through the glass components during fan operation.
Troubleshooting Common Hunter Fan Issues by Component Failure
Understanding the relationship between Hunter ceiling fan parts diagram components and common problems helps you diagnose issues efficiently and determine the correct parts needed for repair. Many symptoms point to specific component failures, enabling targeted troubleshooting.
Wobble Diagnosis: Blade Pitch vs. Motor Housing Issues
Fan wobble typically stems from blade-related issues rather than motor problems. An uneven blade pitch, where blades are mounted at slightly different angles, causes the fan to move side to side during rotation. Loose blade iron screws, blade alignment issues, or damaged blade brackets can all contribute to wobble. The balancing kit provides the standard solution for minor wobble issues.
Electrical Humming Without Rotation: Capacitor Failure Signs
When the fan fails to start but makes a humming sound, the start capacitor is the most likely culprit. This component provides the initial current surge necessary to begin rotation, and failure prevents the motor from overcoming static friction. The fan may appear to be attempting to start without success, with blades remaining stationary despite motor engagement.
How to Order Correct Replacement Parts Using Hunter’s Diagram System
When ordering replacement parts for Hunter ceiling fans, having the model number and manufacture date available helps ensure correct component selection. Many components are model-specific, particularly those related to the motor housing, switch housing, and blade attachment systems.
Model Number Identification: Finding Your Fan’s Specific Parts List
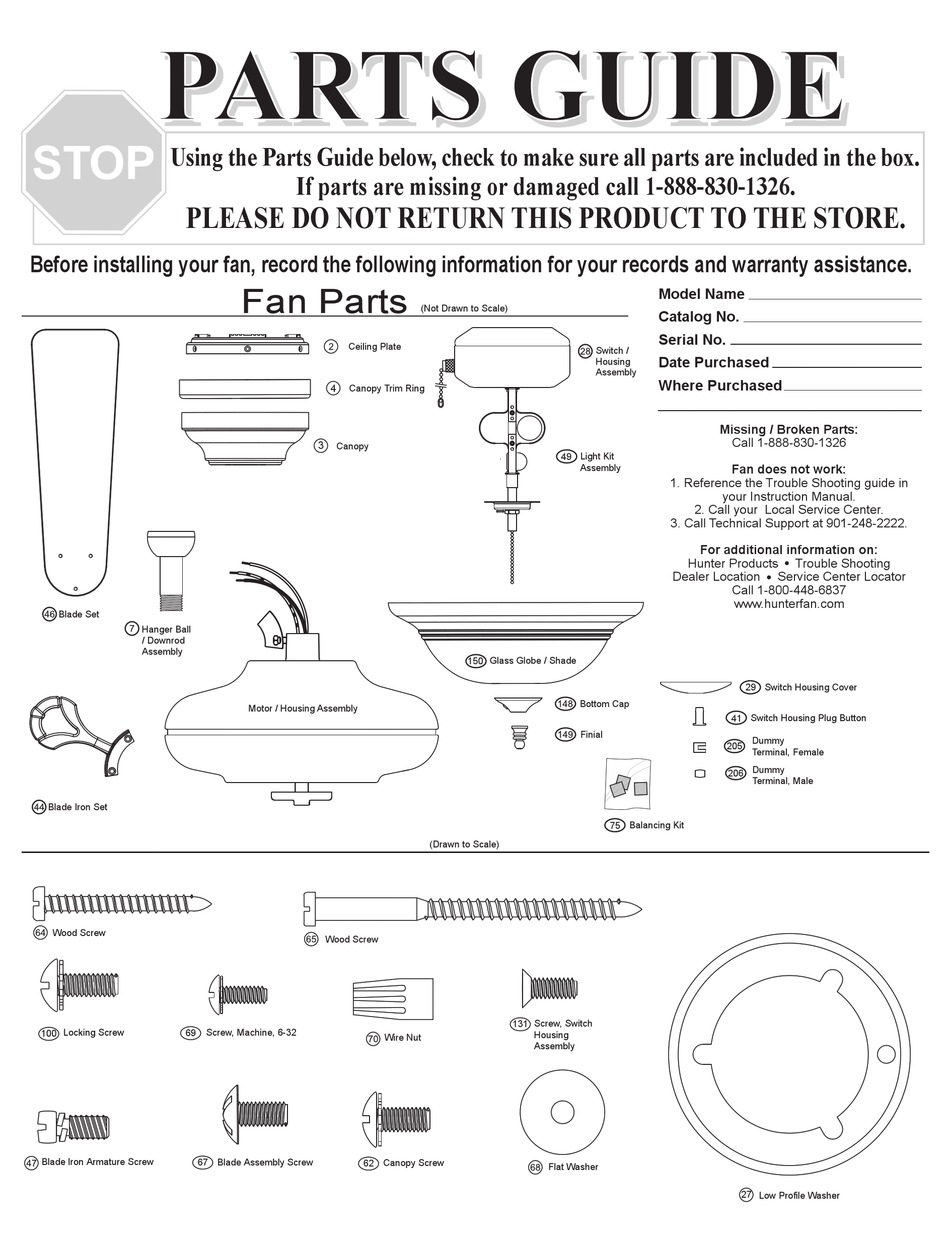
The Hunter parts diagram system organizes components by functional category, making it easier to locate specific parts when working with a dealer or parts counter. Understanding the terminology and component relationships described in this guide enables more effective communication when describing needed parts.
Common Replacement Parts: What Fails Most Often in Hunter Fans
Common replacement items that owners may need to order over the fan’s lifespan include pull chain assemblies including fandangles, switch housing covers for fans without light kits, light bulbs and glassware components, balancing kits if wobble develops, and various decorative nuts and finials that may become damaged or lost. Electrical components such as capacitors and remote control receivers are also available as replacement parts when these components fail during the fan’s service life.
Whether you’re performing routine cleaning, replacing worn components, or diagnosing a malfunction, knowing your Hunter ceiling fan parts diagram helps you approach the project with confidence and achieve successful results. Refer to this comprehensive Hunter ceiling fan parts diagram whenever you need to identify, troubleshoot, or replace components in your ceiling fan system.
Leave a Reply