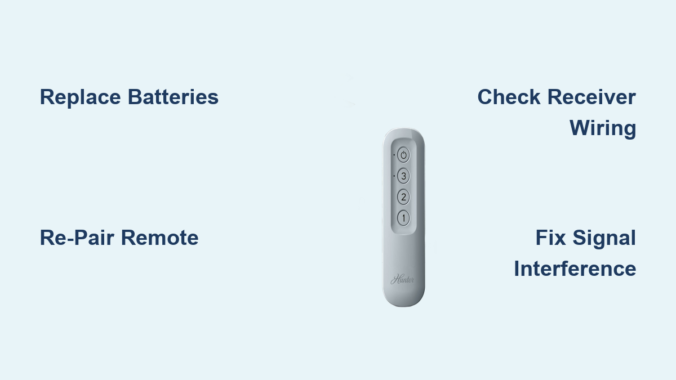
Your Hunter ceiling fan remote suddenly stops responding, leaving you stranded with a fan stuck on high speed or lights you can’t control. This common frustration affects thousands of homeowners who rely on remote convenience. When your Hunter ceiling fan remote not working issue strikes, the problem typically stems from dead batteries, pairing loss, or receiver malfunctions rather than requiring expensive professional repairs. Before replacing your entire fan system, follow this systematic troubleshooting guide to diagnose and fix the issue yourself.
Most Hunter remote problems can be resolved in under 30 minutes with basic tools and zero electrical expertise. This guide covers every potential cause of remote failure, from simple battery replacement to receiver diagnostics. You’ll learn exactly what to check, how to test components, and when it’s time to call for professional help. By the end of this guide, you’ll have your Hunter ceiling fan remote working reliably again.
Replace and Verify Remote Batteries
Dead batteries represent the #1 reason Hunter ceiling fan remotes appear to fail. Before assuming complex issues, confirm your remote has fresh power.
Install Correct CR2032 Batteries
Hunter remotes exclusively use CR2032 lithium coin-cell batteries, not the AAA or AA batteries found in many other devices. Slide the back cover off using a small screwdriver, then verify the battery orientation matches the plus/minus markings inside the compartment. Insert the new battery with the positive side facing up, ensuring it sits flush against the metal contacts without gaps. After replacing the cover, immediately test all remote functions—speed control, light dimming, and direction changes—to confirm proper operation.
If the remote still fails after battery replacement, remove the new battery and test with another fresh CR2032 from a different package. Occasionally, batteries from certain batches have manufacturing defects that cause premature failure. Using a known-good battery eliminates this variable from your troubleshooting process.
Remove Battery Corrosion
Corrosion buildup on battery contacts appears as white, blue, or green powder that blocks electrical connection even with fresh batteries installed. Remove the battery first, then dip a cotton swab in white vinegar to gently dissolve the corrosion deposits. For stubborn buildup, use a small flathead screwdriver to carefully scrape away residue without damaging internal components. Finish by wiping contacts with an isopropyl alcohol-dampened swab to neutralize vinegar residue, then let the compartment dry completely before reinstalling batteries.
Pro Tip: Apply a tiny drop of petroleum jelly to clean contacts after battery replacement to prevent future corrosion while maintaining electrical conductivity.
Test Remote Signal Transmission Range
Hunter remotes function within 10-20 feet depending on model and environmental factors. Test your remote from multiple positions throughout the room to determine if range limitations indicate weakening batteries. If the remote only works when held directly beneath the fan but fails from across the room, battery replacement is likely needed.
Check for signal obstructions like thick walls, metal furniture, or electronic interference from routers and microwaves. IR remotes require direct line-of-sight to the receiver, while RF models transmit through walls but may experience interference. Use your smartphone camera to verify signal transmission—point the remote at the camera lens and press buttons; a working remote will show a visible flash on your screen even though human eyes can’t see infrared light.
Re-Pair Hunter Remote to Fan Receiver
Lost pairing between remote and receiver causes complete remote failure despite having fresh batteries and proper power.
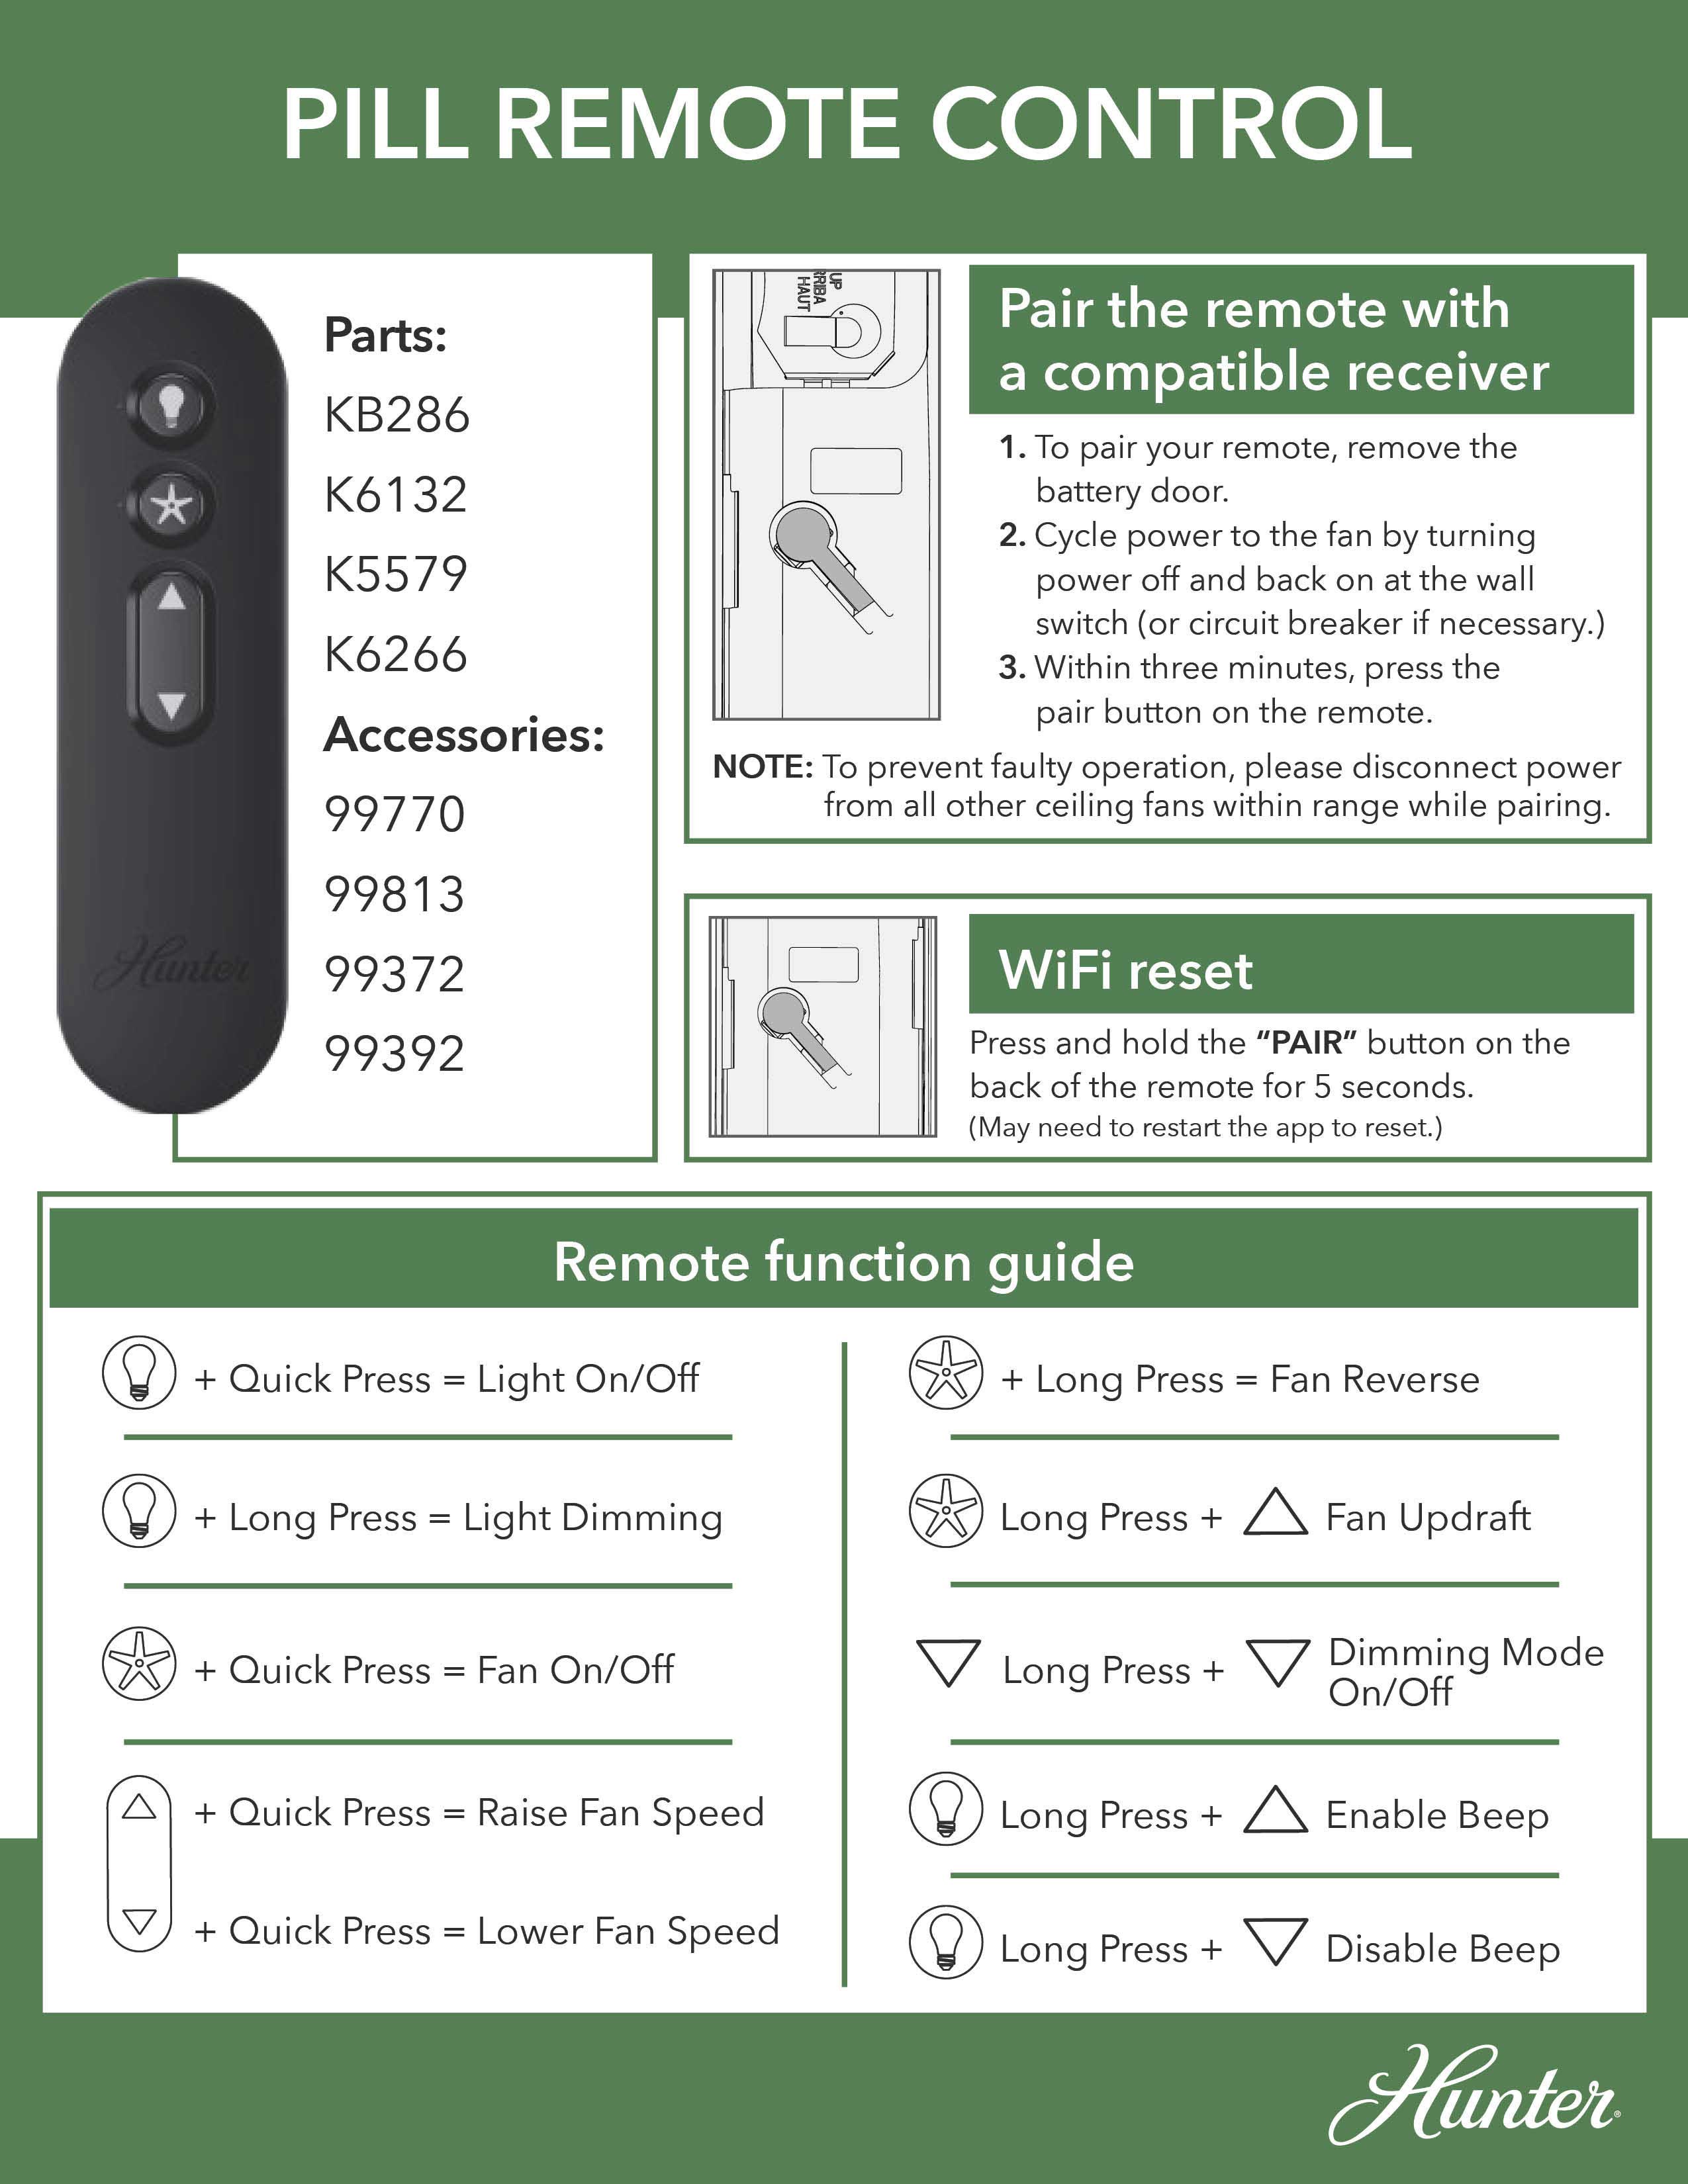
Sync Pill-Style Hunter Remotes
Pill-style remotes feature a dedicated pair button under the battery cover (identified by a circle with partial rectangle symbol). Start by cycling power: turn the wall switch off, wait 5 seconds, then turn it back on. Within 3 minutes, press the pair button once—do not hold it down. The fan should respond with a beep, light flash, or blade movement confirming successful pairing. Test all functions immediately after pairing to verify proper operation.
If pairing fails, repeat the process ensuring precise timing. Some models require multiple attempts if interference prevents initial synchronization. Never hold the pair button for more than 2 seconds, as this triggers Wi-Fi reset rather than standard pairing.
Resync 3-Speed Hunter Remotes
For 3-speed remotes without a dedicated pair button, turn off power at the wall switch, wait 5 seconds, then restore power. Within 3 minutes, press and hold the Fan Off and High buttons together for exactly 4 seconds. The fan will start running at low speed to confirm successful pairing. Release the buttons and test all speed settings and light functions before considering the process complete.
If the fan doesn’t respond with low-speed operation after holding the buttons, the pairing attempt failed. Repeat the process, ensuring you press the correct buttons simultaneously and hold them for the full 4 seconds. Some models require the fan blades to be stationary during pairing for successful synchronization.
Diagnose and Repair Receiver Issues
The receiver unit inside your fan canopy processes remote signals and controls fan operation—failure here causes remote non-responsiveness.
Access and Inspect Receiver Wiring
Turn off power at the circuit breaker, then remove the canopy cover to access the receiver (typically a small rectangular box with wires). Verify all wire connections are tight and properly secured with wire nuts. Check that no copper strands are exposed outside connections and that the antenna wire hangs freely without touching metal components. Loose connections cause intermittent operation that mimics remote failure.
After inspection, restore power and test if the wall switch controls the fan independently of the remote. If the fan works from the wall switch but not the remote, the issue lies with remote-receiver communication rather than power supply.
Reset Hunter Fan Receiver Module
Power cycling the receiver resolves most pairing and signal processing errors. Turn off the circuit breaker for 30 seconds to fully discharge capacitors, then restore power. Immediately attempt to re-pair the remote using the appropriate procedure for your model. This reset clears temporary errors in the receiver’s memory without requiring component replacement.
Some receivers feature a dedicated Learn/Set button—press and hold this briefly after power restoration, then immediately activate the corresponding button on your remote until the fan confirms signal reception. This method provides more reliable pairing than standard power cycling for complex installations.
Eliminate Signal Interference Problems
Electronic interference from household devices can disrupt communication between your Hunter remote and receiver.
Adjust Dip Switch Configuration
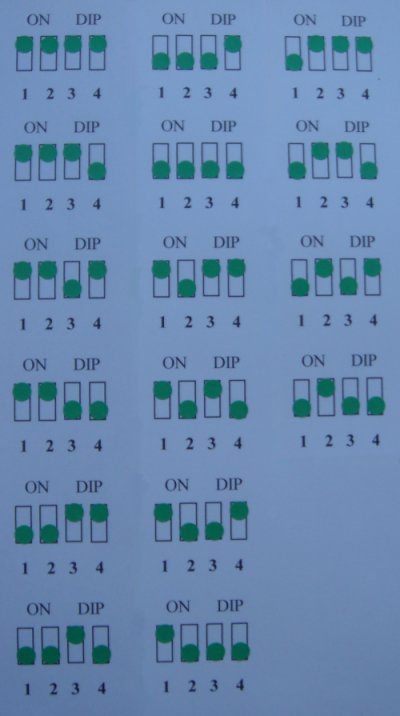
Many Hunter systems use dip switches to set communication frequencies. If multiple fans operate nearby on the same frequency, neither remote will function properly. Access both the remote’s battery compartment and the receiver inside the canopy to locate the dip switch banks (typically 4-8 tiny switches). Record current positions, then change all switches to a new configuration on both components. Test operation to confirm your remote now controls only its intended fan.
Pro Tip: Set dip switches to alternating positions (on-off-on-off) for optimal signal clarity in homes with multiple Hunter fans.
Identify and Remove Interference Sources
Common interference culprits include wireless routers, cordless phones, baby monitors, and microwave ovens. Temporarily turn off nearby electronics while testing remote operation to identify problematic devices. Reposition the receiver’s antenna wire away from metal components and other electronics to maximize signal reception.
If physical barriers like thick walls or metal ductwork block signals, try operating the remote from different angles or positions in the room. RF remotes typically penetrate walls better than IR models—if your remote requires direct line-of-sight, consider upgrading to an RF model for more reliable operation.
Verify Wall Switch and Circuit Power
Power interruptions to the receiver cause complete remote failure despite proper remote function.
Confirm Wall Switch Position
The wall switch controlling your fan must be in the ON position for remote operation—accidental switch toggling is a common oversight. Check all switches in the room that might interrupt power, including dimmers, timers, or smart home controls. If the fan operates from the wall switch but not the remote, the issue is specifically with remote-receiver communication.
Some installations include multiple switches controlling different fan functions—verify all relevant switches are in the correct position for remote operation. Pull-chain fans require the chain to be set to high speed for accessory remotes to function properly.
Check Circuit Breaker Status
The specific breaker controlling your fan circuit may have tripped without affecting other room outlets. Locate your breaker panel and verify the fan’s breaker is fully in the ON position. If uncertain, turn the breaker completely OFF then back ON to ensure proper reset. For recurring trips, contact an electrician to inspect for wiring issues that could create fire hazards.
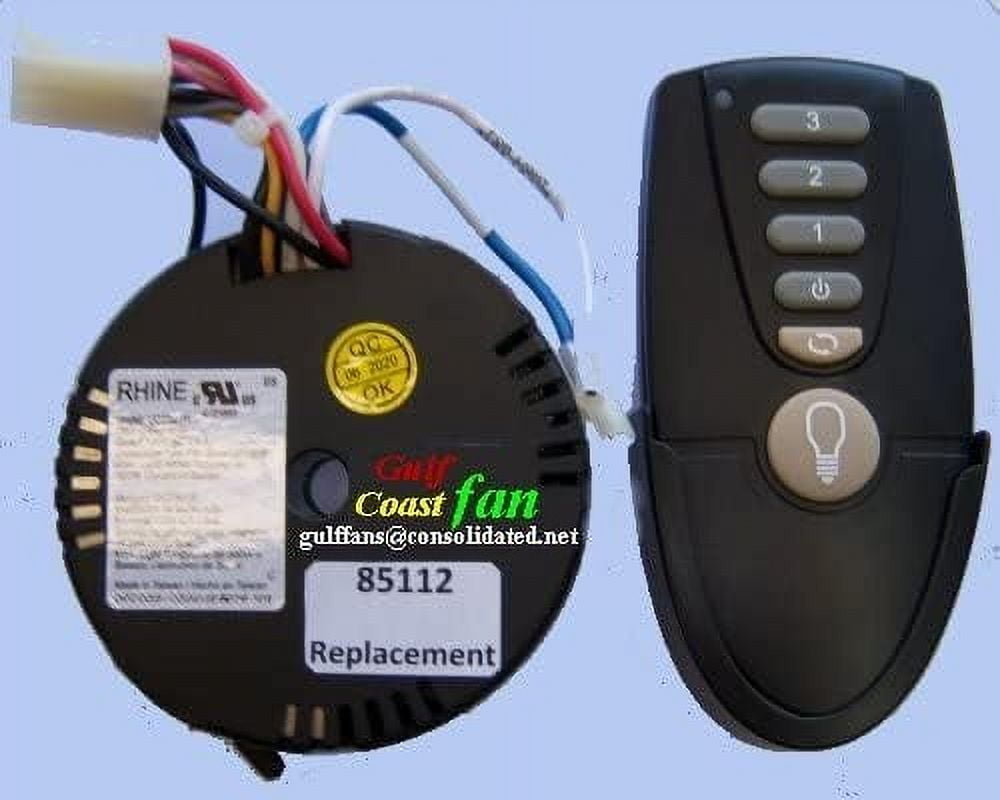
Replace Faulty Remote or Receiver
When troubleshooting confirms component failure, replacement becomes necessary.
Order Correct Replacement Parts
Hunter sells model-specific remotes through their website—have your fan’s model number (found on the motor housing) ready for compatibility. If unavailable, universal remotes from reputable brands like Hampton Bay work with most Hunter models. Test universal remotes before installation to ensure full functionality with your specific fan.
When replacing the receiver, match the exact model number to avoid compatibility issues. Hunter receiver modules cost $25-$45 and require basic wiring skills to install. If uncomfortable with electrical connections, hire an electrician for safe installation.
Prevent Future Remote Failures
Extend your Hunter remote’s lifespan with these maintenance practices.
Proactive Remote Maintenance
Wipe your remote monthly with a slightly damp cloth to remove dust and oils that interfere with button function. Replace batteries annually before they weaken—keep spares of CR2032 batteries on hand for immediate replacement. During extended absences, remove batteries to prevent potential leakage damage.
Store the remote in a dry location away from direct sunlight, which can degrade plastic components over time. Avoid placing heavy objects on the remote that might damage internal circuitry.
Regular Receiver Inspections
Annually inspect the receiver inside your fan canopy for signs of overheating, damage, or pest activity. Verify all wire connections remain tight and that the antenna wire hangs freely without obstruction. Proper maintenance prevents 80% of remote-related issues before they cause complete failure.
Final Note: When your Hunter ceiling fan remote not working issue arises, follow this sequence: replace batteries, verify power supply, re-pair remote, check for interference, then inspect the receiver. Most problems resolve with these simple steps—only 15% require component replacement. For persistent issues, contact Hunter customer support with your model number for specialized assistance, or consult a licensed electrician if electrical work makes you uncomfortable. Proper maintenance ensures reliable remote operation for years of comfortable fan control.
Leave a Reply