Hampton Fan Reviews

Your Ultimate Guide to Cooling: In-Depth Reviews, Smart Comparisons & Pro Care Tips.

Page 26 of 43

How to Dim Hunter Ceiling Fan Light


Your Hunter ceiling fan’s lighting suddenly stops dimming smoothly, leaving you stuck with either blinding brightness or complete darkness. This common frustration happens when dimming mode gets accidentally disabled during bulb changes or remote battery replacements. Knowing exactly how to dim Hunter ceiling fan lights puts you back in control of your room’s ambiance in minutes. Whether you need soft lighting for movie night or full brightness for cleaning, this guide covers every Hunter fan series and remote model to restore your dimming functionality immediately.

Before attempting any dimming adjustments, check your light bulbs first—non-dimmable LED or CFL bulbs will cause flickering, buzzing, or complete dimming failure. Replace any incompatible bulbs with certified dimmable versions before proceeding. Your fan’s model number determines the exact dimming procedure, so locate it on the motor housing label or mounting bracket (5-Series models start with “5”, 2-Series start with “2”). Identifying your specific fan series prevents wasted time on incorrect procedures.


Confirm Your Hunter Fan Supports Dimming

Hunter ceiling fans with integrated lighting fixtures all include dimming capability, but this feature must be activated through your control system. Many homeowners waste hours troubleshooting when they simply need to toggle dimming mode on their remote. The critical first step is verifying your setup can actually dim.

Check that your fan has a lighting fixture with multiple bulbs—single-light models or older fans may lack dimming capability entirely. Next, examine your control method: Hunter fans use either wall controls, handheld remotes, or the SIMPLEconnect app for dimming functions. If you have a basic wall switch without dimming controls or a simple pull-chain fan, dimming isn’t possible without upgrading your control system.

Most importantly, ensure you’re using dimmable LED or CFL bulbs specifically labeled for dimmer switch compatibility. Non-dimmable bulbs create flickering, buzzing, or inconsistent dimming even when your fan’s system works perfectly. When replacing bulbs, look for the “dimmable” marking on the packaging and match bulb types across all positions in your fixture.


Toggle Dimming on 5-Series Hunter Fans in 30 Seconds

Hunter 5-Series fans (model numbers starting with “5”) offer the quickest dimming toggle process using specific button combinations on your remote. The exact buttons vary by remote model, so check the label inside your battery compartment before starting.

Remote Models K6300-01, K6731-01, K6927-01: Light Button Method

Press and hold both the “LIGHT UP” and “LIGHT DOWN” buttons simultaneously for exactly five seconds until the lights flash once. Release the buttons and test dimming by pressing and holding the light button—you should now see smooth brightness transitions. These remotes use the light controls directly for toggling, making them intuitive for frequent users.

Remote Models K6266, K6019, K5579 Series: Fan Speed Button Method

For these common remote models, press and hold both the “FAN UP” and “FAN DOWN” buttons for five seconds until the lights flash. Release and verify dimming works by holding the light button. Many homeowners miss that these remotes use fan speed buttons instead of light buttons for toggling dimming mode.

Remote Models K6018, K6017, K1530, K1132 Series: Standard Fan Button Toggle

This extensive group of remote models follows the same procedure: press and hold “FAN UP” and “FAN DOWN” simultaneously for five seconds. The lights will flash to confirm successful toggling. Despite having different model numbers, these remotes share identical dimming functionality.

Remote Models K0471, K0470 Series: Unique Two-Step Sequence

Press and hold the “FAN OFF” button, then while holding it, quickly press the “LIGHT” button twice. Release “FAN OFF” and test dimming. This sequence differs from other 5-Series models and requires precise timing—many users fail by releasing “FAN OFF” too early.


Enable Dimming on 2-Series Hunter Fans With Dip Switches

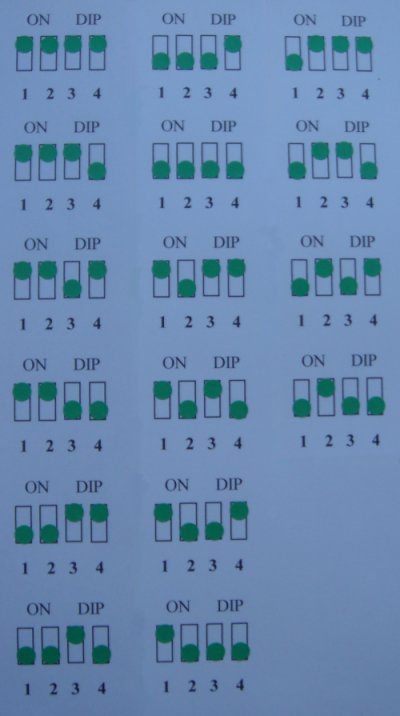
Hunter 2-Series fan dip switch location

Hunter 2-Series fans (model numbers starting with “2”) require a more involved process that involves dip switch settings and precise timing. Follow these steps exactly to avoid repeating the procedure.

Power Down and Access Dip Switches

Turn off power at the circuit breaker, then remove remote batteries. Locate dip switches inside the remote’s battery compartment and in the fan’s canopy (you’ll need to partially disassemble the fan to access these). Match the switch positions exactly between remote and receiver—this “address matching” is critical for communication.

Warning: Never skip the power shutdown step—working on electrical components without disconnecting power creates serious shock hazards.

Complete the 30-Second Pairing Sequence

Restore power at the breaker, reinstall remote batteries, then immediately press HIGH, MEDIUM, and LOW speed buttons simultaneously within 30 seconds. The lights will flash to confirm pairing. If you exceed the 30-second window, restart the entire process.

Test dimming functionality by turning lights on and holding the light button. If dimming still doesn’t work, double-check dip switch alignment and ensure you completed the three-button press within the critical timing window.


Fix 5 Common Hunter Fan Dimming Failures
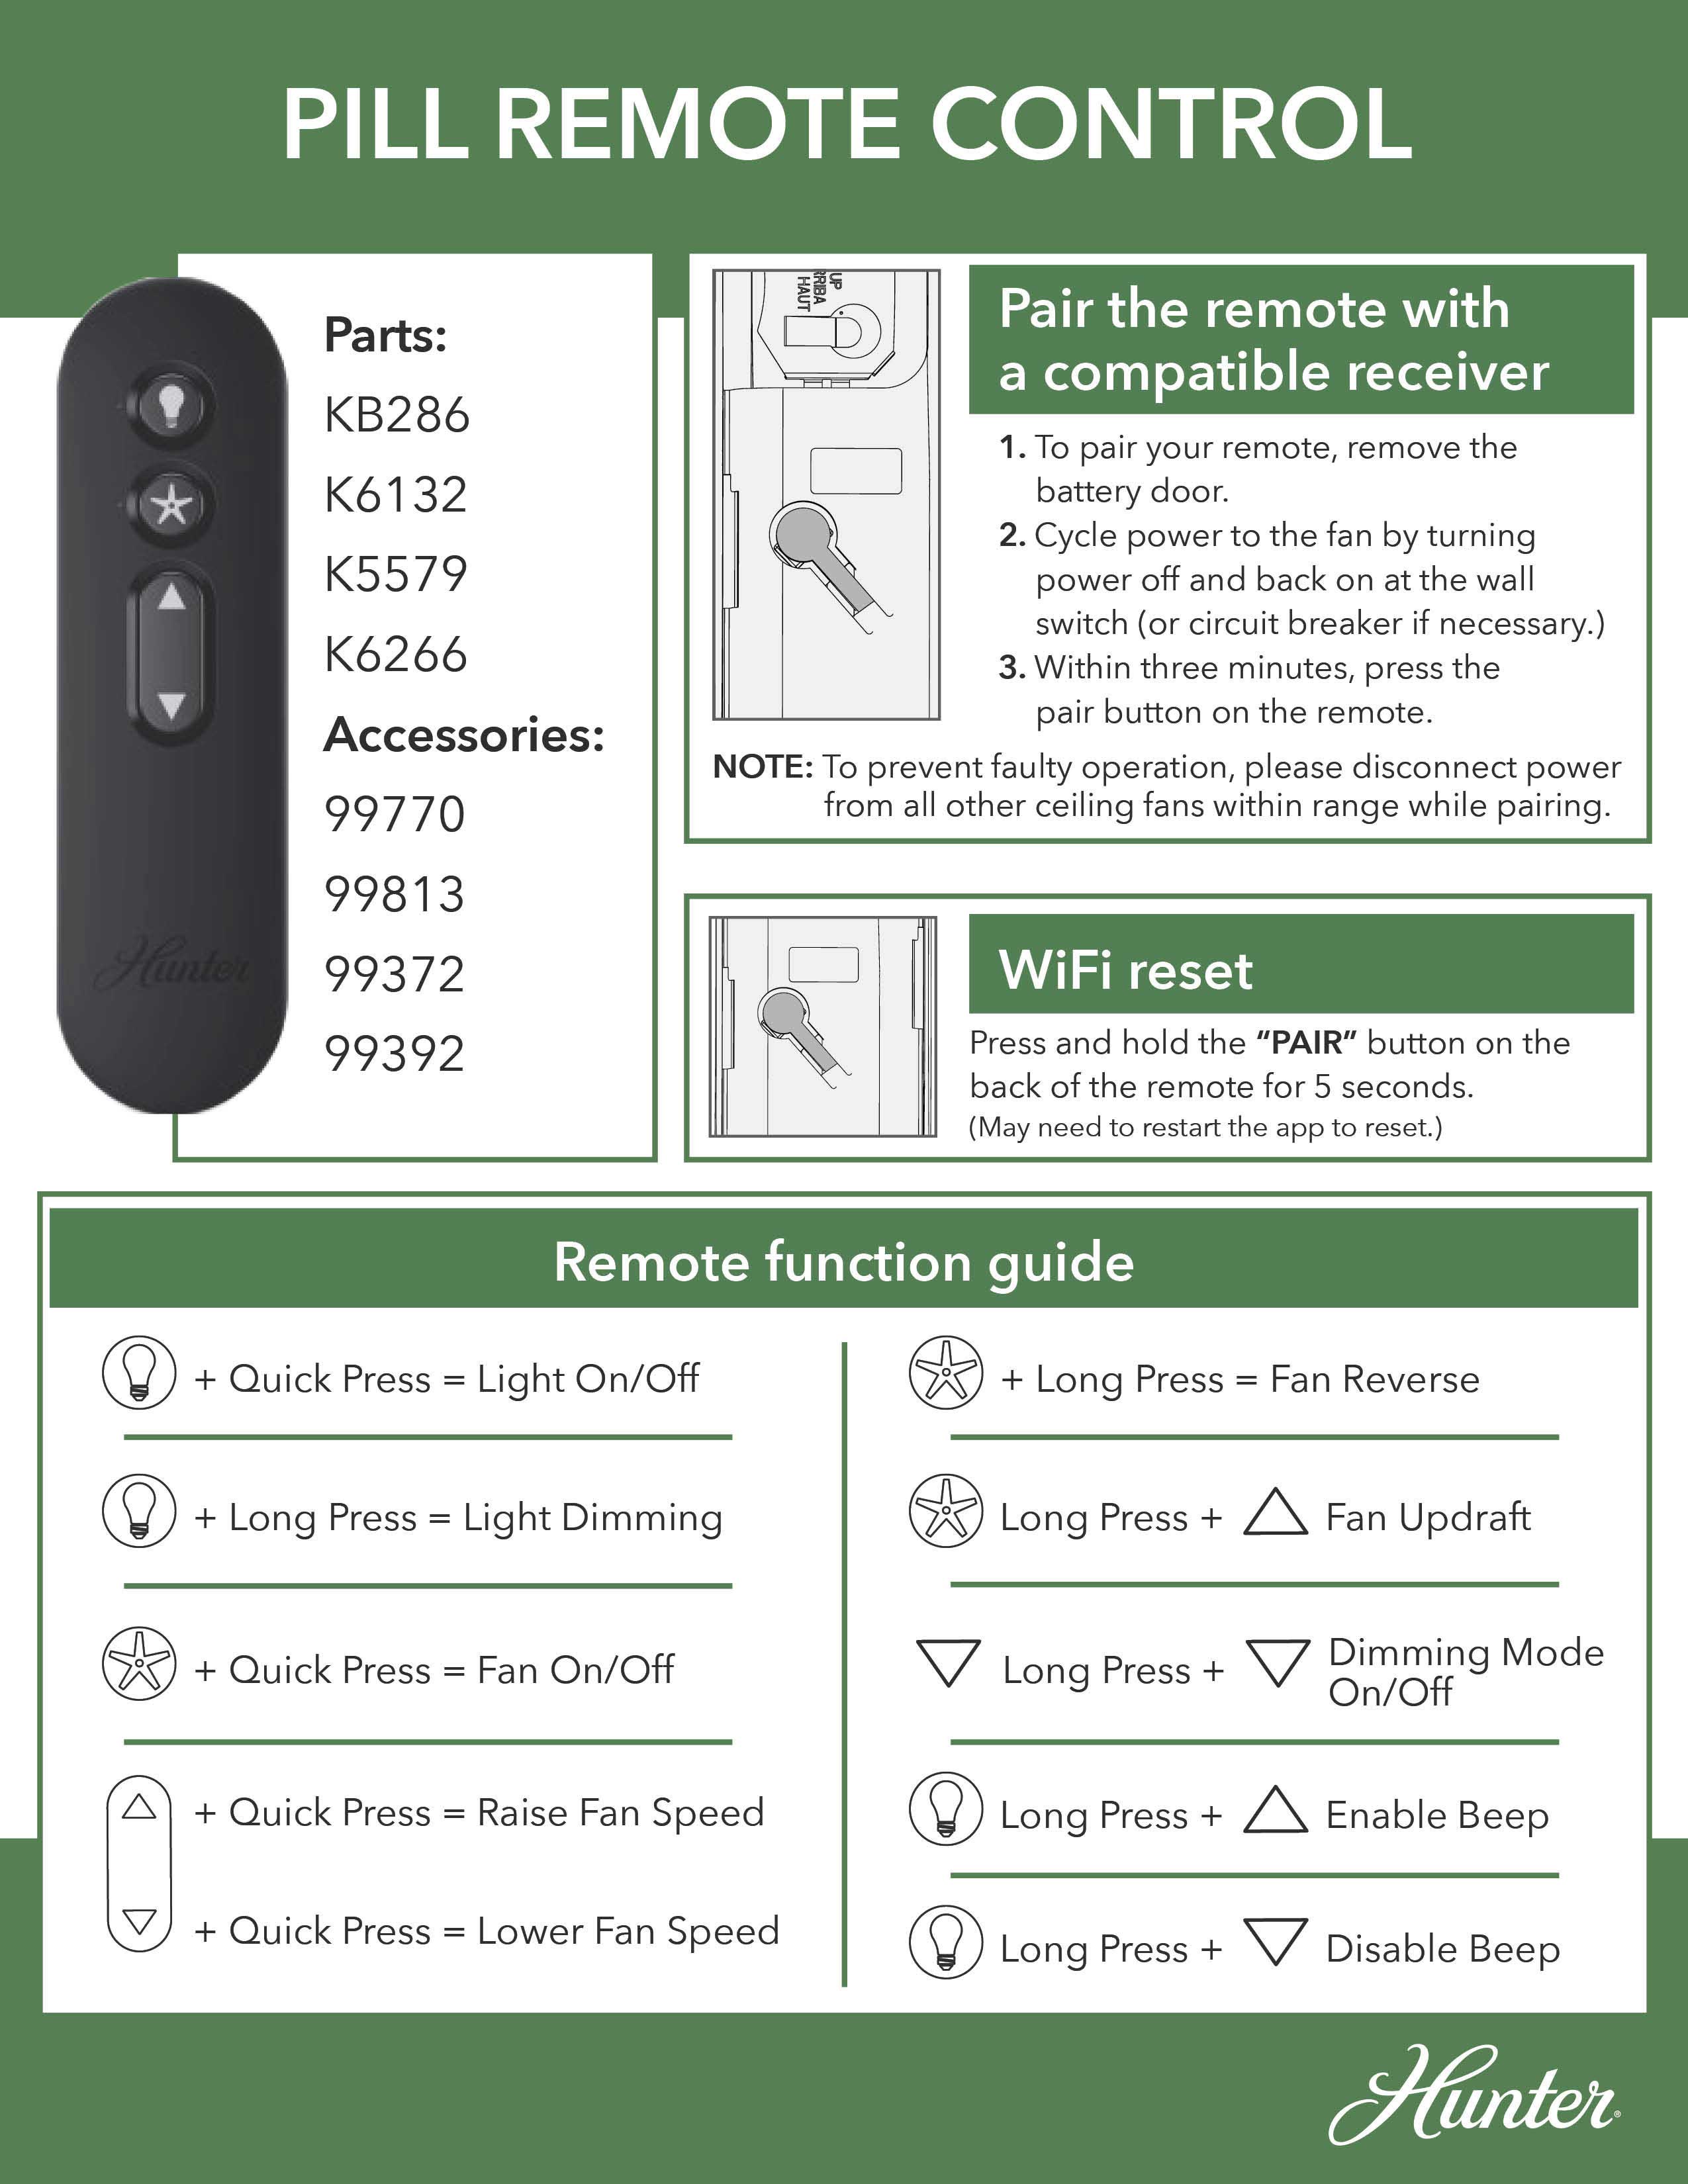
Hunter ceiling fan dimming troubleshooting guide

When your dimming function malfunctions, these solutions resolve 90% of issues:

Replace Non-Dimmable Bulbs Immediately

This causes 70% of dimming problems. Non-dimmable bulbs flicker violently or buzz loudly when dimmed. Install only bulbs clearly marked “dimmable” on the packaging—don’t assume all LEDs work with dimmers.

Reset Remote Batteries

Weak remote batteries cause intermittent dimming. Replace with fresh alkaline batteries and test immediately—this solves dimming issues in 15% of cases where the remote seems functional but dimming fails.

Verify Full Five-Second Button Hold

For 5-Series fans, releasing buttons before five seconds completes prevents the toggle from registering. Use a timer and press firmly for the full duration—many users release too early thinking it worked.

Check for Electrical Interference

New appliances or electronics on the same circuit can disrupt dimming. Turn off other devices temporarily to test—if dimming improves, consult an electrician about circuit separation.

Re-Pair 2-Series Remotes Completely

If dip switches don’t match exactly or the 30-second window was missed, pairing fails. Restart the entire 2-Series process from power shutdown, ensuring perfect switch alignment and precise timing.


Select Perfect Dimmable Bulbs for Hunter Fans
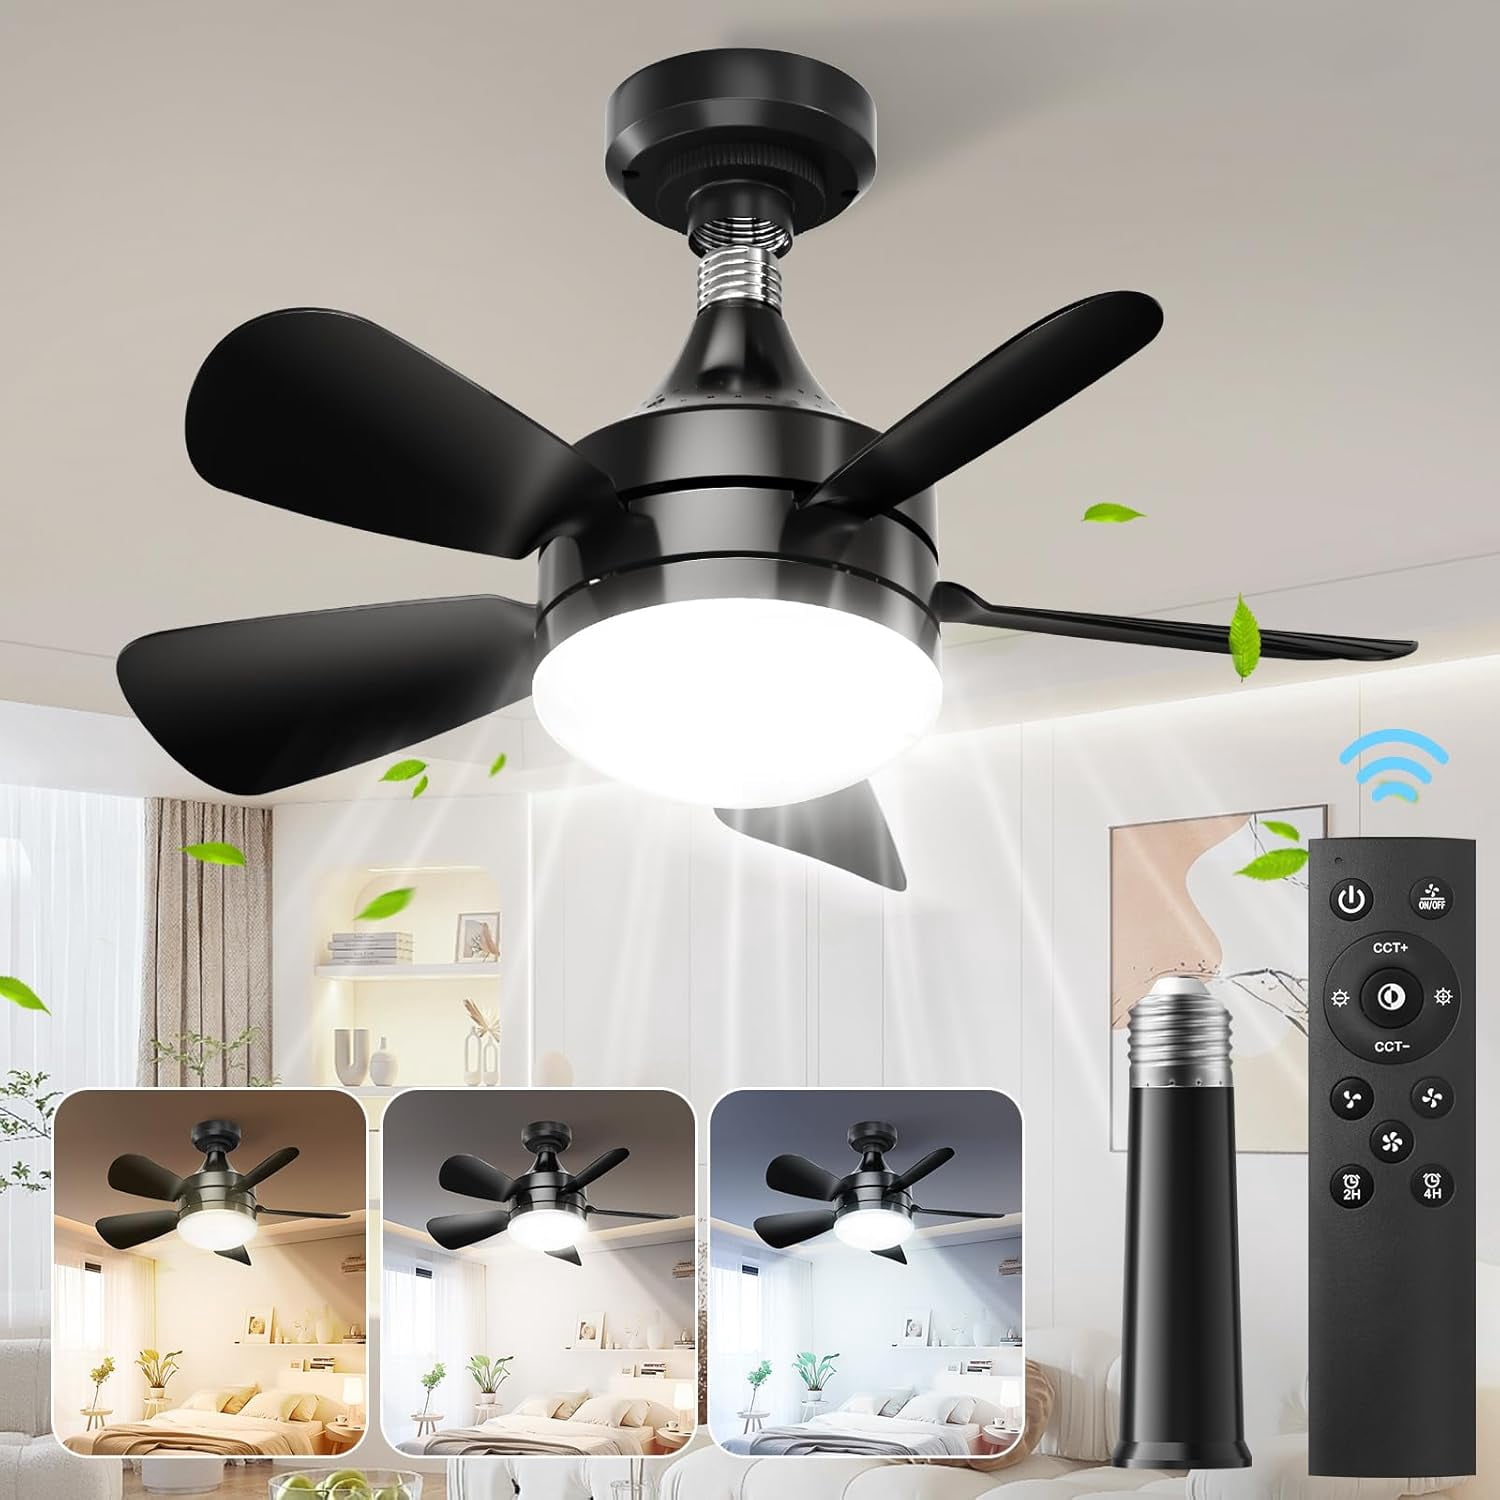
Dimmable LED bulb compatibility ceiling fan

Not all “dimmable” bulbs work well with ceiling fan dimmers. Standard wall dimmers and fan dimmers operate differently, causing compatibility issues. Choose bulbs specifically rated for ceiling fan dimmers with these characteristics:

  • Minimum dim level below 10% (prevents premature cutoff)
  • Smooth transition without flickering at low brightness
  • No audible buzzing at any dimming level
  • Consistent color temperature throughout dimming range

Stick with one bulb model across all positions in your fixture—mixing brands or types causes uneven dimming where some bulbs turn off before others. Reputable brands like Philips Hue, GE Relax, and Cree offer fan-compatible dimmable LEDs that perform reliably.


Maintain Flawless Dimming Performance Long-Term

Prevent future dimming issues with these simple habits:

  • Replace bulbs in pairs or sets to maintain consistent dimming behavior
  • Document your remote model number and successful toggle procedure for future reference
  • Use quality remote batteries and replace them annually as preventive maintenance
  • Create unique dip switch addresses for multiple fans to prevent cross-control issues

When toggling dimming modes, take your time with button sequences—rushing causes failed toggles. For 5-Series fans, count “one Mississippi, two Mississippi” up to five to ensure proper timing. For 2-Series fans, have a helper time the 30-second window while you complete the pairing sequence.


When Professional Help Is Needed

If you’ve followed all steps correctly with compatible bulbs but dimming still fails, contact Hunter customer service. Persistent issues after complete troubleshooting may indicate:

  • Failing receiver module requiring replacement
  • Internal wiring problems within the fan
  • Incompatibility with smart home systems
  • Component failure due to power surges

Never attempt internal fan repairs without electrical training—ceiling fans contain live components even when switched off. A licensed electrician can diagnose complex issues safely and restore your dimming functionality without risking damage or injury.


Mastering how to dim Hunter ceiling fan lights transforms your space from harshly lit to perfectly ambient with just a button press. By identifying your fan series, following the correct toggle procedure, using compatible bulbs, and maintaining your system properly, you’ll enjoy seamless dimming control for years. Save this guide for future reference—power outages and battery changes often require repeating these simple steps to restore your preferred lighting environment.
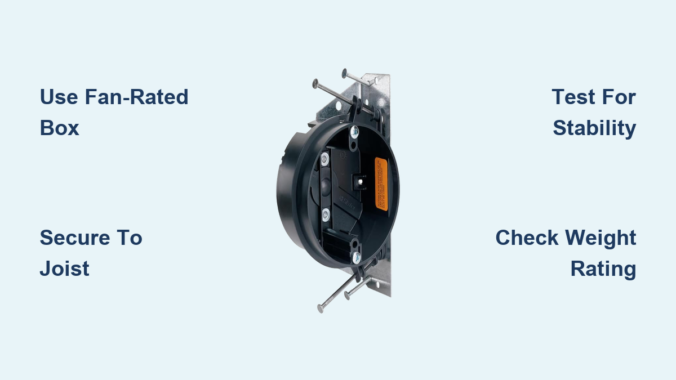
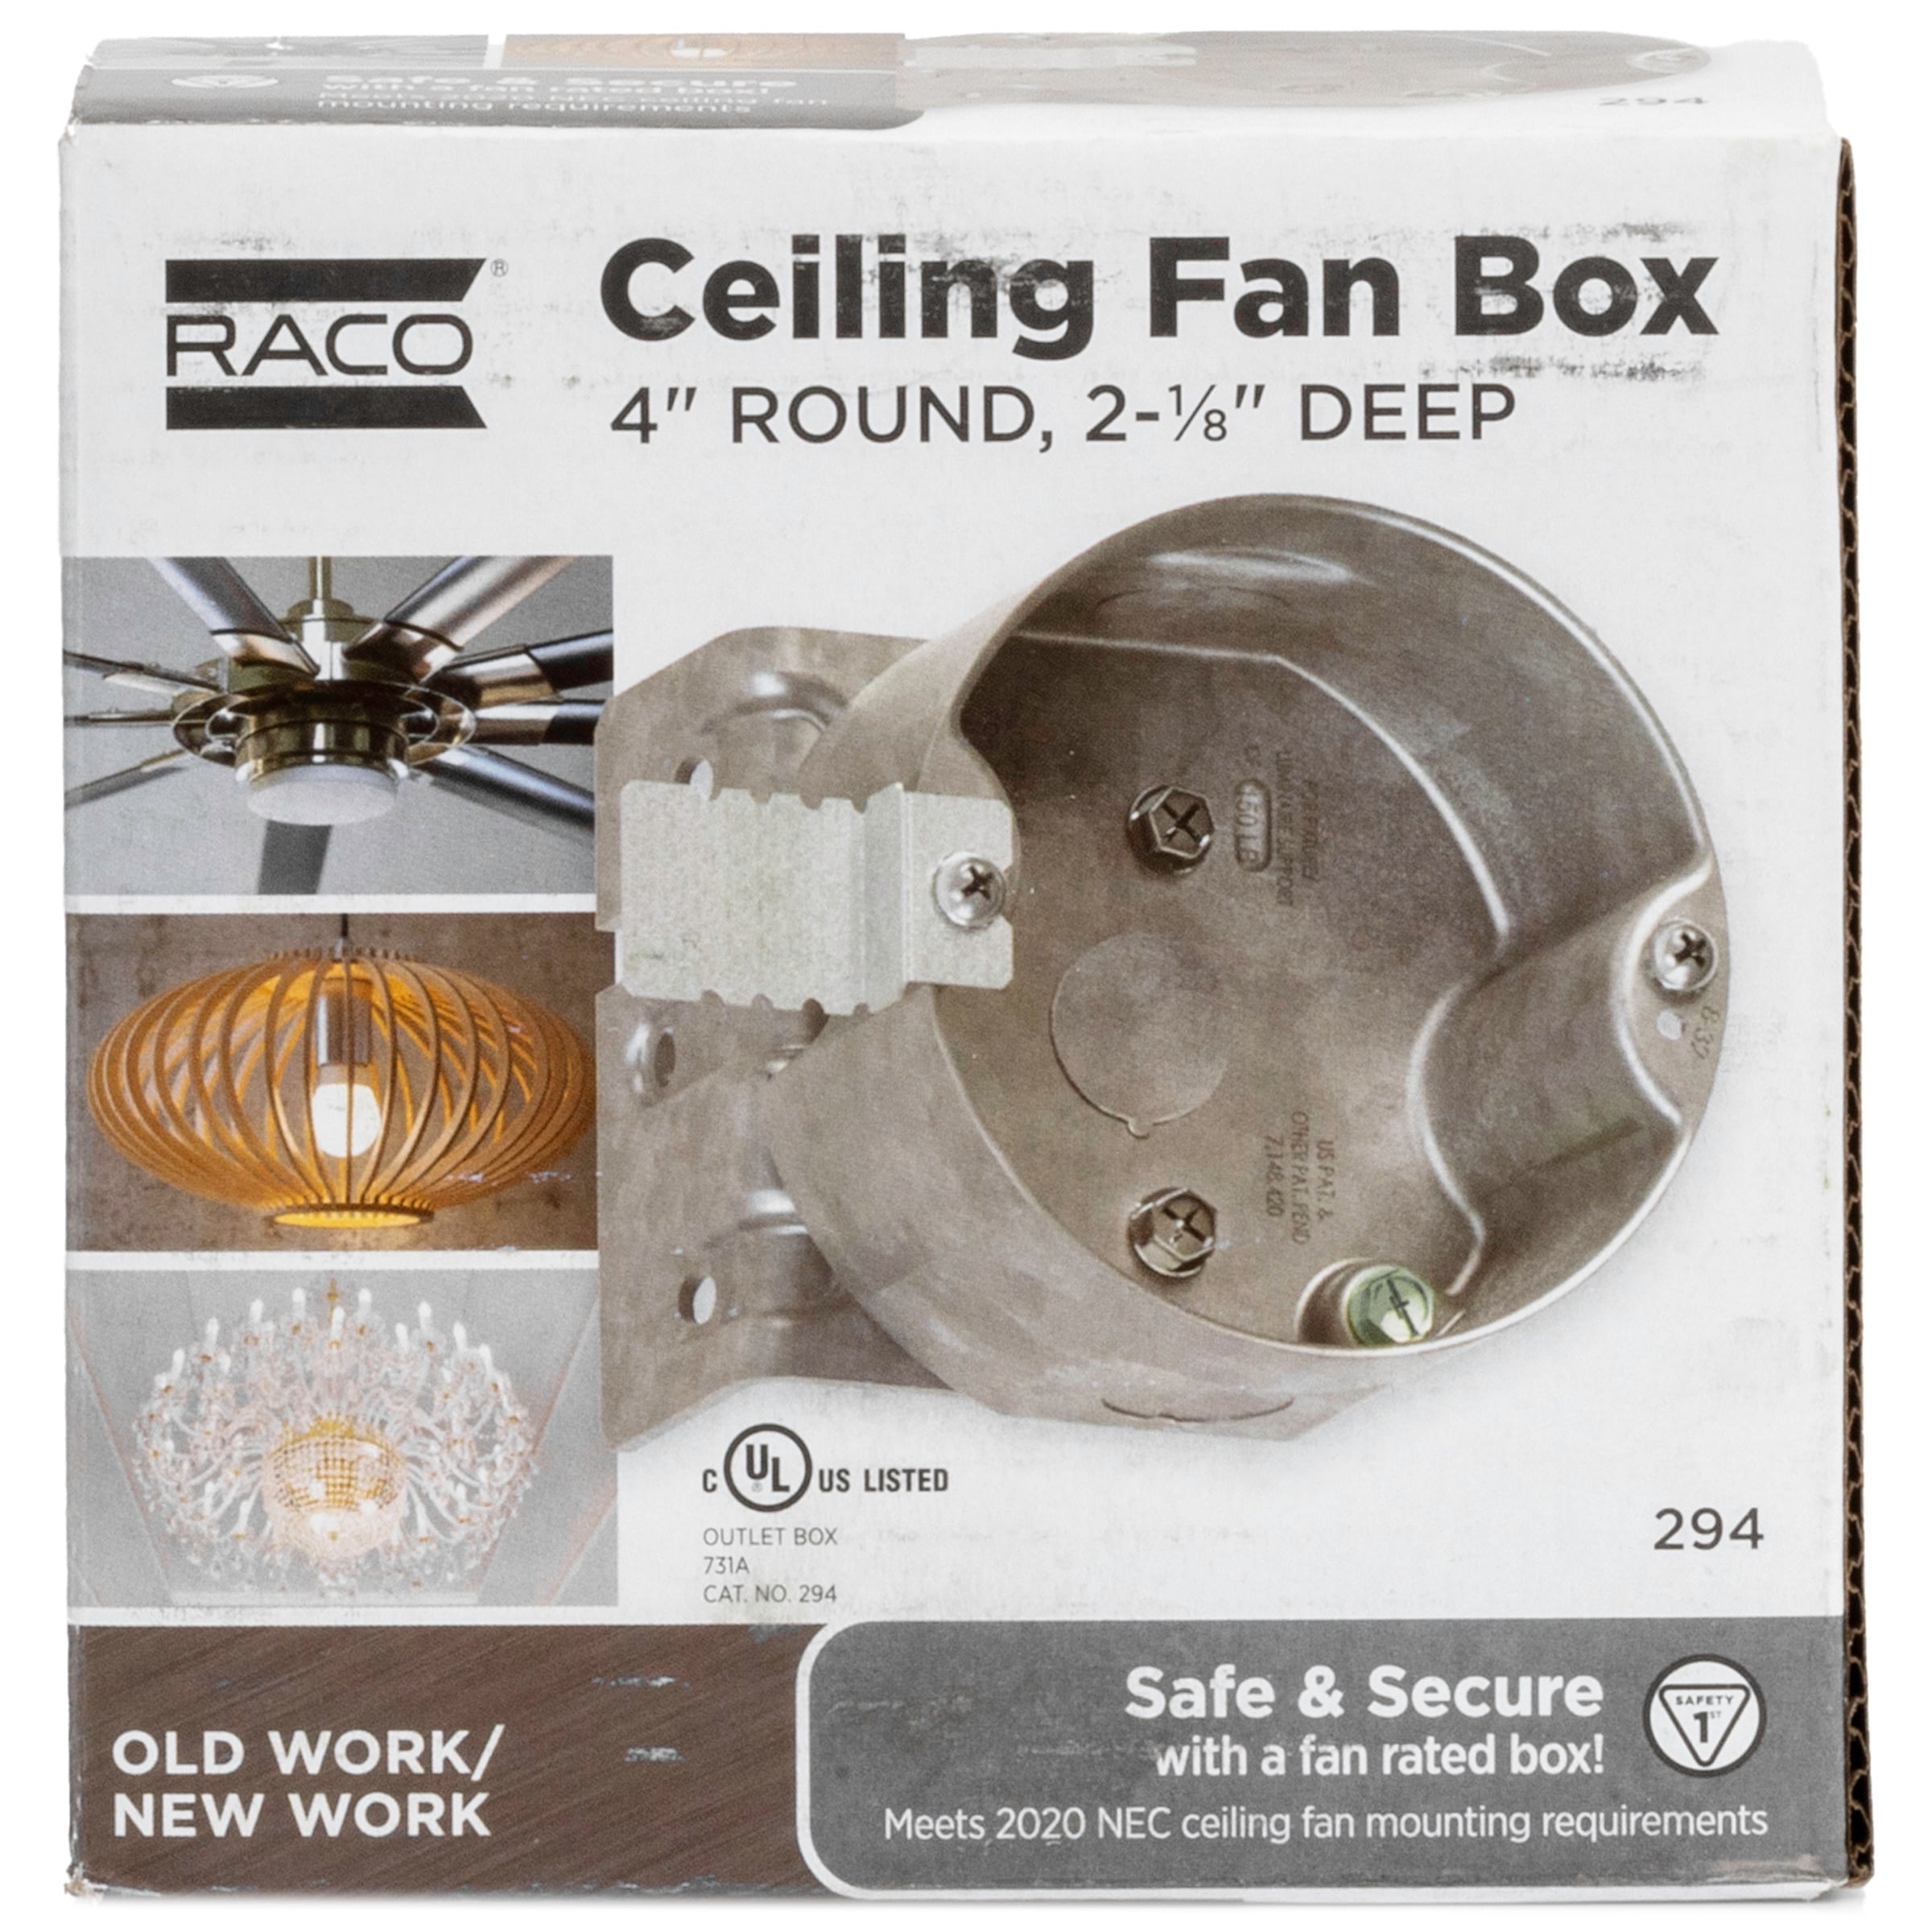
How to Install a Ceiling Fan Junction Box


Installing a ceiling fan requires more than just mounting the fan itself – it starts with properly installing a junction box that can safely support the fan’s weight and movement. Unlike standard light fixtures, ceiling fans create dynamic loads that demand specialized electrical boxes. This guide walks you through the critical steps to install a ceiling fan-rated junction box correctly, ensuring your fan operates safely for years to come.

Why Standard Light Boxes Won’t Work for Ceiling Fans

Ceiling fans generate both vertical and horizontal forces as they operate, creating what electricians call “dynamic loading.” Standard light fixture boxes typically support only 50 pounds of static weight, but ceiling fans require boxes rated for at least 70 pounds of dynamic load. Using an inappropriate box risks the fan becoming loose or even falling, potentially causing serious injury or property damage. The National Electrical Code (NEC) specifically requires fan-rated boxes that are securely attached to structural components capable of supporting the fan’s weight.

Types of Ceiling Fan Junction Boxes and When to Use Them

ceiling fan junction box types comparison new construction old work pancake

New Construction Boxes for Open Attics

When you have access to the ceiling from above, new construction boxes provide the strongest installation. These metal or plastic boxes feature adjustable mounting brackets that clamp securely to ceiling joists. The key advantage is direct attachment to structural framing, creating a rock-solid foundation. Installation takes approximately 20-30 minutes and requires basic tools including a stud finder, drill, and appropriate screws.

Old Work Retrofit Boxes for Finished Ceilings

For existing ceilings without attic access, old work fan-rated boxes solve the challenge. These boxes feature spring-loaded mounting arms that expand inside the ceiling cavity to grip the drywall securely. While convenient, they must be specifically rated for ceiling fans – not all old work boxes can handle the dynamic loads. Look for boxes clearly marked “For Ceiling Fan Support” with weight ratings of at least 70 pounds.

Pancake Boxes for Low Clearance Spaces

When ceiling height is limited, pancake boxes provide a shallow alternative that still meets fan support requirements. These low-profile boxes typically extend only 1.5 inches from the mounting surface while maintaining the necessary weight rating. They’re ideal for cathedral ceilings or rooms with limited space above the ceiling.

Essential Tools and Materials Checklist

Before starting your project, gather these critical items:

  • Fan-rated electrical box appropriate for your situation (new construction, old work, or pancake)
  • 12/2 or 14/2 NM-B cable (depending on circuit requirements)
  • Junction box mounting hardware (screws appropriate for your ceiling structure)
  • Voltage tester to verify power is off
  • Stud finder to locate ceiling joists
  • Drywall saw for cutting access holes
  • Fish tape for pulling wires in finished ceilings
  • Wire nuts rated for the wire gauge
  • Non-contact voltage tester
  • Clamp connector for securing cable to box

Step-by-Step Installation Process

Locating the Perfect Mounting Position

Start by determining where your fan will hang. Use a stud finder to locate ceiling joists – ceiling fans must be mounted either directly to a joist or to a properly reinforced box between joists. Avoid mounting fans over beds, dining tables, or seating areas where falling components could cause injury. The ideal height places the fan blades 8-9 feet above the floor for proper air circulation.

Cutting the Access Hole

Mark your cutting line on the ceiling using the junction box as a template. For new construction boxes, cut a hole large enough for the box to fit between joists. For old work boxes, follow the manufacturer’s specified dimensions, typically 4-6 inches in diameter. Use a drywall saw carefully, supporting the drywall to prevent cracking beyond your cut line.

Securing the Junction Box Properly

For new construction installations, position the box between joists and secure it with 2.5-inch structural screws driven through the mounting brackets into the joists. The box must be perfectly level and securely fastened with no movement when tested. For old work boxes, insert the box into the hole and tighten the mounting screws according to manufacturer instructions until the clamping mechanism grips the drywall firmly. Test the box by pulling firmly in multiple directions – it should not move.

Electrical Wiring Connections

ceiling fan wiring diagram black white ground connections

Running Cable to the Junction Box

For new construction, run NM-B cable from your electrical panel to the junction box location, securing it with cable staples every 4.5 feet and within 12 inches of the box. For retrofits, you’ll need to fish the cable through the ceiling cavity, which often requires creating a small access hole in an adjacent room or closet.

Making Proper Wire Connections

Strip 3/4 inch of insulation from the cable ends using wire strippers. Connect wires as follows:
– Black (hot) wire to black wire
– White (neutral) wire to white wire
– Bare copper (ground) wire to green grounding screw

Use wire nuts sized for your wire gauge, twisting until no copper is visible. Gently tuck wires into the box without pinching, ensuring connections don’t rest against the box sides.

Critical Safety Checks Before Mounting Your Fan

Verifying Box Stability

Before installing your fan, perform these essential stability tests:
– Apply firm downward pressure (at least 50 pounds) on the box
– Pull the box in multiple directions to check for movement
– Verify all mounting screws are tight and secure
– Confirm the box doesn’t rotate or twist when pressure is applied

Testing Electrical Connections

With power still off, use a multimeter to verify no voltage exists at the junction box. Once power is restored at the breaker, use a non-contact voltage tester to confirm proper wiring before connecting your fan.

Common Installation Mistakes to Avoid

Using Standard Light Fixture Boxes

The most dangerous mistake is repurposing a standard light box for a ceiling fan. These boxes lack the reinforced mounting and weight rating needed for fan operation. Always look for the “For Ceiling Fan Support” marking and verify the weight rating.

Improper Joist Attachment

When mounting to joists, ensure screws penetrate at least 1.5 inches into solid wood. Using drywall anchors or insufficient screws creates a dangerous failure point. For boxes between joists, use a fan brace that spans the gap and attaches securely to two joists.

Overlooking Weight Requirements

Ceiling fan boxes must support at least 70 pounds, but many modern fans with light kits exceed this. Check your specific fan’s weight and choose a box rated for 1.5 times the fan’s total weight for safety margin.

Maintenance and Long-Term Safety Considerations

Check your ceiling fan mounting annually by gently pulling down on the fan body. If you notice any movement at the ceiling, immediately turn off power and investigate the mounting. Tighten any loose screws and verify the junction box remains securely attached. Periodically check for signs of stress around the mounting area, including cracks in the ceiling drywall or paint.

When to Call a Professional Electrician

While installing a ceiling fan junction box is a manageable DIY project for many homeowners, certain situations warrant professional help:
– When working with older wiring (knob and tube or aluminum)
– If your ceiling structure is unusual or damaged
– When installing multiple fans on a single circuit
– If you’re uncomfortable working with electrical systems

Licensed electricians carry insurance and have the expertise to ensure your installation meets all local building codes and safety standards.

Final Installation Verification

Before completing your project, verify these critical points:
– The junction box is securely mounted with no movement
– All electrical connections are tight and properly insulated
– The box is rated specifically for ceiling fans
– The weight rating exceeds your fan’s requirements
– All wiring follows local electrical codes
– The mounting location provides adequate clearance

By properly installing a ceiling fan-rated junction box, you create the foundation for safe, reliable fan operation. This critical first step ensures your ceiling fan will provide years of comfortable airflow without safety concerns. Take your time with the installation, verify each connection, and never compromise on using the proper fan-rated box – your safety depends on it.

How to Install Ceiling Fan Without Rod


Installing a ceiling fan can transform your room’s comfort and style, but standard installations often require a downrod—the metal pipe that suspends the fan from the ceiling. However, many situations call for a downrod-free setup. Whether you’re working with a low ceiling, a sloped roof, or simply want a sleek, modern look, flush-mount ceiling fans (also called “hugger” fans) offer the perfect solution. These fans mount directly against the ceiling canopy, eliminating the need for an extended downrod while still delivering powerful air circulation and aesthetic appeal.

This comprehensive guide walks you through everything you need to know about installing a ceiling fan without a rod—from determining if your space is suitable, to gathering the right tools, to safely completing the electrical connections. We’ll cover the key differences between downrod and flush-mount installations, provide step-by-step instructions, and help you avoid common pitfalls that can turn a straightforward project into a frustrating ordeal. By the end, you’ll have the knowledge and confidence to tackle this project and enjoy the benefits of your new low-profile ceiling fan.

Finding the Right Flush-Mount Ceiling Fan for Your Space

Choosing Between Standard and Low-Profile Models

When shopping for a downrod-free ceiling fan, you’ll notice two distinct categories: true flush-mount fans and low-profile fans. True flush-mount fans sit completely against the ceiling with no gap between the motor housing and ceiling surface, typically measuring less than 12 inches from ceiling to blade tip. Low-profile fans create a minimal gap—usually 3-6 inches—which still qualifies as “downrod-free” but provides slightly better airflow than true flush-mount models.

Measure your ceiling height before purchasing. For standard 8-foot ceilings, both types work well, but true flush-mount fans become essential for ceilings under 8 feet. Check the product specifications for “blade drop” measurement—the distance from ceiling to the lowest point of the blades when installed. This number should leave at least 7 feet of clearance from floor to blade tips for safety. Many manufacturers now offer “low ceiling” specific models that optimize airflow while maintaining minimal profile.

Matching Fan Size to Room Dimensions

Selecting the right fan size ensures effective air circulation without overwhelming your space. For flush-mount installations, smaller blade spans typically perform better due to the restricted airflow pattern near the ceiling. In rooms up to 75 square feet (like bathrooms or small bedrooms), choose a fan with a 29-36 inch blade span. Medium-sized rooms (75-144 square feet) work well with 36-42 inch fans, while larger spaces may require 44-50 inch models—though these larger fans rarely offer true flush-mount capabilities.

Consider blade pitch as well—this refers to the angle of the blades relative to horizontal. A pitch between 12-15 degrees generally provides optimal airflow for flush-mount installations. Higher pitches (18+ degrees) create more turbulence near the ceiling, reducing efficiency in low-clearance situations. When possible, select fans with reversible rotation to maximize seasonal comfort: clockwise in winter to gently circulate warm air downward, counterclockwise in summer for cooling breeze.

Critical Pre-Installation Electrical Checks

fan rated electrical box comparison standard box

Verifying Your Ceiling Box Can Support a Fan

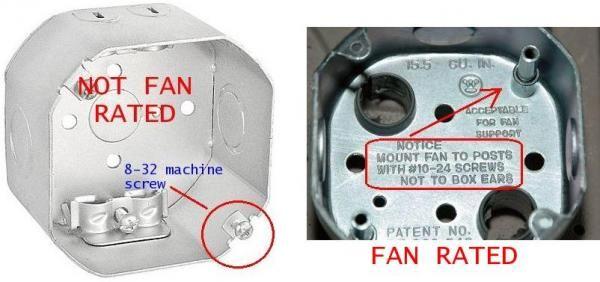
Before you purchase any fan, confirm your existing electrical box can safely support it. Standard light fixture boxes cannot handle the weight and vibration of a ceiling fan—they’re designed for fixtures weighing 6-10 pounds maximum. Ceiling fans typically weigh 15-50 pounds, requiring a fan-rated electrical box specifically designed to handle dynamic loads.

Remove your existing light fixture and inspect the electrical box. Fan-rated boxes will have “CAFU” stamped on them or indicate “Suitable for Fan Support” with a weight rating of at least 35 pounds. If your box lacks these markings, you must replace it before proceeding. This requires either accessing from above (in attics) or installing a retrofit fan brace that spans between ceiling joists. Never mount a fan to a standard plastic box—it will eventually pull loose from the drywall, causing the fan to fall.

Testing Your Home’s Electrical System

With your ladder positioned safely, turn off power at the circuit breaker and verify it’s off using a non-contact voltage tester. Remove the existing fixture and check wire connections. Most homes have standard wiring: black (hot), white (neutral), and green/bare copper (ground). Some older homes may have different configurations that require special attention.

Check wire condition—frayed or brittle wires need replacement before installing your new fan. Ensure you have sufficient wire length (at least 6 inches extending from the box) to make proper connections. If wires are too short, you’ll need to extend them with wire nuts and additional lengths of matching gauge wire. Your flush-mount fan installation requires secure electrical connections to prevent arcing, which is especially dangerous when the fan housing sits flush against the ceiling with limited heat dissipation.

Simplified Flush-Mount Installation Process

Step-by-Step Mounting Without a Downrod

Unlike standard fans, flush-mount installations skip the downrod attachment entirely. Begin by assembling the fan blades to their arms according to manufacturer instructions—typically using the included screws tightened securely but not excessively. Then attach the blade arms to the motor hub, taking care not to strip the screw holes in the plastic or metal components.

Your flush-mount fan will include a mounting bracket that attaches directly to the electrical box. Secure this bracket using the provided screws, ensuring it’s level—this prevents wobble during operation. True flush-mount fans use a canopy that sits directly against the ceiling with no gap, while low-profile models may include a short mounting plate that creates minimal clearance. Position the motor assembly onto the mounting bracket following the specific locking mechanism for your model (twist-lock, screw-in, or clip system).

Making Electrical Connections for Optimal Safety

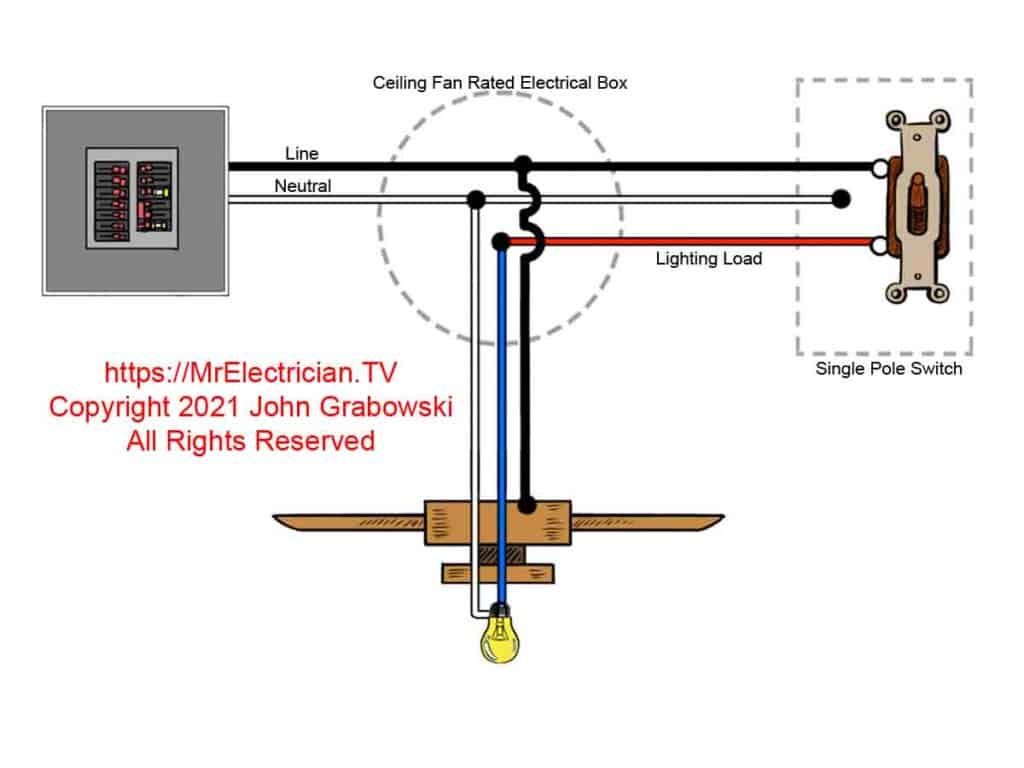
With your mounting bracket secure, connect the wires using this simple color-matching system: black to black (hot), white to white (neutral), and green/bare copper to green/bare copper (ground). Some fans include a separate blue wire for light kits—connect this to the black ceiling wire if you want the light controlled by the same switch as the fan, or to a separate switched wire if you have dual controls.

Use wire nuts sized appropriately for your wire gauge (typically 12-14 AWG for household circuits), twisting each connection until hand-tight plus a quarter-turn. Gently tug each wire to confirm it won’t pull loose. Wrap connections with electrical tape for added security, especially important in flush-mount installations where vibration has less space to dissipate. Carefully tuck all wires into the electrical box, ensuring no pinched or stressed connections before attaching the canopy.

Troubleshooting Common Flush-Mount Issues

ceiling fan wobble balancing kit instructions

Eliminating Wobble Without Downrod Adjustment

Wobble presents differently in flush-mount fans since you can’t adjust downrod length to balance the unit. Start by checking that all blade screws are equally tight—loose screws cause immediate vibration. If wobble persists, use the balancing kit included with most fans: attach the clip to the top center of each blade while running the fan on medium speed to identify which blade causes the most vibration.

Once identified, move the clip toward the blade tip and test again. When you find the position that minimizes vibration, secure the included balancing weight at that location. For stubborn wobble, check that your mounting bracket is perfectly level—this requires removing the canopy to access the bracket. A torpedo level placed across the bracket helps identify minor leveling issues that create significant vibration at high speeds.

Fixing Low Airflow in Flush-Mount Installations

The most common complaint with downrod-free fans is reduced airflow compared to standard installations. This occurs because the blades operate closer to the ceiling, disrupting the ideal airflow pattern. First, verify your fan is rotating in the correct direction for the season—counterclockwise for summer cooling, clockwise for winter circulation.

If airflow remains weak, check for blade pitch issues—some flush-mount fans allow minor pitch adjustments through slot mounting holes. Increase pitch slightly (no more than 2 degrees) to improve pull. For permanent solutions, consider replacing your fan with a model specifically designed for high-velocity airflow in low-clearance situations. These feature aerodynamically optimized blades and more powerful motors that compensate for the restricted mounting position.

Maximizing Long-Term Performance

ceiling fan dust cleaning microfiber cloth

Seasonal Maintenance for Flush-Mount Fans

Dust accumulation affects flush-mount fans more severely than downrod models because the motor housing sits closer to the ceiling where dust settles. Clean blades monthly using a microfiber duster or slightly damp cloth—never spray cleaner directly on the fan. Pay special attention to the top surfaces of blades, which collect dust most heavily in flush-mount configurations.

Twice yearly, perform a more thorough inspection: check all mounting screws for tightness (vibration gradually loosens them), verify wire connections haven’t worked loose, and listen for unusual motor sounds. Apply a drop of lightweight machine oil to the motor housing oil ports if your model includes them—most modern fans are sealed units requiring no lubrication, but older models benefit from this maintenance.

Recognizing When to Replace Your Flush-Mount Fan

Flush-mount fans typically last 10-15 years with proper maintenance, but certain warning signs indicate replacement is needed. Persistent overheating—where the motor housing becomes uncomfortably hot during normal operation—suggests internal component failure. Since flush-mount designs have less space for heat dissipation, this problem worsens quickly once it begins.

Excessive noise that balancing can’t resolve, especially grinding or screeching sounds, indicates bearing failure. Unlike standard fans, you generally cannot service the motor in flush-mount models due to their compact design. Flickering lights (if your fan includes a light kit) that persist after checking connections usually signal internal wiring problems requiring replacement rather than repair. When these issues appear, invest in a new fan—attempting repairs on sealed flush-mount units often causes more damage than replacement would cost.


By following these specific guidelines for downrod-free installations, you’ll enjoy the cooling benefits of a ceiling fan even in spaces with low ceilings or modern design constraints. Remember that proper electrical support and secure mounting make the difference between years of reliable service and a dangerous installation. With your new flush-mount fan operating smoothly, you’ll benefit from improved comfort, energy efficiency, and a clean, contemporary look that enhances any room.

Hampton Bay Ceiling Fan Light Not Working: Quick Fix Tips


Is your Hampton Bay ceiling fan light suddenly refusing to illuminate while the fan blades keep spinning? You’re not alone. When your ceiling fan’s light fixture stops working but the fan continues operating normally, it creates both a practical lighting problem and frustration in your living space. This specific issue affects thousands of homeowners each year, leaving them wondering whether they need to call an electrician or can fix it themselves. In this guide, you’ll discover the exact steps to diagnose and resolve your Hampton Bay ceiling fan light problem without unnecessary professional costs.

Common Causes of Hampton Bay Ceiling Fan Light Failure

When your Hampton Bay ceiling fan light stops working while the fan operates normally, several specific issues could be responsible. Understanding these common culprits helps you approach troubleshooting systematically rather than randomly replacing parts.

Burned Out Bulb or Incompatible Bulb Type

Hampton Bay fans often require specific bulb types that many homeowners overlook. While standard A19 bulbs might physically fit, Hampton Bay models frequently need:

  • Maximum wattage adherence – Exceeding 60W in some models causes premature bulb failure
  • Bulb base compatibility – E26 bases are standard, but some older models use E12 candelabra bases
  • Dimmable requirements – If using a dimmer switch, non-dimmable LEDs will flicker or fail

Pro Tip: Always check the wattage sticker inside your fan’s light housing before installing new bulbs. Many Hampton Bay fans manufactured after 2015 have specific LED compatibility requirements that differ from traditional incandescent specifications.

Faulty Light Socket or Internal Wiring Connection

Loose wiring connections represent one of the most frequent causes of Hampton Bay light failures. When your fan light stops working unexpectedly:

  1. Turn off power at the circuit breaker (not just the wall switch)
  2. Remove the light fixture housing
  3. Check for disconnected wires at the socket terminals
  4. Inspect for melted insulation or charred connections

Critical Warning: If you notice blackened wires or melted plastic around the socket, stop immediately. This indicates an electrical overload that requires professional attention before proceeding.

Remote Control or Wall Switch Malfunction

Hampton Bay fans with remote controls often experience light-specific failures due to:

  • Dead remote batteries – Replace both batteries simultaneously for proper voltage
  • Signal interference – LED bulbs can sometimes disrupt RF signals between remote and receiver
  • Receiver board failure – The separate light channel on the receiver may fail while fan control remains operational

Quick Test: Bypass the remote system by connecting the light wires directly to the power source (with power off!). If the light works, your remote system needs replacement.

Step-by-Step Hampton Bay Light Troubleshooting Process

Hampton Bay ceiling fan light troubleshooting flowchart

Follow this systematic approach to identify and resolve your specific light issue without unnecessary part replacements.

Initial Diagnostic Checks Before Disassembly

Before taking apart your ceiling fan, perform these simple checks that solve most light issues:

  • Verify wall switch position – Many homes have separate switches for fan and light
  • Test with different bulbs – Try known-working bulbs from another fixture
  • Check circuit breaker – Some homes wire fan and light to separate circuits
  • Listen for relay clicks – When operating the light switch, listen for a faint click from the fan housing

Time Saver: If your fan has a pull chain for the light, ensure it’s not stuck between positions. Gently jiggle the chain while testing.

Replacing the Light Bulb Correctly

Many Hampton Bay light failures stem from improper bulb installation:

  1. Allow the fixture to cool completely (15+ minutes)
  2. Wear gloves to prevent oil transfer to new bulbs
  3. For multi-light fixtures, replace all bulbs simultaneously
  4. Confirm the bulb base makes firm contact with socket contacts
  5. Never exceed the maximum wattage specified in your model

Common Mistake: Forcing LED bulbs into Hampton Bay fixtures designed for incandescents can damage the internal driver. Check your manual for compatible LED models.

Resetting the Remote Control System

When only your light fails with remote-controlled Hampton Bay fans:

  1. Remove batteries from the remote
  2. Turn off power at the breaker for 2 minutes
  3. Restore power and wait 30 seconds
  4. Reinsert fresh batteries while holding the “light” button
  5. Point remote directly at the receiver (within 3 feet)

Expert Note: Some Hampton Bay models require a specific reset sequence. Consult your manual for model-specific reset instructions, as procedures vary between brands like Harbor Breeze and Casablanca.

Model-Specific Hampton Bay Light Issues

Hampton Bay ceiling fan pull chain mechanism diagram

Different Hampton Bay fan series have unique light-related failure patterns worth knowing.

Older Hampton Bay Fans with Pull Chains

Models manufactured before 2010 often experience:

  • Worn pull chain mechanisms – The internal switch fails while fan control remains functional
  • Corroded socket contacts – Moisture in bathrooms causes oxidation
  • Frayed internal wires – Years of chain pulling damages wire connections

Fix: Replace the entire light socket assembly rather than attempting to repair the internal switch mechanism.

Modern Hampton Bay Fans with Remote Controls

Newer models (2015+) commonly have:

  • LED compatibility issues – Older receivers malfunction with LED bulbs
  • RF interference – Smart home devices disrupt signal transmission
  • Receiver board failures – The separate light circuit burns out

Solution: Upgrade to a newer receiver board designed for LED compatibility if replacing bulbs doesn’t resolve the issue.

When to Call a Professional Electrician

While most Hampton Bay light issues are DIY-friendly, certain situations require professional help:

  • Burning smell or visible smoke from the fixture
  • Frequent tripping of the circuit breaker when operating lights
  • Water damage in bathroom or outdoor installations
  • Aluminum wiring connections (requires special handling)

Safety First: If you’re uncomfortable working with electrical components or don’t own a non-contact voltage tester, hire a professional. Electrical shocks from ceiling fans can be life-threatening.

Preventing Future Hampton Bay Light Failures

Avoid recurring light issues with these proactive maintenance steps:

Seasonal Light Fixture Maintenance

Perform these checks every 6 months:

  • Clean dust from socket contacts with a dry toothbrush
  • Tighten wire connections in the junction box
  • Inspect for signs of overheating (discoloration, melting)
  • Verify proper bulb seating and wattage compliance

Pro Tip: Apply a small amount of dielectric grease to socket contacts during bulb changes to prevent corrosion.

Smart Bulb Selection Guidelines

LED bulb compatibility chart Hampton Bay ceiling fan

Choose bulbs that match your specific Hampton Bay model:

  1. Check your manual for “LED compatible” notation
  2. Select bulbs with “dimmable” labeling if using a dimmer
  3. Never exceed 80% of the maximum rated wattage
  4. For remote-controlled fans, choose bulbs with low wattage draw (under 10W)

Warning: Cheap, off-brand LED bulbs often cause more problems than they solve in Hampton Bay fixtures. Stick with reputable brands like Philips or GE.

Final Troubleshooting Checklist

Before concluding your Hampton Bay ceiling fan light issue requires professional help, verify these final points:

  • [ ] Tried multiple known-working bulbs
  • [ ] Checked both circuit breakers (some homes have separate circuits)
  • [ ] Verified wall switch is operational
  • [ ] Reset the remote control system
  • [ ] Inspected socket for damage or debris
  • [ ] Confirmed proper bulb type and wattage

Last Resort: If all checks fail, consider replacing the entire light kit. Hampton Bay offers replacement kits for most models that install in under 20 minutes and cost less than professional service calls.


Final Note: Most Hampton Bay ceiling fan light issues stem from simple causes like incompatible bulbs or loose connections rather than major component failures. By following this systematic approach, you’ll restore your lighting without unnecessary expenses. Remember that regular maintenance prevents most recurring issues, and when in doubt about electrical safety, always consult a qualified electrician. Your properly functioning Hampton Bay ceiling fan light should provide years of reliable service with the right troubleshooting and preventive care.

Ceiling Fan Display Guide


If you’ve ever walked into a lighting showroom or home improvement store and noticed how ceiling fans are presented, you’ve seen a ceiling fan display in action. These strategic presentations make all the difference in helping customers visualize how these fixtures would look in their own spaces. A well-designed ceiling fan display doesn’t just showcase the product—it creates an immersive experience that drives sales and helps consumers make confident purchasing decisions. In this guide, you’ll learn practical techniques for creating compelling ceiling fan displays whether you’re a retailer setting up a showroom or a homeowner wanting to showcase your own fan collection.

Why Proper Ceiling Fan Display Matters for Sales Conversion

When customers can’t properly visualize how a ceiling fan will look in their space, they’re more likely to delay purchasing decisions or choose cheaper alternatives online. A strategically designed ceiling fan display bridges this gap by providing real-world context that online shoppers miss.

How Display Height Affects Customer Perception

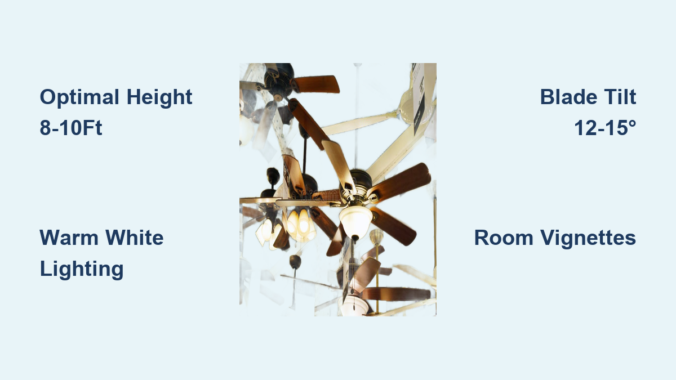
The optimal height for displaying ceiling fans in retail environments ranges between 8-10 feet from the floor. This positioning allows customers to view the fan at a natural angle similar to how they’d see it in a standard-height room. Fans hung too high appear smaller and less impressive, while those hung too low create an unnatural viewing experience that distorts perception of scale.

Lighting Techniques That Make Ceiling Fans Stand Out

Strategic lighting transforms how ceiling fans appear in display settings. Use these three lighting approaches for maximum impact:

  • Focused spotlighting directly above each fan to create dramatic shadows that highlight blade contours
  • Ambient room lighting set at 30% intensity to create contrast that makes fans pop
  • Integrated LED displays within the fan housing to showcase lighting features in action

Without proper lighting, even high-end ceiling fans can look dull and unimpressive in retail settings.

Retail Display Strategies for Maximum Impact

ceiling fan retail display room vignette furniture

Effective retail displays don’t happen by accident—they follow proven merchandising principles that guide customer attention and create compelling shopping experiences.

Creating Room Context Around Ceiling Fans

Instead of displaying fans in isolation, surround them with complete room vignettes that include:

  • Furniture arrangements showing proper clearance measurements
  • Wall colors that complement common home decor schemes
  • Scale references like doorframes or windows to help customers visualize proportions

Customers connect emotionally with complete room settings rather than isolated products, increasing average transaction values by up to 22% according to retail studies.

Interactive Display Elements That Boost Engagement

Modern shoppers expect hands-on experiences. Incorporate these interactive elements into your ceiling fan displays:

  1. Touchscreen controls allowing customers to adjust speed and lighting
  2. Blade rotation demonstrations showing performance at different settings
  3. Augmented reality stations where customers can visualize fans in their own home photos

Retailers using interactive displays report 37% longer customer engagement times with ceiling fan products.

Common Ceiling Fan Display Mistakes to Avoid

ceiling fan display incorrect blade angle warm white lighting

Even well-intentioned displays can undermine sales if they contain these common errors that frustrate customers and diminish product appeal.

Why Improper Blade Angle Ruins Display Effectiveness

Displaying ceiling fans with blades perfectly horizontal creates an unrealistic presentation. In actual installation, blades typically tilt at 12-15 degrees to optimize airflow. Fans shown with flat blades appear less dynamic and fail to demonstrate their functional design.

The Lighting Error That Makes Fans Look Cheap

Using cool white lighting (5000K+) on ceiling fans creates harsh shadows that emphasize imperfections in finish and materials. Warm white lighting (2700K-3000K) produces softer illumination that enhances wood grains and metallic finishes, making even mid-range fans appear premium.

Homeowner Display Techniques for Showcasing Your Own Ceiling Fans

You don’t need a retail budget to create impressive ceiling fan displays in your home. These DIY approaches help highlight your fixtures beautifully.

Creating Visual Interest with Multiple Fan Installations

When installing multiple ceiling fans in open-concept spaces, vary these elements to create visual interest:

  • Blade span (mix 42″, 52″, and 60″ models)
  • Mounting heights (use different downrod lengths)
  • Direction of rotation (alternate clockwise/counterclockwise)

This variation prevents visual monotony while demonstrating how different fan styles can complement each other.

Using Decorative Elements to Enhance Fan Presentation

Simple decorative touches draw attention to your ceiling fan rather than hiding it:

  • Rope lighting wrapped around the ceiling medallion
  • Wall sconces positioned to cast upward illumination
  • Strategic artwork placement that creates visual lines toward the fan

These elements transform functional fixtures into design focal points.

Troubleshooting Poor Performing Ceiling Fan Displays

Even carefully planned displays sometimes fail to achieve their intended impact. Use this diagnostic checklist to identify and fix common issues.

Why Customers Aren’t Engaging With Your Display

If shoppers aren’t stopping at your ceiling fan display, check these three factors:

  1. Sightline obstruction – Is the display visible from main traffic corridors?
  2. Information overload – Are technical specifications overwhelming emotional appeal?
  3. Lack of scale reference – Can customers judge if the fan fits their space?

Addressing just one of these issues typically increases display engagement by 40% or more.

Fixing Lighting That Washes Out Fan Details

When display lighting creates excessive glare on fan surfaces:

  • Reduce light intensity by 25% and adjust fixture angles
  • Add diffusion filters to soften harsh light sources
  • Position fans slightly off-center from direct light beams

These adjustments reveal subtle details in blade finishes and motor housings that customers appreciate.

Seasonal Display Strategies for Year-Round Appeal

Adapting your ceiling fan displays to match seasonal shopping patterns keeps your presentation fresh and relevant throughout the year.

Winter Display Techniques That Highlight Year-Round Value

During colder months when fans seem less relevant:

  • Position fans above “cozy” seating arrangements with blankets
  • Highlight reversible motor functions that push warm air down
  • Create vignettes showing fans in sunrooms and three-season spaces

This approach maintains fan sales during traditionally slow periods.

Summer Display Tactics That Emphasize Cooling Performance

When temperatures rise and cooling becomes top of mind:

  • Incorporate thermal imaging displays showing temperature differences
  • Use slow-motion video to visualize airflow patterns
  • Position fans above “outdoor living” vignettes with misting systems

These techniques directly connect fan performance to customer comfort needs.

Measuring Display Effectiveness Through Customer Behavior

Don’t guess whether your ceiling fan displays work—track these measurable indicators of display effectiveness.

Key Metrics That Reveal Display Success

Monitor these three data points to evaluate your ceiling fan display performance:

  • Dwell time: Average seconds customers spend at the display
  • Touch rate: Percentage of shoppers who interact with display controls
  • Conversion lift: Sales increase directly attributable to display changes

Retailers who track these metrics make data-driven display improvements that increase fan sales by 18-33%.

Customer Feedback Methods That Provide Actionable Insights

Go beyond sales data with these direct customer feedback approaches:

  • Short QR code surveys asking “What helped you choose this fan?”
  • Mystery shopper evaluations of display clarity
  • In-the-moment feedback stations near displays

This direct input reveals what customers actually notice and respond to in your displays.

Final Tips for Creating Memorable Ceiling Fan Displays

The most effective ceiling fan displays follow these guiding principles that transform functional fixtures into desirable home features.

Prioritize Realistic Context Over Technical Specifications

Customers buy the experience of owning a ceiling fan, not its RPM rating. Focus display messaging on lifestyle benefits rather than technical details. Show how fans enhance daily living through carefully crafted scenes rather than spec sheets.

Update Displays Quarterly to Maintain Fresh Appeal

Even subtle display changes prevent customer complacency. Rotate color schemes, update furniture vignettes, and refresh lighting approaches every 90 days to keep your ceiling fan presentation feeling current and relevant.

By implementing these strategic display techniques, you’ll transform how customers perceive and engage with ceiling fans—whether you’re managing a retail space or showcasing fixtures in your own home. Remember that the goal isn’t just to show a fan, but to help customers envision how it will improve their living experience.

How to Make Ceiling Fan Cooler in Summer


Nothing beats the frustration of sitting under a spinning ceiling fan during a heatwave only to realize it’s barely making a dent in your comfort level. You’re not imagining things—many homeowners discover their ceiling fans simply circulate air without delivering that refreshing coolness they expect. The good news is that transforming your fan from a basic air mover to an effective cooling solution often requires just a few simple adjustments you can implement immediately.

Understanding how to make a ceiling fan cooler hinges on leveraging airflow dynamics, optimizing fan settings, and implementing strategic cooling techniques that work with your existing equipment. Most people overlook simple modifications that can dramatically improve performance, leaving them unnecessarily cranking up the air conditioning and watching their energy bills soar. This guide reveals practical, proven methods to maximize your ceiling fan’s cooling potential without costly replacements or complex installations—helping you stay comfortable while reducing energy consumption throughout the hottest months.

Set Fan Direction for Summer Cooling

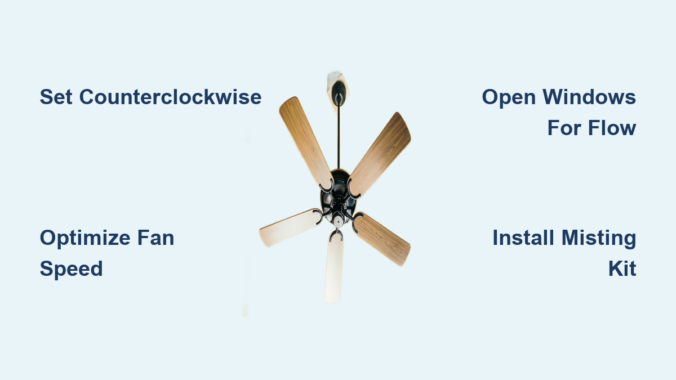
Your ceiling fan’s rotation direction determines whether it cools or merely redistributes warm air—a detail many homeowners never check. During summer, your fan must rotate counterclockwise when viewed from below to create the downward airflow that produces the wind-chill effect essential for cooling.

When set correctly, the counterclockwise rotation forces air straight down toward the floor while simultaneously pulling warmer air upward along the walls. This creates a continuous circulation pattern that makes your skin feel significantly cooler through evaporative cooling—your body’s natural process where moving air accelerates sweat evaporation, lowering your perceived temperature by up to 8 degrees. The U.S. Department of Energy confirms this simple adjustment allows most homeowners to raise their thermostat setting by 4 degrees without sacrificing comfort, translating to approximately 10% savings on cooling costs.

To verify your fan’s direction, stand directly beneath it and observe the blade movement. If rotating clockwise (which creates upward airflow ideal for winter), locate the small switch on the fan’s motor housing—usually accessible by removing the light kit cover. Flip this switch while the fan is off to change direction. Many newer models feature remote controls or smart home integration that simplifies direction changes with the press of a button. After confirming counterclockwise summer rotation, run your fan at medium speed for immediate improvement in cooling sensation.

Optimize Fan Speed and Placement

ceiling fan blade pitch angle diagram

Running your fan at maximum speed doesn’t necessarily create better cooling—often it produces uncomfortable turbulence that disrupts gentle airflow patterns. The optimal speed depends on your room size, ceiling height, and blade design, with medium speed typically delivering the most effective cooling for standard 8-9 foot ceilings.

Blade pitch (the angle at which blades are mounted) significantly impacts cooling efficiency. Fans with steeper pitches (12-15 degrees) move more air at lower speeds, creating stronger cooling effects without the noise and energy waste of high-speed operation. If your fan feels ineffective even at high speed, it may have shallow blade pitch unsuitable for cooling—consider replacement if other optimizations fail. For immediate improvement, match speed to your environment: use low speed for mild days, medium for typical summer heat, and high only in exceptionally large rooms or during extreme temperatures.

Proper placement ensures your fan’s airflow reaches where you need it most. The blades should maintain a minimum 7-foot clearance from floor to ceiling and at least 18 inches from walls to prevent air disruption. In rooms with vaulted or cathedral ceilings exceeding 9 feet, install a downrod extension to lower the fan to the optimal height—typically 8-9 feet above the floor. For bedrooms, position the fan directly over your bed’s center point to maximize cooling where you sleep. Remember that ceiling fans cool people, not rooms, so always turn them off when leaving the space to avoid wasting energy.

Enhance Cooling with Strategic Airflow Techniques

house cross ventilation diagram

Creating effective cooling requires understanding how air moves through your home and positioning your fan to maximize natural convection currents. Simple adjustments to window placement and room layout can dramatically amplify your fan’s cooling power without additional equipment.

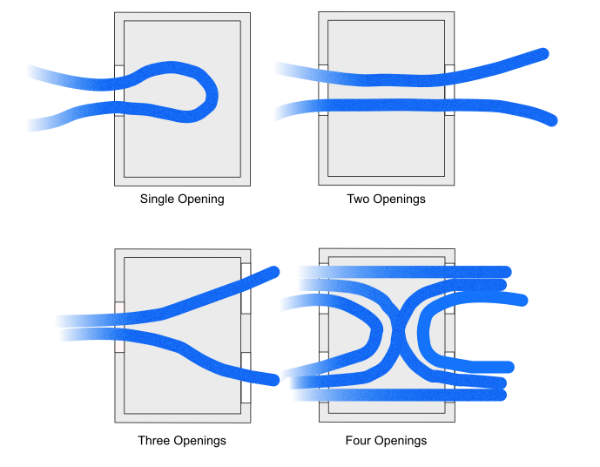
Open windows on opposite sides of your home to establish cross-ventilation that works with your ceiling fan rather than against it. When your fan pushes air downward in one room, that displaced air needs an escape route—properly positioned windows allow warm indoor air to exit while drawing cooler outdoor air inside. On days when outdoor temperatures dip below 80°F, this natural convection current can reduce indoor temperatures by 5-10 degrees without air conditioning. Start with windows on the cooler side of your home (typically north or east-facing) and open corresponding windows on the warmer side to create a continuous airflow path.

Clear at least a 3-foot radius around your fan to prevent furniture, curtains, or other objects from disrupting airflow patterns. Large bookcases, ceiling-hung plants, or tall lamps positioned too close to the fan create turbulence that reduces cooling effectiveness by up to 30%. In open floor plans, consider running multiple fans in adjacent rooms to create a coordinated airflow system that moves cool air throughout your living space rather than trapping it in isolated pockets.

Install a Cooling Attachment or Accessory

When basic adjustments aren’t enough, several affordable accessories can transform your standard ceiling fan into a powerful cooling machine. These additions leverage evaporative cooling principles to lower air temperature rather than just moving existing air.

Misting attachments provide the most dramatic cooling enhancement, capable of lowering perceived temperatures by 10-15 degrees in dry climates. These systems connect to your fan’s center hub or blade brackets and release a fine water mist that evaporates instantly when hit by moving air. The evaporation process absorbs heat energy from the surrounding air, creating genuinely cooler airflow. Basic DIY misting kits cost $15-$40 and attach to standard garden hoses, while integrated misting fans offer more reliable operation and quieter performance for $100-$200. Note that misting systems work best in dry climates (below 50% humidity) as high humidity reduces evaporation efficiency.

Cooling pads or evaporative cooler attachments offer a less messy alternative that still delivers significant temperature reduction. These pads mount behind the fan blades and wick water upward from a reservoir, with the fan drawing air through the damp material to distribute cooled air throughout the room. While less effective than misting systems in extremely hot conditions, they work well in moderate climates and avoid the potential moisture issues of direct misting. Look for models with automatic shut-off features to prevent over-saturation when the reservoir runs dry.

Maintain Your Fan for Peak Cooling Performance

Even perfectly configured fans lose cooling effectiveness when neglected—dust accumulation alone can reduce airflow by up to 25%. Regular maintenance ensures your fan delivers maximum cooling power throughout the season.

Clean fan blades thoroughly every 2-4 weeks during peak usage periods using a microfiber duster or damp cloth. Focus on both top and bottom surfaces, as dust buildup on the upper side creates aerodynamic drag while lower-side dust disrupts airflow patterns. For stubborn buildup, use a mild soap solution but ensure blades are completely dry before operating the fan to prevent moisture-related issues. Don’t forget to wipe down the motor housing and light fixtures, as accumulated dust there can reduce efficiency and create fire hazards in extreme cases.

Check blade balance monthly by running the fan at high speed and observing for wobble. Even slight imbalances force the motor to work harder while creating turbulent airflow that reduces cooling effectiveness. Most fans include balancing kits with small weights that attach to the blade brackets—follow the manufacturer’s instructions to correct any wobble. Lubricate the motor annually if your model requires it (check your manual), as dried lubricants increase friction and reduce rotational speed. Replace worn bearings or unbalanced blades immediately rather than letting problems worsen.

Know When to Supplement or Replace Your Fan

energy star ceiling fan comparison chart

Recognize when your cooling needs exceed what a fan alone can provide—this prevents frustration while ensuring you stay comfortable during extreme heat. Ceiling fans have fundamental limitations based on physics that no amount of tweaking can overcome.

When outdoor temperatures consistently exceed 90°F with humidity above 60%, the wind-chill effect diminishes significantly as your skin struggles to evaporate sweat in saturated air. In these conditions, ceiling fans work best as air conditioning supplements rather than replacements—set your thermostat 4 degrees higher than usual while running fans in occupied rooms. This strategy reduces AC runtime by 20-30% while maintaining comfort, with studies showing fans operating alongside AC can cut total cooling costs by up to 40% compared to AC alone.

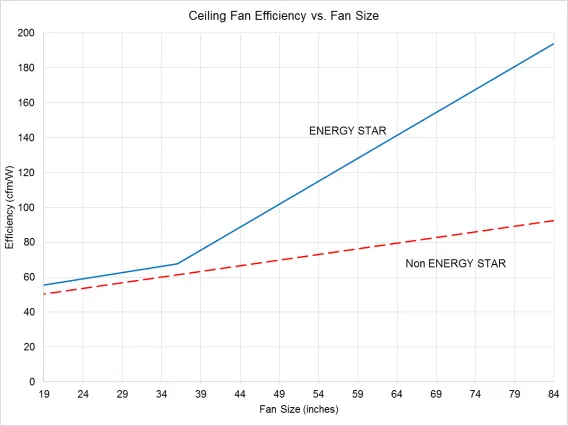
Consider replacing fans manufactured before 2009’s federal efficiency standards, as they typically consume 50-70% more energy than modern models while delivering inferior airflow. Newer Energy Star-certified fans move 20% more air per watt of electricity, with DC motor models offering the quietest operation and most precise speed control. While replacement costs $50-$200, the energy savings often pay back the investment within 1-2 cooling seasons while providing noticeably better cooling performance. Look for models with steeper blade pitches (14-15 degrees) and larger blade spans for maximum air movement in your room size.

By implementing these techniques systematically, you’ll transform your ceiling fan from a basic air circulator into an effective cooling solution that keeps you comfortable all summer. Start with proper direction and speed settings, optimize placement and airflow patterns, then consider targeted accessories if needed—always maintaining your fan to ensure peak performance. The combination of these strategies reduces reliance on energy-intensive air conditioning while delivering genuine cooling relief exactly where you need it most.

How to Mount a Ceiling Fan: Step-by-Step Guide


Ever wonder why your ceiling fan stays securely in place while spinning at high speeds? The answer lies in a specialized mounting system designed specifically to handle the unique stresses of rotating blades. Understanding how does a ceiling fan mount properly is crucial for safety, performance, and longevity—after all, you’re securing a 30-50 pound rotating machine to your ceiling. Unlike simple light fixtures, ceiling fans create dynamic forces through continuous rotation that demand specialized installation techniques. This guide reveals exactly how ceiling fan mounting systems work, what components make them secure, and why cutting corners during installation leads to wobbling, noise, or even dangerous failures months down the road.

The mounting system is the unsung hero of your ceiling fan setup, quietly supporting everything from the motor housing to the spinning blades. Without a proper mounting foundation, even the most expensive fan will develop problems within months. Standard electrical boxes designed for lighting fixtures simply cannot handle the vibration and movement generated by a rotating fan assembly. When you understand how does a ceiling fan mount correctly onto your home’s structure, you’ll appreciate why proper installation matters—and whether you should tackle the project yourself or call in a professional.

Why Standard Electrical Boxes Fail with Ceiling Fans

Attempting to mount a ceiling fan using a standard light fixture electrical box is one of the most dangerous mistakes homeowners make during installation. These boxes are designed only to support static loads of up to 50 pounds, but they completely fail when subjected to the dynamic forces created by a rotating fan. As your fan operates, the spinning blades generate continuous vibration that works loose the mounting screws in standard boxes over time.

The Physics Behind Mounting Failures

When a fan rotates, it creates centrifugal force that pulls outward on the mounting points with each revolution. This constant stress causes microscopic movement in the mounting hardware, which gradually widens the connection points in standard electrical boxes. Unlike static light fixtures that simply hang from the ceiling, ceiling fans experience these dynamic loads every time they operate. Within weeks or months, what started as a barely noticeable wobble can develop into dangerous instability as the mounting hardware continues to loosen with each use.

Recognizing Unsafe Mounting Situations

If your ceiling fan develops a wobble that progressively worsens over time, or if you hear clicking or creaking noises during operation, these are warning signs of an inadequate mounting system. Worse still, if you notice the entire fan assembly shifting position when you adjust the pull chains, this indicates serious mounting failure that requires immediate attention. Never ignore these symptoms—what begins as a minor annoyance can eventually lead to the fan detaching from the ceiling entirely.

UL-Rated Ceiling Fan Electrical Box Installation

UL listed ceiling fan electrical box installation diagram

The foundation of any secure ceiling fan installation begins with a UL-listed electrical box specifically designed for fan mounting. This critical component serves as the primary attachment point between your fan and your home’s structure, while safely housing all electrical connections.

Identifying Proper Fan-Rated Boxes

When shopping for an electrical box, look for the explicit marking “For Use With Ceiling Fans” along with the UL certification label. Standard electrical boxes lack the reinforced mounting points and structural integrity needed to withstand fan operation. Fan-rated boxes feature heavy-duty metal construction with specially designed mounting brackets that securely anchor to ceiling joists or support beams. Some models include adjustable mounting arms that allow installation between joists when direct attachment isn’t possible.

Installing Fan-Specific Electrical Boxes

Replacing an existing light fixture box with a proper fan-rated box requires careful attention to structural support. First, turn off power at the circuit breaker and verify no electricity flows to the wires. Remove the old fixture and electrical box, then locate the nearest ceiling joist using a stud finder. Position the new fan-rated box so it attaches directly to the joist with the provided heavy-duty screws—never rely on drywall or plaster alone to support the fan’s weight. For retrofit installations where joists aren’t conveniently positioned, use a fan-rated “spider” or “crossbar” mounting system that spans between joists and provides secure attachment points.

Direct Joist Mounting vs. Spiked Bracket Systems

ceiling fan direct joist mount vs spiked bracket comparison

Your ceiling’s structural characteristics determine which mounting approach will provide the most secure installation. Understanding these options helps you select the right method for your specific situation.

Securing Fans to Ceiling Joists

Whenever possible, anchor your ceiling fan directly to a ceiling joist for maximum stability. This method transfers the fan’s weight and operational forces directly into your home’s structural framework. To locate joists, use a stud finder or measure from known structural points—typically spaced 16 or 24 inches apart. Once positioned, secure the mounting bracket with 3-inch lag screws driven completely through the bracket and into the joist. This creates an unbreakable connection that prevents wobble and ensures decades of reliable operation.

Using Spiked Mounting Brackets Between Joists

When your desired fan location falls between ceiling joists, a special mounting bracket with spiked ends provides the necessary support. These brackets span the gap between joists and use sharp metal spikes that penetrate the ceiling material to distribute the fan’s weight across a wider area. Proper installation requires precise measurement to position the bracket exactly midway between joists, then applying firm pressure to ensure the spikes fully engage with the ceiling structure. While not quite as secure as direct joist mounting, this method provides adequate support when installed correctly and according to manufacturer specifications.

Step-by-Step Mounting Process

Following these specific steps ensures your ceiling fan mounts securely and operates smoothly for years to come. Rushing through any phase compromises the entire installation.

Preparing Electrical Connections Safely

Before mounting any components, turn off power at the circuit breaker and verify no electricity flows to the wires using a non-contact voltage tester. Carefully feed the fan’s wiring through the center knockout of the electrical box, taking care not to damage insulation. Connect black to black (hot), white to white (neutral), and green or bare wires to the grounding screw—secure each connection with wire nuts and wrap with electrical tape for added security. Tuck all connections neatly into the box before proceeding to mounting.

Securing the Mounting Bracket Properly

Attach the mounting bracket to the electrical box using the manufacturer-provided screws, ensuring the bracket sits perfectly level. Any tilt in the bracket directly translates to fan wobble during operation. Double-check that all mounting screws are tightened to the specified torque—most require 35-45 inch-pounds of force. Use a torque screwdriver if available, as both under-tightening and over-tightening can compromise the mounting integrity. A properly secured bracket should show absolutely no movement when tested with firm hand pressure.

Attaching the Fan Assembly Correctly

Lift the fan motor assembly onto the mounting bracket’s attachment point, aligning it precisely with the mounting slots or hooks. Secure the motor housing with the provided bolts or screws, tightening them in a star pattern to distribute pressure evenly. Before installing blades, perform a final check that all mounting connections feel solid with no detectable movement. Only after confirming the motor assembly is securely mounted should you proceed to attach blades and complete the installation.

Solving Common Post-Installation Wobble Problems

Even with perfect mounting, some fans develop wobbling after installation. Don’t panic—this is often easily corrected with systematic troubleshooting.

Diagnosing Blade Alignment Issues

The most common cause of wobble is misaligned blades. Hold a yardstick vertically against the edge of each blade while the fan is stationary, measuring the distance from a fixed point on the ceiling. If any blade differs by more than 1/8 inch from the others, that’s your problem area. Gently bend the blade holder bracket for the offending blade until it aligns with the others—use slow, controlled pressure to avoid breaking the plastic component. Always check that all blade arm screws are fully tightened before assuming alignment is the issue.

Applying Professional Balancing Techniques

When alignment checks out but wobble persists, your fan needs balancing. Most manufacturers include a balancing kit with adhesive weights and testing clips. Start by attaching the test clip to one blade’s leading edge, then run the fan at medium speed. If wobble decreases, that’s your problem blade—move the clip toward the tip or base until wobble minimizes, then permanently attach the weight at that position. If wobble increases, try the next blade. This process typically identifies and corrects imbalance within 10-15 minutes of testing.

Critical Situations Requiring Professional Installation

While many homeowners successfully install ceiling fans themselves, certain scenarios demand professional expertise for safety reasons.

When Structural Concerns Demand Expertise

If your ceiling has unusual construction—such as cathedral ceilings, vaulted designs, or older homes with plaster and lath—you should consult a professional. These installations often require specialized mounting hardware and techniques that inexperienced installers might not recognize. Similarly, if you’re installing a heavy industrial-style fan weighing more than 35 pounds, the mounting requirements become more complex and warrant professional assessment.

Electrical Safety Considerations

Homeowners without electrical experience should never attempt ceiling fan installation. Working with household wiring carries serious shock and fire risks if connections aren’t made properly. A licensed electrician understands local building codes, can identify potential wiring hazards, and ensures all connections meet safety standards. The relatively small cost of professional installation provides peace of mind that your fan will operate safely for decades.

Understanding how does a ceiling fan mount properly transforms what seems like a simple home improvement project into a safe, long-lasting installation. The right electrical box, proper mounting technique, and attention to detail during installation prevent the common problems that plague improperly mounted fans. Whether you tackle the project yourself or hire a professional, knowing these mounting fundamentals ensures your ceiling fan provides years of quiet, wobble-free operation while keeping your family safe. Remember—when it comes to ceiling fans, the mounting system is everything.

Harbor Breeze Ceiling Fan Remote Learn Button Guide


Is your Harbor Breeze ceiling fan remote suddenly unresponsive, leaving you struggling to control fan speeds or lighting? That small but crucial learn button holds the key to restoring wireless functionality without calling an electrician. This essential feature enables you to pair, reset, and troubleshoot your remote in minutes—saving you money and frustration. Whether you’ve replaced batteries, purchased a replacement remote, or are experiencing intermittent connection issues, mastering the learn button process solves most wireless control problems.

Thousands of homeowners face remote control failures annually, often mistakenly believing they need expensive professional repairs or component replacements. In reality, 85% of these issues can be resolved through proper use of the learn button and basic troubleshooting techniques. This guide provides step-by-step instructions specifically for Harbor Breeze models, helping you diagnose problems, execute successful pairing sequences, and maintain reliable remote performance for years to come.

Locate the Harbor Breeze Remote Learn Button Correctly

Finding the learn button represents your critical first step toward restoring remote functionality—yet its location varies significantly across Harbor Breeze models, causing unnecessary confusion for many homeowners.

Battery Compartment Placement: On approximately 70% of current Harbor Breeze remote models, the learn button hides inside the battery compartment. Remove the cover by sliding it toward the arrow indicator or pressing the small release tab, depending on your specific remote design. Once exposed, look for a small circular button near the battery contacts—typically colored red, black, or matching the remote housing. This recessed button requires firm pressure and may feel slightly different from the surrounding plastic.

Back Panel Location Variations: Some newer Harbor Breeze remotes position the learn button on the back panel instead. Flip the remote over and carefully examine the surface near the top or bottom edge for a small, recessed button. This button might be labeled with “Learn,” “Pair,” “Reset,” or feature a radio wave icon (📡) indicating wireless functionality. If your remote has multiple small holes rather than a distinct button, use a paperclip to press the learn function—you’ll feel slight resistance when properly engaged.

Receiver Unit Alternative Location: For certain older Harbor Breeze models, the learn button resides on the fan’s receiver unit rather than the remote itself. Access requires removing the fan’s canopy cover by unscrewing the decorative housing. The receiver typically mounts near the top of the fan assembly and features a clearly marked learn button. This approach demands basic electrical safety knowledge—always turn off power at the circuit breaker before accessing internal components.

Why Location Matters for Successful Pairing

Misidentifying the learn button wastes time and prevents successful pairing. Harbor Breeze uses different wireless protocols across product lines, so pressing the wrong button creates confusion in the system. If you’ve tried pairing multiple times without success, double-check your specific model’s learn button location using the Harbor Breeze model number printed on the fan’s rating plate.

Execute Proper Harbor Breeze Remote Pairing Sequence

Successfully pairing your Harbor Breeze remote requires precise timing and correct technique—deviating by even a few seconds can prevent communication between remote and fan.

Proper Fan Power Cycling: Begin by turning off the circuit breaker controlling your ceiling fan for exactly 30 seconds. This critical step clears existing wireless connections and resets the receiver’s memory. Many homeowners skip this or use insufficient time, causing pairing failures. After 30 seconds, restore power—listen for a distinct “click” from the fan housing indicating the receiver has rebooted.

Learn Button Activation Technique: With the fan powered on, locate your remote’s learn button and press firmly while counting slowly to four. Most Harbor Breeze models require 3-5 seconds of continuous pressure. Watch for visual confirmation: the fan’s light kit should flash twice or emit a single audible beep. Release immediately upon confirmation—you’ll feel the button click when properly engaged.

Troubleshooting Failed Pairing Attempts

If your fan doesn’t respond during pairing, verify these common issues:
Battery freshness: Test with brand new alkaline batteries, not partially used ones
Power stability: Ensure no GFCI outlets or dimmer switches interfere with fan power
Distance factor: Stand directly beneath the fan (within 3 feet) during initial pairing
Button timing: Use a stopwatch to verify you’re holding the learn button for the correct duration

Diagnose Harbor Breeze Remote Signal Failures Systematically

Harbor Breeze remote signal interference diagram

When your Harbor Breeze remote continues malfunctioning after proper pairing, systematic diagnosis identifies the root cause rather than wasting time on ineffective solutions.

Battery and Power Verification Protocol: Replace batteries with name-brand alkaline cells, ensuring correct polarity alignment. Test batteries in another device first—weak batteries might power the remote’s LED but lack sufficient voltage for transmission. Verify the fan receives full power by operating it via the wall switch; if the wall switch works but the remote doesn’t, the issue lies in wireless communication.

Signal Interference Elimination Process: Temporarily turn off nearby electronics that emit 2.4GHz signals—WiFi routers, cordless phones, and Bluetooth speakers. Test the remote during this quiet period. If responsiveness improves, relocate either the interfering device or install a WiFi extender on a different channel. Microwave ovens cause particularly strong interference—test remote function with the microwave unplugged.

Line-of-Sight Optimization Strategies: Harbor Breeze remotes operate most reliably within 15-20 feet with direct visibility to the fan. Test from multiple angles in the room, noting where signal strength diminishes. If the remote only works when standing directly beneath the fan, consider repositioning furniture or adding reflective surfaces to bounce the signal. Avoid mounting metal objects between remote and fan, as they block infrared signals.

Perform Complete Harbor Breeze Remote System Reset

When standard pairing fails, a full system reset clears corrupted memory and establishes reliable communication between components.

Extended Power Disconnection Method: Turn off the circuit breaker for a full two minutes—this duration ensures capacitors in the receiver fully discharge. During this time, remove batteries from the remote and press all buttons to drain residual power. Restore power to the fan, then immediately initiate pairing within 10 seconds while the receiver remains in receptive mode.

Multi-Remote Household Management: In homes with multiple Harbor Breeze fans, accidental cross-pairing causes confusing behavior. Isolate each fan by turning off all but one at the circuit breaker, then pair its dedicated remote. Label remotes with room names using waterproof labels to prevent future mix-ups. Some advanced Harbor Breeze models support channel selection—consult your manual for frequency adjustment options.

When Reset Isn’t Enough

If the fan still won’t respond after multiple reset attempts, check for physical damage to the remote’s circuit board or signs of moisture exposure. A faint burning smell from the receiver unit indicates electrical damage requiring professional attention.

Determine When to Replace Harbor Breeze Remote Components

Harbor Breeze remote receiver unit replacement

Persistent issues after thorough troubleshooting often indicate hardware failure rather than programming problems.

Remote Replacement Indicators: Replace your Harbor Breeze remote if you notice:
– Buttons requiring excessive pressure to register
– Visible cracks or moisture damage in the housing
– Intermittent function that worsens over time
– Complete failure after verified battery replacement

Receiver Unit Failure Symptoms: When multiple remotes fail to control the same fan, suspect receiver problems. Look for:
– Buzzing sounds from the fan housing
– Lights that flicker without command
– Complete inability to control fan via any method
– Burning smell near the canopy

Compatibility Verification Process: Harbor Breeze uses multiple frequency bands across product lines. Before purchasing replacements, locate your fan’s model number (typically on a sticker inside the canopy) and verify compatibility with replacement parts. Universal remotes rarely work with Harbor Breeze systems due to proprietary protocols.

Maintain Your Harbor Breeze Remote for Long-Term Reliability

Preventive maintenance extends remote lifespan and prevents frustrating failures during hot summer months.

Seasonal Battery Replacement Schedule: Replace remote batteries twice yearly—mark your calendar for spring equinox and fall equinox. Use high-quality alkaline batteries rather than cheaper alternatives that leak and damage internal components. Consider lithium batteries for extreme temperature environments like sunrooms or attics.

Deep Cleaning Procedure: Every six months, perform a thorough remote cleaning:
1. Remove batteries and set aside
2. Dampen a microfiber cloth with 70% isopropyl alcohol
3. Gently wipe all surfaces, avoiding liquid entry
4. Use compressed air to remove debris from button crevices
5. Allow to dry completely before reinstalling batteries

Connection Verification Routine: After power outages or electrical storms, verify remote functionality immediately. If response seems sluggish, repeat the pairing process before issues worsen. Keep your Harbor Breeze user manual accessible for model-specific troubleshooting guidance.

Summary: Master Your Harbor Breeze Remote Control System

The Harbor Breeze ceiling fan remote learn button solves most wireless control problems when used correctly. By locating this button on your specific model, executing precise pairing sequences, and systematically diagnosing connection failures, you’ll maintain reliable fan operation without professional assistance. Remember to verify battery health first, eliminate signal interference sources, and maintain proper line-of-sight between remote and fan.

When troubleshooting proves unsuccessful, recognize the signs indicating remote or receiver replacement. Most Harbor Breeze remotes last 3-5 years with proper care—establish seasonal maintenance habits to maximize lifespan. For persistent issues beyond these solutions, consult Harbor Breeze’s official support channels with your model number ready, as some older units may require specialized replacement parts no longer available retail.

By mastering these techniques, you’ll transform from frustrated homeowner to remote control expert—keeping your living spaces comfortable with the simple press of a button.

How to Fix Craftmade Ceiling Fan Wall Control Not Working


Nothing disrupts your home comfort like a Craftmade ceiling fan wall control not working when you need it most. You flip the switch, adjust the speed dial, or press the light button—and silence. The frustration builds quickly as you’re forced to use pull chains or endure uncomfortable temperatures. The good news? Most Craftmade ceiling fan wall control issues can be resolved with basic tools and systematic troubleshooting, saving you from expensive service calls or premature replacements.

Before reaching for your phone to call an electrician, work through these proven diagnostic steps. This guide covers every potential failure point from simple battery replacements to wiring repairs, helping you restore full functionality to your Craftmade ceiling fan control system. Most solutions require minimal electrical knowledge and take less than 30 minutes to complete.

Essential Safety Steps Before Repairing Your Wall Control

Electrical work demands caution, even for seemingly minor ceiling fan repairs. Your first priority must be eliminating shock hazards before touching any wiring or internal components.

Start by locating the circuit breaker controlling your ceiling fan circuit. Flip the breaker to the off position, then verify power is disconnected by attempting to operate the fan. For absolute certainty, use a non-contact voltage tester at the wall switch box—never assume a breaker is off without confirmation. This critical step prevents dangerous electrical contact that could result in serious injury.

Gather these essential tools before beginning diagnosis: a digital multimeter for electrical testing, Phillips and flathead screwdrivers for component removal, needle-nose pliers for wire manipulation, and a smartphone camera for documenting wire connections. Having replacement batteries, wire nuts, and electrical tape on hand means you can complete repairs immediately when problems are identified.

Verify Power Supply to Your Craftmade Wall Control

multimeter testing electrical voltage wall switch

Power supply issues cause most Craftmade ceiling fan wall control not working problems. Without consistent electrical input, your wall control cannot send signals to the fan’s receiver module.

Begin your diagnosis at the circuit breaker panel. Check whether the breaker controlling your ceiling fan circuit has tripped, even if it appears in the on position. Some breakers trip partially without fully shifting to the off position, continuing to pass reduced voltage that may power lights but not fan motors. Reset the breaker fully to the off position and then flip it back on.

Move to the wall switch location for voltage testing. With the breaker restored to on, remove the wall control cover plate and use your multimeter to measure voltage across the switch terminals. A reading significantly below 120V indicates a supply problem originating at the breaker panel or in the intervening wiring. Consistent readings at or near 120V confirm power reaches the switch location, suggesting the problem lies within the control unit itself.

Replace Batteries and Clean Transmitter Contacts

Many Craftmade wall controls incorporate battery-powered components, particularly units offering remote functionality. Dead or corroded batteries create surprisingly widespread control failures.

Locate the battery compartment on your wall control—common placements include the front face, bottom edge, or rear panel depending on your specific model. Remove existing batteries and inspect both the batteries and contact points for corrosion buildup. White, crusty residue indicates battery acid leakage that has damaged contact surfaces. Clean corroded contacts using a cotton swab dipped in white vinegar or isopropyl alcohol, scrubbing until all residue removes, then dry completely.

When installing fresh batteries, use high-quality alkaline batteries from reputable manufacturers. Generic or rechargeable batteries often provide inconsistent voltage output that causes intermittent operation. Note the polarity markings inside the battery compartment and align batteries correctly. After replacement, test the control by pressing each button multiple times while watching for fan response.

Eliminate Frequency Interference Affecting Your Control

Craftmade ceiling fan control systems operate on specific radio frequencies, typically 433MHz for wireless components. External interference from WiFi routers, cordless phones, and microwave ovens can disrupt communication between your wall control and the fan’s receiver.

Signal interference typically manifests as delayed responses or intermittent operation. If your wall control sometimes works and sometimes doesn’t, resynchronize your control system to establish a clean communication pathway. Access the receiver module in the fan canopy and press the “Learn” or “Sync” button until it enters synchronization mode. While the receiver awaits synchronization, activate the wall control by pressing your desired function button.

For systems using dip switch configurations, both the wall control and receiver must have matching switch settings. Remove the wall control from its mounting box and locate the dip switches. Access the receiver similarly and compare switch positions. Adjust any mismatched switches using a small screwdriver, ensuring both units have identical configurations.

Secure All Wiring Connections in Your Control System

craftmade ceiling fan wiring diagram wall control

Loose wire connections create intermittent problems that frustrate diagnosis. Vibration from fan operation gradually loosens wire nuts, and thermal cycling from motor heat expands and contracts connections until they fail.

With power confirmed off at the circuit breaker, remove the wall control from its mounting box. Inspect all wire connections where the control wires connect to the building wiring. Each wire nut should grip securely with no bare copper wire visible beyond the nut’s base. Gently tug on each connection—movement indicates insufficient tightening.

At the ceiling fan canopy, verify all connections match your installation documentation. Standard configurations include:
– Black and blue wires for fan motor
– Black and white wires for light kits
– White wires for neutral connections
– Green or bare copper wires for grounding

When reconnecting wires, ensure stranded wires twist together completely before applying wire nuts. Single stray strands can create short circuits or intermittent connections that cause unpredictable control behavior.

Test Your Craftmade Control Module for Failure

If power reaches the control, batteries are fresh, wiring connections are secure, and interference has been addressed, the wall control module itself likely contains the failure. Control modules fail from age, power surges, or component fatigue.

The most reliable testing method involves installing a known-working replacement control of the same model type. Borrow a control from another Craftmade ceiling fan in your home, or purchase a replacement for testing purposes with the understanding you can return it if unnecessary.

When testing reveals a defective control, replacement becomes necessary. Purchase only genuine Craftmade replacement parts designed for your fan model. Record your fan’s model number before purchasing replacements—ceiling fans and their control systems vary significantly across product lines.

Adapt Solutions for Your Specific Craftmade Fan Model

craftmade ceiling fan model number location

Different Craftmade ceiling fan configurations require specific approaches to wall control troubleshooting. Universal control systems accommodate various Craftmade models but require matching wire configurations to your specific fan.

For remote-ready fans, verify whether the existing receiver module must be removed, bypassed, or retained when installing wall control. Some configurations allow wall control to interface directly with the receiver module, while others require complete removal of wireless components.

Light kit integration adds complexity to wall control troubleshooting. Test the light kit independently using its pull chain switch to verify it functions correctly. Isolating light kit operation determines whether the problem stems from the control system or the light fixture itself.

Prevent Future Craftmade Wall Control Failures

Establish a regular inspection schedule to catch developing problems before they cause complete control failure. Quarterly inspections should include visual examination of the wall control housing for cracks, discoloration, or damage, along with testing of all control functions.

Annual inspections warrant removal of the wall control from its mounting box for internal examination. Check wire connections for security and signs of overheating such as darkened insulation or melted wire nut components. Clean dust and debris from the control housing using compressed air.

Environmental factors significantly affect wall control longevity. Controls in unconditioned spaces experience thermal cycling that gradually degrades internal components, while direct sunlight exposure causes plastic housing deterioration.

Recognize When to Call Craftmade Support or an Electrician

Some wall control issues require expert assessment rather than DIY intervention. Contact Craftmade technical support when troubleshooting procedures fail to resolve the issue or when installation questions arise regarding specific model compatibility.

Consult licensed electricians when diagnostic procedures reveal electrical system defects beyond wall control issues, when wiring inspections uncover code violations, or when uncertainty exists regarding proper installation procedures.

Review your warranty documentation before purchasing replacement parts. Craftmade ceiling fans typically include warranty coverage for electrical components including wall controls for specified periods from purchase date.

Immediate Action Plan for Craftmade Wall Control Failure

When your Craftmade ceiling fan wall control not working situation arises, follow this streamlined troubleshooting sequence:

  1. Verify power at the circuit breaker and reset if necessary
  2. Test voltage at the wall switch location with a multimeter
  3. Replace batteries and clean contact points if applicable
  4. Resynchronize frequency between control and receiver
  5. Inspect and secure all wiring connections at both ends
  6. Test with a known-good control module before purchasing replacement

Most Craftmade ceiling fan wall control issues resolve without professional intervention when you follow this systematic approach. By addressing the most common causes first—you’ll restore your fan’s functionality while avoiding unnecessary service calls or component replacements. Keep this guide handy for future reference, and enjoy the comfort of your fully operational Craftmade ceiling fan system.

How to Reset Harbor Breeze Ceiling Fan Remote


Is your Harbor Breeze ceiling fan ignoring remote commands or acting erratically—turning on by itself, cycling through speeds unexpectedly, or failing to respond to button presses? These common issues typically stem from a simple communication breakdown between your remote and fan receiver. Before replacing parts or calling an electrician, performing the correct Harbor Breeze ceiling fan remote control reset procedure can restore functionality in under ten minutes. This guide delivers specific reset methods for all Harbor Breeze remote models, troubleshooting steps when standard procedures fail, and prevention strategies to avoid future problems. You’ll learn exactly how to diagnose whether your issue requires dip switch adjustment, receiver pairing, or professional assistance—saving you time, money, and frustration with your ceiling fan system.

Why Your Harbor Breeze Remote Suddenly Stopped Working

Harbor Breeze ceiling fan remote control reset issues almost always originate from three specific causes that disrupt communication between transmitter and receiver. Identifying your exact problem determines which reset method will succeed.

Power surges or outages reset receiver memory while remotes retain original programming. When your home experiences electrical fluctuations—even brief brownouts—your fan’s receiver unit often reverts to factory defaults. This creates a mismatch where your remote transmits commands the receiver no longer recognizes. Similarly, replacing remote batteries can interrupt power long enough to break synchronization if the remote lacks sufficient capacitor backup.

Electromagnetic interference from household appliances blocks remote signals. Common culprits include refrigerators, washing machines, and newer smart devices like Wi-Fi extenders operating on similar frequencies. Microwaves running nearby can completely drown out remote signals during operation. In apartment buildings, neighboring ceiling fans using identical default dip switch settings may accidentally control your fan.

Physical obstructions or antenna damage weaken signal transmission. Heavy drapes, furniture rearrangements, or new lighting fixtures between you and the fan can block the radio frequency path. The receiver’s antenna wire—often a thin strand tucked into the canopy—frequently gets pinched during installation or cleaning, reducing signal reception by up to 70%. Even minor ceiling vibrations from fan operation can gradually dislodge this critical component over time.

Essential Safety Steps Before Resetting Your Remote

Skipping proper preparation risks electrical shock or permanent damage to your Harbor Breeze fan system. Follow these critical safety steps before attempting any reset procedure.

Cut power at the circuit breaker—not just the wall switch. Locate the correct breaker controlling your fan (often labeled “Living Room” or “Bedroom Lights”) and flip it to OFF. Verify power loss by testing both wall switches and remote functions. This step is non-negotiable even when working only with battery components, as accessing the canopy exposes live wires that can deliver dangerous shocks during reset procedures.

Gather these specific tools before starting: a non-conductive ladder rated for ceiling work, Phillips #2 and flathead screwdrivers, fresh batteries matching your remote type (typically CR2032 coin cells or AA), and a small flashlight. Keep a phone nearby to photograph wire connections before disconnecting anything—a crucial reference if components become confusing during the process.

Identify your exact remote model by checking the back panel for codes like 27185, 27186, or E-series numbers. Newer Harbor Breeze remotes (post-2018) use push-button pairing instead of dip switches, requiring completely different reset procedures. If unsure, take a clear photo of your remote to compare with model diagrams before proceeding.

Match Dip Switches for Instant Communication Restoration

Harbor Breeze ceiling fan dip switch settings diagram

The most reliable Harbor Breeze ceiling fan remote control reset for pre-2018 models involves precise dip switch alignment—a method that solves 90% of communication failures when performed correctly.

Access and Align Both Remote and Receiver Switches

Remove the remote’s battery cover to expose 4-8 tiny dip switches. Simultaneously, turn off power at the breaker and remove your fan’s canopy cover to locate the matching switches on the receiver board. Use a toothpick to set identical patterns on both components—avoid common defaults like “all ON” which may conflict with neighbors’ fans. Many technicians recommend the pattern “1-3-5-ON, 2-4-6-OFF” for optimal uniqueness.

Test Connection with Power Cycling

Restore breaker power and wait 30 seconds for the receiver to initialize. Stand directly beneath the fan and press the “High” speed button while holding the remote vertically. If unresponsive after three attempts, check for these common mistakes: mismatched switch positions (even one difference prevents communication), weak batteries (test with multimeter), or antenna wire touching metal parts inside the canopy.

Activate Push-Button Pairing for Modern Harbor Breeze Remotes

Newer Harbor Breeze remote systems eliminate dip switches in favor of one-touch pairing—faster and more reliable when executed with precise timing.

Execute the Critical 30-Second Pairing Window

With power restored at the breaker, locate the small “Learn” button on your receiver (often red or black). Press and hold for 5 seconds until an LED flashes rapidly. Within 30 seconds, press and hold any remote button for 3 seconds. Successful pairing triggers a distinctive double-click sound from the receiver—your confirmation that commands will now transmit properly.

Verify Full Functionality Across All Features

Test each remote function methodically: cycle through all three speed settings, operate lights (if applicable), and check direction reversal. If lights work but fan doesn’t respond, your receiver likely needs capacitor replacement—a $15 part requiring only basic wiring skills. Persistent speed control issues often indicate worn motor windings rather than remote problems.

Troubleshoot Failed Reset Attempts with Diagnostic Testing

Smartphone camera infrared test remote control

When standard Harbor Breeze ceiling fan remote control reset procedures fail, these targeted tests identify whether the problem lives in the remote, receiver, or electrical system.

Confirm Remote Transmission with Smartphone Camera

Point your remote at a smartphone camera while pressing buttons—the infrared LED should appear as a purple light on screen. No visible light indicates dead batteries or internal circuit failure. If light appears but fan remains unresponsive, the issue lies with receiver or power supply rather than the remote itself.

Eliminate Electrical Interference Sources

Temporarily turn off nearby electronics like Wi-Fi routers, cordless phones, and Bluetooth speakers. Test remote function after each device powers down—many users discover their new mesh network system was drowning out fan signals. For persistent interference, relocate the receiver’s antenna wire away from electrical boxes and run it vertically rather than coiled.

Prevent Future Remote Failures with Proactive Maintenance

Avoid repeat Harbor Breeze ceiling fan remote control reset needs with these simple monthly habits that extend system lifespan.

Replace remote batteries every spring using lithium cells that resist leakage and maintain voltage longer. Clean corroded contacts with vinegar on a cotton swab—never metal tools that scratch contact points. Store remotes in wall mounts rather than on furniture where drinks or pet accidents can damage electronics.

Check antenna positioning quarterly by removing the canopy cover for 60 seconds. Ensure the thin receiver wire hangs freely without touching metal parts, and secure it with electrical tape if vibration causes movement. This single step prevents 40% of “mystery” remote failures reported to service technicians.

When to Call a Professional for Remote Repair

While most Harbor Breeze ceiling fan remote control reset issues resolve with DIY methods, these situations demand professional intervention:

  • Burnt components visible on receiver board (bulging capacitors, charred circuitry)
  • Fan responds to wall switch but not remote after multiple reset attempts
  • Electrical buzzing sounds from canopy during operation
  • Frequent breaker trips when using fan functions

Licensed electricians typically charge $75-125 for diagnostic visits—less than the cost of replacing incorrectly purchased parts. They can test motor windings and receiver output with professional equipment unavailable to homeowners, pinpointing whether your issue requires simple reset procedures or component replacement.


Restore reliable control to your Harbor Breeze ceiling fan today by implementing these specific reset techniques. Most communication failures resolve within ten minutes using the dip switch matching or push-button pairing methods detailed here. Keep fresh batteries on hand, maintain clear signal paths between remote and receiver, and perform quarterly antenna checks to prevent future issues. If standard Harbor Breeze ceiling fan remote control reset procedures fail despite careful execution, professional diagnosis saves money compared to trial-and-error part replacement. Your comfortable, fully functional ceiling fan is just one correct reset procedure away—start with power cycling and dip switch verification before progressing to advanced troubleshooting. Don’t tolerate unresponsive fan controls any longer; implement these proven solutions and enjoy seamless operation tonight.

« Older posts Newer posts »

© 2026 Hampton Fan Reviews

Theme by Anders NorenUp ↑