Installing a ceiling fan can transform your room’s comfort and aesthetics, but the process often intimidates homeowners. With Savoy House ceiling fans known for their quality craftsmanship and elegant designs, proper installation is crucial to ensure both safety and optimal performance. This guide walks you through the complete installation process with specific attention to Savoy House models, helping you avoid common pitfalls that could lead to wobbling, electrical issues, or worse—safety hazards. By following these steps, you’ll have your new Savoy House fan circulating air efficiently while enhancing your space’s visual appeal in about 2-3 hours, even if you’re working with basic DIY skills.
Before you begin, understand that improper ceiling fan installation causes thousands of electrical incidents annually. The right preparation prevents dangerous situations while ensuring your investment delivers years of reliable service. This comprehensive guide covers everything from verifying your electrical box can support the fan’s weight to making those final adjustments that eliminate annoying wobble. Whether you’re replacing an existing light fixture or installing in a new location, you’ll learn the professional techniques that make the difference between a shaky, noisy installation and a smoothly operating centerpiece for your room.
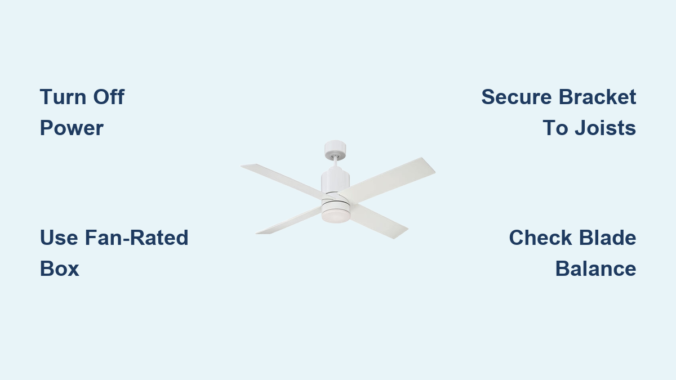
Essential Safety Preparations Before Starting
Electrical safety must be your top priority when installing any ceiling fixture. Begin by turning off power at the circuit breaker—not just the wall switch—and verify it’s off using a non-contact voltage tester. Many homeowners skip this critical verification step, risking serious shock. For Savoy House fans, which typically weigh between 15-30 pounds depending on model and blade size, you must confirm your electrical box is rated for ceiling fan support (minimum 35 lbs capacity). Standard light fixture boxes won’t safely support a fan’s rotational forces and could lead to catastrophic failure.
Required Tools and Materials Checklist
- Non-contact voltage tester (mandatory for safety)
- 10-14 AWG wire nuts (size depends on your wiring)
- Screwdrivers (Phillips and flathead)
- Wire strippers
- Adjustable pliers
- Ladder rated for your height and weight
- Ceiling fan-rated electrical box (if replacing light fixture)
- Mounting hardware specific to your Savoy House model
- Optional but recommended: stud finder, torque screwdriver
Why Your Electrical Box Matters Most
“What if my ceiling only has a standard light fixture box?” This is the most common installation hurdle. Savoy House fans require UL-listed fan-rated electrical boxes that securely anchor to ceiling joists. If you’re converting from a light fixture, you’ll need to replace the existing box with a fan-rated one—a step many DIYers overlook. Look for boxes marked “For Ceiling Fan Support” with integrated mounting brackets. When properly installed, these distribute rotational stress across multiple joists rather than relying on a single mounting point that can loosen over time.
Mounting Your Savoy House Fan Bracket Correctly
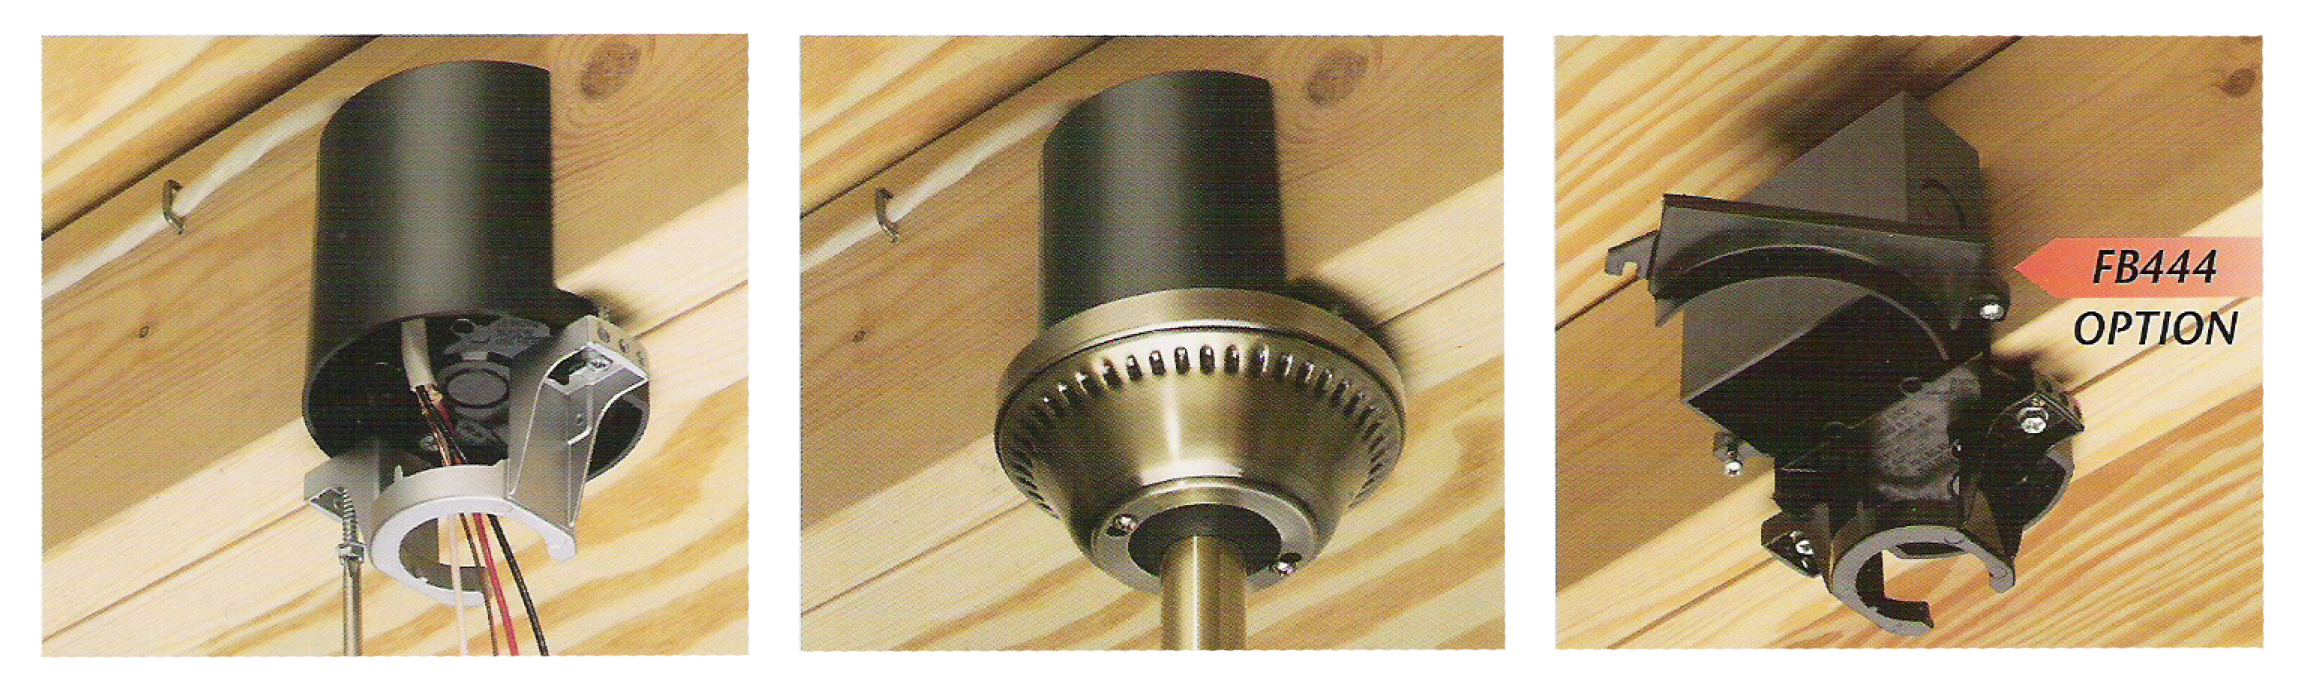
The mounting bracket serves as the critical foundation for your entire installation. Savoy House includes specific mounting hardware with each fan model, but improper bracket installation causes 70% of wobble issues. Locate ceiling joists using a stud finder—don’t rely on measuring from walls as joist spacing varies. For optimal stability, secure the mounting bracket directly to two joists whenever possible. When joists aren’t aligned with your desired fan location, use an adjustable fan brace that spans between joists and locks in place when tightened.
Common Bracket Installation Mistakes to Avoid
- Using drywall anchors instead of joist connections (never acceptable for ceiling fans)
- Overtightening mounting screws which can strip wood or crack metal boxes
- Installing on cathedral ceilings without proper reinforcement
- Ignoring the gap between bracket and ceiling (should be flush with no light showing through)
Wiring Your Savoy House Fan and Light Kit
Savoy House fans typically feature color-coded wiring that follows standard electrical conventions: black for hot (fan motor), blue for hot (light kit), white for neutral, and green or bare copper for ground. Match these to your house wiring accordingly—black to black, white to white, etc. The critical step many miss is securing wire connections with both wire nuts AND electrical tape for vibration resistance. Ceiling fans create constant movement that can loosen standard wire nut connections over time.
Troubleshooting Wiring Issues Before Power-Up
“Why does my fan work but not the light?” This common issue usually stems from improper blue wire connection. If your fan operates but the light doesn’t, double-check that the blue wire from the fan connects to the switched hot wire (typically black) in your ceiling box. Some Savoy House models with dual controls require separate hot wires for fan and light—verify your model’s specific wiring diagram before final assembly. Never assume the ceiling wiring matches your fan’s configuration.
Assembling and Attaching Fan Blades Properly
Savoy House blades attach using either threaded rod systems or direct mount brackets, depending on model. The key to vibration-free operation is consistent blade pitch and secure mounting. When installing blades, alternate directions around the motor housing to balance stress points. Tighten blade screws gradually in a star pattern rather than fully securing one at a time—this prevents warping the blade iron. Most importantly, verify all blade screws are snug but not overtightened, which can crack composite blades or strip mounting holes.
Critical Blade Installation Checks
- Measure blade tip height (must be at least 7 feet from floor)
- Confirm equal distance between all blades and ceiling
- Check blade pitch angle consistency with included gauge
- Verify no blade screws protrude through mounting brackets
Testing and Balancing Your Newly Installed Fan
After assembly, perform a critical safety test before installing blades. With power restored temporarily, run the fan at highest speed without blades to check for motor vibration. If the bare motor housing shakes excessively, the problem lies in your mounting—not balance weights. Once blades are installed, operate at medium speed and observe for wobble. Minor vibration is normal during break-in period, but significant wobble requires balancing.
How to Fix Wobble Without Balance Kits
Many Savoy House fans include balancing kits, but you can often correct minor wobble by:
1. Checking all blade screws for tightness (most common fix)
2. Verifying equal blade pitch using the included gauge
3. Cleaning dust buildup from blade undersides (causes imbalance)
4. Ensuring mounting bracket sits flush against ceiling with no gaps
Final Adjustments and Safety Verification
Complete your installation with these professional finishing touches. First, confirm all electrical connections remain secure after initial operation—vibration can loosen wire nuts during first use. Next, verify the pull chains operate smoothly without binding, and adjust chain length so they hang 18-24 inches below the fan body. Finally, test all speed settings and light functions to ensure proper operation. For safety, wait 24 hours before regular use to confirm no unexpected noises or movement develop as components settle.
Long-Term Maintenance Tips for Savoy House Fans
- Schedule quarterly checks of blade screws and mounting hardware
- Clean blades every 2-3 months to prevent dust-related imbalance
- Lubricate motor housing annually with manufacturer-approved oil
- Replace worn rubber isolators every 3-5 years to reduce vibration
Proper Savoy House ceiling fan installation transforms both your room’s functionality and aesthetic appeal when done correctly. By focusing on secure mounting, precise wiring, and careful balancing, you’ve avoided the most common installation pitfalls that lead to noisy operation or safety concerns. Remember that regular maintenance checks will preserve your fan’s smooth operation for years to come, while attention to those small details during installation makes the difference between a frustrating experience and a job well done. If you encounter model-specific challenges beyond this general guide, always consult Savoy House’s official documentation for your exact fan model—proper installation ensures you enjoy both the comfort and beauty of your new ceiling fan safely and reliably.
Leave a Reply