Dust, grease, and moisture silently accumulate on your exhaust fan cover until you notice strange noises, lingering steam, or a musty smell. If your bathroom mirror won’t stop fogging after a shower or your kitchen fan struggles to clear cooking fumes, a dirty exhaust fan cover could be the culprit. Learning how to clean exhaust fan cover properly isn’t just about appearance, it is essential for safety, efficiency, and healthy indoor air quality. Over time, caked-on grime reduces airflow, increases fire risk, and strains the motor. But with the right tools and a few simple steps, you can restore peak performance in under 30 minutes. This guide walks you through every stage from power-down to reassembly, including internal cleaning, troubleshooting, and maintenance tips tailored to bathroom and kitchen models.
Why Your Exhaust Fan Cover Needs Regular Cleaning
A clean exhaust fan cover keeps your home safe, dry, and quiet while maintaining proper airflow.
Prevent Fires and Mold Growth
Dust buildup inside the fan housing represents a leading fire hazard. When the motor heats up during operation, accumulated lint and debris can ignite. Bathroom fans, often forgotten for years, become ticking risks. Similarly, poor ventilation traps moisture, creating ideal conditions for mold and mildew on ceilings, walls, and tiles. Cleaning the cover ensures proper airflow, reducing humidity and preventing structural damage throughout your home.
Boost Airflow and Efficiency
A clogged cover forces the fan to work harder, lowering efficiency, increasing energy consumption, and shortening motor life. Users report airflow improvements of up to 50% after cleaning. You will notice faster steam removal, quieter operation, and cooler running, essentially like having a brand-new unit without the purchase price.
Extend Fan Lifespan
Regular cleaning reduces wear on internal components. Motors last significantly longer when not choked by dust and debris. For homes with pets or allergy sufferers, removing accumulated dust and dander improves overall air quality and system reliability.
Identify Your Exhaust Fan Cover Type
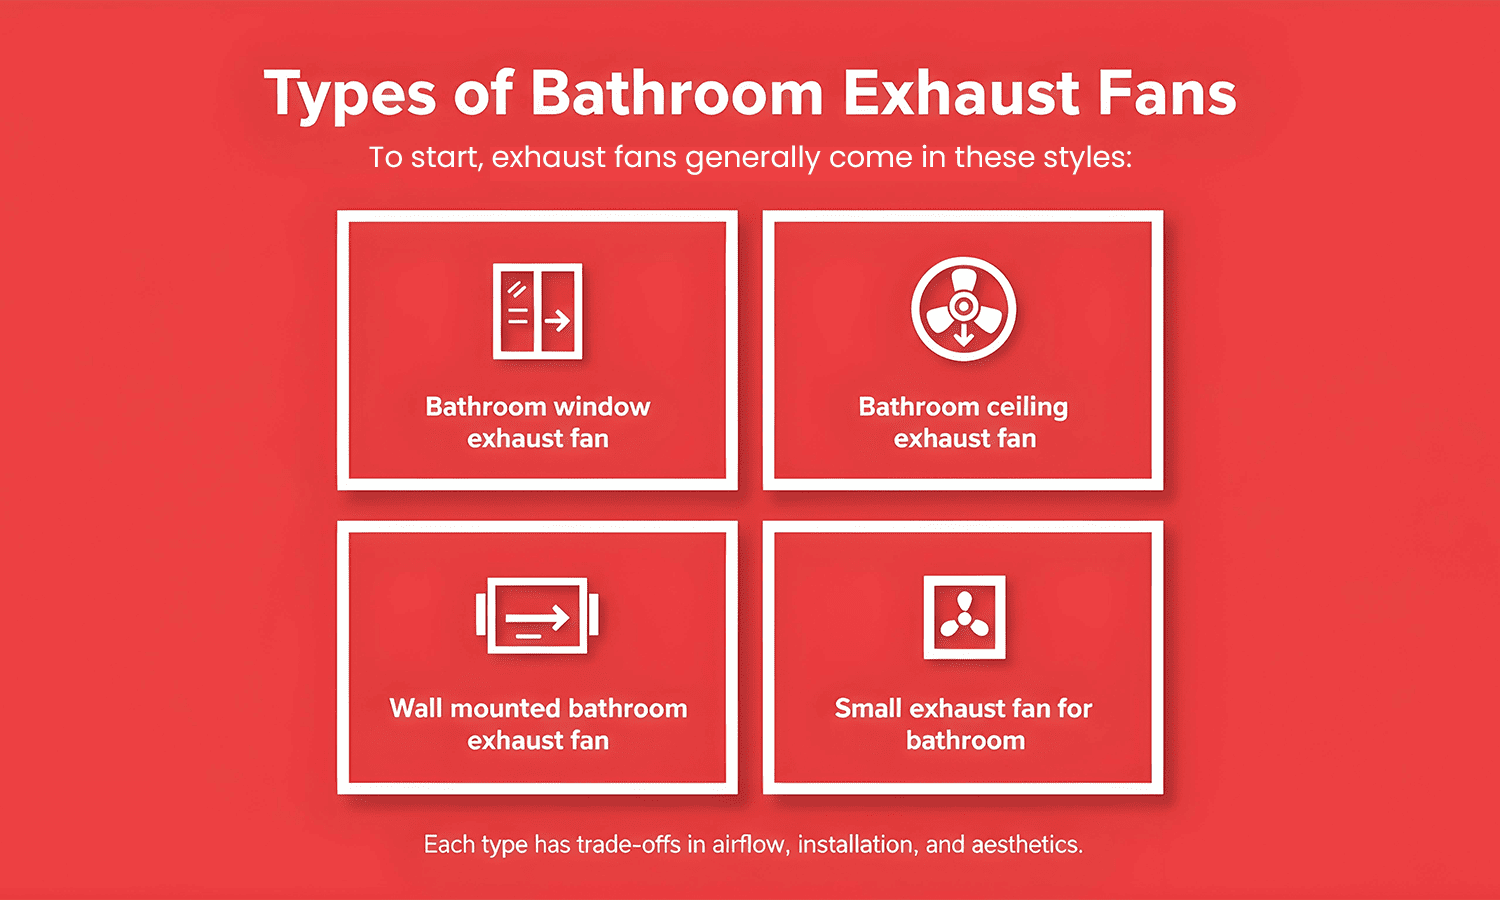
Different fans require different removal and cleaning methods. Knowing your cover type prevents damage during maintenance.
Bathroom Fan Covers
Most bathroom units use plastic covers made from ABS or polycarbonate in square, rectangular, or round designs. They often include louvers to direct airflow and may integrate lights, humidity sensors, or speakers.
- Mounting styles:
- Spring clips: Gently pull down and squeeze side tabs to release
- Screws: Two to four visible screws secure the cover in place
- Twist-lock: Rotate slightly to release the mechanism
- Smart models: If your fan has lighting or electronics, disconnect the wiring harness before removal to prevent damage
Kitchen Fan Covers
Kitchen models typically form part of a range hood and are made of stainless steel or metal designed to handle grease, not just dust.
- Grease filters: Remove these first as they are often dishwasher-safe for easy cleaning
- Cover removal: May require unscrewing or unclipping depending on the model
- Heavy buildup: Expect thick, sticky grease that requires commercial degreasing solutions
When to Clean Your Exhaust Fan Cover
Timing matters significantly. Clean too late and performance drops noticeably. Clean too often and you risk unnecessary wear on components.
Recommended Cleaning Schedule
| Environment | Frequency |
|---|---|
| Standard bathroom | Every 3-6 months |
| High-use bathroom | Every 3 months |
| Light-use kitchen | Every 6 months |
| Heavy-cooking kitchen | Every 3-4 months |
| Arid or dusty areas | Every 6 months minimum |
| Homes with pets or allergies | Every 3-4 months |
Pro Tip: Schedule cleanings with seasonal HVAC filter changes in spring and fall for consistent maintenance habits.
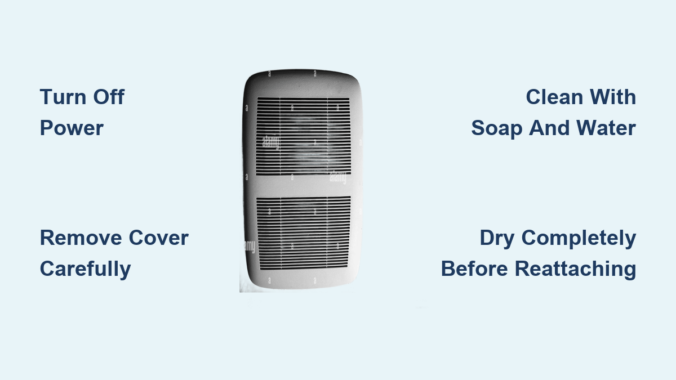
Safety First: Power Down and Protect Yourself
Never skip safety protocols when working with electrical appliances near moisture.
Turn Off Power Completely
- Switch off the fan at the wall first
- Shut off the circuit breaker to eliminate shock risk entirely
- Use a non-contact voltage tester near the unit to confirm no live current exists
Warning: Even low-voltage fans can deliver dangerous shocks. Always verify power is off before proceeding.
Wear Protective Equipment
- Eye protection: Dust and debris can fall into your eyes during cleaning
- Face mask: Prevents inhaling mold spores, dust, or allergens
- Gloves: Use when handling greasy kitchen components to protect your skin
Use a Stable Ladder
Ceiling-mounted fans require a stepstool or ladder for safe access. Ensure it sits on a flat, non-slip surface. Have someone spot you if possible while working at heights.
Tools and Supplies You Will Need
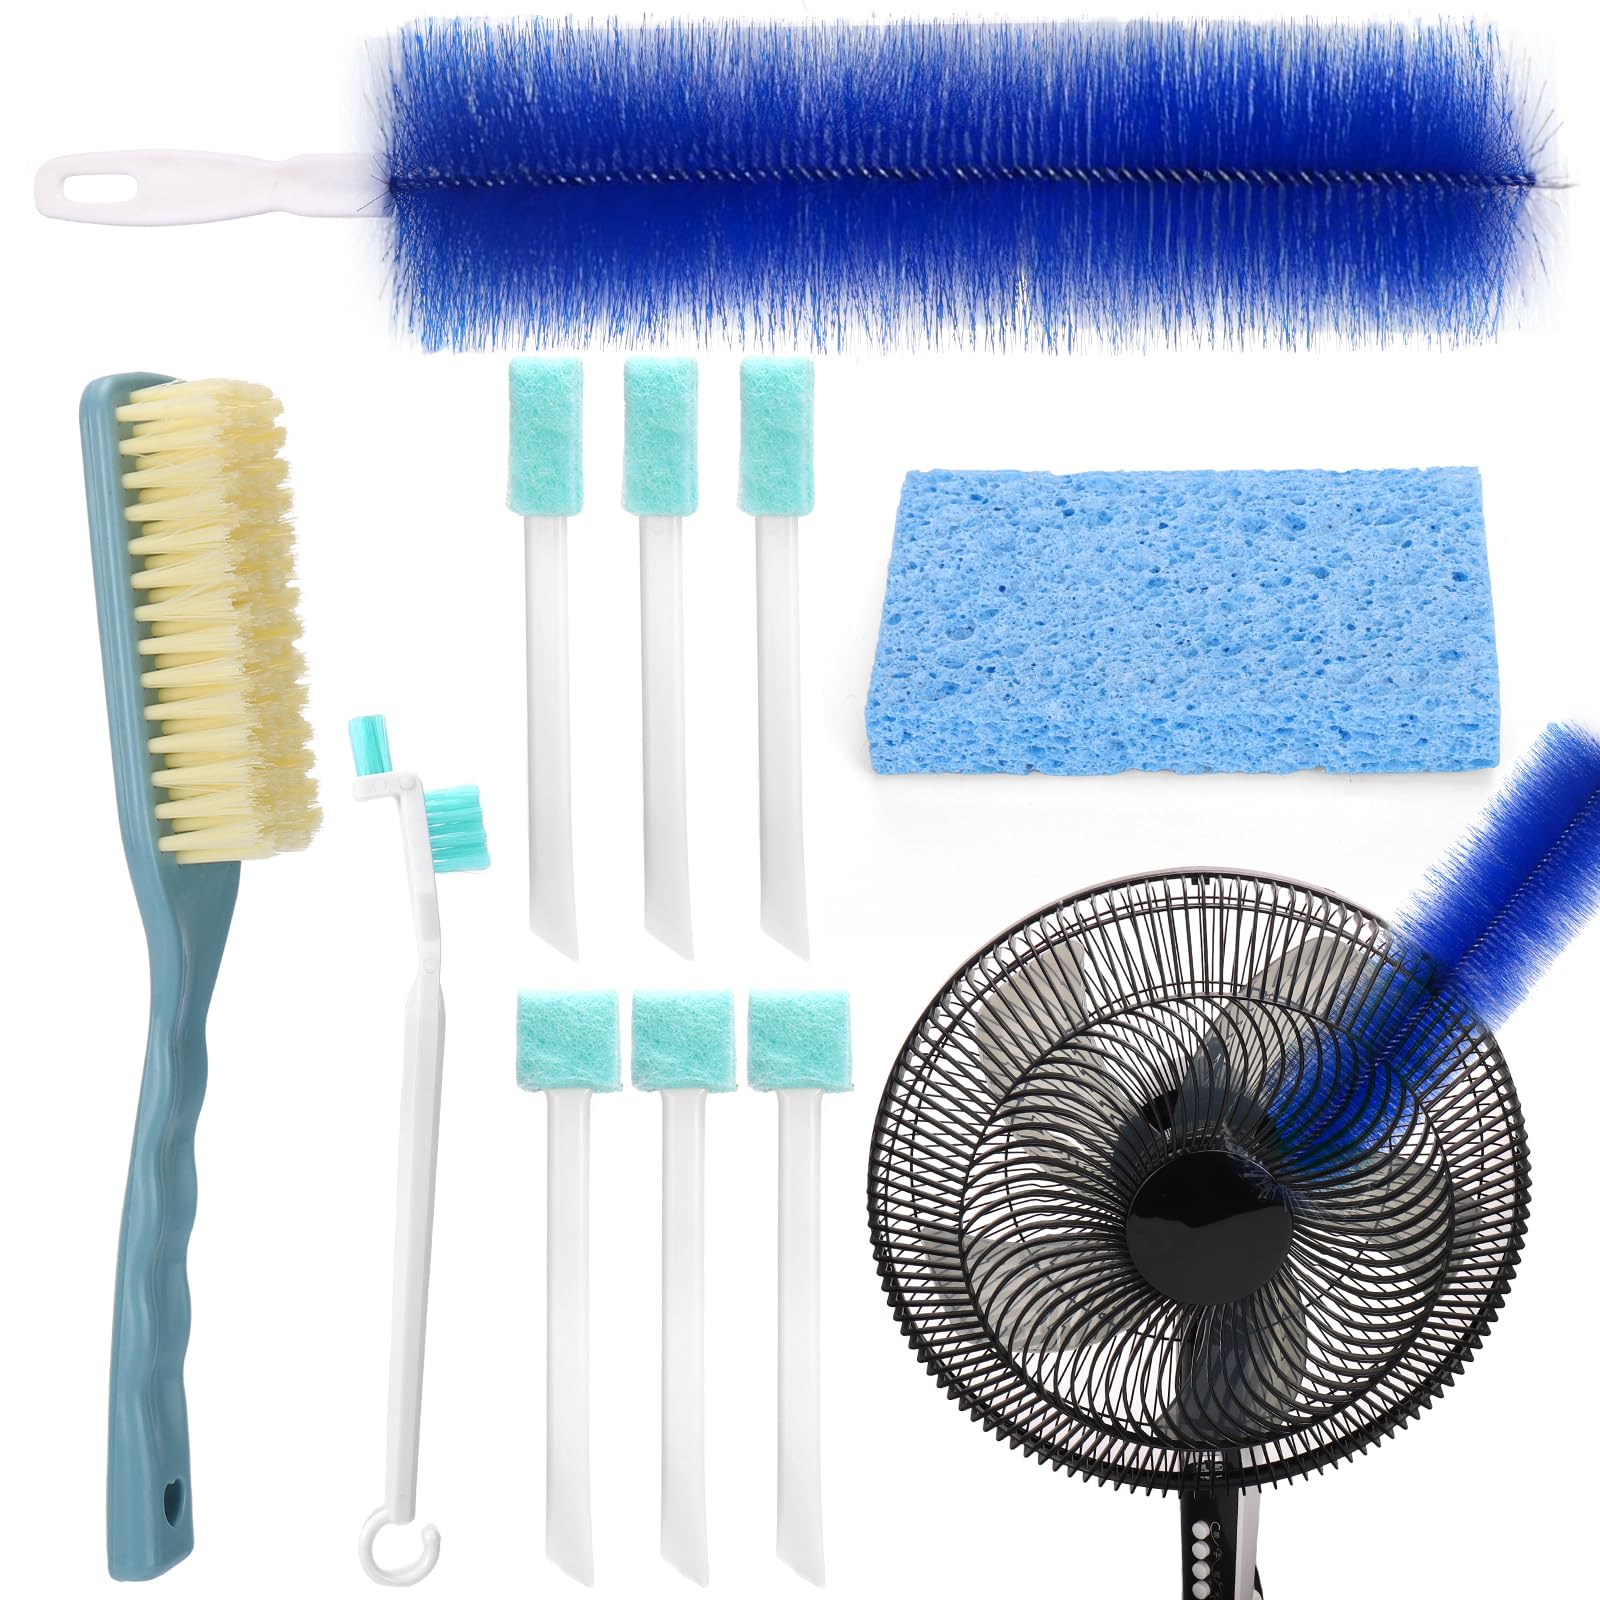
Gather everything before starting to avoid mid-cleaning trips to the hardware store.
Cleaning Supplies
- Dish soap (mild, non-abrasive)
- Warm water for soaking
- Baking soda (1-2 tablespoons for degreasing)
- Commercial degreaser for kitchen grease
- Microfiber cloths (lint-free for drying)
- Old towels for floor protection and handling wet parts
Essential Tools
- Screwdriver (magnetic tip helps prevent lost screws)
- Vacuum with brush and crevice tools
- Soft-bristled brush or old toothbrush
- Sink or basin for soaking covers
- Non-contact voltage tester
- Stepstool or ladder
- Compressed air for deep dust removal
Step-by-Step: Remove the Fan Cover
Bathroom Fan Cover Removal
For clip-mounted covers, gently pull downward and press inward on both sides to release spring tabs. Squeeze metal mounting wires together and slide out carefully.
For screw-mounted covers, use a screwdriver to remove the two to four screws. Hold the cover as you remove the last screw to prevent it from dropping unexpectedly.
For units with lights or electronics, remove the light cover first if separate. Unplug the wiring harness before removing the main cover. Take a photograph of connections for easy reassembly.
Kitchen Fan Cover Removal
Remove the grease filter first as this is typically the primary barrier. Unscrew or unclip the cover based on your specific model. Some range hood covers require full disassembly, so consult manufacturer instructions for complex systems.
Clean the Cover Properly
Plastic or Non-Electrical Covers
- Fill a sink or basin with warm water and a few drops of dish soap
- Add one to two tablespoons of baking soda for extra cleaning power
- Soak the cover for 15-30 minutes to loosen grime
- Use a soft brush or toothbrush to scrub vents, crevices, discolored areas, and mildew spots
- Rinse thoroughly under running water
- Dry completely with a microfiber cloth or air-dry on a clean towel
Critical: Ensure 100% dryness before reinstallation. Moisture causes mold growth and electrical issues.
Electrical or Integrated Covers
- Never soak in water
- Wipe with a damp microfiber cloth only
- For stubborn spots, lightly dampen the cloth with soapy water, then dry immediately
- Avoid spraying liquids directly onto the cover
Warning: Moisture can damage sensors, lights, or circuitry. Less is more when cleaning electronic components.
Clean the Internal Components
:max_bytes(150000):strip_icc()/How-to-Clean-a-Dusty-Bathroom-Fan-8419-09-bea27a1488e644e1988768fe60b67eb1.jpg)
A clean cover is not enough. Dust inside the housing kills performance and increases fire risk.
Vacuum the Housing and Blades
Use the crevice tool to remove dust from corners and edges. Switch to the brush attachment to gently vacuum fan blades, motor housing, and duct opening edges without applying excessive pressure.
Scrub Blades and Housing
Use a dry or slightly damp toothbrush to dislodge caked-on dust from fan blades. For sticky buildup, lightly moisten the brush but never pour water directly onto components. Wipe with a damp microfiber cloth that is not dripping wet.
Deep Clean with Compressed Air
Take the unit outdoors or to a well-ventilated area. Use compressed air to blow dust from motor fins and housing. Follow with vacuuming to remove dislodged particles for a thorough clean.
Reassemble and Test the Fan
Reattach the Cover
For clip-mounted models, squeeze mounting wires together, align with slots, and push up until they snap securely into place.
For screw-mounted models, insert screws and tighten gently. Over-tightening can crack plastic covers.
Restore Power and Test
Turn the circuit breaker back on and flip the wall switch. Observe for smooth startup, no unusual noise, and strong airflow. Test by holding tissue near the vent to confirm proper suction.
Listen for grinding or rattling sounds that indicate misalignment or motor damage. If the fan hums but does not spin, the motor may be seized. If it does not turn on at all, check power and wiring connections.
Troubleshoot Common Post-Cleaning Issues
Fan Is Noisy After Cleaning
Loose screws or misaligned cover often cause noise. Tighten all screws and ensure proper seating of the cover in its track.
Reduced Airflow
Clogged blades, dirty housing, or blocked external vent reduce airflow. Recheck internal cleaning and inspect the outdoor exhaust for obstructions.
Cover Will Not Snap Back
Bent tabs or debris in the track prevent proper attachment. Clean the track thoroughly and gently bend tabs back into shape if needed.
Musty Smell When Running
Mold in the duct or housing causes persistent odors. Clean interior with a vinegar-dampened cloth and inspect for moisture sources.
Maintain Peak Performance
Monthly Inspection
Visually check for dust buildup on the cover and housing. Listen for unusual sounds during operation. Run the fan during and 15-20 minutes after showering to manage humidity.
Every Six Months
Perform a full cleaning cycle and inspect the exterior vent for blockages like leaves, bird nests, or debris accumulation.
Annual Check
Test backdraft damper function to ensure proper airflow direction. Consider professional duct cleaning if airflow declines despite thorough cleaning.
Final Thoughts on Cleaning Your Exhaust Fan Cover
Cleaning your exhaust fan cover is a quick, low-cost task with high-impact benefits. It prevents fires, stops mold growth, improves air quality, and extends your fan’s operational life significantly. Whether dealing with a bathroom unit clogged with dust or a kitchen hood coated in grease, a thorough cleaning takes less than 30 minutes and pays off immediately in performance, safety, and comfort. Regular maintenance every three to six months keeps your home’s air flowing freely and your ventilation system running efficiently for years to come.
Frequently Asked Questions About Cleaning Exhaust Fan Covers
How often should I clean my exhaust fan cover?
Clean standard bathroom fans every three to six months and high-use bathrooms every three months. Kitchen fans cleaning frequency depends on cooking habits, ranging from every three to six months.
Can I submerge my exhaust fan cover in water?
Only non-electrical covers can be soaked. Never submerge covers with lights, sensors, or electronics. Wipe these with a damp microfiber cloth only.
Why is my exhaust fan still noisy after cleaning?
Loose screws or a misaligned cover typically cause post-cleaning noise. Tighten all screws and verify the cover sits properly in its mounting track.
What happens if I do not clean my exhaust fan cover?
Neglected covers lead to reduced airflow, increased fire risk from dust ignition, mold growth from poor ventilation, and premature motor failure from excessive strain.
Can I use a pressure washer on my exhaust fan cover?
Never use pressure washers on exhaust fan covers. High-pressure water damages internal components, electronics, and motor housing. Stick to gentle hand cleaning with mild soap and water.
Leave a Reply