Your Hunter ceiling fan remote suddenly stops working in the middle of summer, leaving you sweltering without a breeze or proper lighting control. This frustrating scenario affects thousands of homeowners each year when their Hunter remote loses synchronization after power fluctuations, battery changes, or mysterious electronic glitches. Knowing how to reset Hunter ceiling fan remote controls saves you from unnecessary service calls and keeps your comfort system running smoothly. Most reset procedures take less than five minutes with no special tools required, though the exact steps vary significantly based on your specific Hunter remote model—whether you have the compact pill remote, traditional 3-speed remote, or wall-mounted control. This guide delivers precise reset instructions for every Hunter remote type, troubleshooting techniques for persistent issues, and maintenance practices to prevent future synchronization problems before they leave you stranded in discomfort.
Immediate Power Cycle Fix for Unresponsive Hunter Remotes
Before diving into model-specific reset procedures, perform this universal first step that resolves 60% of Hunter remote issues without further intervention. Power cycling clears temporary communication errors between your remote transmitter and the fan’s receiver unit by completely resetting both components’ electrical states.
Why Power Cycling Works for Most Remote Failures
Hunter remotes communicate with their fans through radio frequency signals that can become disrupted during electrical fluctuations. When you cycle power properly, you force the receiver’s microcontroller to reboot with a clean state, eliminating software glitches that prevent signal recognition. This method works whether your issue stems from a recent power outage, electrical interference, or simply accumulated electronic noise in the system.
Begin by turning off power at the wall switch controlling your ceiling fan. Wait exactly 30 seconds—this critical timing allows internal capacitors in the receiver to fully discharge. If your fan lacks a dedicated wall switch, turn off the circuit breaker instead. After the 30-second wait, restore power. The receiver now enters pairing mode for approximately three minutes, giving you a limited window to complete synchronization. During this time, test basic remote functions. If your remote responds, the power cycle successfully resolved your issue. If not, proceed to the model-specific reset method for your Hunter remote type.
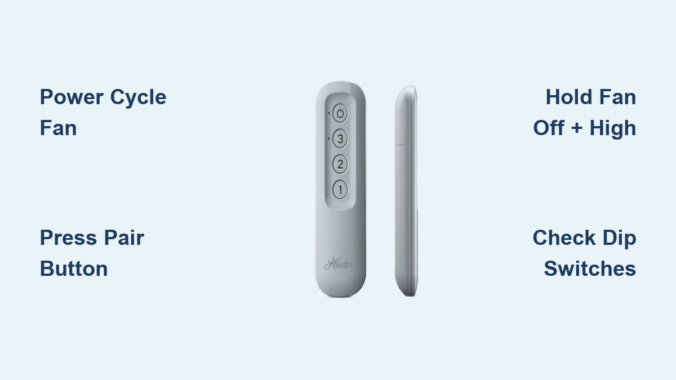
Reset Hunter Pill Remote Using Pair Button Method
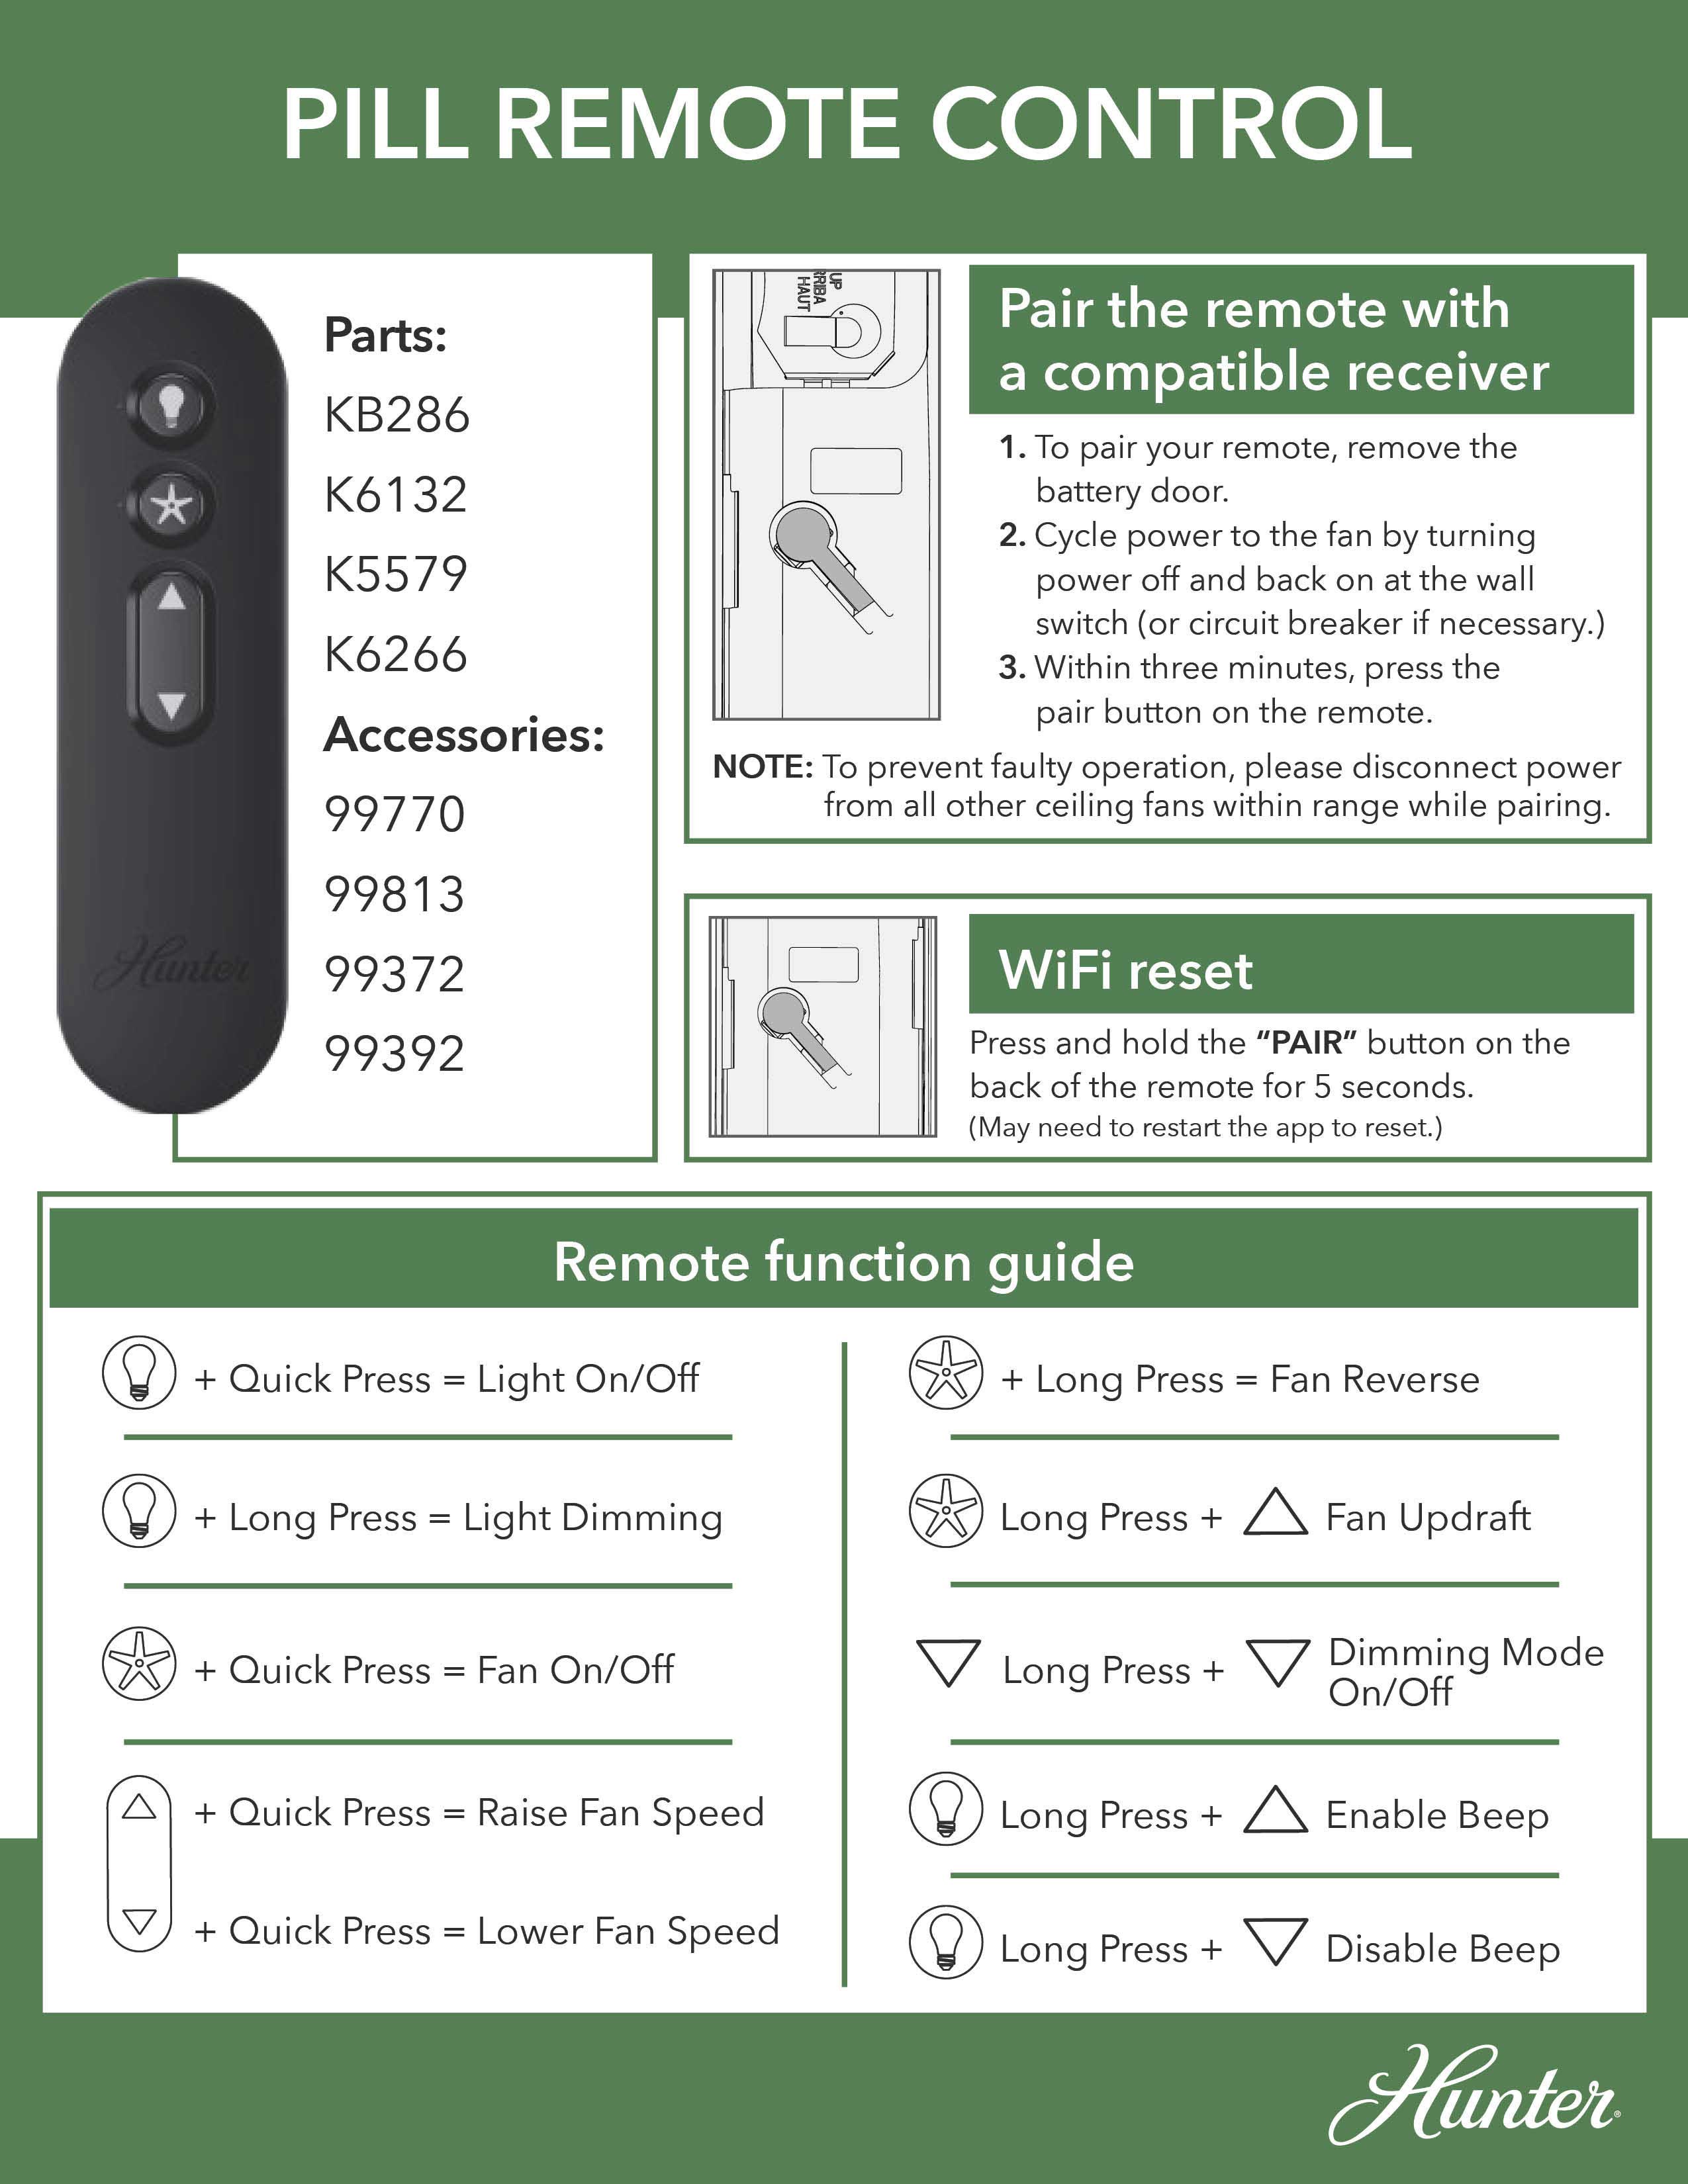
The pill remote (model H98P) requires a unique reset sequence due to its specialized circuitry and compact design. This rectangular remote features a distinctive pair button icon showing a circle with a protruding rectangle—your visual confirmation you have this specific model.
Step-by-Step Pill Remote Synchronization Process
Start by removing the battery cover from the back of your Hunter pill remote. Press and slide the cover downward to access the internal components and locate the pair button near the top of the circuit board. With the cover removed, turn off your ceiling fan at the wall switch and wait five seconds before turning power back on. Within three minutes of restoring power, press the pair button once firmly—do not hold it down. A single press initiates pairing mode, while holding it longer may reset Wi-Fi settings instead.
Listen carefully for a confirmation beep from your fan motor housing within 10 seconds. This audible signal indicates successful synchronization between remote and receiver. If you don’t hear the beep, repeat the process ensuring you press the pair button only once and complete all steps within the three-minute pairing window. After successful pairing, test all functions including fan speed control, light operation (if equipped), and power toggle to verify complete functionality.
Reset Hunter 3-Speed Remote With Dual-Button Technique
Hunter’s traditional 3-speed remote (model H99P) features separate buttons for off, low, medium, and high speeds, requiring a different reset approach than the pill remote. This model is easily identified by its multiple dedicated speed buttons rather than a single toggle control.
Precise Four-Second Button Hold Procedure
Turn off power to your ceiling fan at the wall switch or circuit breaker, wait five seconds, then restore power to activate the receiver’s pairing mode. Within three minutes of powering on, simultaneously press and hold both the FAN OFF button (displaying a fan with a slash through it) and the FAN HIGH button (marked with three dots) together. Maintain firm pressure on both buttons for exactly four seconds—timing is critical as shorter presses won’t trigger pairing mode.
Watch for visual confirmation as your fan automatically starts at the lowest speed setting. This low-speed startup confirms successful synchronization between remote and receiver. If the fan doesn’t respond, repeat the procedure ensuring you hold both buttons for the full four seconds without releasing early. After successful pairing, test each speed setting individually to verify complete functionality before considering the reset complete.
Fix Hunter Light Control Issues With Double-Click Reset
When your Hunter ceiling fan operates correctly but the lights won’t respond to remote commands, use this specialized reset procedure targeting the light control module within the receiver unit. This method works for both pill and 3-speed remotes when light functionality fails independently of fan operation.
Two-Minute Wait Light Synchronization Process
Turn off both fan and lights using the wall switch, then wait a full two minutes—this extended waiting period differs from standard reset procedures and allows the light control circuitry to fully reset. After the two-minute wait, turn the fan back on using the remote control. Within 30 seconds of powering on, press the LIGHT button twice in quick succession (less than one second between presses). The lights should blink twice as confirmation of successful reset.
If the lights don’t respond, repeat the entire sequence with strict timing adherence. The two-minute preliminary wait and 30-second activation window are interdependent—skipping either step prevents proper reset execution. For persistent light issues, combine this method with a full power cycle by turning off the circuit breaker for 30 seconds before beginning the light button reset sequence.
Correct Battery Replacement Reset Protocol
Replacing batteries in your Hunter remote often requires a specialized reset procedure even when the old batteries appeared functional. Depleted batteries can cause synchronization loss without obvious symptoms, and the act of battery replacement interrupts the remote’s stored configuration.
Post-Battery Reset Sequence for Reliable Operation
After inserting a fresh CR2032 battery (positive side facing up), wait 30 seconds before testing the remote—this allows the microcontroller to reset completely. Simultaneously, reset the fan’s receiver by turning off power at the circuit breaker for 30 seconds, then restoring power. After both components reset, allow two to three minutes for the receiver to fully initialize before testing.
Test basic functions first—power and low speed—before expecting full functionality. If the remote doesn’t work after battery replacement, perform the full pairing procedure for your specific remote model. The new battery’s different signal characteristics often require re-establishing the communication link, which is why many users mistakenly believe their remote has failed when it simply needs re-pairing.
Eliminate Remote Cross-Talk With Dip Switch Adjustment

When multiple Hunter fans operate within range of each other, frequency interference causes remote control confusion where one remote controls multiple fans. Hunter’s dip switch system creates unique frequency settings for each remote-fan pair, preventing cross-talk between neighboring units.
Matching Dip Switch Configuration Process
Turn off power at the circuit breaker before accessing your fan’s receiver. Remove the fan cover to expose the canopy where the receiver is mounted. Locate the dip switches inside the receiver housing—typically 2-4 small sliding mechanisms labeled numerically. Note the current positions, then adjust to a new configuration. Open your remote’s battery compartment and set its dip switches to match the receiver exactly.
After matching both sets of switches, restore power and perform a complete reset procedure. This frequency isolation ensures your remote exclusively controls your specific fan. Test all functions including speed changes and light control to confirm successful pairing. When setting up multiple fans, assign each a unique dip switch configuration and document the settings to prevent future confusion.
Troubleshoot Persistent Remote Reset Failures
When standard reset procedures fail, systematic troubleshooting identifies whether the issue stems from the remote, receiver, or external factors. Begin by verifying your remote operates within effective range—typically 10-20 feet with minimal barriers between remote and receiver.
Diagnostic Steps for Unresponsive Hunter Remotes
Check for interference sources including Wi-Fi routers, cordless phones, and microwave ovens that operate on the 2.4 GHz frequency band shared by many wireless remotes. Temporarily turn off these devices during testing to eliminate interference. Inspect the remote for physical damage including cracks, moisture exposure, or sticky buttons that impair functionality.
Test the fan using the pull chain—if it operates via pull chain but not remote, the receiver or wiring is faulty. Examine the receiver’s indicator light (if equipped) for flashing when buttons are pressed; absence of flashing indicates signal reception failure. Clean battery contacts with vinegar and isopropyl alcohol to remove corrosion that weakens signal transmission. Replace batteries with high-quality CR2032 cells even if existing ones appear functional, as inconsistent power output causes apparent synchronization failures.
When to Replace Hunter Remote or Receiver Unit
If all reset procedures and troubleshooting steps fail, component replacement becomes necessary. Receiver failure is indicated by complete non-responsiveness to remote commands while the pull chain continues functioning, or by intermittent operation that worsens over time.
Replacement Process and Warranty Considerations
Hunter fan motors carry a lifetime warranty, but electronic components like receivers typically have limited coverage. Contact Hunter customer service with your fan’s model number (found on the motor housing label) to determine warranty eligibility. When ordering replacements, provide both fan and remote model numbers to ensure compatibility—purchasing mismatched components risks communication failures.
For remote replacements, opt for genuine Hunter remotes or verified universal models compatible with your specific fan. Professional installation by a licensed electrician is recommended for receiver replacement due to electrical wiring requirements. The receiver is mounted in a confined space above the fan canopy, and improper installation creates electrical hazards or voids warranties.
Final Note: Regular maintenance prevents most Hunter remote issues—replace batteries annually, clean contacts periodically, and verify dip switch settings when adding new fans to your home. Document your fan’s model number and remote type for quick reference during future troubleshooting. By following these precise reset procedures and maintenance practices, you’ll keep your Hunter ceiling fan remote functioning reliably for years to come.
Leave a Reply