If your bathroom exhaust fan isn’t removing steam, you’re not alone. Many homeowners expect their fan to clear foggy mirrors and visible steam during a shower, only to find the room stays damp. But here’s the truth: bathroom exhaust fans are designed to remove humidity after showering, not eliminate steam instantly. Their real job is preventing mold, peeling paint, and long-term moisture damage by circulating air and reducing humidity over time.
The problem often isn’t a broken fan. It’s improper use, poor airflow, or hidden duct issues. A fan that runs for just 5 minutes during a shower won’t cut it. Without enough make-up air, correct CFM rating, or proper venting, even the best fan fails. The good news is most causes are fixable with simple checks and adjustments.
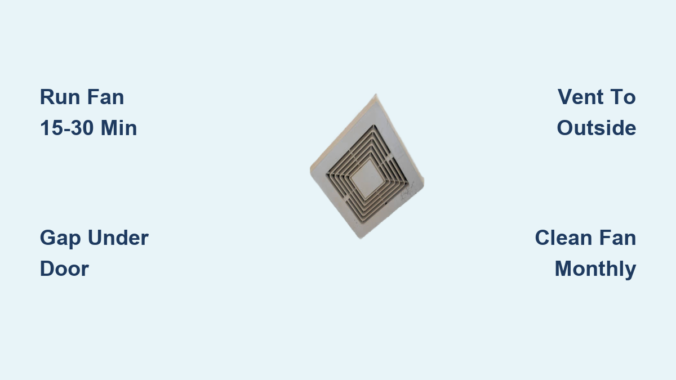
Run Fan Long Enough After Shower
The most common reason fans seem ineffective is they’re turned off too soon. Running the fan only during your shower does little to reduce humidity. Steam builds faster than any standard fan can remove it. The real test comes after the water stops: can the fan dry the air in 20 to 30 minutes?
Experts agree: run your fan for at least 15 to 30 minutes post-shower, and up to 60 minutes in high-humidity climates or after long, hot showers. This allows the system to cycle out moist air and prevent condensation on walls, ceilings, and windows.
Ninety percent of moisture damage problems are due to not running the fan long enough. Ignoring this step leads to mold, warped grout, and peeling paint. These are costly issues that start small but grow fast.
Install Timer or Humidistat Control
Manually remembering to turn off the fan is unreliable. Upgrade with one of these options:
- Timer switches: automatically shut off after 20 or 30 minutes
- Humidistats: sense moisture levels and run fan until humidity drops to a safe level around 50% RH
These smart controls eliminate guesswork and ensure consistent performance, especially in homes with frequent bathroom use or tight construction.
Choose a combo unit that includes light, fan, and timer to simplify wiring and maximize convenience. Avoid motion sensors because they shut off too early for effective dehumidification.
Ensure Proper Air Intake Under Door
An exhaust fan needs replacement air to create suction. Without it, the fan starves, like trying to breathe through a straw with your nose pinched. In tightly sealed modern homes, lack of intake is a top cause of poor performance. Air must flow into the bathroom to replace what the fan pulls out. That means a gap under the door is essential.
Minimum Gap Requirements
Minimum acceptable gap under the bathroom door is 12 mm, which is about 0.47 inches. The ideal gap is 1 inch, which is 25.4 mm. A half-inch gap may work in older, leaky homes, but often fails in new builds with sealed windows and HVAC systems.
If there’s no gap or too small a gap under the bathroom door, no fresh air is flowing back into the room. Cutting more than half an inch from a hollow-core door risks damaging the internal frame. If your door is solid or salvageable, use a circular saw with a straight-edge guide for a clean, safe cut.
Test for Intake Issues
Try this quick diagnostic:
- Close all windows and doors
- Run the fan with the bathroom door closed
- Repeat with the door slightly open
If steam clears faster with the door open, insufficient intake air is your problem. Don’t install ceiling vents because they cause short-circuiting, where air flows directly from the intake to the fan without mixing in room air. This defeats the purpose. Instead, undercut the door or install a floor-level transfer grille.
Verify Fan Is Vented to Outside
:max_bytes(150000):strip_icc()/bathroom-fan-building-code-requirements-1821320-011210338c4a47e4ad0d66b35c531fe8.jpg)
Many bathrooms have ductless recirculating fans, often mistaken for vented models. These use carbon filters to reduce odors but do not remove moisture. Ductless fans recirculate air and are suitable only for powder rooms or closets. Vented fans expel humid air outdoors via ductwork and are required for full bathrooms.
If your fan isn’t connected to exterior ducting, it cannot remove steam.
Check Where Duct Terminates
Common mistakes include ducts ending in the attic instead of outside, or connections at roof cap or wall exit being disconnected or blocked. To verify proper venting:
- Turn on the fan
- Go outside and feel for airflow at the exterior vent
- Look for condensation stains in the attic, which are signs of indoor venting
Even a powerful fan fails if it’s blowing moisture into your insulation. Use a smoke test: light incense indoors and watch if smoke exits outside. If it lingers, the system isn’t working.
Size Fan Correctly Match CFM to Room

A fan too small for the space won’t move enough air. Use this formula to calculate minimum CFM needed: Required CFM equals Length times Width times Height times 8, divided by 60. This ensures 8 air changes per hour, which is the minimum standard.
For example, a 5-foot by 10-foot by 7.5-foot bathroom has 375 cubic feet of volume. Multiply by 8 and divide by 60, and you get 50 CFM minimum. For frequent hot showers or large tubs, aim for 110 CFM or higher.
Don’t Trust Rated CFM Alone
Manufacturers list CFM under ideal, no-resistance conditions. Real-world performance drops significantly due to long duct runs, 90-degree elbows, flexible sagging ducts, and dirty dampers. A 100 CFM fan may deliver only 60 to 70 CFM in practice.
Rule of thumb: for every 25 feet of duct plus one 90-degree bend, reduce effective airflow by 10 to 15%. Use short, straight runs and smooth rigid ducts to preserve performance.
Clean Fan and Duct Regularly
Over time, fans collect hair, soap scum, aerosol residue from hairspray and deodorant, and dust. This gunk coats blades, slows the motor, and restricts airflow, cutting performance by up to 50%. Bath fans accumulate lint on the blades, and hair spray and other aerosols exacerbate this. It’s inevitable.
How to Clean the Fan
- Turn off power at the breaker
- Remove the grille, which usually has clips or screws
- Wipe down the cover with soapy water
- Use a vacuum with brush attachment to clean blades
- Manually spin the fan to ensure it rotates freely
- Inspect the backdraft damper to ensure the flapper opens and isn’t stuck shut
Repeat every 6 months for peak performance. Label the circuit breaker for easy shutdown during cleaning.
Fix Duct Design Flaws
Mismatched ducts kill airflow. An undersized duct creates restriction, while an oversized duct reduces air velocity, allowing moisture to condense inside. Always match duct diameter to fan outlet, typically 3 inches or 4 inches.
Avoid Corrugated and Sagging Ducts
Corrugated flex duct creates turbulence, traps lint, and reduces flow. Sagging duct collects water and debris, acting like a dam. Replace with smooth rigid metal duct or smooth-walled flex duct if bends are needed.
Each 90-degree elbow adds resistance equal to several feet of straight duct. Keep total run under 25 to 30 feet, and use no more than 2 to 3 bends. Prefer wide-radius elbows over sharp turns, and slope duct slightly downward toward exterior to drain condensation. Seal joints with foil tape, not duct tape, which dries and cracks.
Place Fan Near Shower or Tub
Steam rises and concentrates near the ceiling. If the fan is too far from the moisture source, it won’t capture rising vapor. Ideal placement is within 12 inches of the shower or tub. Ceiling-mounted fans should be directly above or adjacent to the wet zone. Wall-mounted units must be high on the wall, near the ceiling.
The fan is roughly 3 feet outside the edge of the shower, which is a common mistake. A fan across the room pulls air from the floor, missing the humid layer at the top. If you can see the shower from the fan, it’s likely well-placed. For larger bathrooms, consider dual fans or a higher CFM model.
Inspect Exterior Vent for Blockages
Even a perfect fan fails if the exhaust path is blocked. Common issues include stuck flappers closed due to paint, ice, or shipping tape, clogged mesh from dust, lint, or bird nests in wildfire-rated vents, and snow or leaves blocking roof or wall caps.
Test Exterior Airflow
- Turn on the fan
- Go outside and place hand near the vent
- Feel for steady airflow
No air means possible causes like disconnected duct, crushed or collapsed duct, or damaged roof cap. Use a mirror or smartphone camera to inspect roof vents. Hold a tissue near the exterior cap. It should blow outward when fan runs. Clear debris with a brush or vacuum, and replace damaged caps.
Perform Diagnostic Tests
Tissue Test Check Fan Suction
This test is quick and reliable:
- Turn on fan
- Hold a single square of toilet paper against the grille
- Let go
Paper sticks means the fan is pulling air. Paper falls means no suction, so check the motor, duct, or damper.
Incense Test Reveal Airflow Patterns
This is more sensitive than the tissue test:
- Light 2 to 3 incense sticks
- Close bathroom door
- Turn on fan
- Observe smoke behavior
Smoke drawn to fan and exiting means the system works. Smoke lingering or spreading means an intake, blockage, or power issue.
Set Realistic Expectations
No residential bathroom fan can eliminate visible steam during a hot shower. The goal is post-shower drying, not instant defogging. Foggy mirrors and initial steam are normal. What matters is whether the room dries within 20 to 30 minutes after the shower ends, whether walls and ceiling stay dry, and whether condensation is gone.
If yes, the system is working, even if steam was visible earlier. You might end up spending a significant amount trying to meet unrealistic expectations. Focus on air changes per hour, runtime, and maintenance, not magical instant clearing.
Frequently Asked Questions About Bathroom Exhaust Fan Not Removing Steam
Why does my bathroom fan still feel humid after running for hours?
The most likely cause is insufficient runtime. Fans need 15 to 30 minutes after your shower ends to actually remove moisture. If you’re only running the fan during your shower, that’s not enough time to dry the air. Install a timer or humidistat switch to ensure the fan runs long enough after each use.
Can I vent my bathroom fan into the attic?
No, you should never vent a bathroom fan into the attic. This pumps moisture into your insulation and ceiling structure, leading to mold growth, wood rot, and costly repairs. Always vent bathroom exhaust fans to the outside through the roof or an exterior wall.
How do I know if my bathroom fan is powerful enough for my bathroom?
Calculate the required CFM using your bathroom’s volume. Measure the length, width, and ceiling height, multiply them together, then multiply by 8 and divide by 60. For example, a small 5 by 10 foot bathroom with 8-foot ceilings needs at least 67 CFM. If your fan is rated lower than this calculation, it’s likely undersized.
Does a bigger CFM fan always work better?
Not necessarily. A higher CFM rating only tells you the fan’s potential under ideal conditions. In real installation, long duct runs, multiple bends, and corrugated ducts can reduce actual airflow by 30% or more. A properly sized fan with good ductwork outperforms an oversized fan with poor duct design.
Why does steam disappear faster when I leave the bathroom door open?
This indicates insufficient make-up air. Your fan needs fresh air flowing into the bathroom to create proper suction. If the door is sealed tight, the fan starves and can’t pull air effectively. Undercut your bathroom door to create at least a 1-inch gap, or leave the door slightly open while the fan runs.
How often should I clean my bathroom exhaust fan?
Clean your bathroom exhaust fan and its components every 6 months. This includes the grille, fan blades, and motor. In households with heavy shower use or if someone sprays aerosols daily, consider cleaning every 3 to 4 months. Regular cleaning maintains airflow efficiency and prevents fire hazards from accumulated lint.
Key Takeaways for Fixing Your Bathroom Exhaust Fan
A well-maintained bathroom exhaust system won’t stop steam during your shower, but it will prevent mold, mildew, and structural damage. The most critical fixes are running the fan for at least 15 to 30 minutes after showering, ensuring a 1-inch gap under your bathroom door for proper air intake, and verifying the fan vents to the outside rather than into attic space.
Clean the fan blades and ductwork every 6 months to maintain airflow efficiency. Test your system regularly using the tissue or incense test to confirm it’s actually moving air. If your fan is undersized, poorly placed, or connected to sagging corrugated ducts, upgrade these components for real improvement.
Address the airflow, extend the runtime, and clean regularly. That’s how you win the humidity war and protect your bathroom from moisture damage.
Leave a Reply