A bathroom exhaust fan that hums but refuses to spin, rattles loudly, or fails to pull moisture from the air is signaling a failing motor. The exhaust fan motor is the engine of your ventilation system, and when it dies, humidity builds up, mold risks increase, and your bathroom becomes stuffy. Replacing just the motor instead of the entire unit saves significant money and effort, especially when your housing, ductwork, and wiring are still in good shape. This guide walks you through how to replace an exhaust fan motor safely and correctly, from diagnosis to testing.
Identify Signs of Motor Failure
Common Symptoms of a Failing Motor
Watch for these warning signs that indicate your exhaust fan motor needs replacement:
- No airflow despite the fan turning on
- Grinding, buzzing, or screeching noises during operation
- Slow startup or failure to reach full speed
- Overheating detectable by warm housing or a burnt smell
- Intermittent operation where the fan works only sometimes
Pro Tip: Before replacing the motor, rule out simple issues like a tripped breaker, faulty wall switch, or clogged duct.
Decide Between Motor Replacement or Full Unit Swap

When to Replace Only the Motor
Choose motor-only replacement if all of these conditions apply:
- The fan housing is intact and securely mounted
- Ducting is clear and properly connected
- Only the motor is damaged
- A compatible replacement motor is available
- The impeller (fan blade) is undamaged and removable
When to Replace the Entire Unit
Consider a full fan replacement if you encounter any of these issues:
- Housing is cracked, corroded, or warped
- Duct connection is broken or inaccessible
- Motor and housing are integrated as a single non-modular unit
- The unit no longer meets CFM requirements (less than 50 CFM for bathrooms)
- The model is outdated with no replacement parts available
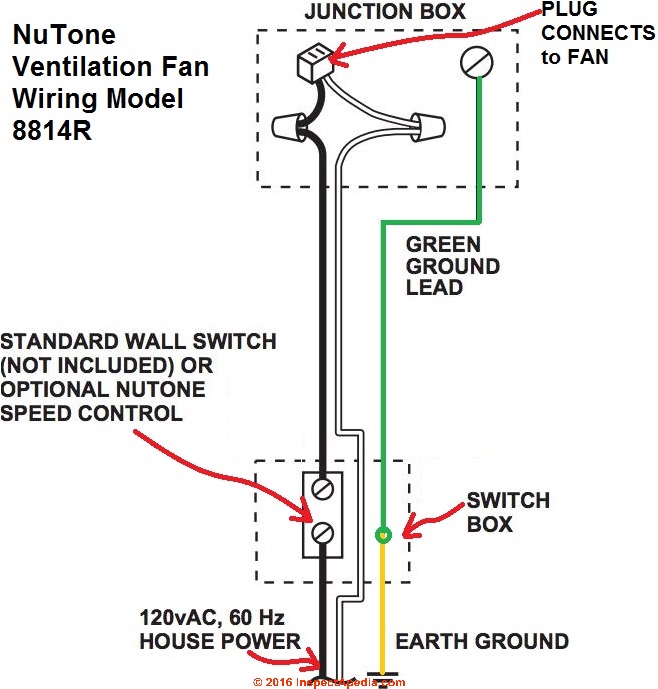
Note: Older models like Nutone 668-K or Broan S97017065 often allow motor-only replacement, while newer units may require full assembly swaps.
Gather Required Tools and Parts

Essential Tools
- Phillips and flat-head screwdrivers
- Nut driver or small socket wrench
- Non-contact voltage tester
- Flashlight or headlamp
- Stable ladder appropriate for ceiling height
- Wire connectors (wire nuts or push-in caps)
- Pliers for bending tabs or releasing clips
Safety Gear
- Safety glasses
- Dust mask because ceiling cavities collect dust and insulation
Replacement Parts
- New exhaust fan motor matching original voltage, RPM, and shaft size
- New impeller if the old one is damaged
- Spare screws or clips in case originals are stripped
Pro Tip: Bring the old motor to a hardware store or HVAC supplier for exact matching if the model number is faded or unreadable.
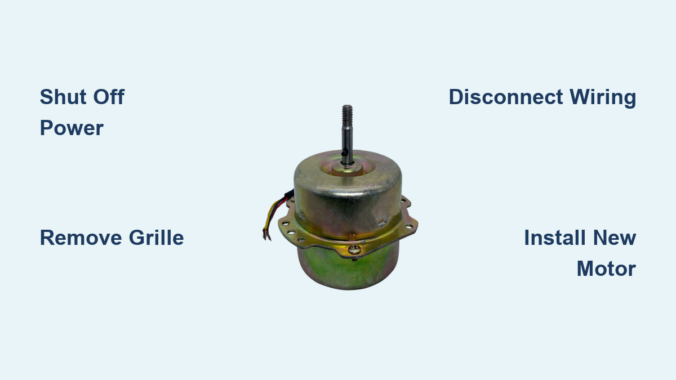
Shut Off Power Safely
Critical Electrical Safety Steps
Follow these steps without exception:
- Turn off the circuit breaker that controls the exhaust fan
- Do not rely on the wall switch alone for power isolation
- Test for power at the fan’s wiring using a non-contact voltage tester
- Label the breaker to prevent accidental re-energizing
- Wait for light bulbs to cool if working with a fan-light combo unit
Warning: Working on live circuits can cause serious injury. Always confirm power is off with a voltage tester before touching any wires.
Remove the Fan Grille
Snap-In Grille Removal
- Locate the flexible metal rods on the sides of the grille
- Pinch them together while gently pulling the grille downward
- Some grilles release with a quarter-turn motion
Screw-Mounted Grille Removal
- Look for hidden screws under vent slots or behind light covers
- Remove all screws and carefully lower the grille
- Support the grille with your hand as you remove the last screw
Visual Cue: If the grille resists removal, do not force it. Check for additional clips or screws that may be holding it in place.
Access the Motor Assembly
Once the grille is removed:
- Inspect the internal housing for any debris or damage
- Locate the motor mounting plate that holds the motor and impeller
- Most units allow the entire assembly to pivot or slide out for service
- Identify whether the motor uses screws, clips, or both for mounting
User Insight: One side of the motor bracket typically has a screw while the other uses clips. Remove the screw first, then pull the bracket down to release the clips.
Disconnect the Old Motor
Electrical Disconnection
- Locate the wiring connection type (plug-in connector or wire nuts)
- For plug-in type: Unplug the motor’s power cord from the housing socket
- For wire nuts: Unscrew connectors, separate wires, and take a photo before disconnecting for reference
- Match wire colors precisely when reconnecting (black to black, white to white, green/bare to ground)
Safety Check: Double-confirm power is off using your voltage tester before touching any wires.
Mechanical Removal
- Remove the mounting screws securing the motor or motor plate
- For clip-mounted models: Remove the screw on one side, then tilt or pivot the motor plate downward to disengage clips
- If stuck: Gently pry with a flat-head screwdriver using even pressure to avoid breaking plastic clips
- Place all removed screws in a magnetic tray to prevent dropping them into the ceiling
Inspect Components Before Installing New Motor
Check the Impeller
- Determine if the impeller can be removed from the shaft
- Check whether it is press-fit (may break on removal) or slip-fit (reusable)
- If undamaged, reuse the impeller on the new motor
- Replace bent or cracked blades as they cause imbalance and noise
Evaluate the Housing
- Clean dust and debris with a vacuum or soft brush
- Look for corrosion, warping, or damaged clips
- Ensure no obstructions are blocking the fan airflow path
Install the New Exhaust Fan Motor
Verify Compatibility First
Match these specifications exactly:
- Voltage (typically 120V)
- RPM (common options include 1,075 or 1,500 RPM)
- Shaft diameter and length
- Mounting style (bracket, clip, or screw)
- Rotation direction (usually clockwise)
Common compatible replacement models include Nutone 696N, Broan S97017065, and universal motors from HVAC suppliers.
Pro Tip: If unsure about compatibility, bring the old motor to a store for side-by-side comparison.
Attach the Impeller
- Slide the fan blade onto the new motor shaft
- Ensure it is fully seated and secure
- Spin by hand to verify smooth rotation with no wobble
Mount the New Motor
- Align the motor plate with the housing mounting points
- Insert one side first, then pivot the other into place
- Reinstall mounting screws and tighten securely without over-tightening plastic
- Reconnect wiring matching colors exactly
- Use new wire nuts if the old ones are brittle or damaged
Visual Check: Wires should be snug but not strained. No bare copper should be exposed after connection.
Reassemble and Test the Fan
Reinstall the Grille
- For snap-in types: Align and press evenly until it clicks into place
- For screw-mounted types: Reinsert screws and tighten securely
Restore Power and Test
- Turn the circuit breaker back on
- Flip the wall switch to activate the fan
Success Indicators:
- Smooth, quiet startup with no delays
- Steady airflow (test by holding tissue near the grille)
- No vibration or rattling sounds
- Full speed reached within a few seconds
Troubleshoot Common Problems
Fan Doesn’t Start
- Cause: Power not restored or wiring error
- Fix: Check the breaker, verify all connections, test with voltage tester
Buzzing or Humming Noise
- Cause: Loose motor, binding impeller, or incorrect voltage
- Fix: Tighten all screws, check for obstructions, confirm motor specifications match
Weak Airflow
- Cause: Wrong RPM motor or blocked duct
- Fix: Verify motor specs match original, inspect duct for kinks or debris
Vibration or Rattling
- Cause: Unbalanced impeller or loose mounting
- Fix: Rebalance or replace the blade, retighten all mounting screws
User Note: If noise continues after tightening, turn off power and recheck the alignment of all components.
Extend Motor Life with Regular Maintenance
Routine Care Tips
- Clean blades and housing every 3 to 6 months
- Vacuum dust from the grille and duct entrance
- Inspect wiring connections annually for looseness or corrosion
- Tighten mounting screws to prevent vibration
- Replace worn impellers before they damage the motor
Pro Advice: Regular cleaning prevents overheating and can extend motor life by several years.
Where to Purchase Replacement Motors
Best Sources for Replacement Parts
- HVAC Jack: Commercial-grade motors with fast shipping and bulk options
- Home Depot or Lowe’s: Carry popular residential models
- Amazon or eBay: Search by specific model number (such as “Nutone 696N motor”)
- HVAC Supply Distributors: Best for exact commercial matches
Recommendation: When in doubt about which motor to buy, bring the old motor to a store for expert matching assistance.
Final Checklist Before Finishing
Verify each of these items before considering the job complete:
- Power turned off and verified with voltage tester
- Old motor model matched exactly for compatibility
- Impeller inspected and reused or replaced as needed
- Wiring correctly connected color-to-color
- Motor securely mounted with no wobble
- Grille reinstalled properly and seated
- Fan tested for proper airflow and quiet operation
Frequently Asked Questions About Replacing Exhaust Fan Motors
How do I know if my exhaust fan motor is bad?
Signs of a bad motor include no airflow despite the fan turning on, grinding or buzzing noises, slow startup, overheating (warm housing or burnt smell), and intermittent operation. If your fan displays any of these symptoms, the motor likely needs replacement.
Can I replace just the motor on my bathroom exhaust fan?
Yes, you can replace only the motor if the housing is intact, ductwork is clear, the impeller is undamaged, and a compatible replacement motor is available. Older Nutone and Broan models often allow motor-only replacement. If the housing is cracked or the unit is integrated, you may need to replace the entire fan.
What tools do I need to replace an exhaust fan motor?
You will need Phillips and flat-head screwdrivers, a nut driver or socket wrench, a non-contact voltage tester, flashlight or headlamp, a stable ladder, wire connectors, and pliers. Safety gear includes safety glasses and a dust mask.
How much does a replacement exhaust fan motor cost?
Replacement motors typically range from $30 to $100 depending on the brand and specifications. Premium or commercial-grade models may cost more. Purchasing just the motor is usually significantly cheaper than replacing the entire exhaust fan unit.
Do I need an electrician to replace an exhaust fan motor?
No, replacing an exhaust fan motor is a straightforward DIY job for most homeowners. As long as you follow proper electrical safety procedures (turning off the breaker and verifying power is off), you can complete the replacement yourself without hiring an electrician.
Key Takeaways for Replacing Your Exhaust Fan Motor
Replacing a bathroom exhaust fan motor is a cost-effective DIY repair that restores proper ventilation and prevents moisture damage. Always disconnect power at the circuit breaker before starting, and verify with a voltage tester. Match your replacement motor exactly to the original specifications including voltage, RPM, shaft size, and mounting style. Inspect the impeller and housing during the process, cleaning debris and replacing damaged components as needed. After installation, test for smooth operation, steady airflow, and quiet performance. With proper maintenance including regular cleaning and annual inspections, your new motor will provide years of reliable service.
Leave a Reply