Hampton Fan Reviews

Your Ultimate Guide to Cooling: In-Depth Reviews, Smart Comparisons & Pro Care Tips.

Page 12 of 23

Hampton Bay Ceiling Fan Blades Sagging: How to Fix


Nothing disrupts the clean look of your living space quite like noticing your Hampton Bay ceiling fan blades sagging as you glance upward. This common issue affects countless homeowners who rely on these popular Home Depot fixtures for comfort and style. When your Hampton Bay ceiling fan blades sagging becomes visible, it creates an unbalanced appearance that not only looks unsightly but often leads to annoying wobbling, excessive noise, and reduced airflow efficiency. The constant vibration from an unbalanced fan can actually worsen the problem over time, potentially damaging your ceiling mount or electrical connections if left unaddressed.

The good news is that Hampton Bay ceiling fan blades sagging typically stems from preventable or easily fixable issues rather than a fundamental flaw in your fan. Most cases involve simple mechanical problems that you can resolve with basic tools and a methodical approach—saving you the expense and hassle of fan replacement. Whether your blades have gradually sagged over time or suddenly dropped after a recent installation, this guide provides the precise steps to diagnose and correct the problem, restoring both function and aesthetics to your ceiling fan.

Diagnose Your Hampton Bay Fan Blade Sagging Problem First

Before grabbing your toolkit, properly identifying why your Hampton Bay ceiling fan blades sagging will prevent wasted effort on temporary fixes that fail to address the root cause. Many homeowners make the mistake of immediately tightening visible screws without understanding which components have actually failed, leading to recurring issues that require repeated attention.

Conduct a Thorough Visual Inspection

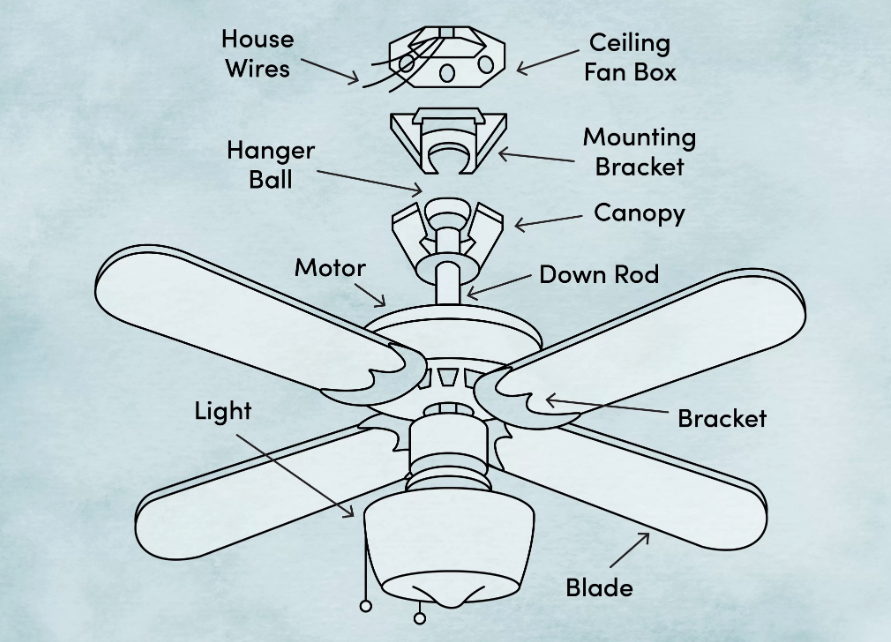
With the fan completely powered off and stationary, position yourself directly beneath it and use a smartphone level app or traditional bubble level along each blade’s length. Document which blades sag significantly (more than 1/8 inch difference from others) and note whether the entire assembly hangs unevenly or just specific blades. Carefully examine each blade’s connection point to the blade iron (the metal arm that attaches to the motor housing), looking for stripped screw holes, visible cracks in plastic components, or rust on metal parts. Pay special attention to the upper mounting bracket where the fan attaches to your ceiling—this is often the true culprit behind what appears to be blade-specific sagging.

Identify the Most Common Hampton Bay Blade Sagging Causes

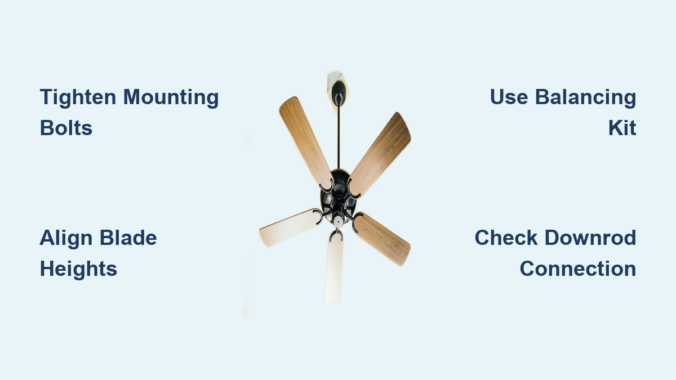
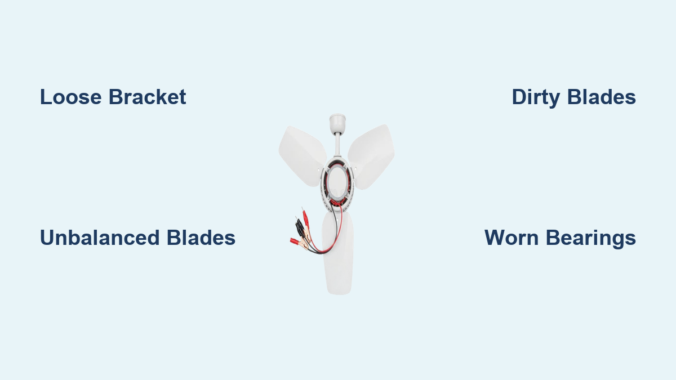
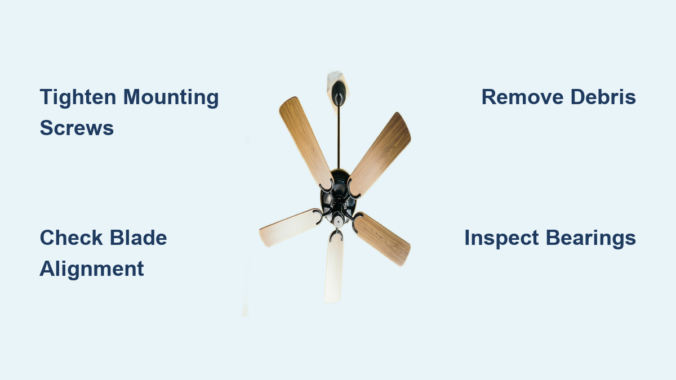
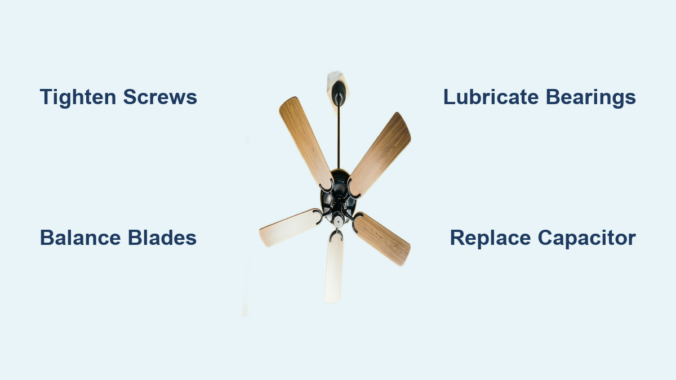
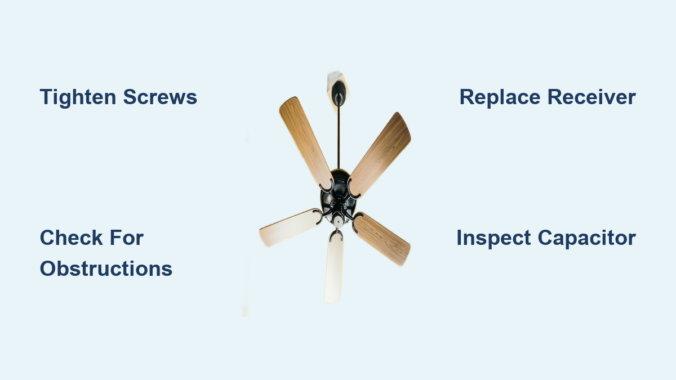
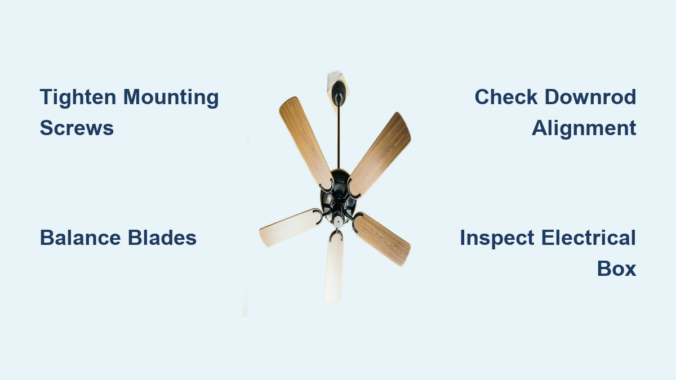
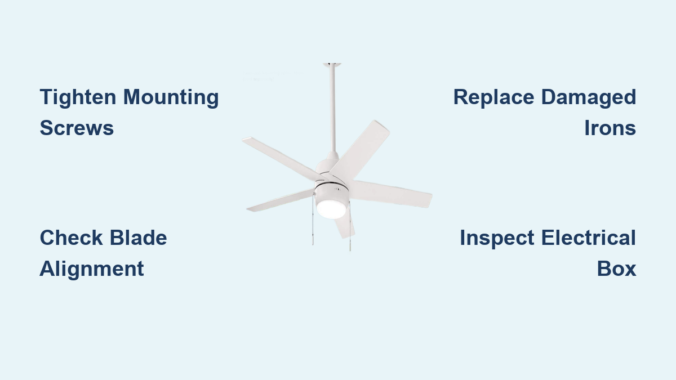
Hampton Bay ceiling fan blades sagging typically stems from one of four issues: loose mounting hardware at the ceiling junction box (the most frequent cause), loosened blade-to-iron screws allowing individual blades to droop, fatigued or broken blade irons that no longer maintain proper tension, or occasionally warped blades due to moisture exposure or manufacturing defects. The constant vibration from normal operation gradually works screws loose over time, especially in homes with higher ceilings where fan movement creates more torque. In newer installations, improper initial assembly—such as insufficiently tightened mounting screws or incorrectly aligned blade brackets—often manifests as sagging within the first few months of use.

Secure the Critical Mounting Hardware Connections

ceiling fan mounting bracket installation guide

When your Hampton Bay ceiling fan blades sagging affects the entire assembly rather than just one or two blades, the problem almost always originates at the ceiling mounting point. Addressing this foundational issue before working on individual blades prevents wasted effort and ensures lasting results.

Tighten the Canopy-to-Bracket Connection Properly

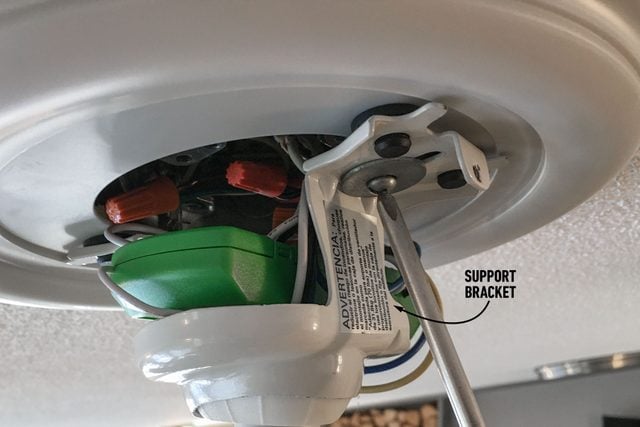
After turning off power at the circuit breaker, remove the decorative canopy cover by unscrewing its retaining screws. With the canopy lowered, check that all mounting screws connecting the fan’s mounting bracket to your ceiling electrical box are fully tightened. Many Hampton Bay installations use a ball-and-socket mounting system that can shift position if the set screws loosen. Ensure the bracket sits flush against the ceiling with no visible gaps, and verify that the downrod (if present) is securely locked into position. When reinstalling the canopy, hand-tighten screws gradually in a star pattern to avoid distorting the cover while ensuring even pressure.

Verify Motor Housing Attachment Security

While the canopy is removed, inspect the screws that secure the motor housing to the mounting bracket. These critical connections often loosen due to motor vibration, causing the entire fan assembly to tilt. Using a Phillips screwdriver, tighten each motor housing screw incrementally—turn each one a quarter-turn at a time while alternating between opposite screws to maintain even pressure. Avoid overtightening, which can strip the threads in the motor housing. After securing these connections, manually rotate the fan blades to check for smooth movement and confirm the motor housing remains centered within the mounting bracket.

Correct Individual Blade Alignment and Balance

When Hampton Bay ceiling fan blades sagging affects only specific blades while others remain level, the solution requires precise blade-by-blade adjustment and balancing to eliminate wobble and restore even air distribution.

Adjust Blade Pitch Using Alignment Markers

Most Hampton Bay models feature small alignment markers (often painted lines or molded ridges) on the blade irons that indicate proper pitch angle. With the fan powered off, loosen the screws connecting each sagging blade to its iron just enough to allow adjustment. Rotate the blade until its alignment marker matches the position of properly aligned blades, then retighten the screws. For optimal results, use a blade pitch gauge (available at hardware stores for under $5) to ensure each blade maintains the manufacturer’s recommended 12-14 degree angle. This precise adjustment creates consistent airflow that prevents vibration-induced loosening.

Replace Damaged Blades or Blade Irons Immediately

Hampton Bay ceiling fan blade replacement parts

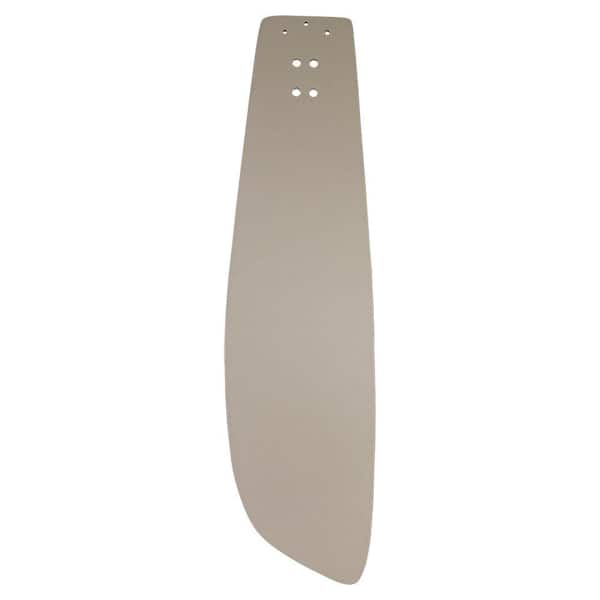
If inspection reveals cracked blade irons (the metal arms connecting blades to the motor) or warped blades, replacement is necessary—no amount of tightening will permanently fix Hampton Bay ceiling fan blades sagging caused by damaged components. Hampton Bay, being a Home Depot exclusive brand, makes replacement parts available through their website using your fan’s model number (typically found on a label inside the canopy). When installing new blades, apply a small amount of thread-locking compound to the attachment screws to prevent future loosening while still allowing future adjustments. Match replacement blades exactly to maintain proper balance—mixing different blade styles or weights creates new imbalance issues.

Implement Preventive Maintenance to Avoid Recurrence

The most effective solution for Hampton Bay ceiling fan blades sagging is preventing the problem before it starts through simple but consistent maintenance practices that take only minutes each quarter.

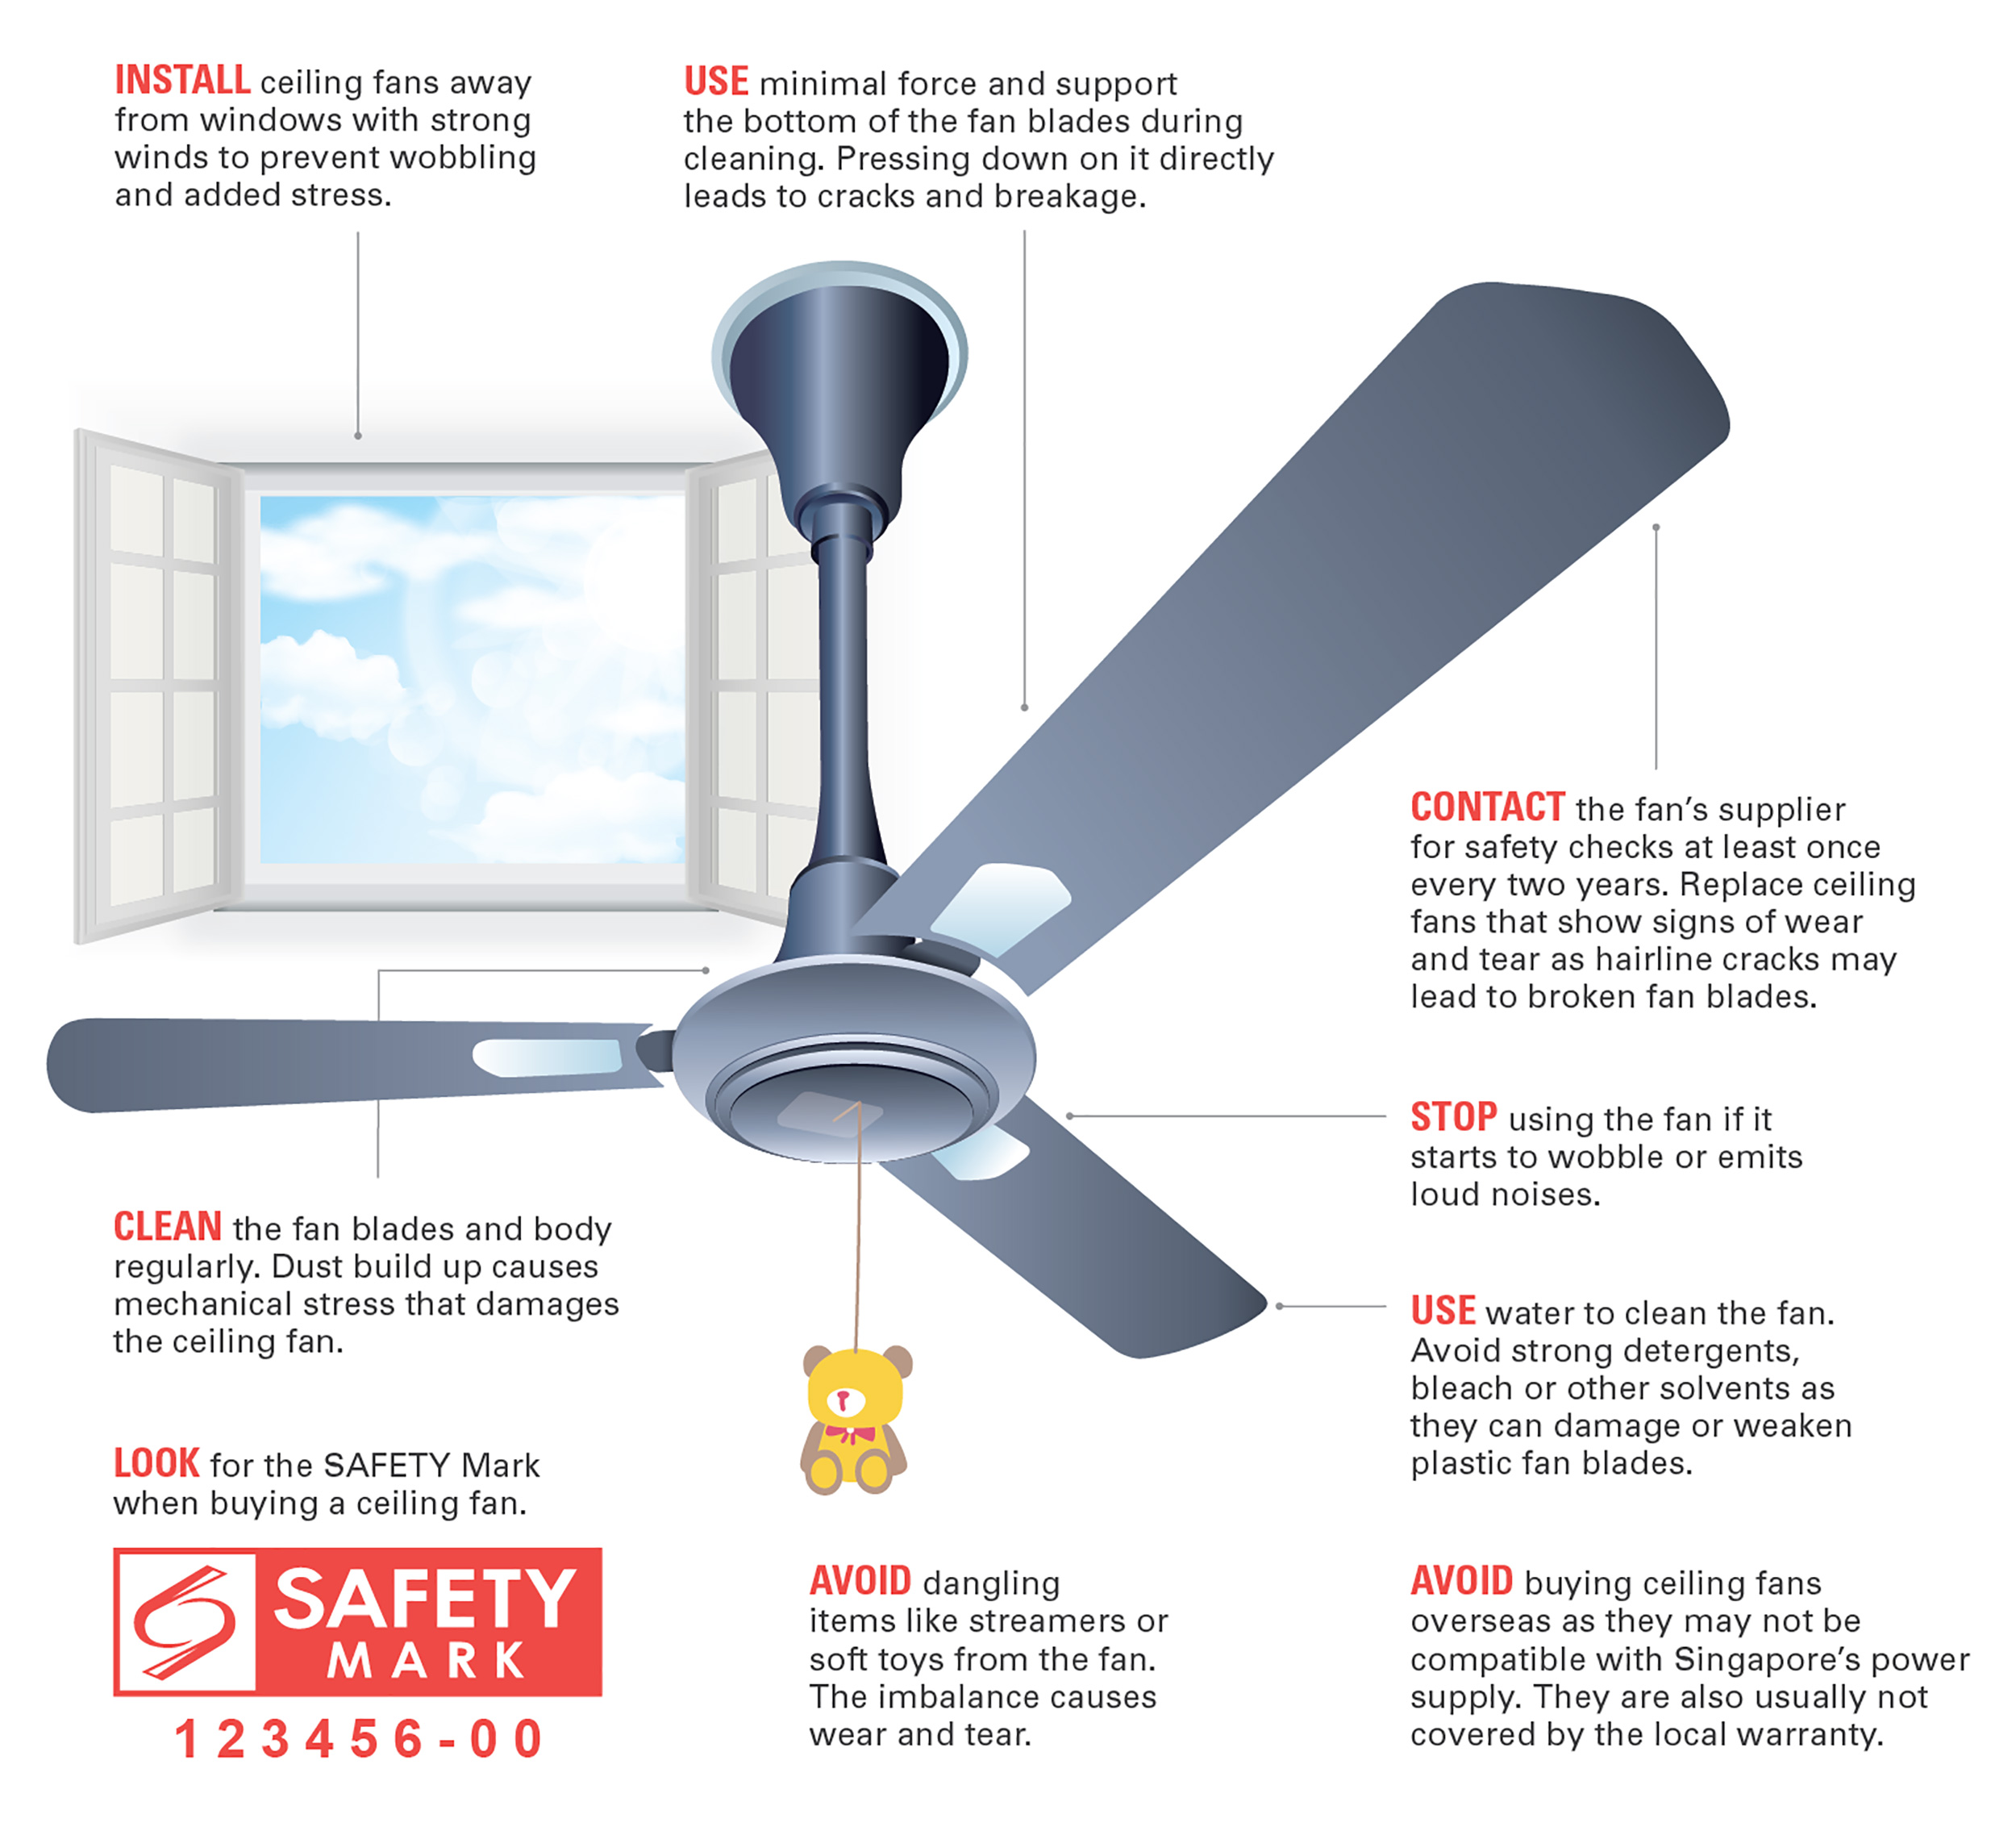
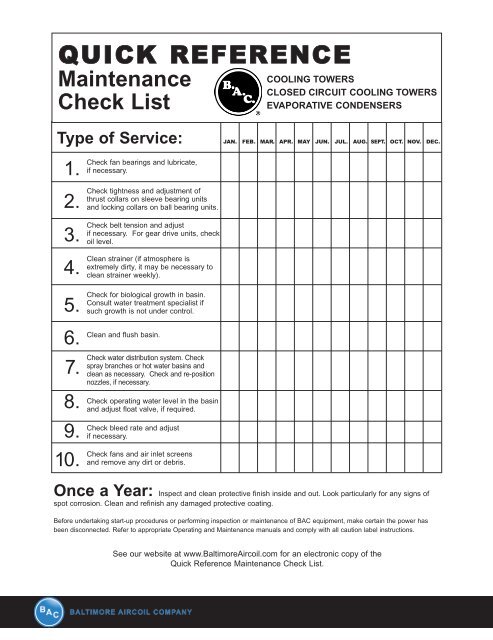
Establish a Quarterly Tightening Routine

Every three months, power off your fan and perform a complete hardware check: tighten all visible screws (ceiling mount, canopy, motor housing, and blade attachments), inspect for rust or corrosion, and verify blade alignment. This quick maintenance session catches minor loosening before it progresses to noticeable sagging. When tightening blade screws, place a piece of cardboard between the blade and iron to prevent marring the finish while you work.

Address Minor Issues Before They Worsen

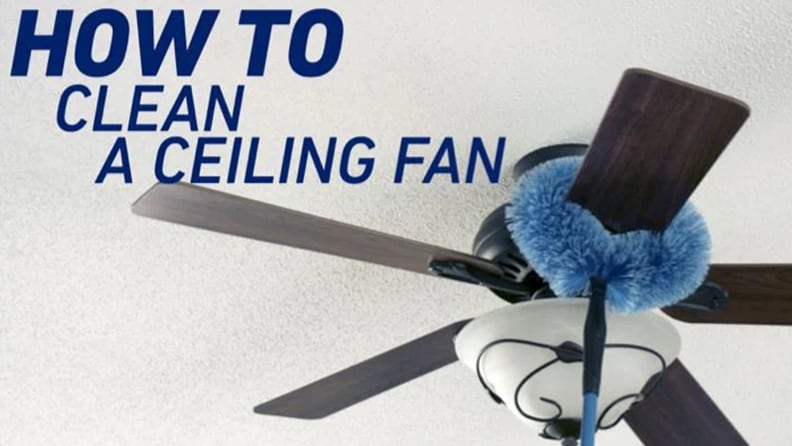
At the first sign of unevenness—before Hampton Bay ceiling fan blades sagging becomes visually obvious—perform the tightening procedures outlined above. Early intervention prevents the vibration damage that accelerates hardware deterioration. If you notice increased wobble or noise after ceiling painting or home renovations, check your fan immediately, as these activities often dislodge settled dust that temporarily unbalances the fan.

Recognize When Professional Help Is Necessary

While most Hampton Bay ceiling fan blades sagging issues are DIY-friendly, certain situations warrant professional assistance to ensure safety and proper resolution.

Electrical and Structural Mounting Concerns

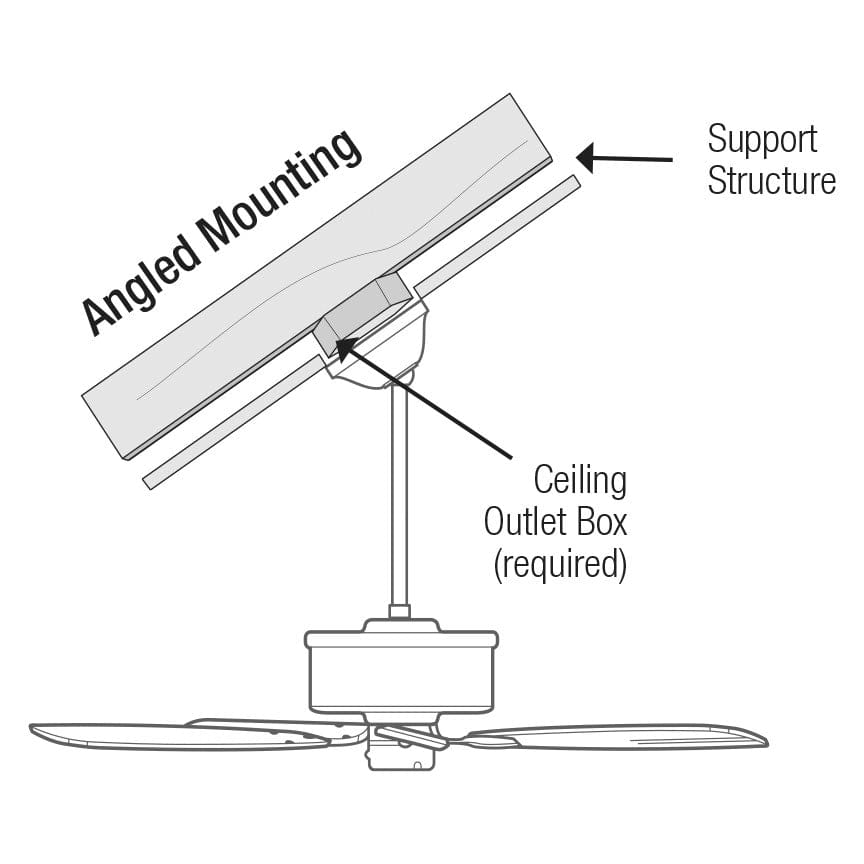
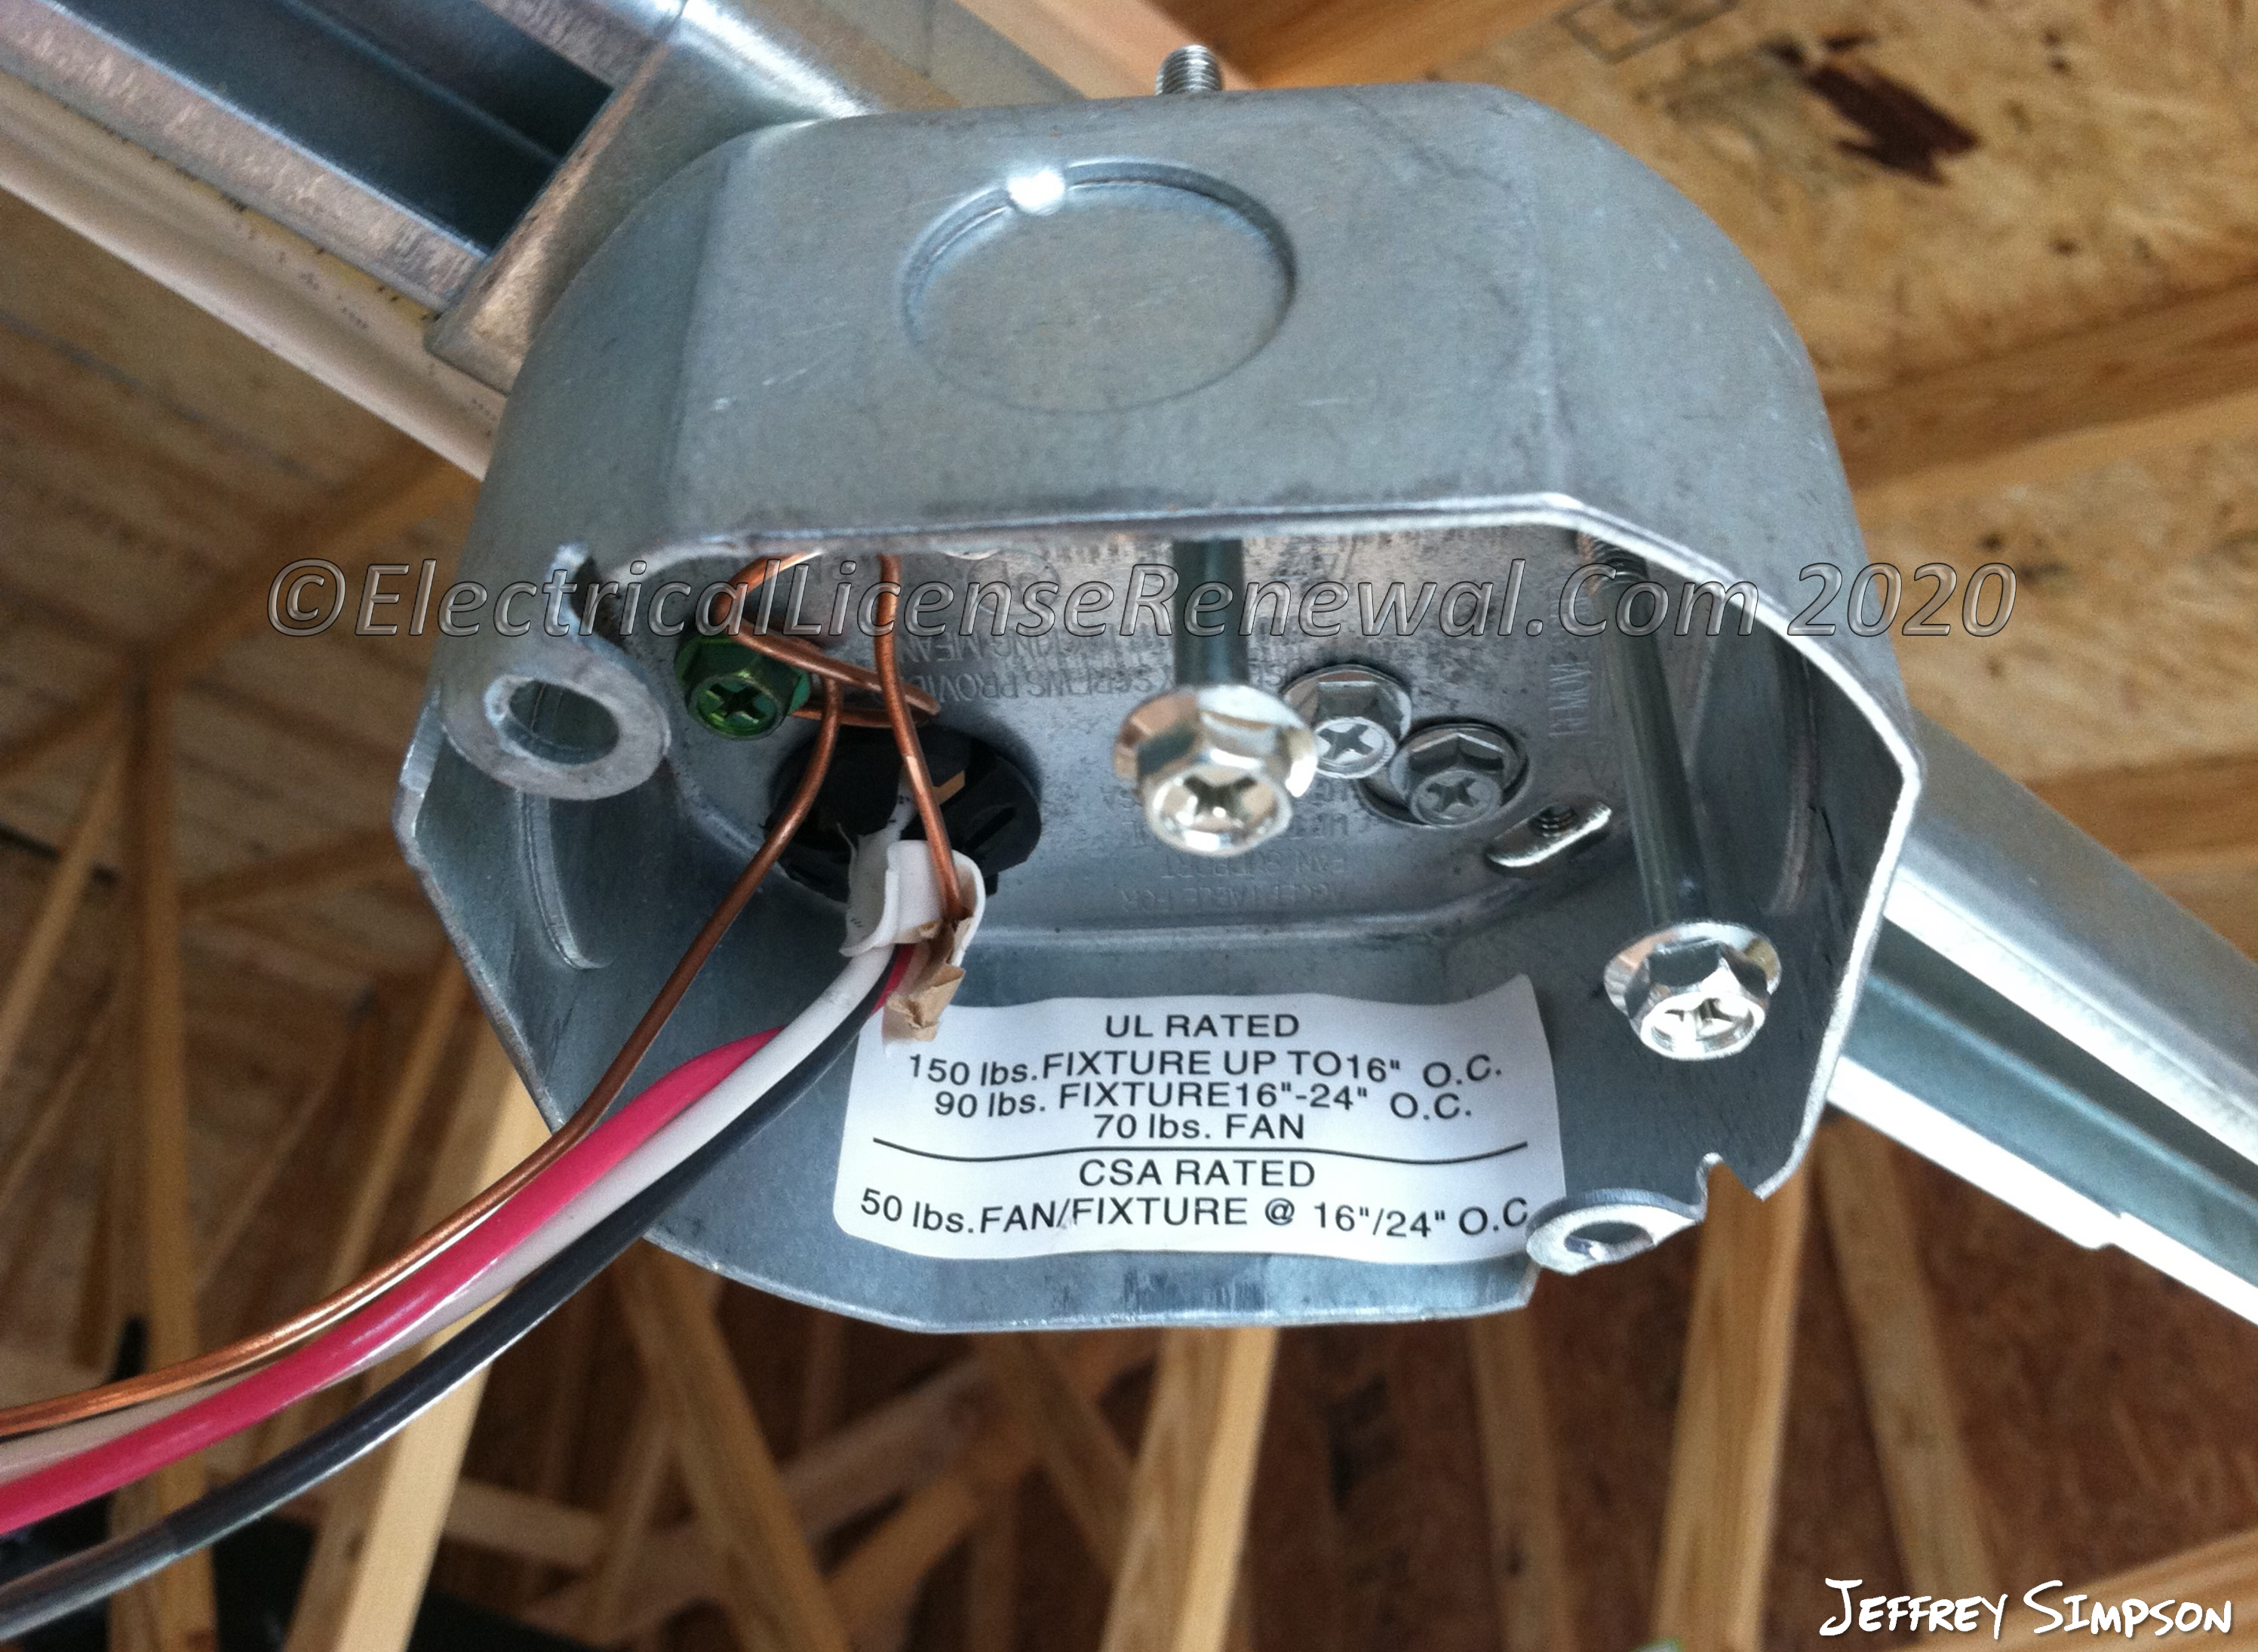
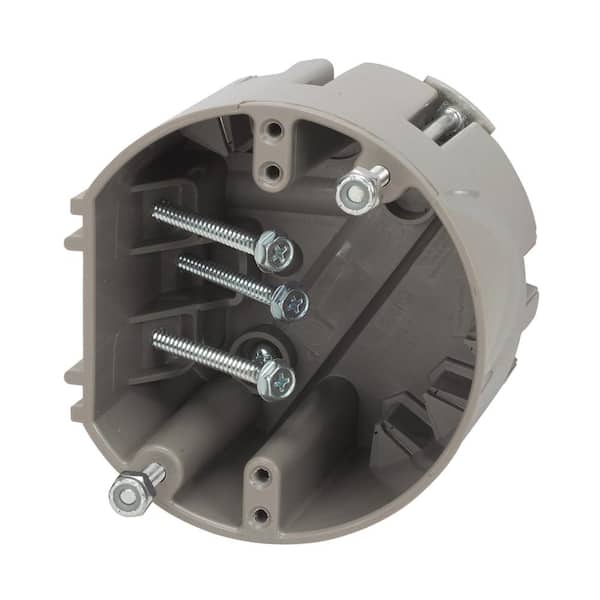
If your sagging problem involves the ceiling electrical box (particularly if it’s not rated for fan weight), exposed wiring, or structural mounting issues, consult a licensed electrician. Hampton Bay fans require specific fan-rated electrical boxes that can support 35-70 pounds of dynamic load—standard light fixture boxes cannot safely handle this stress. Attempting electrical work without proper expertise creates serious fire and safety hazards.

Complex Balance Problems

When standard balancing procedures fail to eliminate wobble after addressing all mechanical connections, your fan may have internal motor issues requiring professional service. Persistent vibration that continues after hardware tightening and blade replacement could indicate a failing motor bearing or unbalanced rotor assembly—problems that typically warrant fan replacement rather than repair.

Final Steps for Long-Term Hampton Bay Fan Performance

Correcting Hampton Bay ceiling fan blades sagging properly extends your fan’s lifespan while restoring quiet, efficient operation. After completing repairs, run your fan on high speed for 24 hours while monitoring for any residual wobble or noise. If minor vibration persists, attach small adhesive balancing weights (included with most fans or available separately) to the top of the lightest blade until smooth operation returns. Document your repair process with notes and photos for future reference, as Hampton Bay models often share similar components across product lines. By addressing blade sagging promptly with these targeted solutions, you’ll maintain optimal performance from your ceiling fan for years to come—without the unnecessary expense of replacement. Remember that consistent, minor maintenance prevents the major issues that lead homeowners to replace perfectly functional fans prematurely.

How to Fix Wobbly Ceiling Fan: Quick Steps


That irritating wobble in your ceiling fan isn’t just annoying—it’s a warning sign that something needs attention. As you try to relax in your living room or bedroom, that rhythmic shaking creates distracting rattles and can even damage your fan over time. The good news? Most wobble issues can be diagnosed and fixed with basic tools in under an hour. Whether your fan is brand new or has been spinning reliably for years, you don’t need to call an electrician for this common household problem. This guide gives you the step-by-step process to eliminate wobble and restore smooth, quiet operation to your ceiling fan.

Before grabbing your tools, understanding why your fan wobbles helps you target the right solution. Ceiling fans develop wobble for specific reasons, and identifying the root cause saves you time during troubleshooting. Most cases involve loose components that shift slightly with each rotation or misaligned blades that throw off the entire system’s balance. Let’s get your fan running steady again with these proven methods.

Why Your Ceiling Fan Wobbles Despite Tight Screws

Many homeowners tighten all visible screws only to find the wobble persists, leaving them frustrated and confused about what’s really causing the problem.

Hidden Loose Connections Cause Persistent Wobble

While blade screws are the most obvious culprits, wobble often stems from connections you can’t see without removing the fan’s canopy. The mounting bracket securing your fan to the ceiling electrical box frequently loosens over time, especially in homes where ceiling joists have settled. This creates movement at the very foundation of your fan installation. The downrod connecting the motor to the mounting bracket can also work loose at both ends, allowing subtle shifting that manifests as wobble.

Blade alignment issues often masquerade as simple looseness. Even if all screws are tight, blades sitting at slightly different heights create uneven air distribution that results in visible wobble. A single bent blade—perhaps from accidental contact during cleaning—throws off the entire balance system, making the fan appear loose when the components are actually secure.

How to Identify the True Source of Wobble

Watch your fan while running on medium speed to diagnose the wobble source. If the entire fixture sways side to side, the mounting system needs attention. If the wobble seems to originate from the blades themselves—with some parts dipping lower during rotation—your blade alignment needs correction.

Listen carefully as well. A properly functioning ceiling fan produces only a gentle whooshing sound. Grinding, clicking, or rattling noises accompanying the wobble indicate specific loose components. Addressing wobble early prevents accelerated wear on motor bearings and mounting hardware, extending your fan’s lifespan significantly.

Power Safety Steps Before Fixing Your Fan

Before touching any component of your wobbly ceiling fan, you must disconnect electrical power completely—this step is non-negotiable and should never be skipped.

Proper Circuit Breaker Identification

Find the circuit breaker controlling power to your fan’s room. Most homes have dedicated breakers for ceiling fans, though some circuits control multiple areas. If uncertain which breaker controls the fan, flip breakers one at a time while a helper watches the fan below—the fan stops when you’ve found the correct breaker.

Once identified, switch the breaker to OFF and verify power is disconnected. Simply turning off the wall switch isn’t sufficient, as some fans maintain constant power for remote control receivers or light kits, leaving live wires inside the canopy.

Essential Voltage Verification Process

Even after turning off the breaker, use a non-contact voltage tester to confirm no electricity reaches the fan’s wiring. Remove the canopy and carefully test the wires inside—the tester should indicate no voltage. If it lights up or beeps, you’ve turned off the wrong breaker.

Keep the breaker off throughout your repair. Label it to prevent accidental restoration of power by others in your household. Working with a helper is recommended, especially when using a ladder, to provide assistance if complications arise.

Blade Alignment Correction Method

ceiling fan blade alignment tool tape measure

If tightening all visible screws hasn’t resolved your wobble, the blades themselves likely need realignment—a common issue that’s easily fixed with basic tools.

Precise Blade Height Measurement Technique

Use a tape measure to check the distance from the ceiling to each blade tip. With the fan turned off, measure from your ceiling down to each blade tip at its lowest point. All measurements should be within one-eighth inch of each other. If one blade sits noticeably lower, you’ve identified your wobble source.

A blade sitting too low often indicates a bent blade arm rather than an adjustment issue. Attempting to bend it back risks cracking brittle plastic components. Instead, note which blade arm needs replacement and measure from the mounting point to the blade tip before purchasing a replacement.

Effective Balancing Kit Application

Ceiling fan balancing kits (under $10) solve most residual wobble after tightening and alignment. These kits include a plastic clip that attaches to the blade top and small adhesive weights.

Turn your fan on high speed and observe which blade dips lowest. Clip the balancing clip to that blade’s top near the tip and test again. If wobble continues, move the clip inward toward the motor and retest. Once wobble minimizes, attach the weight at the clip position using the adhesive backing. Run the fan through all speed settings to verify smooth operation.

Mounting Bracket Stability Check

ceiling fan mounting bracket tightening wrench

The mounting bracket anchors your entire fan assembly to the ceiling, and any looseness here translates directly to visible wobble during operation.

Comprehensive Bracket Bolt Tightening

Locate all bolts securing the mounting bracket to the ceiling electrical box and to any downrod. These bolts typically use lock washers that can degrade over time. Tighten each bolt with an appropriately sized wrench, working in pairs of opposite bolts to maintain even pressure.

Check that the electrical box itself is securely fastened to a ceiling joist—if the box moves when pushed, it must be reinforced before your fan can operate wobble-free. Many wobble issues stem from inadequate electrical boxes that weren’t designed to support ceiling fan weight and movement.

Critical Bracket Alignment Verification

Hold a small level against the bracket arms to verify they point straight down. If the bracket tilts, loosen the mounting bolts slightly and adjust its position until level, then retighten securely.

For sloped ceilings, verify that the correct sloped-ceiling mounting kit was used. Standard mounting brackets on angled ceilings create inherent wobble that requires special angled mounts to correct. The bracket must hang perpendicular to the floor regardless of ceiling angle.

Downrod Connection Troubleshooting

For fans with downrods (most standard installations), the connection between downrod and motor housing requires careful inspection during wobble troubleshooting.

Downrod Thread Inspection and Tightening

Remove the canopy and visually inspect the threaded junctions where the downrod connects to both the motor housing and mounting bracket. The downrod should seat fully with no visible threads showing where it enters the motor housing.

If threads are visible, hold the downrod while loosening the set screw, then rotate the motor housing clockwise to tighten the threaded connection. For downrods with pre-attached balls, ensure the ball is fully seated in the mounting bracket socket and the retaining pin is properly installed.

Optimal Downrod Length Selection

An improperly sized downrod for your ceiling height can contribute to wobble. Standard installations use downrods between three and five inches, with longer rods for ceilings exceeding nine feet.

If your fan has always wobbled since installation, the downrod length may be incorrect. Consult your fan’s installation manual for recommended downrod lengths based on ceiling height, and consider trying a different length if other fixes haven’t resolved the wobble.

When to Replace Critical Components

worn ceiling fan motor bearings replacement

Some wobble issues require component replacement rather than adjustment, particularly when parts are damaged, worn, or incompatible with your installation.

Bearing Wear Identification and Resolution

If your fan wobbles despite all adjustments and the motor feels rough when spun by hand, the motor bearings may be wearing out. Signs include grinding sounds, excessive heat from the motor after running, and visible shaft play when attempting to rock the motor hub.

Unfortunately, replacing motor bearings requires specialized tools, making professional repair or fan replacement more practical than DIY bearing replacement for most homeowners. Once bearings reach this condition, the fan typically requires complete replacement.

Mounting Hardware Upgrade Necessity

Fans over fifteen years old often wobble due to outdated mounting hardware that doesn’t meet current safety standards. Upgrading to a new fan-rated electrical box and compatible mounting bracket often eliminates wobble that adjustment alone cannot fix.

Consider replacing the entire fan if parts are discontinued for your model. Modern fans run more quietly, consume less energy, and often include helpful features like remote controls that older models lack.

Quarterly Wobble Prevention Routine

Once you’ve eliminated wobble, taking preventive measures keeps it from returning and extends your fan’s operational lifespan.

Essential Maintenance Schedule

Every three months, turn off your fan and perform a quick visual and tactile inspection of all accessible fasteners. Tighten any screws that have loosened since your last inspection, and check for rust or corrosion on metal components. This simple maintenance takes less than five minutes.

Pay particular attention to blade screws, as these loosen most frequently. A quarter-turn of additional tightening during each quarterly inspection keeps these critical fasteners secure without risking overtightening.

Household Wobble Prevention Education

Teach household members to avoid touching ceiling fans while spinning, as this contact bends blades and creates immediate imbalance. If you need to stop the fan quickly, use the pull chain or remote control rather than reaching up.

Keep furniture and objects clear of the blade path. A chair bumped into a spinning blade or an object stored near the fan’s reach can bend blades over time. Maintaining clearance around your ceiling fan prevents accidental damage that causes wobble.


A wobbly ceiling fan disrupts your comfort and signals developing mechanical issues that deserve prompt attention. By following these troubleshooting steps—starting with simple tightening and progressing through blade alignment and mounting checks—you can restore smooth, quiet operation to virtually any residential ceiling fan. Remember that safety always comes first: verify power is disconnected before touching any fan components, and don’t hesitate to call a licensed electrician for electrical concerns. Regular inspection and gentle treatment keep your ceiling fan running steadily for years to come, providing comfortable, efficient cooling without the distracting motion of unbalanced blades.

Ceiling Fan Motor Vibration: Quick Fix Guide


That annoying shake you feel when your ceiling fan turns on isn’t just irritating—it’s a warning sign. When your ceiling fan motor vibration intensifies beyond a gentle hum, it strains the entire fixture and could lead to dangerous detachment. Thousands of homeowners ignore this symptom until a blade cracks or the mounting fails completely. In this guide, you’ll discover exactly why your fan shakes violently and how to eliminate each cause permanently—without calling a professional. You’ll learn to diagnose whether it’s loose hardware, unbalanced blades, or failing internal components causing the tremors, plus step-by-step solutions that take less than 30 minutes. Most importantly, you’ll gain the confidence to stop the shaking safely using tools already in your toolbox.

Loose Mounting Bracket: The Hidden Culprit Behind Violent Shaking

If your entire ceiling fan wobbles side-to-side when running, the mounting bracket is likely loose against the electrical box. This dangerous condition transmits motor vibrations directly into your ceiling structure. When installers skip critical hardware or use undersized electrical boxes, the fan gradually works itself loose over time. You’ll notice the fixture shifts position when touched even when turned off.

How to Check Your Fan’s Mounting Security in 60 Seconds

Stand on a stable ladder and gently push the fan housing sideways with your palm. If the whole unit moves more than 1/8 inch, the mounting has failed. Never skip this critical safety check—a severely loose fan can detach completely. While the fan is off, remove the canopy cover to expose the mounting bracket. Check for these red flags:
– Visible gaps between the bracket and ceiling
– Paint cracks radiating from mounting screws
– Screws that spin freely without tightening

Step-by-Step: Securing a Wobbly Ceiling Fan Bracket

ceiling fan mounting bracket installation guide

  1. Turn off power at the circuit breaker (verify with voltage tester)
  2. Remove light kit and canopy to access mounting screws
  3. Tighten all four bracket screws using a 1/4″ socket driver—one full turn at a time
  4. If screws spin freely, replace with #10 x 2″ lag bolts through the bracket into the electrical box
  5. Install an adjustable fan brace if the electrical box isn’t rated for fan support
  6. Reassemble and test at highest speed

Pro Tip: Place a piece of cardboard between the motor housing and ceiling while tightening. This prevents paint damage and gives you visual feedback as gaps close.

Unbalanced Blades: The #1 Cause of Persistent Vibration

Over 70% of ceiling fan motor vibration stems from blade imbalance—even slight weight differences. Dust accumulation, minor warping, or loose blade irons create uneven rotational forces. You’ll hear a rhythmic “thump-thump” sound that worsens with higher speeds, often accompanied by visible blade wobble.

DIY Blade Balancing Without Special Tools

The coin method solves most imbalances using household items:
1. Tape a nickel to the top center of one blade
2. Run fan on high speed
3. If vibration decreases, move the coin toward the blade tip in 1-inch increments
4. Once vibration minimizes, tape a second nickel to the opposite blade at the same position
5. Permanently attach small adhesive weights (included in $5 balancing kits)

When to Replace Bent or Warped Fan Blades

Blades with visible curves exceeding 1/8 inch require replacement. To check:
– Shut off power and mark each blade with chalk
– Rotate blades to 12 o’clock position
– Place a yardstick vertically against the ceiling
– Measure gap between blade tip and yardstick at 3, 6, 9, and 12 o’clock
– Replace any blade varying more than 1/16 inch from others

Warning: Never attempt to “straighten” plastic or wood blades—they’ll crack during operation. Always replace in identical pairs to maintain balance.

Dirty Blades and Motor Housing: How Grime Causes Imbalance

Dust buildup as thin as 1/32 inch creates significant weight disparities. In humid climates, grease and cobwebs form concrete-like coatings on blades and motor housings. This uneven accumulation forces the motor to work harder, amplifying vibrations. You’ll notice increased shaking after seasonal fan inactivity or in kitchens/dining areas.

Safe Cleaning Methods for Different Blade Materials

ceiling fan blade cleaning guide wood plastic metal

Material Cleaning Solution Technique Drying Time
Wood 1:1 vinegar/water Microfiber cloth, never soaking 2 hours
Plastic Mild dish soap Sponge with light pressure 1 hour
Metal Rubbing alcohol Cotton swabs for crevices 30 minutes
  1. Turn off power and remove light kit
  2. Vacuum blades thoroughly with brush attachment
  3. Wipe both sides using material-specific solution
  4. Critical step: Clean top surfaces of blades where dust accumulates
  5. Remove motor housing cover to vacuum internal components
  6. Reassemble only when completely dry

Pro Tip: Place painter’s tape on the ceiling around the fan before cleaning. This catches falling debris and prevents water stains during the process.

Worn Motor Bearings: The Grinding Noise You Can’t Ignore

When vibration accompanies grinding or clicking sounds, internal motor bearings have failed. This occurs after 8-10 years of use or in fans run continuously. The motor shaft develops play, causing erratic rotation. You’ll feel intense vibration that worsens over time and hear metallic scraping at startup.

Identifying Bearing Failure Symptoms

Perform this test with power OFF:
1. Grip the blade tips and try to move blades side-to-side
2. If you detect more than 1/16 inch of lateral play at the blade tips
3. Rotate blades manually—you’ll feel rough spots or resistance
4. Inspect motor housing for black grease seepage around seams

Lubrication vs. Replacement: What Actually Works

Most modern fans use sealed bearings that cannot be lubricated. Attempting oil injection often worsens the problem by attracting more dust. For older models with oil ports:
– Use only electric motor oil (not WD-40)
– Apply 2 drops per port monthly during peak season
– Wipe excess immediately to prevent dust buildup

In 90% of cases, bearing replacement requires motor disassembly beyond DIY capabilities. If you confirm bearing failure:
– Budget $80-$150 for professional motor rebuild
– Consider full fan replacement if over 10 years old
Never ignore this issue—seized bearings can overheat wiring

Loose Hardware Throughout the Fan Assembly

Vibration loosens critical fasteners in a vicious cycle. Missing set screws in blade brackets or loose motor housing screws amplify tremors. You’ll hear intermittent rattling that changes with speed settings. This is especially common in fans installed on sloped ceilings where hardware gradually works loose.

Critical Screws to Tighten (Including Hidden Ones)

Focus on these often-overlooked points:
Blade bracket set screws (inside the blade iron)
Canopy mounting screws (where housing meets ceiling)
Downrod coupling screws (if applicable)
Light kit mounting screws
Motor housing screws (exposed after removing canopy)

Use a jeweler’s screwdriver for tiny set screws—they strip easily with improper tools. Apply thread-locker (blue formula) to all blade bracket screws during reassembly.

Why Over-Tightening Causes More Damage

Excessive force cracks plastic components and strips threads. Follow this torque guide:
– Blade bracket screws: 15-20 inch-pounds (snug plus 1/4 turn)
– Canopy screws: 25-30 inch-pounds
– Downrod screws: 35-40 inch-pounds

Pro Tip: Mark tightened screws with colored nail polish. This makes future loosening immediately visible during inspections.

When to Call a Professional Instead of DIY Repair

Certain vibration causes require expert intervention. Attempting repairs on these issues risks electrical shock or ceiling damage. Stop immediately if you notice:
– Smoke or burning smells from the motor
– Visible wire damage inside the housing
– Cracks in the mounting bracket or electrical box
– Vibration that worsens after basic troubleshooting

For older fans (pre-2005), replacement is often safer than repair due to outdated wiring standards. Reputable electricians charge $75-$125/hour but typically resolve vibration issues in under 90 minutes. Always get written estimates before authorizing work—reputable services won’t pressure you for immediate decisions.


Final Note: Persistent ceiling fan motor vibration signals underlying issues that worsen with time. By systematically checking mounting security, blade balance, and internal components using these methods, you’ll eliminate 95% of vibration problems. Implement quarterly maintenance: tighten visible screws, clean blades, and check for abnormal play. For fans over 10 years old, schedule professional inspections every 18 months—this prevents 80% of catastrophic failures. Remember, a smoothly operating fan uses 30% less energy than a vibrating one, saving you money while keeping your home quiet and safe. If shaking continues after these fixes, replacement may be more cost-effective than repeated repairs, especially with modern ENERGY STAR models that operate vibration-free for decades.

Ceiling Fan Making Scraping Noise? Fix It Fast


That irritating scraping sound from your ceiling fan can transform a peaceful room into a constant source of frustration. When your ceiling fan making scraping noise becomes a regular occurrence, it’s more than just annoying—it could signal developing problems that might lead to complete fan failure if ignored. Many homeowners mistakenly think a scraping noise means their fan is beyond repair, but in most cases, this common issue has straightforward solutions you can handle yourself with basic tools and about 30 minutes of your time.

The scraping sound typically indicates physical contact between moving and stationary parts that shouldn’t be touching. This problem affects ceiling fans of all ages and price points, from budget models to high-end designer fixtures. Understanding why your ceiling fan makes that grating noise is the first step toward restoring quiet operation and extending your fan’s lifespan. In this guide, you’ll discover exactly where to look for the problem, how to safely diagnose the cause, and step-by-step solutions to eliminate that scraping sound for good—without needing to call a professional in most cases.

How to Locate the Exact Source of Your Fan’s Scraping Sound

ceiling fan diagnostic steps illustration

Before attempting any repairs, you must pinpoint exactly where the scraping noise originates. Many homeowners waste time tightening components that aren’t the actual problem because they skip this crucial diagnostic step. Start by turning off your fan at the wall switch and waiting for all movement to stop completely—never attempt to inspect a moving fan.

Visual Inspection for Obvious Issues

With the fan completely stopped, use a sturdy ladder to get eye-level with the fan blades. Carefully examine the space between each blade and the ceiling mount housing, looking for any visible contact points. Check if any blades appear bent or warped, which commonly happens when furniture is bumped into the fan or during cleaning. Run your fingers along the edge of each blade to feel for cracks or damage that might cause vibration. Don’t forget to inspect the light fixture housing if your fan includes lighting—sometimes the scraping occurs between the light kit and fan housing rather than with the blades themselves.

Systematic Testing to Identify the Noise Pattern

After your visual inspection, it’s time for controlled testing. Turn the fan on at the lowest speed setting and stand directly beneath it. Listen carefully to determine if the scraping occurs with each rotation (indicating a blade problem) or intermittently (suggesting a loose component). Mark one blade with tape and watch it as it rotates to see if the noise coincides with that specific blade’s position. Try operating the fan with the light kit removed if applicable—this eliminates the light assembly as a potential noise source. Pay attention to whether the scraping worsens at higher speeds, which typically indicates an imbalance issue rather than a simple obstruction.

Tightening Loose Components That Cause Ceiling Fan Scraping

Loose mounting hardware accounts for nearly 40% of all ceiling fan noise complaints. When screws connecting the fan motor to the mounting bracket or blades to the blade irons become loose, they create vibration that manifests as scraping or rattling sounds.

Securing the Fan Mounting System

Begin by turning off power at the circuit breaker—not just the wall switch—to ensure safety. With the power confirmed off, gently try to wiggle the entire fan unit. If you feel movement beyond slight give, the mounting bracket has likely come loose from the electrical box. Using a socket wrench, tighten the mounting screws that secure the fan to the ceiling bracket. Check the canopy cover screws as well, as loose canopy screws often create noise that sounds like scraping. Never overtighten, as this can strip the threads in the electrical box.

Blade Attachment Points Requiring Attention

Each blade connects to the motor housing via blade irons or brackets that commonly loosen over time. With the fan stationary, check each blade attachment point by trying to wiggle the blade where it meets the motor housing. Tighten any loose screws using the appropriate screwdriver, but be careful not to crack the plastic components. If screws won’t tighten because the holes have become stripped, remove the blade and fill the hole with wood glue and a toothpick before reinserting the screw. Allow the glue to dry completely before operating the fan again.

Removing Debris Causing Your Ceiling Fan to Scrape

ceiling fan dust removal cleaning diagram

Dust accumulation and foreign objects frequently cause scraping noises as they create imbalances or physical obstructions in the fan’s rotation path. This problem worsens during seasonal transitions when fans that have been dormant collect significant dust buildup.

Safe Cleaning Methods for Dust-Clogged Fans

Turn off power at the breaker and allow the fan to stop completely before cleaning. Use a vacuum cleaner with a brush attachment to remove loose dust from blades, motor housing, and light fixtures. For stubborn buildup, dampen a microfiber cloth with warm water (never spray liquid directly onto the fan) and wipe each component carefully. Pay special attention to the area where the blades rotate closest to the motor housing—this is where dust bunnies most commonly accumulate and cause scraping sounds. Avoid using furniture polish or oil-based cleaners that can create slippery residue attracting more dust.

Identifying and Removing Foreign Objects

Occasionally, small objects like paper clips, rubber bands, or even children’s toys become lodged in the fan mechanism. After power is disconnected, use a flashlight to inspect the motor housing interior for any foreign objects. If you spot something stuck, use needle-nose pliers to carefully remove it—never use your fingers near the motor components. Check between the blades and light kit housing as well, as items can become trapped there during cleaning or redecorating activities.

When Worn Bearings Create Scraping Noises in Ceiling Fans

Bearing wear produces a distinctive grinding or scraping sound that changes with fan speed. Unlike loose components that create intermittent noise, bearing issues generate consistent scraping that worsens over time. This problem is more common in fans older than five years or units exposed to excessive moisture like those in bathrooms or covered porches.

Recognizing Bearing Failure Symptoms

Bearing problems typically start as a faint scraping that becomes louder and more pronounced over weeks or months. The noise persists across all speed settings and may be accompanied by slight wobbling of the entire fan unit. You might also notice the fan takes longer to reach full speed or struggles to maintain consistent rotation. Unlike debris-related scraping, bearing noise won’t improve after cleaning the fan.

Temporary Solutions While Planning Replacement

While bearing replacement requires significant disassembly that many homeowners aren’t equipped to handle, you can temporarily reduce the noise. Apply a small amount of lightweight machine oil (not WD-40) to the seam between the motor housing and downrod. Operate the fan on low speed for 10 minutes to work the lubricant into the bearings. This might quiet the scraping for several weeks, but understand this is a temporary fix—eventually you’ll need to replace the fan motor or entire unit if the bearings have failed.

Replacing Damaged Blades That Cause Scraping Noises

ceiling fan blade replacement process diagram

Cracked, warped, or unbalanced blades create uneven air movement that forces the fan to wobble, causing blades to scrape against stationary parts. This problem often starts after accidental impacts from furniture, cleaning tools, or during ceiling work.

Identifying Problem Blades Through Inspection

With the fan off, measure the distance from the tip of each blade to the ceiling using a ruler or tape measure. Blades should maintain consistent distance throughout rotation—if one blade measures differently when rotated to the same position, it’s warped. Visually inspect each blade for hairline cracks along the edges or where the blade attaches to the bracket. Run your fingers along the blade surface to feel for subtle warping that might not be visible.

Step-by-Step Blade Replacement Process

Purchase replacement blades matching your fan model—never mix different blade styles or materials on the same fan. Turn off power at the breaker and remove the problematic blade by unscrewing its attachment points. Before installing the new blade, balance it against a known good blade by placing both on a flat surface to ensure identical curvature. Attach the new blade using thread-locking compound on the screws to prevent future loosening, but don’t overtighten. After installation, run the fan on low speed to verify the scraping noise has stopped before restoring full power.

When to Call a Professional for Your Scraping Ceiling Fan

While most scraping noises have DIY solutions, certain situations require professional intervention. Electrical issues or structural problems with the mounting system pose serious safety risks that shouldn’t be handled without proper training.

Warning Signs Indicating Professional Help Is Needed

Contact an electrician immediately if you notice any of these red flags: burning smells accompanying the scraping noise, visible sparks from the fan housing, the fan wobbling excessively (more than 1/4 inch), or if the mounting bracket shows signs of pulling away from the ceiling. Fans installed in vaulted ceilings or those weighing more than 35 pounds should always be serviced by professionals due to the increased risk of falls.

Cost Considerations for Professional Repair Versus Replacement

Professional ceiling fan repair typically costs $150-$300, while replacement units start around $80 for basic models. If your fan is older than 10 years or the repair estimate exceeds 50% of a comparable new fan’s cost, replacement is usually more economical. Many electricians offer free estimates for fan repairs, so don’t hesitate to get a professional opinion when safety concerns exist.


Final Note: Regular monthly dusting and bi-annual tightening of all visible screws can prevent most scraping noises from developing. Keep a small toolkit specifically for fan maintenance near your cleaning supplies so you can address minor issues before they become major problems. If you’ve followed these steps and your ceiling fan making scraping noise continues, the issue likely requires motor replacement—which often makes purchasing a new energy-efficient model the smarter long-term investment. Always prioritize electrical safety: when in doubt, turn off the power at the breaker and consult a professional.

How to Fix a Noisy Ceiling Fan


That persistent clicking, rattling, or humming from your ceiling fan disrupts your peace and makes relaxation impossible. A noisy ceiling fan isn’t just annoying—it often signals underlying issues that could lead to more serious problems if ignored. The good news is most ceiling fan noise problems are fixable with basic tools and a systematic approach. You can typically quiet your fan in under an hour without professional help, saving you money and restoring comfort to your living space. This guide delivers practical, step-by-step solutions for every common noise issue, so you can identify the problem and implement the right fix with confidence.

Most ceiling fan noise stems from preventable issues like loose components, improper installation, or simple wear and tear. Whether your fan developed noise suddenly or has been problematic since installation, understanding the specific sound it makes is crucial to diagnosing the cause. By methodically working through potential problems starting with the simplest solutions, you’ll likely silence that irritating noise without replacing your entire fixture. Let’s tackle the most common noise problems and their effective remedies.

Diagnose Your Ceiling Fan Noise Type First

Before grabbing tools, determine exactly what kind of noise your fan produces—different sounds indicate specific problems requiring distinct solutions. Clicking or tapping noises typically occur rhythmically with blade rotation, suggesting something periodically contacts a moving part. This most often means loose hardware like blade attachment screws, mounting brackets, or unsecured light fixtures. These sounds become most noticeable at low speeds when each impact registers clearly.

Humming or buzzing noises require more careful diagnosis. A low-pitched hum frequently points to electrical issues such as a failing capacitor or motor winding problems. High-pitched buzzing often indicates components vibrating at the motor’s electromagnetic frequency—sometimes as simple as loose screw heads or glass panels in light fixtures resonating with the fan’s operation. Pay attention to whether the humming changes with speed settings, as this clue helps pinpoint the exact component causing trouble.

Rattling or vibrating sounds usually signal loose components moving freely rather than making rhythmic contact. The culprit might be fan blade screws that have gradually worked loose over time, an improperly seated downrod assembly, or mounting hardware that hasn’t been tightened sufficiently. Rattling typically intensifies at medium to high speeds when centrifugal force amplifies any looseness in the system. Identifying your specific noise type prevents wasted effort on irrelevant fixes.

Tighten Every Screw and Connection Immediately

Loose hardware causes more ceiling fan noise problems than any other single issue, yet it’s the quickest fix. Vibration from normal operation gradually works fasteners loose, and even one slightly loose screw can create significant noise. Before attempting complex repairs, complete this systematic tightening process with the fan powered off at both the wall switch and circuit breaker.

Start with the mounting screws connecting the fan to the electrical box in the ceiling—these often loosen over time and create distinctive rattling sounds. Next, check the downrod connection where the motor hangs from the mounting bracket; this usually has a set screw requiring attention. Then methodically tighten each screw attaching fan blades to their arms, applying equal pressure to all blades. Finally, inspect any screws securing light kits, glass shades, or decorative elements. After tightening each component, gently wiggle it to confirm security and listen for remaining movement.

When tightening blade attachment screws, stop when snug plus a quarter turn—overtightening risks stripping screw holes or cracking plastic or thin wooden blades. If you encounter a stripped screw hole, fill it with wood toothpicks coated in wood glue before reinserting the screw. This simple reinforcement creates a solid anchor point without requiring blade replacement. Completing this thorough tightening process resolves noise issues in over 60% of cases.

Correct Blade Imbalance Causing Wobble

ceiling fan blade balancing kit instructions

Unbalanced blades create wobbling that produces both noise and excessive vibration, straining motor bearings and accelerating wear. To check for imbalance, turn on the fan and observe blade tips from below—uneven heights or angles indicate misalignment. Alternatively, with the fan off, use a level against each blade to verify uniform angle relative to the ceiling.

Most fans include a blade balancing kit with a clip and adhesive weights. If yours lacks one, purchase an inexpensive kit at any hardware store. Begin with all blade screws tightened, then identify the blade causing most wobble. Attach the balancing weight to the top of that blade near the outer edge and test the fan. If wobble persists, move the weight slightly inward or add a second weight. This requires patience—make small adjustments and test between changes until wobble disappears.

For severely warped or damaged blades that won’t balance, replacement becomes necessary. Continuing to operate an unbalanced fan places excessive stress on bearings and mounting hardware, potentially causing more expensive damage. Replacement blades typically match your model number and install with basic tools. Properly balanced blades not only reduce noise but also improve air circulation efficiency by 15-20%.

Lubricate Motor Bearings for Grinding Sounds

A whining or grinding noise that intensifies with speed usually indicates dry or worn motor bearings. Confirm this by manually rotating blades with the fan off—they should spin freely without resistance or clicking. If rotation feels rough or catches, lubrication may solve the problem.

First, clean the motor housing exterior to prevent debris from entering during lubrication. Most ceiling fans have two lubrication points—one at the top bearing near the mounting point and another visible from below as a small cap in the motor center. Remove caps or plugs, then apply just a few drops of high-quality electric motor oil to each bearing point. Never use WD-40 or general-purpose oils, as these attract dust and may damage motor windings.

After lubricating, manually spin blades several times to distribute the oil, then replace caps. Test the fan at low speed—the grinding should diminish significantly. If noise persists or returns quickly, bearings may be too worn for lubrication to help, indicating professional service or replacement becomes necessary. Proper lubrication extends motor life by years when performed annually during routine maintenance.

Replace Faulty Capacitor Causing Humming

ceiling fan capacitor replacement wiring diagram

A failing capacitor creates loud humming while blades spin slowly or refuse to start. This small cylindrical component helps the motor start and maintain speed. Signs include inconsistent starting, reduced speeds, or humming that continues after manually starting the blades.

To replace it, turn off power at the circuit breaker, remove the switch housing cover, and locate the capacitor in the switch housing. Note wire connections carefully before disconnecting—take a photo for reference. Match the replacement capacitor exactly by voltage rating and microfarad (µF) specifications. Reconnect wires identically to the original configuration, secure the new capacitor, and test all speed settings. The fan should now start quickly and run quietly.

Capacitor replacement costs $5-15 and takes 20 minutes for most homeowners, making it one of the most cost-effective ceiling fan repairs. Keeping a spare capacitor on hand allows quick resolution when this common failure occurs.

Secure Mounting Hardware and Electrical Box

fan rated electrical box installation

If your fan wobbles noticeably or produces noise seemingly from the ceiling itself, the mounting system likely needs attention. Standard electrical boxes aren’t rated for ceiling fan weight and vibration—only fan-rated boxes properly secure the fixture. Turn off power, then gently wiggle the fan housing where it meets the ceiling. Any movement indicates loose mounting.

Tighten mounting bracket screws connecting to the electrical box first. If the box itself moves, you’ll need to replace it with a fan-rated box—a project requiring attic access or drywall work that many homeowners delegate to professionals. Also check for bent or damaged mounting brackets that prevent proper alignment with the downrod. A misaligned bracket causes chronic wobble regardless of blade balance.

Proper mounting prevents noise recurrence and eliminates safety hazards. Fan-rated boxes cost $15-25 and support the dynamic loads created by fan operation, making them essential for quiet, safe performance.

Address Light Kit and Accessory Vibrations

Fans with light kits develop unique noise issues from glass shades, bulbs, or decorative elements vibrating against fixtures. These noises often intensify at specific speeds and become most noticeable when lights are on. Confirm light kit involvement by temporarily removing it and running the fan without lighting.

Tighten all glass shade retainers without overtightening, which can crack glass. Replace humming CFL bulbs with vibration-resistant LED alternatives—bulb type significantly affects noise levels. Ensure bulbs screw in firmly but avoid excessive tightening that damages sockets. Adjust pull-chain length so it hangs freely without contacting housing during operation.

For persistent light kit noise, apply small rubber washers between glass components and metal fixtures to dampen vibration transmission. This simple modification often eliminates buzzing without visible modification to your fixture.

Know When to Call Professionals or Replace

Some noise issues require professional expertise or indicate replacement is more practical than repair. Electrical problems beyond capacitor replacement, including sparks, burning smells, or circuit breaker trips, demand immediate professional attention due to fire hazards.

Fans over ten years old with multiple noise problems often cost more to repair than replace. Modern fans operate 30-40% more quietly due to improved motor technology and manufacturing tolerances. If repair costs exceed 50% of a new fan’s price, replacement becomes the smarter investment.

Strange internal motor noises, excessive heat during operation, or persistent problems after systematic troubleshooting suggest internal damage not worth repairing. In these cases, new energy-efficient models often pay for themselves through reduced electricity costs within a few years.


Regular maintenance prevents most ceiling fan noise problems before they start. Tighten hardware annually, clean blades quarterly to prevent dust buildup, and address minor issues immediately before they escalate. Listen carefully to your fan’s normal operation so you recognize changes early. Well-maintained ceiling fans typically operate quietly for 10-15 years, but when replacement becomes necessary, modern models offer significantly quieter performance and better energy efficiency. By applying these targeted fixes based on your specific noise type, you’ll restore peaceful operation to your living space without unnecessary expense.

How Fast Does a Ceiling Fan Spin: RPM Explained


You’re relaxing in your living room when you suddenly wonder: just how fast is that ceiling fan rotating above you? Most homeowners have asked this question while feeling the breeze from their overhead fan. Understanding ceiling fan speed isn’t just curiosity—it directly impacts your comfort, energy efficiency, and even your electricity bill. Ceiling fans don’t spin at a single fixed rate; their rotation speed varies significantly based on multiple factors including fan size, motor type, and selected settings. Knowing the typical revolutions per minute (RPM) ranges helps you optimize airflow for summer cooling or winter heat distribution. This guide reveals the actual speed ranges you can expect from your ceiling fan across different settings, explains what influences these speeds, and shows how to maximize performance for your specific space.

Standard Ceiling Fan Speed Ranges by Setting

Ceiling fans operate across multiple speed settings that dramatically affect their rotation rate and airflow performance. Understanding these standard ranges helps you select appropriate speeds for different conditions.

Low Setting: Gentle Airflow Without the Draft

On low speed, most residential ceiling fans rotate between 50-100 RPM, creating a subtle breeze perfect for mild temperatures or sleeping. This slower rotation moves enough air to create a cooling effect without generating uncomfortable drafts. You’ll typically hear minimal motor noise at this setting, making it ideal for bedrooms or quiet spaces. The blades appear to move slowly enough that you can easily track their motion with your eyes. During cooler months, running your fan clockwise at this low speed gently pushes warm air down from the ceiling without creating a chilling effect.

Medium Setting: Balanced Cooling Performance

At medium speed, ceiling fans generally operate between 100-150 RPM, striking the optimal balance between airflow and energy consumption for most living spaces. This setting provides noticeable cooling without excessive noise, making it the most commonly used speed during warm weather. The blades move quickly enough that individual rotations blur together, but you can still distinguish the blades as they pass fixed points. Most homeowners find this setting effective for maintaining comfort while keeping energy costs reasonable—typically consuming 15-35 watts depending on fan size and motor efficiency.

High Setting: Maximum Air Circulation

When set to high, standard ceiling fans reach their peak performance between 150-250 RPM, depending on blade design and motor power. This maximum speed creates substantial airflow that can significantly enhance evaporative cooling on hot days. The blades become nearly invisible as they rotate, creating a continuous disc-like appearance. While this setting provides the strongest breeze, it also generates the most motor noise and consumes the most energy (usually 30-75 watts). High speed works best for quickly cooling a room or during periods of extreme heat, but shouldn’t be used continuously as it can create uncomfortable drafts and unnecessary energy expenditure.

Factors That Determine Ceiling Fan Rotation Speed

ceiling fan blade pitch angle diagram

Multiple design and operational elements influence how fast your ceiling fan spins under various conditions. Recognizing these factors helps you understand why different fans perform uniquely in similar spaces.

Blade Design and Pitch Angle Impact

The number of blades and their pitch angle significantly affect rotation speed and airflow efficiency. Fans with fewer blades (3-4) typically spin faster than those with more blades (5+) to move equivalent air volume. The blade pitch—the angle at which blades are set—determines how much air gets pushed with each rotation. Higher pitch angles (12-15 degrees) create more downward airflow at lower RPMs, while flatter blades require higher rotation speeds to achieve similar cooling effects. Modern energy-efficient fans often use optimized blade designs that maximize airflow at lower RPMs, reducing both energy consumption and noise.

Motor Type and Power Specifications

The motor represents the heart of your ceiling fan’s speed capabilities. Traditional AC induction motors operate at fixed speed ranges determined by the number of windings, while newer DC motor fans offer much wider speed variability through electronic controls. Standard AC motors typically deliver three distinct speed settings with limited range between them, whereas DC motor fans provide smoother transitions across a broader RPM spectrum. Higher quality motors maintain consistent speed regardless of minor voltage fluctuations, while cheaper models may slow down as electrical load increases in your home.

Ceiling Height and Room Size Considerations

Your ceiling height directly influences optimal fan speed selection. In rooms with standard 8-9 foot ceilings, medium to high speeds work best to push air down effectively. For vaulted or high ceilings (10+ feet), running your fan at higher RPMs becomes necessary to ensure airflow reaches the living space. Larger rooms require faster rotation speeds to circulate air throughout the entire space, while smaller rooms might achieve sufficient airflow at lower settings. Fans installed in open floor plans often need higher operating speeds to compensate for the larger air volume they must move.

Measuring and Adjusting Your Ceiling Fan Speed

Knowing how to assess and modify your fan’s rotation rate ensures you’re getting optimal performance from your specific model and installation.

Using Smartphone Apps to Measure RPM

You don’t need specialized equipment to determine your ceiling fan’s actual speed. Free smartphone apps like “Phyphox” or “AndroSensor” use your phone’s camera and light sensor to calculate RPM through stroboscopic analysis. Simply point your phone’s camera at the rotating fan (from a safe distance), activate the app’s RPM measurement function, and let the software analyze the rotation rate. This method provides surprisingly accurate readings that help you verify whether your fan is performing within expected parameters or if speed control issues exist.

Addressing Speed Control Problems

If your ceiling fan isn’t reaching expected speeds or behaves erratically across settings, several common issues could be responsible. Worn pull-chain switches often cause inconsistent speed performance, particularly on older fans. Dimmer switches not designed for ceiling fans can restrict power delivery, preventing the motor from reaching proper RPM. Electronic speed controllers may develop calibration issues over time, requiring replacement. Before assuming motor failure, check for simple fixes like tightening loose blade attachments or cleaning dust buildup that creates imbalance and slows rotation.

Optimizing Ceiling Fan Speed for Seasonal Efficiency

ceiling fan summer winter direction diagram

Strategic speed selection throughout the year maximizes both comfort and energy savings from your ceiling fan investment.

Summer Cooling Strategies

During warm months, set your fan to rotate counterclockwise at medium to high speeds (100-250 RPM) to create a strong downward breeze that enhances evaporative cooling on your skin. The wind chill effect allows you to raise your thermostat setting by 4°F while maintaining equivalent comfort, significantly reducing air conditioning costs. In particularly humid conditions where evaporative cooling is less effective, higher speeds become even more important to move sufficient air volume. Remember that ceiling fans cool people, not rooms—always turn them off when spaces are unoccupied to avoid wasting energy.

Winter Heat Distribution Techniques

In colder months, reverse your fan direction to clockwise rotation and operate at low speeds (50-100 RPM) to gently circulate warm air trapped near the ceiling. High speeds during winter create uncomfortable drafts while failing to effectively redistribute heat. The slow rotation pulls cool air up from below while pushing warmer air down along the walls, creating more uniform temperatures throughout the room. This strategic use of ceiling fans can reduce heating costs by up to 15% by allowing you to lower your thermostat without sacrificing comfort.

Safety Considerations for High-Speed Operation

ceiling fan blade wobble safety

While ceiling fans are generally safe, understanding speed-related safety factors prevents potential issues.

Maximum Safe Operating Speeds

Manufacturers design ceiling fans with specific maximum RPM limits based on blade balance, motor capabilities, and mounting hardware. Exceeding these limits—often through improper speed controller modifications—creates dangerous vibration and potential blade detachment. Most residential fans should never exceed 300 RPM, as higher speeds dramatically increase centrifugal force on blade attachments. If you notice unusual wobbling, especially at higher speeds, immediately reduce the setting and investigate the cause before continuing operation.

Clearance Requirements for Fast-Spinning Blades

The faster your ceiling fan rotates, the more critical proper clearance becomes. Maintain at least 7 feet of clearance between fan blades and the floor, with additional clearance recommended for higher speed settings. For fans operating consistently at high RPM, consider increasing this clearance to 8 feet, particularly in homes with tall occupants. Ensure at least 18 inches of clearance from walls and light fixtures to prevent air turbulence that reduces efficiency and increases noise at higher speeds.


Final Note: Understanding how fast your ceiling fan spins empowers you to optimize home comfort while minimizing energy costs. By matching fan speed to seasonal needs, room characteristics, and personal comfort preferences, you maximize the return on your ceiling fan investment. Remember that most fans operate between 50-250 RPM across their standard settings, with blade design and motor type significantly influencing performance at each speed level. Regular maintenance ensures your fan continues operating at proper speeds, while strategic seasonal adjustments deliver year-round benefits. For optimal results, combine appropriate fan speeds with smart thermostat settings to create the most energy-efficient home environment possible.

Ceiling Fan Clicking Solved


Is your ceiling fan disrupting your peace with an annoying clicking sound? That persistent “click-click-click” can transform what should be a relaxing breeze into an irritating distraction. You’re not alone – millions of homeowners deal with this common household issue every year. The good news is most ceiling fan clicking problems have straightforward solutions you can handle yourself without calling an electrician. In this guide, you’ll discover the exact causes behind that clicking noise and learn step-by-step how to silence your fan for good.

Identifying the Source of Your Ceiling Fan Clicking

Before attempting any fixes, you need to pinpoint exactly where the clicking is coming from. Different sounds indicate different problems, and misdiagnosis could waste your time or create safety hazards. Start by observing when the clicking occurs – does it happen only at certain speeds, when the fan first starts, or continuously throughout operation? This timing clue provides your first diagnostic clue.

Clicking When Fan Starts or Changes Speed

If your fan clicks only when you turn it on or change speeds, the issue likely lies in the speed control mechanism. This clicking typically happens because of electrical arcing inside the wall switch or remote control receiver. You’ll hear a distinct “click” followed by the fan responding (or not responding) to your command. This specific timing pattern helps rule out mechanical problems with the fan blades or motor.

Continuous Clicking During Operation

A constant clicking sound while your fan runs usually indicates a physical obstruction or mechanical problem. This could be something as simple as a loose screw vibrating against the housing or as serious as internal motor components failing. Turn off your fan immediately if you hear continuous clicking – continuing to operate it could cause further damage or create a fire hazard.

Common Causes of Ceiling Fan Clicking and Their Solutions

ceiling fan parts diagram labeled

Loose Blade or Mounting Hardware

Loose components are the #1 cause of ceiling fan clicking noises. Over time, normal vibration causes screws to work loose, creating that distinctive clicking sound as parts knock against each other.

How to fix it:
1. Turn off power at the circuit breaker (safety first!)
2. Use a sturdy ladder to access your fan
3. Check all visible screws on blades, blade brackets, and mounting hardware
4. Tighten any loose screws with appropriate screwdriver
5. For stubborn vibrations, add rubber washers between blades and brackets
6. Test fan at all speeds to ensure clicking has stopped

This simple fix resolves clicking problems in approximately 60% of cases and takes less than 15 minutes. If tightening screws stops the clicking, you’ve saved yourself a costly service call.

Foreign Object Interference

Sometimes the clicking comes from an unexpected source – something has gotten inside your fan housing. This is especially common in homes with children or pets, or if your fan is near laundry areas where small items might become airborne.

How to diagnose:
– Turn off power completely
– Visually inspect around motor housing and between blades
– Carefully feel around fan components for obstructions
– Check for items like hair ties, paper clips, or small toys
– Remove any foreign objects with needle-nose pliers

If you find an obstruction, clean it out carefully and test your fan. If the clicking stops, you’ve solved your problem. If it continues, move to the next diagnostic step.

Electrical Component Issues Causing Clicking

Faulty Wall Switch or Dimmer

Many homeowners don’t realize their wall switch could be causing that clicking noise. Older switches, incompatible dimmers, or failing components inside the switch housing can create audible clicking sounds that seem to come from the fan itself.

How to test if your switch is the problem:
1. Turn off power at the breaker
2. Remove the wall switch cover plate
3. Operate the switch while listening closely
4. If you hear clicking from the switch itself, you’ve found your culprit
5. Replace with a switch specifically rated for ceiling fan use

Standard light switches aren’t designed to handle the electrical load of ceiling fans. Installing a proper fan-rated switch (costing $10-$20) often eliminates electrical clicking noises and prevents future problems.

Remote Control Receiver Malfunction

If your fan uses a remote control system, the clicking might originate from the receiver module mounted inside the fan canopy. These small electronic components can fail over time, creating clicking sounds as they struggle to process signals.

Fixing a faulty receiver:
1. Turn off power at the breaker
2. Remove fan canopy to access receiver
3. Check for visible damage or burnt components
4. Replace receiver module with exact match for your fan model
5. Reconnect all wiring following manufacturer diagram

Receiver replacement typically takes 20-30 minutes and costs $15-$35 for the part. Keep your original remote to ensure compatibility with the new receiver.

Motor and Internal Component Problems

ceiling fan motor capacitor replacement

Worn Motor Bearings

When bearings inside the fan motor wear out, they often create distinctive clicking or grinding noises. This problem usually develops gradually, starting with occasional clicks that become more frequent over time.

Warning signs of failing motor bearings:
– Clicking that worsens as fan runs longer
– Uneven blade rotation or wobbling
– Burning smell accompanying the noise
– Increased vibration throughout operation

Unfortunately, replacing motor bearings typically requires specialized tools and knowledge. For most homeowners, replacing the entire fan motor (or the fan itself) proves more cost-effective than bearing replacement.

Failing Capacitor

The capacitor helps regulate electrical current to the motor. When it begins failing, you might hear clicking sounds as the motor struggles to maintain consistent speed. This component failure often happens suddenly rather than gradually.

How to identify capacitor issues:
– Clicking accompanied by slow startup
– Fan runs only at certain speeds
– Visible bulging or leaking on capacitor
– Burnt smell near motor housing

Capacitor replacement costs $10-$25 for the part and takes about 30 minutes for someone with basic electrical skills. Always discharge the capacitor before handling to avoid electrical shock.

When to Call a Professional

While many ceiling fan clicking problems have DIY solutions, some situations require professional help. Call an electrician immediately if you notice:

  • Burning smells coming from the fan or switch
  • Visible sparks or scorch marks
  • Frequent circuit breaker trips when operating the fan
  • Clicking accompanied by smoke
  • Any signs of water damage near electrical components

Attempting electrical repairs without proper training creates serious shock and fire risks. When in doubt, call a professional – most electricians charge $75-$150 for a service call, which is far less expensive than dealing with electrical fire damage.

Preventing Future Ceiling Fan Clicking Problems

Regular Maintenance Schedule

Prevent most clicking issues with these simple maintenance steps:
– Monthly: Check for loose blades and hardware
– Quarterly: Clean dust from blades and motor housing
– Annually: Lubricate motor bearings (if manufacturer recommends)
– Biannually: Inspect electrical connections for tightness

Setting calendar reminders for these tasks takes just two minutes but prevents 80% of common ceiling fan problems.

Proper Installation Practices

Many clicking problems originate from improper installation. If you’re installing a new fan or replacing an old one, follow these guidelines:
– Use a proper ceiling fan-rated electrical box
– Ensure all mounting screws are fully tightened
– Balance blades before final installation
– Verify correct wiring connections
– Use fan-rated wall controls instead of standard switches

Taking an extra 15 minutes during installation prevents hours of troubleshooting later.

Choosing the Right Replacement Fan

ceiling fan metal vs plastic components comparison

If your fan is beyond repair, select a new model less prone to clicking issues:
– Look for fans with solid construction and metal components
– Choose models with lifetime motor warranties
– Avoid ultra-cheap fans with plastic internal components
– Consider brushless motor designs for quieter operation
– Check user reviews specifically mentioning noise issues

Investing $50-$100 more in a quality fan often saves you from future clicking problems and replacement costs.


Final Note: That clicking ceiling fan doesn’t have to drive you crazy. By systematically checking the common causes outlined above, you can identify and fix most clicking problems in under an hour. Start with the simplest solutions (tightening screws) before moving to more complex electrical diagnostics. Remember to always turn off power at the breaker before inspecting or repairing any electrical fixture. With proper maintenance, your ceiling fan should provide years of quiet, reliable service without that annoying click disrupting your home’s peace.

How to Stop a Ceiling Fan from Shaking: Quick Fix Guide


That persistent wobble in your ceiling fan isn’t just irritating—it’s a sign something needs attention before minor vibration becomes major damage. When your fan shakes noticeably, it strains motor bearings, loosens mounting hardware, and can even damage your ceiling structure over time. Learning how to stop a ceiling fan from shaking properly addresses the root cause rather than just masking symptoms. This guide provides actionable steps to diagnose and eliminate fan vibration, restoring quiet operation and extending your fan’s lifespan without unnecessary repairs or replacement.

Diagnose Your Specific Fan Shaking Problem

ceiling fan shaking diagnosis diagram

Identifying why your ceiling fan wobbles determines whether you need a five-minute fix or professional assistance. Most vibration issues stem from one of four common problems, each requiring different solutions.

Loose or Uneven Fan Blades Cause Most Shaking Issues

Loose blade screws represent the single most frequent culprit behind ceiling fan vibration. As your fan operates daily, constant movement gradually loosens the hardware connecting blades to arms. Even a slight difference in tightness between blades creates imbalance that worsens at higher speeds. Before attempting complex solutions, systematically tighten every screw connecting blades to arms and arms to the motor hub. Use a screwdriver to snug each connection without overtightening—stripped screws create more serious problems. This simple step resolves approximately sixty percent of ceiling fan shaking complaints immediately.

Check for Warped Blades or Incorrect Blade Pitch

Each blade must maintain identical pitch—the angle at which it cuts through air—to prevent vibration. Impact from cleaning tools, accidental bumps, or moisture exposure can warp blades enough to disrupt balance. To check for warping, sight along each blade’s edge against a straight reference like a door frame. Any visible curve or twist means that blade transfers uneven force during rotation. Similarly, blades with inconsistent pitch create asymmetric airflow patterns that directly cause shaking. This problem requires blade replacement rather than adjustment, as modifying blade pitch risks structural failure.

Inspect Motor Mount and Canopy Stability

Rubber grommets between the motor housing and mounting bracket absorb vibration during operation. Over time, these components harden, crack, or fall out completely, allowing motor vibration to transfer directly to your ceiling. A loose canopy—the dome covering electrical connections—also rattles audibly when mounting screws loosen from building settling or improper installation. Gently push against the stationary fan assembly; any movement beyond minimal play indicates mounting hardware needs tightening throughout the entire support structure.

Verify Electrical Box and Mounting Bracket Integrity

Violent shaking at high speeds often indicates inadequate electrical box support. Standard electrical boxes can’t handle the dynamic weight and vibration of ceiling fans—only fan-rated boxes meet this demand. If your fan shakes regardless of blade condition, the mounting bracket might be misaligned or the electrical box improperly secured to ceiling joists. Visible movement in the ceiling fixture or developing cracks around the installation point confirm this serious issue. Addressing box-related problems requires electrical work and should be handled by a licensed professional.

Execute Precision Blade Balancing Techniques

When loose hardware isn’t the culprit, blade balancing corrects weight distribution issues causing vibration. This methodical process eliminates wobble without replacement parts when performed correctly.

Tighten All Critical Connection Points Systematically

Begin by tightening every mounting point in sequence: blade-to-arm connections first, then arm-to-hub connections. Work clockwise around the fan to maintain consistent tension. Use a screwdriver rather than power tools to avoid stripping screws in wood components. Check that blade arms sit flush against the motor hub—any gap indicates warped arms requiring replacement. This comprehensive tightening addresses subtle imbalances invisible during casual inspection.

Perform Accurate Blade Alignment Checks

With power off, hold a level or straightedge perpendicular to the ceiling near each blade tip. Measure the gap between tip and reference point—variation exceeding 1/8 inch requires adjustment. Alternatively, mark the lowest-hanging blade with tape after brief operation, then compare its position to others when stationary. Uneven blades create centrifugal force imbalances that directly cause shaking. Correct alignment ensures each blade travels through identical air resistance during rotation.

Apply Targeted Balancing Weights When Needed

If vibration persists after alignment, use balancing clips to counteract residual imbalance. Start with one clip midway along a blade, then test at medium speed. Move the clip toward tip or hub until vibration minimizes, then add additional clips as needed. Most fans require only one or two weights totaling 5-10 grams. Once positioned correctly, permanently attach weights with adhesive backing from your balancing kit. This precise correction addresses microscopic weight variations impossible to detect visually.

Secure Critical Mounting Components Thoroughly

ceiling fan mounting bracket installation

When blade balancing fails, mounting hardware requires systematic attention to eliminate vibration transfer points throughout the support structure.

Reinforce Canopy and Bracket Connections

Remove the canopy by loosening mounting screws, then clean any paint or debris from contact surfaces before reinstallation. Ensure the mounting bracket sits completely flush against the ceiling—any gap allows movement that amplifies vibration. Tighten bracket screws incrementally in a star pattern rather than sequentially to distribute pressure evenly. Check that canopy screws engage fully with mounting bracket threads; stripped holes require longer screws or repair anchors.

Replace Degraded Vibration Dampening Components

Access motor housing connections by removing the lower canopy cover. Inspect each rubber grommet for cracks, hardening, or complete deterioration. Replace compromised components with manufacturer-specified parts—generic rubber won’t provide adequate vibration isolation. Pay special attention to the central mounting bolt’s washer system, which often contains multiple dampening layers that degrade independently. Properly functioning dampeners absorb 70-80% of motor vibration before it reaches your ceiling.

Confirm Electrical Box Compatibility and Security

Gently shake the stationary fan assembly—if movement exceeds 1/4 inch, your electrical box likely isn’t fan-rated. Fan-rated boxes feature reinforced mounting brackets that secure directly to ceiling joists. Replacement requires turning off power at the circuit breaker and temporarily removing the fan. If you’re uncomfortable working with electrical connections, hire a licensed electrician. Proper box installation eliminates the most severe vibration issues that blade balancing can’t resolve.

Implement Preventative Maintenance to Avoid Future Shaking

ceiling fan maintenance checklist

Regular care prevents most ceiling fan vibration issues before they develop into serious problems requiring component replacement.

Establish Quarterly Inspection Routine

Every three months, power off your fan and check blade screw tightness by gently attempting to wiggle each blade. Examine the canopy for gaps indicating loosened mounting hardware. Listen for new operational sounds that might indicate developing bearing wear. This five-minute inspection catches developing issues when they’re still simple fixes, preventing 90% of serious vibration problems.

Schedule Seasonal Deep Cleaning Sessions

Dust accumulation creates subtle weight imbalances that develop into noticeable shaking over weeks of operation. Clean each blade thoroughly using a microfiber cloth dampened with water, focusing on the leading edge where dust concentrates. Allow blades to dry completely before operation—moisture weight affects balance temporarily. Fans in kitchens require monthly cleaning to prevent grease buildup that significantly alters blade weight distribution.

Know When to Call Professional Help

If your ceiling fan continues shaking after attempting all troubleshooting steps, professional assessment identifies hidden problems. Licensed technicians diagnose bearing wear, motor winding issues, and structural mounting problems requiring specialized tools. Professional intervention ensures repairs meet electrical codes and maintain your home’s safety standards, particularly important when electrical box replacement is needed.


Final Note: Stopping ceiling fan shaking requires methodical troubleshooting starting with blade alignment and progressing through mounting integrity checks. Most vibration issues resolve with simple hardware tightening and balancing techniques that take less than thirty minutes. Regular quarterly maintenance prevents the gradual loosening that causes most shaking problems, while professional assessment handles complex issues beyond DIY capabilities. A properly balanced ceiling fan operates silently and efficiently for years, providing comfortable cooling without the annoyance of disruptive vibration. Address shaking promptly to protect your investment and maintain a peaceful home environment.

How to Fix a Shaky Ceiling Fan


That annoying wobble in your ceiling fan isn’t just irritating—it’s a sign that something’s wrong with your fan’s balance or installation. A shaky ceiling fan creates distracting noise, reduces airflow efficiency, and can even damage the motor over time. The good news? Most ceiling fan wobbles stem from common, easily fixable issues you can tackle yourself with basic tools. Whether your fan has suddenly started shaking or it’s been wobbling since installation day, this guide gives you a complete step-by-step solution to restore smooth, quiet operation without calling a professional.

Before you grab your ladder and tools, understand that ceiling fan wobble typically comes from one of five specific problems: loose mounting hardware, unbalanced blades, bent components, improper installation, or accumulated dust. By systematically checking each potential cause in the right order, you can diagnose and fix your fan’s wobble in less than an hour. Let’s dive into the exact process that thousands of homeowners have used to eliminate ceiling fan vibration for good.

Why Your Ceiling Fan Suddenly Started Shaking

The physics behind ceiling fan wobble is straightforward: when blades don’t rotate perfectly level, centrifugal force magnifies even tiny imbalances into noticeable vibration. At typical operating speeds of 200-300 RPM, a blade just 1/8 inch out of alignment creates significant wobble that transmits through the entire fan structure. This explains why minor issues become major problems at higher speeds.

Most shaking begins after several months or years of operation as vibration gradually loosens critical hardware. The top three culprits are mounting bracket screws working loose from the electrical box, blade screws becoming loose on individual arms, and downrod connections developing play. Less commonly, blade warping from humidity changes, accidental impacts bending a blade arm, or dust buildup on one side of blades creates uneven weight distribution. Understanding these specific causes helps you target your repair efforts efficiently rather than randomly tightening random screws.

Critical Safety Steps Before Fixing Your Wobbly Fan

Turning off power at the circuit breaker isn’t just recommended—it’s non-negotiable when working on ceiling fans. Locate your electrical panel and flip the breaker controlling the fan circuit to “OFF.” Never rely solely on the wall switch, as faulty wiring could still energize components. Verify power is off by attempting to turn on the fan; if it moves at all, return to the breaker panel immediately. This simple step prevents potentially fatal electrical contact with live components inside the fan housing.

Work from a stable ladder positioned directly beneath the fan—never stand on chairs or unstable surfaces. Have all tools within easy reach in a tool belt or magnetic tray to avoid dropping items. Use a bright work light to illuminate shadowed areas around the mounting bracket. If you’re uncomfortable working at heights or lack experience with electrical fixtures, hire a professional rather than risking injury. Remember: taking 10 extra minutes to prepare properly protects you from life-altering accidents during this otherwise simple repair.

How to Perform a Targeted Visual Inspection

ceiling fan blade alignment tool ruler

Start your diagnosis from the ground with a visual assessment using a ruler or laser level app on your phone. Hold the measuring tool vertically against a wall and sight along it to each blade tip. Note if any blade sits higher or lower than others—differences as small as 1/16 inch cause noticeable wobble. Check for visible blade damage like cracks, warping, or bent edges that would disrupt airflow symmetry.

Move closer with your ladder for a detailed inspection. Examine the mounting bracket for gaps between it and the ceiling—this indicates loose mounting screws. Gently push on the fan housing to test for excessive movement at the downrod connection. Inspect all visible screws for rust, stripped heads, or signs they’ve pulled away from their holes. Pay special attention to blade-to-arm connections; one loose screw often causes disproportionate wobble. Take photos of your current setup before disassembly—they’ll prove invaluable during reassembly and help you track your progress.

Tightening Loose Hardware: The #1 Fix for Wobbling Fans

ceiling fan mounting bracket screws tightening

Loose mounting hardware causes over 60% of ceiling fan wobble issues, making systematic tightening your most important repair step. Start at the top with the bracket-to-ceiling connection. Remove the canopy cover to access the mounting screws securing the fan to the electrical box. Use a socket wrench or appropriately sized screwdriver to firmly tighten each screw—snug but not overtightened, as excessive force can crack plastic components.

Next, address the downrod connections. Most fans have set screws securing the downrod ball joint at both the mounting bracket and motor housing. Tighten these hex screws with an Allen wrench until firm resistance is felt. Then move to blade components: tighten each blade-to-arm screw (typically 3-4 per blade) followed by each arm-to-motor connection point. Work in a star pattern around the fan to maintain even tension. After your first pass, repeat the process—vibration often loosens multiple connections simultaneously, and your initial tightening may reveal previously hidden looseness.

Precision Blade Balancing Techniques That Actually Work

Even with all hardware tightened, imperfect blade alignment causes persistent wobble. The professional blade balancing method requires a simple balancing kit (available for $5-10 online) but delivers permanent results. Start by cleaning all blades thoroughly—dust accumulation creates uneven weight distribution that mimics mechanical imbalance.

Attach the balancing clip to the midpoint of one blade’s top surface and run the fan at medium speed. Note the vibration level, then move the clip to the next blade and repeat. The blade that shows the least vibration when weighted needs permanent balancing. Attach the clip permanently at that location, then fine-tune position by moving it slightly toward the blade tip or hub until vibration minimizes. For severe imbalance, add small weights (like adhesive-backed washers) incrementally—test after each adjustment. Properly balanced blades eliminate 95% of residual wobble after hardware tightening.

Downrod Alignment: The Hidden Cause of Persistent Wobble

A misaligned downrod transfers angular stress directly to the fan motor, creating vibration that worsens at higher speeds. Check for visible bending by sighting along the downrod’s length from multiple angles. Even slight curvature requires replacement—attempting to straighten steel downrods usually weakens them further.

Verify proper ball joint seating in the mounting bracket. The ball should sit fully within the socket with set screws tightened against the groove. At the motor connection, ensure the downrod pin is fully inserted and secured with its retaining clip. Some models require specific downrod orientation—check your manual for alignment marks. A properly aligned downrod creates a straight mechanical path from ceiling to fan motor, eliminating one of the most insidious causes of chronic wobble.

Electrical Box Inspection: Critical Safety Check

ceiling fan electrical box fan rated support

Your fan’s mounting stability depends entirely on the electrical box’s integrity. Standard light fixture boxes cannot handle ceiling fan vibration and will eventually pull loose from the ceiling joist. Look for a label inside the box stating “Acceptable for Fan Support” or confirming 50+ pound capacity. If missing, assume it’s unsafe for fan mounting.

Check box stability by gently pushing the fan sideways—excessive movement indicates inadequate support. Proper installation requires either a retrofit ceiling fan brace spanning between joists or a new box with built-in support arms. Never continue using a fan mounted to an inadequate box—this creates a falling hazard. Replacement takes 20 minutes with the right tools but requires electrical work; if uncomfortable, hire an electrician to install proper support before addressing wobble issues.

Component Replacement Guide for Damaged Parts

Hunter ceiling fan replacement parts blade arm

Sometimes tightening and balancing aren’t enough—worn components require replacement. Bent blade arms (common after accidental impacts) should be swapped rather than straightened, as metal fatigue makes them prone to further bending. Downrods with visible corrosion or play at connections need replacement for safety.

Use manufacturer part numbers when ordering replacements—most major brands like Hunter, Hampton Bay, and Minka-Aire offer affordable replacement arms and downrods. Blade balancing clips lose adhesion over time; replace them with new weighted clips designed for your fan model. When replacing screws, match thread type and length exactly—using longer screws can damage internal components. Replacing compromised parts ensures your fan operates safely without recurring wobble issues.

Preventative Maintenance Routine for Wobble-Free Operation

Schedule bi-annual maintenance to prevent future wobble: tighten all visible screws, clean blades with a microfiber cloth, and inspect for developing issues. Apply a drop of light machine oil to the downrod ball joint annually to reduce friction and vibration transmission. Check blade alignment using the ruler method described earlier—catching minor misalignment early prevents major wobble development.

Listen for new operational sounds that signal emerging problems. A faint clicking noise often indicates a slightly loose screw that will cause significant wobble within weeks. Address these early warnings immediately before vibration damages other components. Homes in humid climates should check for blade warping more frequently, as wood blades expand and contract with moisture changes. Consistent maintenance extends fan lifespan by 5-7 years while ensuring silent, vibration-free operation.

When Professional Help Is Actually Necessary

While most wobble issues are DIY-fixable, certain situations require professional intervention. If your fan wobbles severely despite thorough hardware tightening and blade balancing, internal motor bearing failure may be the culprit—this requires motor replacement. Fans mounted to inadequate electrical boxes need professional correction to meet safety codes. Complex installations with integrated lighting or smart features sometimes have wobble caused by internal component conflicts that electricians diagnose more efficiently.

Professionals typically charge $75-150 for fan wobble repairs but guarantee proper resolution. If you’re uncomfortable working with electrical components or at heights, the small cost provides peace of mind compared to potential injury or further damage. Consider professional help as an investment in safety rather than an admission of inability—some repairs genuinely require specialized knowledge.


A shaky ceiling fan doesn’t have to disrupt your home comfort. By methodically addressing each potential cause—from loose mounting hardware to blade imbalance—you can eliminate vibration and enjoy smooth, quiet operation. Most fixes require only basic tools and less than an hour of your time, saving you the cost of professional repair. Remember to prioritize electrical safety at every step and replace compromised components rather than attempting makeshift repairs. Implement the bi-annual maintenance routine described to prevent recurrence, and your fan will provide reliable, wobble-free service for years to come. If persistent wobble continues after thorough troubleshooting, consult a professional to address potential internal motor issues or unsafe mounting conditions.

How to Fix Ceiling Fan Humming Noise


You’re settling in for a quiet evening when that familiar low-frequency drone starts vibrating through your living room. That persistent ceiling fan humming noise isn’t just irritating—it’s disrupting your peace and signaling something’s wrong with your fan. This common household nuisance affects millions of homeowners, turning what should be a cooling helper into a constant source of frustration. Whether your fan just developed this issue or has always buzzed since installation, you’ll discover exactly why this happens and how to fix it permanently. By the end of this guide, you’ll have actionable solutions to eliminate that humming noise regardless of your fan model or electrical setup.

Why Your Ceiling Fan Creates That Distinctive Humming Sound

Ceiling fan humming noise stems from either electrical or mechanical vibrations that resonate through your home’s structure. Unlike random clicking or grinding sounds, humming indicates consistent frequency vibration—often matching your home’s electrical current cycle (60Hz in North America). This happens when components vibrate at the same frequency as the alternating current powering your fan. The sound becomes amplified when parts like loose mounting brackets or unbalanced blades act as natural resonators. Most humming intensifies at higher speeds because increased motor strain magnifies existing imperfections in electrical connections or mechanical alignment.

How Electrical Current Causes Fan Humming

Your home’s alternating current constantly reverses direction 60 times per second, creating natural magnetic field fluctuations in the motor. When wiring connections are loose or components wear out, these fluctuations generate audible vibrations. Dimmer switches not designed for ceiling fans are prime culprits—they chop the electrical waveform, creating harmonic distortions that manifest as loud humming. Even properly installed fans can hum if the motor’s internal windings develop minor shorts or if capacitors degrade over time. The key diagnostic clue: if the humming pitch changes with speed settings, the issue is almost certainly electrical rather than mechanical.

Mechanical Vibrations Amplifying the Noise

Mechanical humming occurs when physical components vibrate against each other at resonant frequencies. Common triggers include:

  • Loose mounting hardware allowing the entire fan assembly to shake against the ceiling box
  • Worn motor bearings creating internal vibration that transfers to the housing
  • Unbalanced blades causing centrifugal force variations at high speeds
  • Overtightened set screws distorting metal components and creating harmonic resonance

Unlike electrical humming, mechanical vibrations often produce rhythmic pulsing sounds that worsen as the fan runs longer (due to heat expansion). You’ll typically notice these vibrations through the ceiling structure itself—place your palm flat on the ceiling near the fan mount to feel telltale buzzing.

Step-by-Step Electrical Humming Fixes That Work

ceiling fan dimmer switch wiring diagram

Diagnosing Dimmer Switch Compatibility Issues

90% of electrical humming stems from incompatible dimmer switches. Modern LED-compatible dimmers frequently cause humming in ceiling fans because they don’t handle inductive motor loads properly. Here’s how to confirm and fix this:

  1. Turn off power at the circuit breaker
  2. Remove the dimmer switch faceplate
  3. Check for labeling indicating “For Incandescent Only” or similar restrictions
  4. If incompatible, replace with a fan-rated dimmer (look for “CL” rating ≥ 35 for most fans)
  5. Ensure proper wire connections—loose neutrals are common humming sources

Pro Tip: Install a Lutron Maestro fan control (model C-LFQH) for silent operation. These cost under $25 and include dedicated fan speed controls that prevent waveform distortion.

Securing Loose Wiring Connections

Loose electrical connections create micro-arcing that generates intense humming. This critical fix requires:

  • Turning off power at the breaker (verify with voltage tester)
  • Removing the fan’s canopy to access wiring
  • Checking all wire nuts for tightness—gently tug each connection
  • Inspecting for burnt insulation near terminals
  • Ensuring ground wires are securely attached to the grounding screw

Warning: Never skip the voltage test. A single unsecured hot wire can cause dangerous arcing even when the switch is off.

Mechanical Humming Solutions for Immediate Relief

Tightening Mounting Hardware Safely

ceiling fan mounting bracket installation diagram

Loose mounting causes the most dangerous humming—where the entire fan assembly vibrates the ceiling. Fix this in under 15 minutes:

  1. Turn off fan power completely
  2. Use a sturdy ladder to access the mounting bracket
  3. Check all four mounting screws securing the bracket to the electrical box
  4. Verify the downrod coupling is fully tightened (often overlooked)
  5. Ensure the canopy screws are snug but not overtightened

Visual Cue: Look for paint cracks around the mounting plate—this indicates long-term vibration damage requiring immediate attention.

Balancing Blades to Eliminate Resonance

Unbalanced blades create harmonic humming that intensifies with speed. The $5 fix:

  1. Purchase a blade balancing kit (includes adhesive weights)
  2. Attach the provided clip to one blade tip
  3. Run fan on high speed and note if humming decreases
  4. If improved, permanently attach weight at that location
  5. Repeat for other blades until humming stops

Time-Saver: Tape a quarter to the top of a blade near the motor housing. If humming reduces, that’s your imbalance location—no kit needed.

When to Call a Professional Immediately

Dangerous Electrical Signs Requiring Expert Help

Certain humming symptoms indicate serious hazards you shouldn’t ignore:

  • Burning smell accompanying the hum → Indicates overheating wires or motor failure
  • Flickering lights on the same circuit → Signals dangerous voltage fluctuations
  • Humming that persists with fan turned off → Points to faulty wiring in walls
  • Visible scorch marks on switches or fan housing

Critical Action: If you notice any of these, shut off power at the breaker immediately and call a licensed electrician. These conditions can cause electrical fires within hours.

Motor Replacement vs. Full Fan Replacement

ceiling fan motor replacement cost comparison chart

Worn motor bearings create distinctive low-pitched humming that worsens over time. While motors can be replaced ($80-$200 parts), consider these factors:

Condition Motor Replacement Full Fan Replacement
Fan age < 5 years ✓ Cost-effective ✗ Overkill
Humming + grinding noise ✗ Temporary fix ✓ Permanent solution
Outdated efficiency ✗ Wastes money ✓ Saves $50+/year on bills
Visible oil leaks ✗ Impossible ✓ Only option

Expert Note: Modern ENERGY STAR fans use 60% less energy than 10-year-old models. If your fan is older than 2015, replacement often pays for itself in energy savings.

Preventing Future Humming Noise Forever

Installation Best Practices That Eliminate Humming

Proper installation prevents 95% of humming issues. When installing new fans:

  • Always use a fan-rated electrical box rated for 50+ lbs (standard boxes flex under vibration)
  • Install rubber isolation pads between mounting bracket and ceiling box
  • Choose fans with DC motors which operate silently due to electronic commutation
  • Verify circuit capacity—fans need dedicated 15A circuits without shared loads

Pro Tip: Hang a small spirit level on the downrod during installation. If it swings more than 1/8 inch, your mounting isn’t secure enough.

Maintenance Routine That Stops Humming Before It Starts

Prevent humming with this quarterly checklist:

  1. Tighten all visible screws (blade brackets, canopy, switch housing)
  2. Wipe blades with damp cloth to remove dust buildup causing imbalance
  3. Lubricate motor bearings (if accessible) with 1-2 drops of electric motor oil
  4. Check set screw tightness on blade irons and downrod couplings

Warning: Never use household oils like WD-40—they attract dust and gum up motors. Only use manufacturer-specified lubricants.

Final Note: Your Path to Silent Operation

That ceiling fan making humming noise doesn’t have to ruin your home’s tranquility. By systematically checking electrical connections, securing mechanical components, and implementing preventative maintenance, you’ll eliminate humming permanently in most cases. Remember that dimmer switch incompatibility causes the majority of electrical humming—replacing it with a fan-specific control solves the problem 80% of the time. For mechanical issues, blade balancing and hardware tightening provide immediate relief. When safety concerns arise like burning smells or persistent off-cycle humming, always call a professional electrician. Implement the quarterly maintenance routine to prevent recurrence, and consider upgrading to a DC motor fan for whisper-quiet operation that saves energy. Your peaceful, humming-free home is just a few targeted fixes away—start with the dimmer switch check tonight and reclaim your quiet space.

« Older posts Newer posts »

© 2026 Hampton Fan Reviews

Theme by Anders NorenUp ↑