You flip the bathroom exhaust fan switch, but nothing happens. No hum, no airflow. Just silence. This common household problem frustrates homeowners, and while the wall switch is usually the first suspect, the actual cause often lies elsewhere in the electrical system or fan assembly. The good news? Most causes are fixable with basic tools and a systematic approach. In this guide, you will learn how to accurately diagnose whether your exhaust fan switch is truly faulty or if the problem stems from power loss, motor failure, or hidden wiring issues.
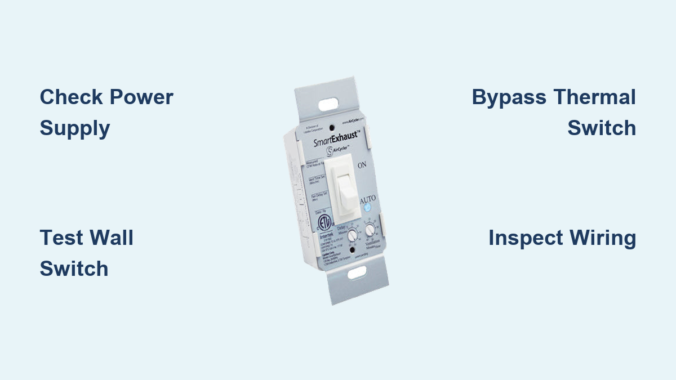
Check Power Supply First
Before replacing the switch, confirm the circuit has power. Many switch failures are actually tripped breakers or GFCI outlets. This simple verification step saves time and prevents unnecessary part purchases.
Reset the Circuit Breaker
Go to your electrical panel and locate the bathroom circuit breaker. Even if it appears in the “on” position, it may be in a tripped intermediate state. Turn it fully off, wait ten seconds, then switch it back on. Test the fan afterward to see if operation is restored.
Pro Tip: Bathrooms often share circuits with adjacent rooms. Check if outlets or lights also stopped working, which indicates a broader circuit issue.
Test GFCI Outlets
Bathroom fans may be on GFCI-protected circuits even if they are not plugged into an outlet. Press “Test” and then “Reset” on any GFCI outlets in the bathroom, hallway, or nearby rooms. Some older installations wire fans through GFCI for safety compliance.
Real Case: Spraying undiluted bleach near a switch once created a conductive path that tripped a GFCI due to residue. No hardware was damaged. Resetting the outlet restored full function.
Verify Voltage with a Multimeter
:strip_icc()/measuring-voltage-outlet-77726753-ac9266c6cc0c4b56bf0b663bedd85883.jpg)
A non-contact voltage tester detects live wires but cannot confirm a complete circuit. For accurate diagnosis, use a multimeter set to AC voltage (200V range). Turn off power, remove the switch cover, and measure between hot (black) and neutral (white) wires. A reading of approximately 120V indicates proper power. No voltage means the issue is upstream at the breaker, GFCI, or junction box.
Inspect the Wall Switch
If power reaches the switch location but the fan does not respond, the switch is a likely suspect. However, testing first prevents unnecessary replacement costs.
Look for Physical Damage
Turn off power at the breaker. Remove the switch cover and mounting screws. Gently pull the switch from the box and inspect for burn marks on terminals or switch body, melted wire insulation, and loose or corroded wires. Back-stabbed connections (wires pushed into rear holes) are particularly unreliable and should be avoided.
Expert Note: Always use side screw terminals for secure connections. Back-stabbed wires loosen over time due to vibration and heat cycling.
Test Switch Function with a Jumper
With power off, disconnect both wires from the switch. Connect them temporarily with a short jumper wire or wire nut. Restore power briefly. If the fan turns on, the switch is faulty and needs replacement. If the fan still does not operate, the problem lies downstream in the wiring, thermal switch, or motor.
Safety First: Never perform this test with exposed wires touching metal surfaces or each other.
Use a Multimeter for Continuity Testing
Set the multimeter to continuity or ohms mode. Disconnect the switch completely. Toggle the switch while testing across terminals. The switch should show continuity only in the ON position. No continuity when ON indicates an open switch (failed). Continuity in both positions indicates a shorted switch, which is dangerous and requires immediate replacement.
Bypass the Thermal Protection Switch
Many exhaust fans have an internal thermal cutoff switch on the motor that stops operation when overheated. This safety device is a common culprit that mimics switch failure.
Locate and Test the Thermal Switch
The thermal switch is found on or near the motor housing. It appears as a small device (white or black) with one wire entering and one wire exiting. Disconnect both wires and test for continuity with a multimeter set to ohms. No continuity (infinite resistance) means the thermal switch has failed and requires replacement.
Temporary Bypass Test
Bridge the two terminals with a wire temporarily. Restore power and test the fan. If the fan runs, the thermal switch is the cause. If the fan still does not operate, proceed to motor or wiring diagnostics.
Warning: Never leave the thermal switch bypassed permanently. This removes overheat protection and creates a serious fire risk.
Check Internal Wiring and Connections
Even with a functioning switch, loose connections inside the fan housing can interrupt power delivery. This is an often-overlooked cause of apparent switch failures.
Access the Fan Motor
Turn off power at the breaker. Remove the vent cover by releasing clips or prongs. Unscrew the motor housing, typically secured with Phillips screws. Pull the motor assembly down gently to access the wiring connections.
Inspect Wire Nuts and Terminals
Check all wire nuts for looseness, corrosion, or frayed wires. Vibration over time commonly loosens wire nuts in fan housings. Re-terminate any questionable connections with fresh wire nuts. Ensure the ground wire is securely attached to the housing.
Common Failure Point: Many homeowners replace the switch when the real problem is a loose wire nut inside the fan housing.
Test the Fan Motor Directly
If all switches and wiring check out, the motor may be the issue. A bench test confirms whether the motor itself is functional or failed.
Perform a Direct Power Test
Disconnect the motor from the ceiling wires. Attach a pigtail adapter (hot, neutral, ground) to the motor leads. Plug into a known-working 120V outlet. If the motor spins, the original circuit or switch is the problem. If the motor is silent or hums without spinning, the motor is failed and needs replacement.
Pro Tip: A humming motor indicates power is reaching it, but the rotor is stuck, often due to seized bearings from age and lack of lubrication.
Recognize Motor Failure Symptoms
Do not blame the switch for signs of motor wear. Understanding these symptoms prevents misdiagnosis and wasted money on unnecessary switch replacements.
Delayed Startup
If the fan takes two to three minutes to start, this is frequently misdiagnosed as a faulty switch. The actual cause is typically motor bearing degradation, especially in units over ten to fifteen years old.
Fan Runs Continuously
When the fan will not turn off, the switch is likely stuck in the closed position (shorted), not the motor. This is a switch problem, not a motor problem.
Burning Smell or Overheating
This indicates internal motor damage or excessive load from a duct blockage. The motor is working harder than designed due to restricted airflow, triggering the thermal protection switch.
Expert Insight: Fans over fifteen years old should be replaced rather than repaired due to declining efficiency, part obsolescence, and increased reliability of modern units.
Clear Duct Blockages
Poor airflow increases motor strain, leading to overheating and thermal shutdown. This creates symptoms that appear to be electrical problems but are actually mechanical.
Inspect and Clear the Duct System
Check the roof cap for bird nests, debris, or pest infestations. Inspect flexible duct for kinks, crushing, or sagging that restricts airflow. Clean the interior with a vacuum or duct brush. Use rigid metal ducting when possible and minimize bends, as each ninety-degree turn increases resistance significantly.
Performance Fact: Poor ducting can reduce airflow by up to fifty percent, forcing the motor to work harder and fail prematurely.
Avoid Common Misdiagnoses
Many switch-related assumptions are incorrect. Use this guide to avoid costly mistakes and unnecessary part purchases.
| Symptom | Likely Misdiagnosis | True Cause |
|---|---|---|
| Fan starts after delay | Faulty switch | Worn motor bearings |
| Intermittent operation | Bad switch | Loose wire nut in housing |
| No power at fan | Dead switch | Tripped breaker or open thermal switch |
| Fan runs nonstop | Motor issue | Stuck or shorted wall switch |
Critical Reminder: A working bathroom outlet does not mean the fan circuit is live. Fans are often on separate lighting circuits with independent breakers.
Replace the Wall Switch
If testing confirms switch failure, replacement is straightforward and requires basic electrical knowledge.
Installation Steps
Turn off power at the breaker. Label all wires before disconnecting (common: black is hot, red is load). Use side screws, not back-stab holes, for secure connections. Connect wires securely and wrap with electrical tape for additional security. Mount the switch, reinstall the cover, restore power, and test fan operation.
Best Practice: Use a high-quality single-pole toggle switch. Avoid dimmers or smart switches unless the fan is specifically rated for them.
Replace the Fan Motor or Unit
When the motor is dead, decide between motor-only replacement or a full unit upgrade based on the fan’s age and condition.
Motor-Only Replacement
This is cost-effective for units under ten years old. Match the model number and voltage (120V standard). Follow manufacturer instructions for mounting and wiring connections.
Full Unit Upgrade
Consider replacement if the fan is over ten years old. Modern units offer higher CFM (at least eighty for large bathrooms), lower noise (below one sone), humidity sensors for automatic operation, and LED night lights. Choose a DC motor fan for quieter operation, better efficiency, and longer lifespan.
Essential Tools for Diagnosis
You do not need a full electrician’s kit. These basics handle most diagnostics.
• Multimeter for voltage, continuity, and resistance testing
• Non-contact voltage tester for quick safety checks
• Insulated screwdrivers and pliers for safe wire handling
• Pigtail adapter for bench-testing the motor
• Flashlight for seeing into ceiling cavities
Pro Move: Label and photograph wiring before disconnecting anything. This saves significant time during reassembly.
Frequently Asked Questions About Exhaust Fan Switch Issues
Why does my exhaust fan not turn on even when the switch is flipped?
The issue could be a tripped breaker, failed GFCI outlet, faulty wall switch, open thermal protection switch, or failed motor. Follow the diagnostic sequence in this guide to identify the exact cause.
Can a faulty GFCI outlet prevent the exhaust fan from working?
Yes. Even if the fan is not plugged in, it may be on a GFCI-protected circuit. Moisture, chemical exposure, or conductive residue can trip the GFCI, cutting power to the fan without obvious signs.
How do I know if the thermal protection switch is the problem?
Test the thermal switch with a multimeter for continuity. No continuity indicates a failed thermal switch. Temporarily bypassing it confirms the diagnosis, but never leave it bypassed permanently.
Is it worth repairing an old exhaust fan, or should I replace it?
Replace fans over fifteen years old. Older units have declining efficiency, worn motors, and obsolete parts. Modern fans offer better airflow, quieter operation, and smart features like humidity sensors.
Why does my exhaust fan start working after a two to three minute delay?
Delayed startup is usually motor bearing wear, not a switch problem. The motor struggles to overcome resistance in aged bearings before spinning up. This is common in units over ten to fifteen years old.
Key Takeaways for Fixing Your Exhaust Fan Switch
A non-responsive exhaust fan switch rarely means the switch itself is the only problem. Always verify power at the circuit breaker and GFCI outlets before replacing components. Use a multimeter for accurate testing rather than guessing. The thermal protection switch, loose wire nuts inside the fan housing, and motor failure all mimic switch failure. Follow the systematic diagnostic sequence in this guide to pinpoint the exact cause and avoid wasted repairs. Remember to cut power first, test before replacing, and consider upgrading units over ten years old for better performance and reliability.
Leave a Reply